Showing posts with label fruit. Show all posts

Wednesday, April 21, 2010

Strawberry Shortcake (with Angel Food Cake)

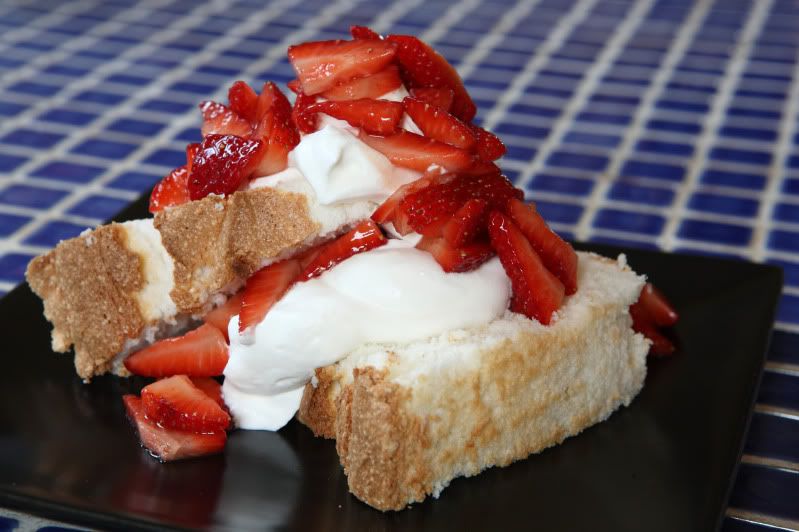
Strawberry shortcake is sort of the epitome of summertime desserts. The sweet-but-slightly-tart berries, swirls of whipped cream, and yummy shortcake make for one delicious dessert. (And it has fruit in it, so it’s good for you, right?)

There are several schools of thought on the proper base for strawberry shortcake. Some people like it served with sweetened biscuits. Some like it with sponge cake. Some like it with pound cake. Those are all good, but my favorite way to serve strawberry shortcake is with angel food cake.
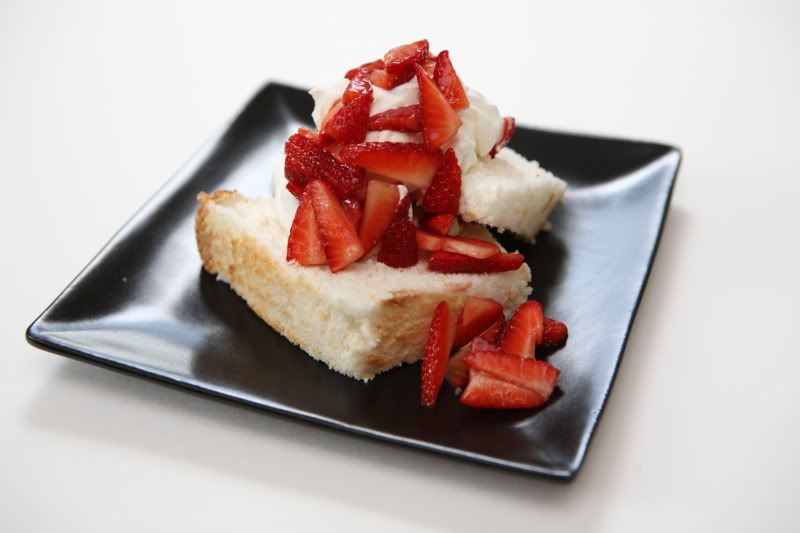


This particular angel food cake recipe comes from Betty Crocker, circa the 1960’s. Yeah, the cookbook is a little outdated, but this recipe is a keeper...unlike some of the other ones in the book. There are a bunch of angel food cake variations on the same page, and they all require gelatin and something called “dessert topping mix” Fortunately this recipe steers clear of all of that. It is a standard angel food cake recipe, tried-and-true, and I’ve made this exact cake for many birthdays, a few graduation parties, and on many, many other occasions over the years.

If you don’t have an angel food cake pan and are planning to buy one, you should select your pan carefully.

  • An angel food cake pan should NOT be nonstick. (Angel food cake keeps itself risen by climbing up and sticking to the sides of the pan, and a nonstick pan prevents this from happening. The cake won’t have the proper height and the texture will suffer if the pan is nonstick.)
  • For almost all of my baking, I prefer light-colored pans because it keeps the food from over-browning. Angel food cake is no exception: try to find a light-colored pan.
  • The pan doesn’t need to be insulated or have any other fancy technology.
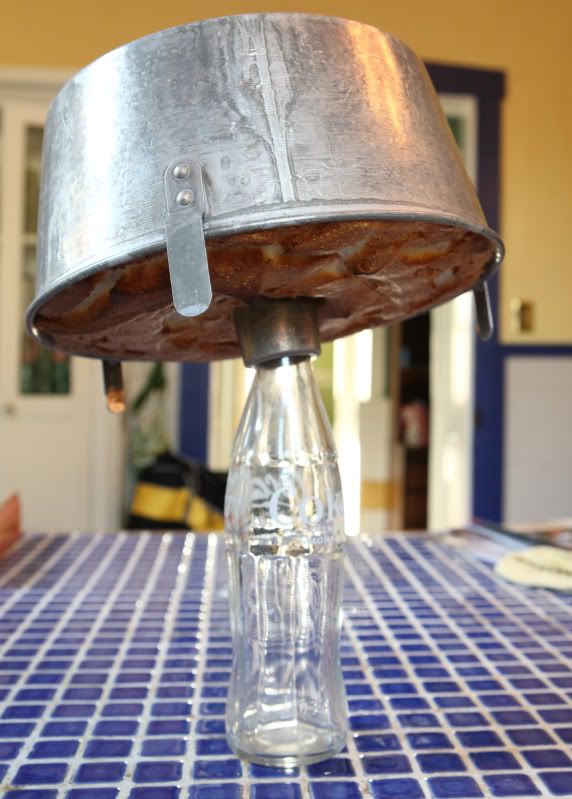
  • It does, however, need to have a way to stand upside down during the cooling process. My angel food cake pan has a tall central tube and little aluminum feet sticking off the top of the pan, which hold the cake off the countertop when the pan is inverted. This will cool the cake properly, but for even better air circulation, I stick a coke bottle in the central tube and turn the pan over balanced on the bottle (you’ll see pictures below). So, you’ll need either a pan that has feet, or you’ll need to come up with a way to invert it without smashing the cake. A wine bottle works too.
  • The best pans are two-part pans. Angel food cake needs to be cut out of its pan, and its basically impossible to do that with a one-piece pan. (That’s why they started making the one-piece pans nonstick, but we already went over why nonstick is a bad idea…) The one-piece pans work well for other things (pound cake!) but not well for angel food cake.
It’s really hard to find a good angel food cake pan at the kitchen store. Most properly-shaped pans are nonstick or made of dark-colored aluminum, neither of which I want. Last time I needed another angel food cake pan (before the days of the internet), I hit up the garage sales until I found an old one for a buck. The pan can be dinged up slightly and it won’t hurt anything. It’s not supposed to be a water-tight pan (properly-made angel food cake batter isn’t runny and shouldn’t leak through the pan), so don’t worry if the bottom doesn’t fit absolutely flat into the sides of the pan. Now that we are in the days of internet shopping, you can buy a new one from Amazon that meets all the specifications I’ve mentioned and it should work just as well as all of my Garage Sale Specials have worked for me.

Angel Food Cake
Makes one cake 10” in diameter and 4” tall

1 cup cake flour
3/4 cup plus 2 Tbsp granulated sugar
12 egg whites (about 1-1/2 cups)
1-1/2 tsp cream of tartar
1/4 tsp salt
3/4 cup granulated sugar
1-1/2 tsp vanilla
1 tsp almond extract

Preheat your oven to 375 degrees F.

In a medium mixing bowl, whisk together the flour and 3/4 cup plus 2 Tbsp granulated sugar. Set the mixture aside.

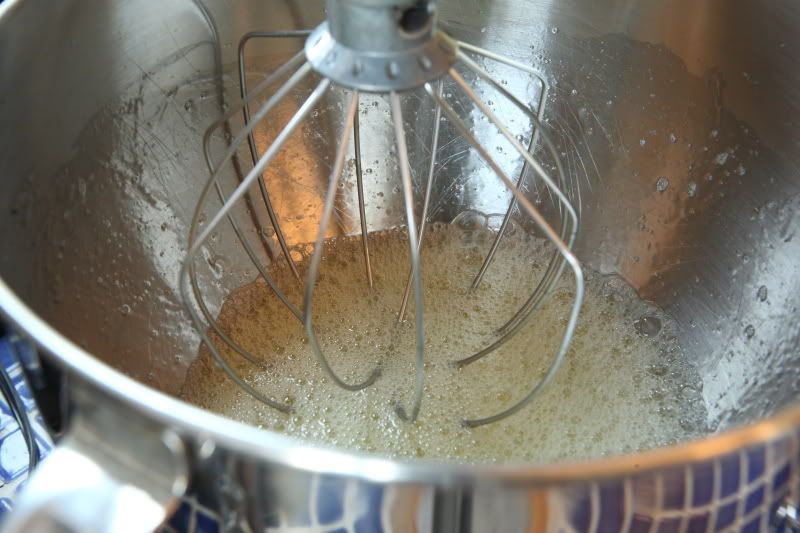
In a large mixer bowl, use the wire whip attachment to beat together the egg whites, cream of tartar, and salt until foamy.


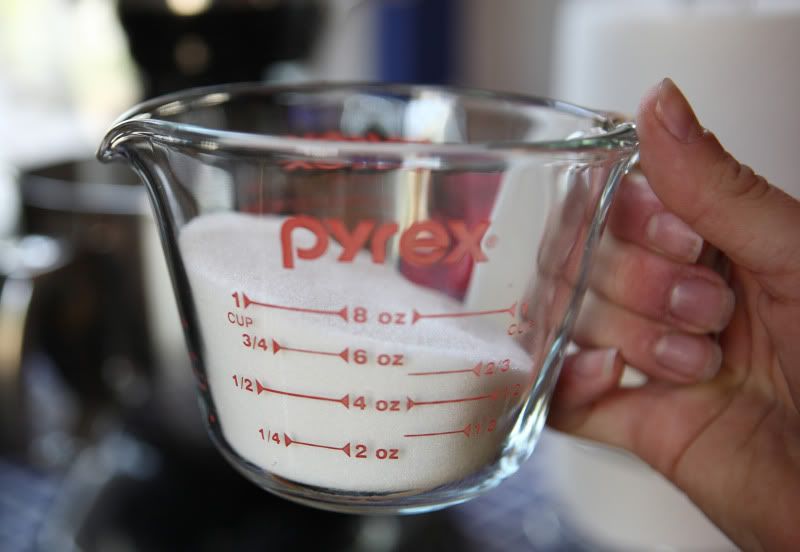
While this is happening, measure 3/4 cup granulated sugar into a spouted cup similar to this one:


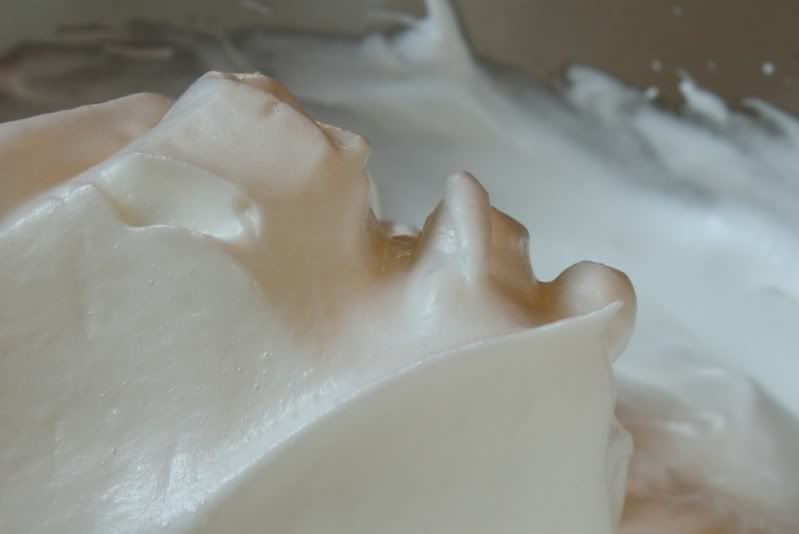
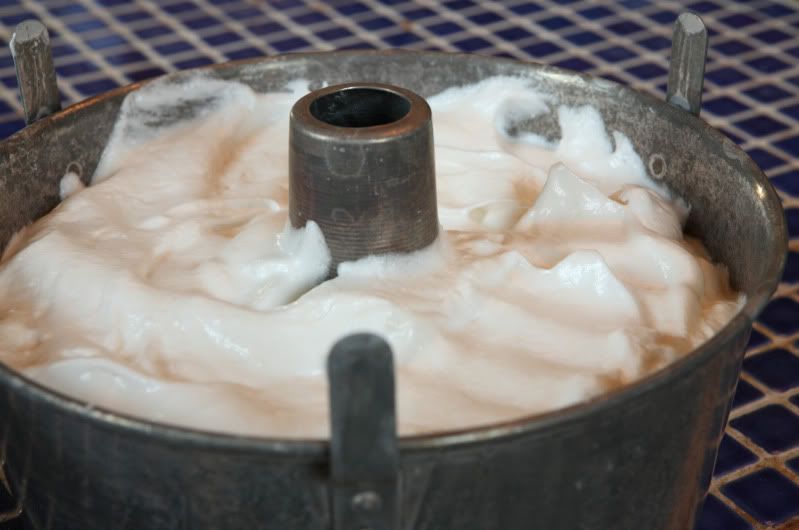
With the mixer on the highest speed, slowly shake in a very small stream of granulated sugar into the egg white mixture. Continue to add the sugar very slowly as the mixer is whipping the whites. Do not dump in large quantities of sugar at once. As the whites whip up, they will increase in volume. The goal is to shake all of the sugar into the egg whites in about the same amount of time it takes for the whites to be beaten to the “stiff peak” stage. You’ll know the whites are “stiff peaks” when you lift the beater out of the bowl and the whites hold shape and don’t slump back down into the mixture. But, use caution to avoid over whipping the whites – they’ll become chunky and that’s not what we’re looking for either.

Properly whipped egg whites are smooth and stand up like this:


Once you’ve finished beating the egg whites, take the bowl off of the mixer. The rest of the steps must be mixed by hand or you’ll deflate the batter. I like to use a large flat rubber spatula, but before I owned that particular piece of kitchen equipment, I used to use a flat wooden spoon with nearly-as-good results. Whatever you use, you’ll need to have something with a fairly long handle because in case you haven't noticed, there’s a lot of volume in that bowl now.

Add the vanilla and almond extracts. Use your rubber spatula or flat spoon to gently fold them into the egg whites. Don’t stir the batter or you’ll deflate it. Fold it. (I wish I had a video camera – I’d demonstrate it…sorry.) To fold, cut the spatula down the center of the egg whites, then run it along the bottom of the bowl, up the side, and down into the center again. Rotate the bowl and repeat the motion.

Sprinkle approximately 1/4 of the flour mixture over the surface of the flour. Fold it gently into the egg white mixture just until the flour mixture disappears into the batter. Add another fourth of the flour mixture and repeat the folding-and-adding process until you’ve folded all of the flour mixture into the egg whites.

Spoon the batter into an ungreased angel food cake pan, 10” x 4.” Tap your rubber spatula straight down through the batter to help remove any air bubbles from the cake.


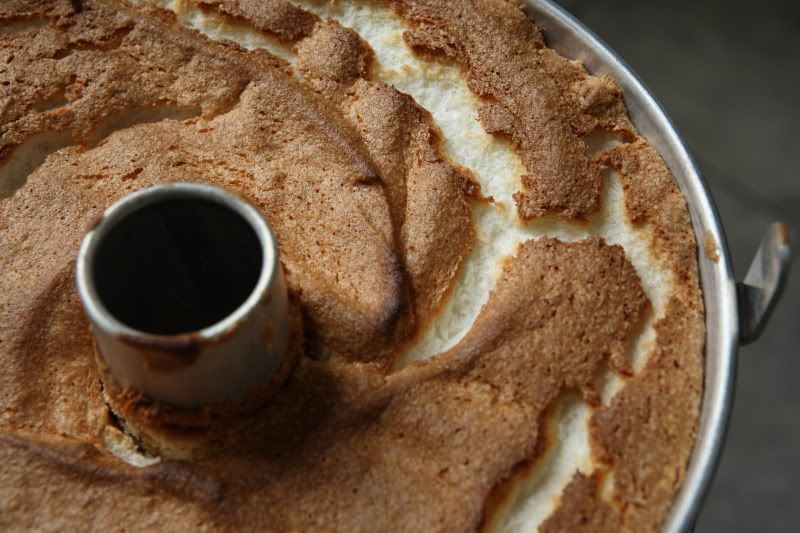
Bake the cake approximately 30-35 minutes. How can you tell when angel food cake is done baking? The top should be lightly browned. “Betty" tells you it should “spring back when touched lightly with a finger,” whatever that means. Here’s how I tell: as the cake bakes, the top surface cracks, exposing lighter-colored cake interior. When that lighter colored section of the cake is dry and no longer sticky, the cake is properly baked. I use the point of a knife or my fingernail to scrape just a tiny bit of crumb out of one of the lighter areas and see if it is still moist and sticky or if it is dry. If it’s still sticky, give it another 3 to 5 minutes in the oven. The top will be nicely browned and any peaked areas will be an even deeper, nearly-toasty brown.


As soon as the cake comes out of the oven, the pan must be inverted or the cake will sink. As I mentioned above, I use the coke bottle cooling method, but if your pan has feet, you can simply turn it upside down. The cake must be entirely cooled before it is removed from the pan. If you come back to your cake in fifteen minutes and find it has fallen out all over the countertop, you under baked it and didn’t give it enough time in the oven. Take notes for next time and try again. I promise, if it’s completely baked, and if you used the proper pan, it won’t fall out despite the fact that it's sitting upside down.


A side story… Once, earlier in my baking days, I decided I wanted to make lots of angel food cake for a party. I baked a whole bunch of these cakes in sort of an assembly line, one cake after another. I was running out of countertop space in my kitchen and had nowhere to cool the cakes. So I looked around my small apartment for somewhere else to balance my coke-bottle-cake-pan setup for an hour or so, and saw the flat surface of my bedroom dresser. Unfortunately I was in such a rush to get these cakes baked, I slightly under baked the cake – but I was new enough to baking that I didn’t realize it at the time. After I thought the cake had a sufficient amount of time to cool, I went back to my bedroom to bring it back to the kitchen…and found cake EVERYWHERE. (Since it was under baked, it fell out of the pan.) What a mess! Cake all over the top-of-the-dresser knick-knacks! Cake all over my clothes! Cake on the carpet! Cake all over the cat (who was very interested in it). And because it was under baked, it was sticky and sugary and very messy to clean up - and the last thing I wanted to do while running around making last-minute preparations for a party. Lesson learned:  be sure the cake is completely baked. Don’t get in a hurry to get it out of the oven!

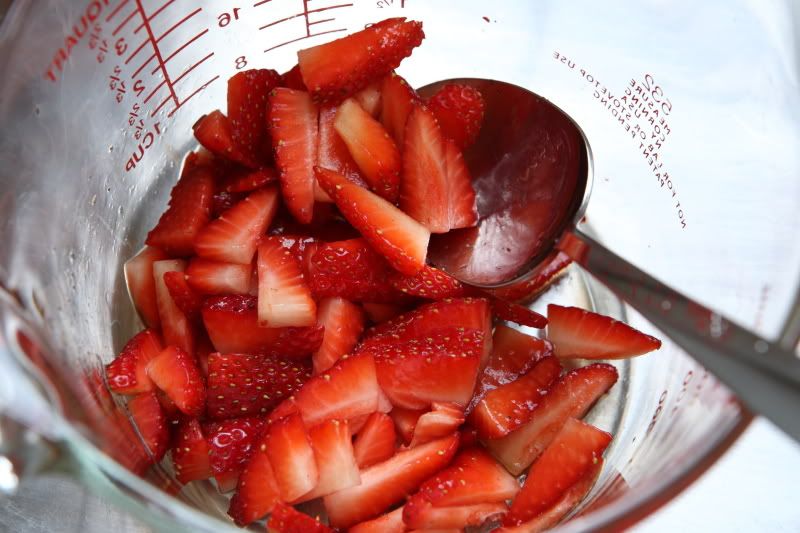
While the cake is cooling, you can prepare the strawberries for the shortcake:

Macerated Strawberries

16 ounces strawberries, tops discarded, fruit sliced
2 to 3 Tbsp of granulated sugar
1 to 2 tsp best-quality balsamic vinegar

The measurements above are somewhat approximate because the amount of sugar necessary will depend on how sweet your strawberries are. I recommend mixing the smaller quantity of sugar and vinegar in with the berries first. Let it all sit for about 20 minutes, then taste it and adjust the flavoring as necessary. (You can always add more sugar and vinegar, but you cannot take it out!) I like them on the tart side, but you might like them sweeter than even what I’ve written above.


After the cake has cooled completely, the cake will need to be cut out of the pan. You’ll need a long serrated knife. First, holding the knife vertically, cut around the outside edge of the cake.  Use a sawing motion with the knife.  Then cut around the center tube in the pan. If you miss a spot, the cake will rip when you try to remove the pan, so be sure you are thorough in your cutting.
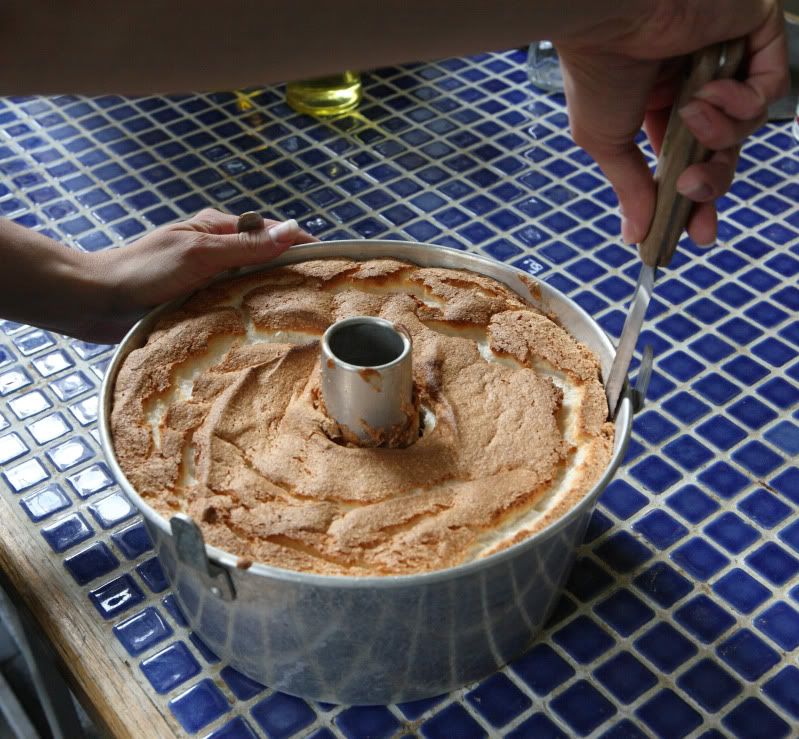


As long as you haven’t missed any spots, if you lift up on the center tube, you should be able to ease the side of the pan away from the cake.
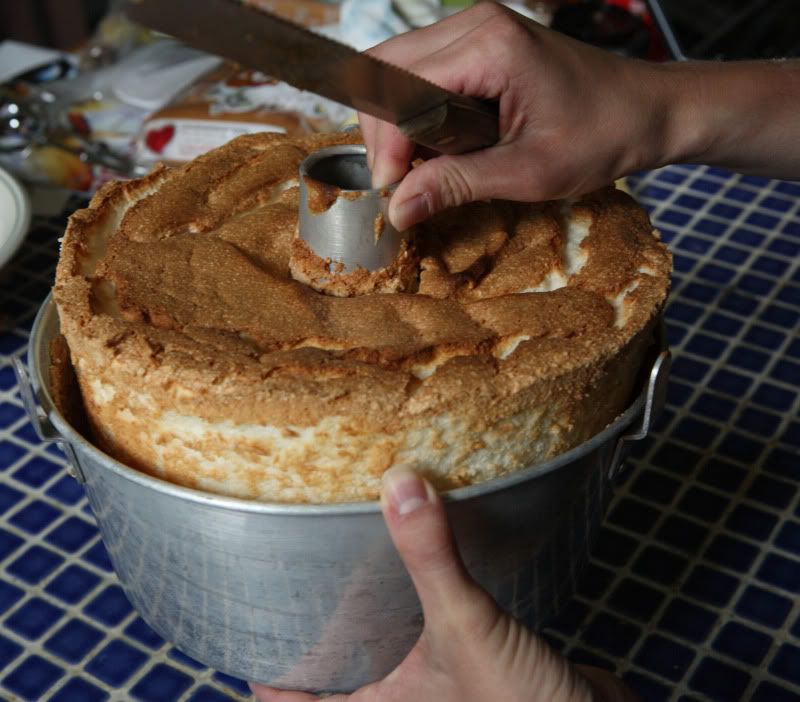


Hold the cake pan by the center tube. Place the knife horizontally and cut between the bottom of the cake and the base of the pan. Rotate the pan as you work so you get all areas of the pan. Double check to be sure your center tube is thoroughly cut free.
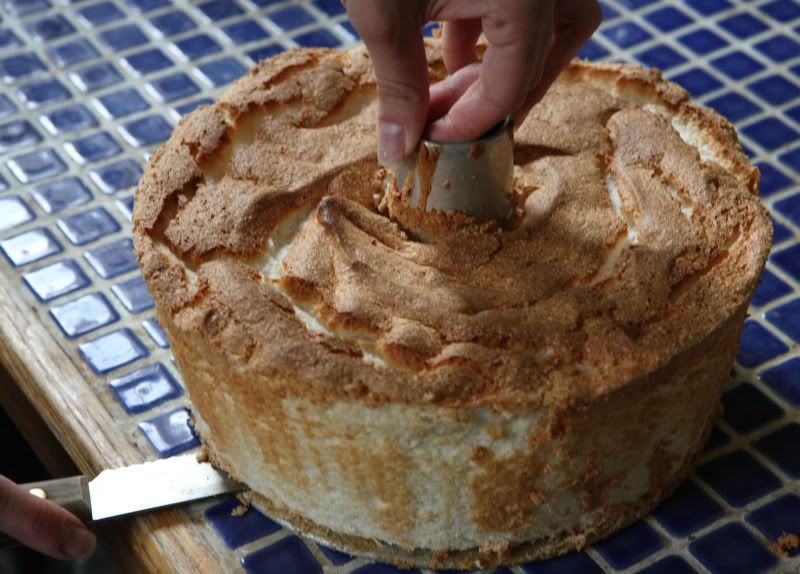


Once everything has been cut away from the pan, invert the cake onto a plate or a wire rack – the center piece should come right out.


(I turned mine out onto a rack, then flipped it over onto a plate because I thought the crackly top was prettier than the squared off bottom was.)
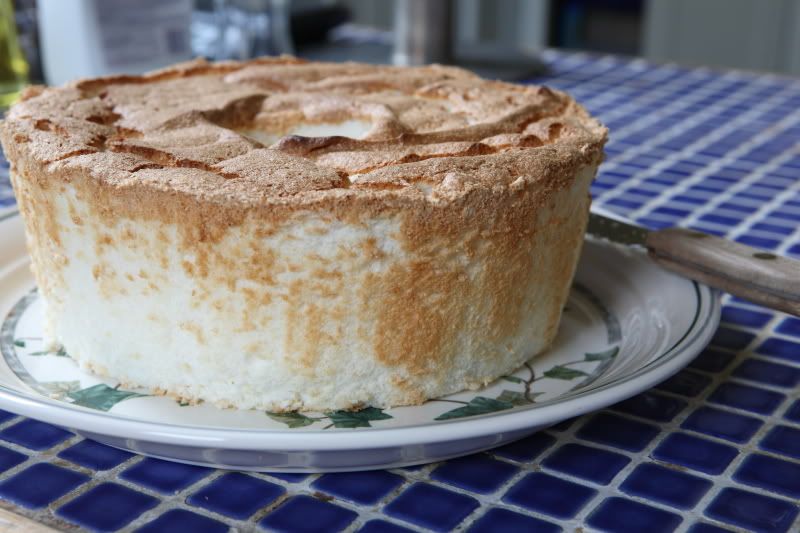


Immediately prior to serving, whip the cream

1 cup heavy whipping cream, more or less
1 Tbsp granulated sugar

Place the cream and sugar in a small bowl - one large enough to accommodate a hand mixer. Use a hand mixer to beat the cream on high speed until soft peaks form.

Assemble the strawberry shortcake from the angel food cake, berries, and whipping cream. Yum!


A note:  Angel food cake tastes best when it's served the same day it's baked.  If you must store it for another day, loosely cover it or put it under a cake dome.  Since the cake is mostly sugar and egg whites, it breaks down quickly if it gets moist, so it won't last too long, especially in a humid environment.  It doesn't last too long in my household anyway because it tastes pretty good...

Printable PDF file (with pictures)
Printable PDF file (recipe text only)

Saturday, January 30, 2010

Grilled Pork Tenderloin with Pineapple Ginger Sauce, served with Grilled Pineapple


Have you ever had grilled pineapple? If you haven't had it, try it!  It will totally change your opinion of pineapple. The heat causes the sugars to caramelize slightly, resulting in a deeper flavor, and the grill marks look pretty against the yellow fruit.

Not only does pineapple taste great grilled, but it also makes a great marinade ingredient due to a certain naturally-occurring enzyme. The recipe written here is a fruity pineapple marinade, spiked with ginger and a little garlic. It pairs really well with pork tenderloin, and works great on the grill.

If you’ve never bought or cut up a whole pineapple before, don’t worry, I have provided you with instructions! Give it a try!

How to choose a pineapple at the grocery store:

Pineapples don’t continue to ripen after they’ve been picked, so you’ll want to choose the ripest pineapple available from your grocer. Unless you live in or near Florida and have other locally-grown options available to you, you’re probably buying a pineapple imported from Hawaii. (I guess that statement is only true if you live in the United States…I’m not sure what the pineapple availability is elsewhere.)

Since Hawaiian pineapples are the ripest when they have a bright golden color, pick the pineapple that has the most gold on its skin (but not a mottled brown color, because too much brown = rotten!). Some green skin coloration is ok, but the greener the skin is, the less ripe the pineapple was when it was picked.

The spiky leaves should be stiff and green (again, not brown). Grab the base of the bunch of leaves – it should wiggle slightly…not too much wiggle, but not totally stiff either. One more thing to check: the pineapple was once attached to its plant on the underside of the fruit. Turn the fruit over and look to be sure the place where it was attached to the plant hasn’t turned moldy.

Now that you have your pineapple, you're ready to start making...

Grilled Pork Tenderloin with Pineapple Ginger Sauce, served with Grilled Pineapple
Serves 4

1 fresh pineapple
1/3 cup hoisin sauce
4 tsp peeled, grated fresh ginger
1 large clove of garlic, minced
1 tsp Dijon mustard
1-1/2 pounds pork tenderloin, trimmed of any fat
1 tsp soy sauce
2/3 cup chicken stock

First, cut up the pineapple:

Chop off and discard the leafy crown. A lot of people cut off the bottom of the pineapple at this point, but I usually leave it on because its roughness provides more stability on your cutting board (cut pineapple is slippery!). If its really uneven, though, you might prefer to cut it off. Cut off and discard all of the skin from the sides of the pineapple. If you missed any “eyes” or seeds, cut them out too.


If you haven’t yet, slice off and discard the bottom of the pineapple. With the pineapple standing on its end, cut straight down just next to the core.


Set aside the coreless piece. Mirror the exact same cut on the other side of the core so you have two large coreless pieces and one rectangular piece which still contains the core. Cut off the pineapple on either side of the core. The core is too tough for me to want to eat, so I usually just discard it (although I do know a guy who puts lots of salt on it and eats it anyway…).


You should be left with two smaller pieces of pineapple and two larger slabs of pineapple. Cut the larger slabs of pineapple into 1/2-inch slices. Set these aside – they’ll be grilled later.


The two smaller pieces of pineapple can be cut into chunks – place them in a small food processor. Process the pineapple to make chunky juice. Transfer approximately half of it to a small saucepan and reserve it for later – this will become a sauce to be served with the meat. The rest will be used to create a marinade.

Then, marinate your meat:

The remaining processed pineapple can be transferred to a gallon-sized food storage bag (or whatever vessel you’re going to use to marinate your meat). Add 3 Tbsp hoisin sauce, 2 tsp grated fresh ginger, the minced garlic, the mustard, and the trimmed pork tenderloin. Seal the bag and smash it around a bit to incorporate the ingredients and coat the pork. Let the pork sit a minimum of 15 minutes. (Obviously longer is fine, you can even put this together in the morning before you go to work.)

Then make the sauce:

Near the end of the marinating time, prepare the sauce: In the small saucepan with the reserved processed pineapple, combine 2 Tbsp hoisin sauce, 2 tsp grated fresh ginger, the soy sauce, and the chicken stock. Set the sauce aside until its time to grill the meat.

About grilling big pieces of meat:

When I’m grilling a piece of meat this big, I do several things. One is that I use medium indirect heat. I have a three-burner gas grill. I turn the two outer burners up to medium or medium-high, and the middle burner on low. The pork is placed over the middle low-heat burner.

I also use a heat-safe thermometer. They’re not too expensive to buy from the kitchen section of your grocery store. You just put it in the meat and leave it there during the entire cooking time. The thermometer beeps when it reaches the proper temperature. Easy, and totally worth the nominal cost. Go buy one while your meat’s marinating. (Just remember, use a hot pad to remove it when you’re done with it…it’s hot. Yes, that’s personal experience talking. Doh!)

Grill the pork tenderloin over medium indirect heat, with the grill covered, turning it once, until it reaches 155 degrees internally. The exact time varies (there’s a lot of variables), but count on around 20 minutes.


While the meat is grilling:

While the meat is cooking, bring the sauce to a simmer over medium heat, then turn it to low heat until serving time. The sauce will thicken as it bubbles – if necessary, add another splash of chicken stock if the pan gets too dry. I pour a few tablespoons of the sauce over the meat at the halfway point of the grilling time – just after turning it over. (Careful, don’t contaminate the sauce with raw meat…and if you do, bring it back up to a boil before serving it.)


Half-way through the pork's cooking time, add the reserved pineapple slices to the warmer part of the grill. Cook them over medium direct heat, turning them once, until the pineapple is soft and warm, with nice grill marks on each side. Each side should take just a few minutes at the most. When they’re done, you can move them to a cooler spot on the grill, or transfer them to a plate and cover them with foil to keep them warm.


When the meat has reached 155 degrees internally, remove it from the heat and cover it with aluminum foil. Let it rest for about five minutes before slicing it (the temperature will rise to 160 as it rests).

To serve, thinly slice the pork into medallions. Serve it alongside the grilled pineapple slices, topped with the sauce. I like to serve this meal with rice…it’s a great way to soak up the sauce!

Thursday, January 7, 2010

White Chocolate Cherry Oatmeal Cookies, with Simple Hot Cocoa


Today was a snow day for me. It doesn’t snow too often in St. Louis – usually just a few times each winter. So when we have four inches of accumulation, most schools and many businesses go ahead and call off. I was given the day off! Great! Besides, it was really one of those days where you might as well just stay indoors curled up in a blanket, sip on a hot chocolate, and enjoy a good book…and I had off from work and didn’t have to go anywhere, so that’s exactly what I did.

I knew I wanted to bake something today. With the beautiful – but cold – blanket of sparkly white snow just outside my kitchen window, I wanted to make something that would heat my kitchen up and ward off the chill. I also didn’t want to have to go to the store to collect ingredients – it was just too cold outside! Fortunately, I had all the ingredients at home for oatmeal cookies…

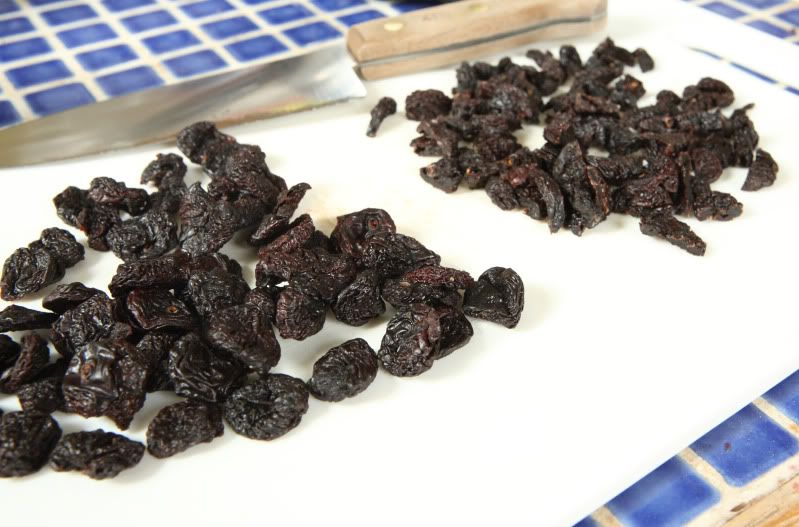
And, I’ve been craving oatmeal cookies lately. My version is a soft and moist cookie, spiced with a bit of cinnamon and nutmeg. They are studded with sweet Lambert dried cherries, compliments of my mom’s summer cherry harvest (thanks, Mom!). White chocolate chips are folded into the dough – they give a creamy flavor counterpoint to the sweet cherries.

White Chocolate Cherry Oatmeal Cookies
Makes about 3 dozen cookies

1-3/4 cups flour
3/4 tsp baking soda
3/4 tsp baking powder
1/2 tsp salt
1/2 tsp ground cinnamon
1/2 tsp ground nutmeg
1/2 lb (2 sticks) unsalted butter, room temperature
1-3/4 cups dark brown sugar
2 large eggs
2-1/2 tsp vanilla
1 c dried cherries, either sweet or tart will work, but I used sweet, because that is what I had on hand
3-1/2 cups oatmeal (not instant!)
1 c white chocolate chips

Preheat your oven to 350 degrees. Cover your cookie sheets with parchment paper.

In a medium bowl, use a whisk or a fork to mix together the flour, baking soda, baking powder, salt, cinnamon, and nutmeg. Set this aside. (I tend to measure my nutmeg and cinnamon generously, like the next picture…)


Place the butter and brown sugar in a clean large bowl, preferably one that goes to a stand mixer. Beat the butter and brown sugar together until it is well-incorporated. Add the eggs and vanilla, and beat until a smooth batter has formed.

While the batter is beating, roughly chop the cherries to approximately the size of a raisin. Set them aside.


Once the butter mixture is smooth and well-mixed, add the flour mixture, stirring only until the ingredients are combined.

Add the oatmeal, cherries, and white chocolate chips. Stir until all ingredients are incorporated. (The batter is very stiff – this is definitely a recipe that is easier to make in a stand mixer.)


Use a small ice cream scoop to portion out 1.5-ounce balls of dough, approximately the sized of a ping pong ball. Place the cookie dough balls about two inches apart on a cookie sheet covered with a sheet of parchment paper or a Silpat.


Bake at 350 degrees until the cookies are pillowy and are almost firm to the touch, 6 to 9 minutes. They should appear slightly underbaked. Remove the cookies from the oven and let them sit on their cookie sheet, undisturbed, for five minutes. Transfer the parchment paper to a cooling rack and let the cookies sit on the paper until they are firm enough to transfer directly to the cooling rack.

What goes better with cookies on a cold winter day than…hot cocoa! Its super easy to make and tastes so much better than the stuff that comes from a packet. I don’t own a microwave, so I just make mine on the stovetop, but if your kitchen is so equipped, you could zap your milk long enough to heat it just until its steaming hot.

I have several small mixing bowls, so I mix each drink’s cocoa individually, that way I don’t have to worry about evenly portioning the cocoa mixture. I just use a fork to stir up each bowl of cocoa.


Simple Hot Cocoa
For each drink, you’ll need:

1 cup of milk
1 Tbsp granulated sugar
1-1/2 Tbsp cocoa powder
A teeny, tiny pinch of salt

Scald the milk over medium heat. (That is, heat it over medium heat, but don’t let it boil. It should be steamy and warm, but not bubbling.)

While the milk is heating, in a small bowl, combine the granulated sugar, cocoa powder, nutmeg, and salt. Whisk it together with a fork until it is well-incorporated and all of the large cocoa chunks have been disintegrated into powder. Pour the cocoa mixture into the bottom of your mug; top with the warm milk and stir to incorporate.


If you’re feeling particularly decadent, top your hot chocolate with whipped cream and a drizzle of homemade caramel sauce.

Saturday, November 14, 2009

Triple Layer White Cake With Raspberry Filling


My sister recently had a birthday, so we spent last weekend celebrating. I was lucky enough to be invited to join her and her friends at a tapas-style fusion restaurant, Mosaic. One word: yum. Our group tried nearly everything on the hot tapas menu, plus a few items from the cold tapas menu. Just about everything was outstanding. (If you’re in St. Louis and enjoy tapas-style food, give them a try. Go for the quail, potato gnocchi, tuna tartare, scallops, or the mussles…those were my favorites.)

For dessert, her boyfriend surprised her with a plate of beautiful cupcakes from The Cupcakery. Their cupcakes are simply delicious – tender cake with perfectly-sweetened frosting. (“Yum” works here too!) We had a great time celebrating together - thanks for inviting me along, sis!

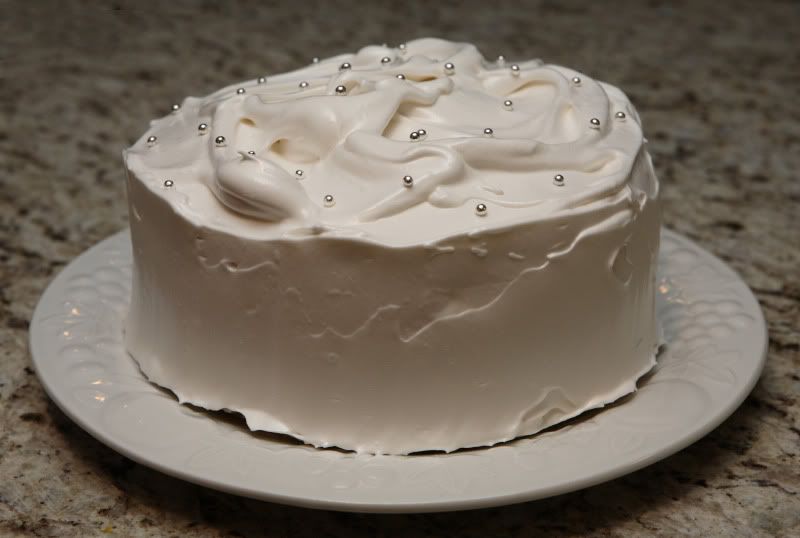
The next evening we had a birthday celebration with just our family. I knew I wanted to make my sister a white cake since that’s her favorite flavor, but the cupcakes from the previous night were also white cake, and I didn’t want to have Round Two of exactly the same basic flavors. So, to mix things up a bit, I decided I’d layer the cake with raspberry filling and frost the outside with a totally different kind of frosting than what was on the cupcakes – I used a billowy marshmallow-flavored frosting.

Only problem was, I’ve never made a raspberry filling for a cake. (Well, I have used raspberry jam in certain applications before, but I needed something that would hold up to the weight of a three-layer cake.) I found a recipe for blackberry mousse filling on a cooking forum online, and it looked like several people tried it and thought it was decent enough, and people even indicated they had made it with raspberries instead of blackberries, and I was kind of short on time, so I gave it a shot. It was pretty good, but not exactly what I was looking for. Actually, it was almost too dense – at least, it was too dense when paired with the light-textured billowy frosting I used on the rest of the cake. That said, I think it’d be great when paired with a regular American-style buttercream or any other densely-textured frosting. It did make for a pretty presentation, though, and it was not too bad, so I’ll include it here. And more likely than not I’ll make it again, but next time I will probably omit the whipped egg white – that should make the texture less dense.

The cake and frosting I used came from one of my favorite cookbooks – one you’ve seen on this blog before – Diner Desserts, by Tish Boyle. I keep turning to this cookbook for great made-from-scratch desserts. I’m not sure how much I paid for the cookbook, but it was worth every penny. I haven’t changed the recipe much – it is really good exactly as it is. Some of the text I rewrote here to make it easier to understand (I hope!). And I added the raspberry filling.

As I was debating on how to transport the cake (its at least a 40-minute drive, even with decent traffic), I decided I’d bring the cake unassembled to my sister’s house. I finished the last steps of the filling and frosting there. I was afraid the cake would slide apart and be ruined if I tried to bring it already assembled (the frosting is really very light textured, and I was not sure exactly how the raspberry filling would hold up since I had never made it before). So I left the cooled cakes on their wire racks, covered each loosely with freezer paper (it has a coating of some kind of plasticy material that helps keep food from sticking), and stacked it all up in a cardboard tray left over from a case of bottled water. It worked out pretty well. The cakes did not stick to the freezer paper and everything arrived intact.

Triple Layer White Cake
Makes one three-layer cake 8 inches in diameter

2 cups cake flour
1 Tbsp baking powder
1/2 cup unsalted butter
1-1/2 cups granulated sugar
1 tsp finely grated lemon zest
1-1/2 tsp vanilla extract
1 tsp salt
9 large egg whites, at room temperature
1 cup whole milk

To make the white cake, position two baking racks near the center of the oven and preheat to 350 degrees F. Grease the bottom and sides of three 8-inch round cake pans. Cut out three rounds of parchment paper slightly smaller than the internal diameter of the bottom of the pans (test then to be sure they fit).


Grease the empty cake pans, then place a round of parchment paper in the bottom of the pan. Grease the paper. Dust the sides of the pan with flour and tap out the excess. (I’ll admit, I forgot this step…it all still worked out in the end, but it would have been easier to get the cake to come out of the pan if I had remembered…)

In a medium bowl, sift together the cake flour and baking powder. Stir them together with a whisk. Set them aside.

In an electric mixer, using the paddle attachment, in a large clean bowl, beat the butter on medium-high speed until smooth, about one minute. On medium speed, gradually beat in 1 1/4 cups of the granulated sugar. Increase the speed to high and beat until well combined, about two minutes. Add the lemon zest, vanilla, salt, and three of the egg whites. Scarpe down the sides of the bowl with a rubber spatula and beat the mixture on medium high speed until light and fluffy, about two minutes. Add the sifted dry ingredients in three additions alternately with the milk in three additions. (Three? Ok, at least split it into two (there’s hardly enough volume to easily split it into thirds), and I believe the best results are obtained if you work it out so an addition of dry ingredients goes in the bowl last. Not sure if there’s any logical reason as to why that’s better, but that’s how I’ve always done it.) Scrape down the bowl and beat until smooth, about 1 minute.

You’ll need to beat egg whites next. If you’re using a stand mixer and have no secondary hand-mixer or extra stand mixer bowl, transfer the batter to another large bowl, set it aside, and thoroughly wash the empty stand mixer bowl. (Any residual butter in the bowl will prevent the egg whites from properly whipping.) Or you can do what I did and just whip the egg whites in a new bowl with my electric hand-mixer.

In a large, clean bowl, beat the remaining six egg whites on medium-low speed until foamy. Increase the speed to medium-high and gradually beat in the remaining 1/4 cup of granulated sugar. Continue to beat until the whites are stiff, but not dry. Using a large rubber spatula, fold about 1/3 of the egg whites into the reserved batter. Then gently fold the remaining egg whites into the batter.  Avoid overmixing and deflating the batter - Fold only until the whites are incorporated.  It will look sort of foamy like this:


Scrape the batter into the prepared pans.

Bake the cakes for 15-20 minutes (mine took more like 25-30, but you might want to check them earlier…). The cakes are done when the tops spring back when they are touched, and a toothpick inserted into the center of each cake comes out clean. (Note From First-Hand Experience: do not use a knife point…the toothpick makes a much smaller, less-noticable hole!)


While the cakes are baking, start the raspberry filling. (If you elect to skip the berry filling, the white frosting as written will likely yield enough to frost and fill the cakes, as long as you don’t go overboard in piling on the filling.)

Once the cakes are done baking, cool them in their pans on wire racks for 30 minutes. Invert the cakes onto the racks, peel off the paper, and cool completely.

Raspberry Filling
Makes enough to frost the tops of two 8” cake layers

2 tsp unflavored gelatin
6 Tbsp cold water
2 cups frozen raspberries
1/2 cup granulated sugar
2 egg whites (probably optional...)
1-1/2 cups heavy cream

In a small bowl, sprinkle the gelatin over 2 tablespoons of the water. Let it stand until the gelatin has softened, about 5 minutes.


Meanwhile, in a food processor, puree the raspberries with the remaining 4 tablespoons of water.


Use the back of a spoon to press the raspberry puree through a fine-mesh sieve. Collect the strained puree in a small saucepan – there should be about 1 1/2 cups. Add the sugar and stir over medium heat until the berry puree is warm and the sugar is dissolved.


Stir in the softened gelatin until it has dissolved. Let the mixture cool.

In a medium bowl, using an electric mixer, beat the egg white until firm peaks form. (By the way, this is the step I’d probably omit in the future…but I haven’t actually tried it myself, so I’m not quite sure how it’d turn out!  Try it at your own risk...) Using a rubber spatula, fold the egg white into the cooled berry puree until no streaks of white remain.

In another medium bowl, beat the heavy cream until it holds soft peaks. Fold the whipped cream into the berry mixture and refrigerate until chilled, about 1 hour. Once the filling has chilled, it is ready to use.

While the berry puree and the cakes are cooling, you can make the fluffy white frosting.

Fluffy White Frosting
Makes enough to frost the exterior of a three-layer 8” cake (and then some)

5 large egg whites
1-3/4 cups granulated sugar
1/3 cup water
1/2 tsp cream of tartar
2 tsp vanilla extract

To make the fluffy white frosting, you’ll need to fashion a double boiler out of a pan of simmering water and a large mixing bowl. You’ll need to use an electric hand-mixer, so the stand mixer is out. Note that you’ll need to select an electric hand-mixer that is up to the task: you’ll need to use it for nearly 15 minutes straight. I burnt out the motor of my first hand-mixer while making this frosting, but the upside was that I had a great excuse to buy a great heavy-duty one which has successfully whipped the frosting on several occasions since then.

Fill a medium saucepan with several inches of water. Take a large, deep bowl and place it over the saucepan to see if the water touches the bottom of the bowl. It shouldn’t – and if it does, dump out some of the water. Turn the heat onto medium-high. You may need to adjust the heat as you work – you’re looking to maintain a simmer in the water, but not a boil, and again, the water level shouldn't touch the bottom of the bowl.


In the large bowl, combine the egg whites, sugar, water, and cream of tartar. With the handheld mixer, beat the mixture until foamy, about one minute.

With the bowl set in the saucepan of simmering water, beat constantly on medium speed until the mixture reaches 160 degrees. This will take approximately seven minutes. Use caution – don’t let the mixer cord melt or catch on fire or cause some other terrible situation!

Once the mixture has reached 160 degrees, remove the bowl from the heat. Add the vanilla and beat the frosting on high speed until it holds stiff peaks. This will take approximately seven more minutes. The frosting is now ready to use.


To prepare to assemble the cake, I start by placing two-inch wide strips of waxed paper on the edges of the serving plate. Place a cake round on the plate. Adjust the strips as necessary: the waxed paper should be placed in such a way that it catches any drips or smears of frosting, protecting the plate and keeping it clean while the cake is being frosted.

Top the bottom layer of the cake with half of the raspberry filling. Stack another layer of cake on top of the cake, then frost it with the remaining raspberry filling.


Finish by stacking the third layer on top. If necessary, insert skewers vertically into the stacked cake to help stabilize the layers (cut the skewers to the height of the cake). Using a large offset metal spatula, spread the fluffy white frosting around the sides and top of the cake, piling it up in dramatic swirls. Pull out the waxed paper strips and serve the cake immediately or refrigerate and bring it to room temperature before serving.


If you decide to add the egg to the raspberry filling, be mindful of its presence: the cake should be eaten shortly after the filling is prepared. I don’t think I’d eat it after the first day, but that’s just me. The fluffy white filling keeps slightly better, but not well enough to make the cake too far in advance. I’d recommend assembling the cake the same day you plan to eat it. (If you must do something in advance, bake the cake in advance and freeze the layers. Thaw them in their wrappers before you use them!)

Sunday, August 16, 2009

Better Than Church Lady Banana Bread

I had a banana left over from July’s Daring Cooks challenge…and what do you do when you have one leftover banana?

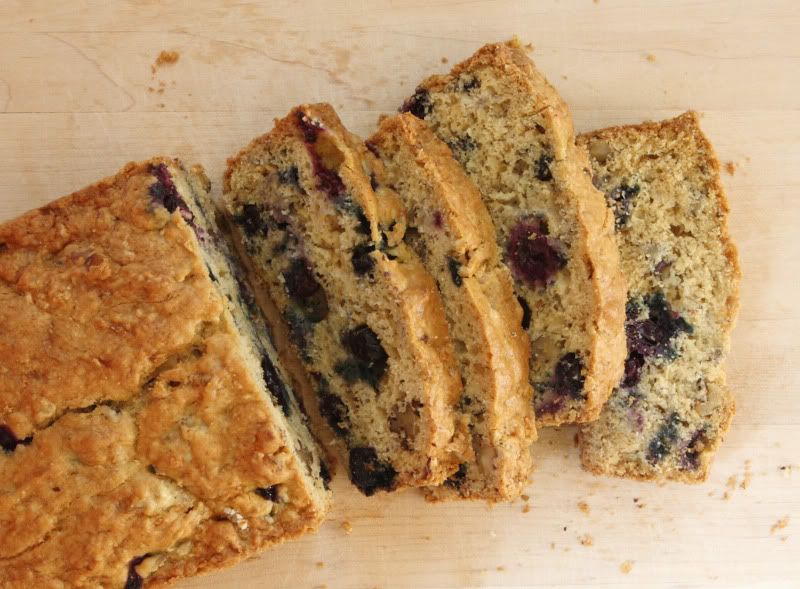
Make blueberry banana bread, of course!


And, actually, you don’t need to have a mushy, old, brown, yucky banana sitting around to make delicious banana bread. If you are short an old banana, but happen to have a fully-ripe (all-yellow, no-green) banana on hand, toss it in your mini food processor and whirl it into banana mush. Although the taste and texture of the bread is slightly better if you use an older, hand-mashed banana, this substitute works perfectly well in a pinch, and chances are no one will even notice the difference unless they have a chance to taste it side-by-side. So don’t let the lack of an overripe banana stop you from making banana bread.

After looking through a few of my cookbooks, I decided to modify a recipe from one of those church-lady compilation fundraising cookbooks. You know, those cookbooks where the ladies of a church submit their favorite tried-and-true recipe to a committee, who organizes them all, types them up, and sends the finished product in to some small publishing company for printing and binding. This particular cookbook is probably at least 25 years old – and before the days of computers, these cookbooks were a pretty big production!

Sometimes these types of cookbooks are hit-or-miss – I guess it depends on how much the parishioners like to cook. This book was from a small, rural community, was printed at a time when made-from-scratch cooking was the norm, and as it turns out, the cookbook has a few goodies in it. I’ll admit, I might be biased – my mom helped out with the production of this particular cookbook and most of the recipes I make from it are ones she submitted herself.

However, this particular recipe wasn’t one of hers – it was simply a standard banana bread recipe, which I picked specifically because it only called for one banana - that’s all I had on hand! As usual, I made a few changes to the recipe: I added berries, reduced the nuts, and rewrote it to make it easier to follow and more logical.

I like blueberry banana nut bread the best, but you can also make cranberry banana nut bread. You could probably substitute just about any moist fruit for the blueberries...raspberries, diced oranges, strawberries...

Better Than Church Lady Banana Bread
Makes one 8.5” loaf

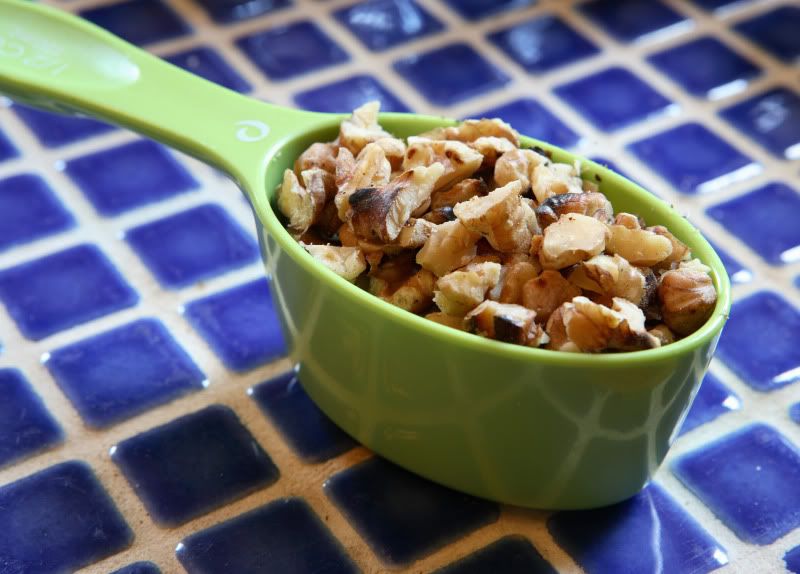
1/2 cup coarsely chopped walnuts
1 3/4 sifted cake flour (I used White Lily brand All-Purpose flour and it worked fine)
1 3/4 tsp baking powder
3/4 tsp salt
1/2 tsp baking soda
1 c blueberries (or cranberries)
1 Tbsp all purpose flour
1 Tbsp granulated sugar (ONLY if you use cranberries…if you use blueberries, omit this)
1/3 cup butter
1/2 cup brown sugar
2 eggs
1 roughly mashed-up, slightly overripe banana

Preheat the oven to 350 degrees. Grease an 8.5x4.5x3” loaf pan. I think the crust tastes best when the bread is baked in a light-colored pan, not a dark nonstick pan.

In a small skillet, toast the walnuts over medium-high heat until they begin to brown, stirring occasionally. Remove them from the pan; set them aside to cool. Chop any of the larger pieces (the nuts shouldn’t be any bigger than a small blueberry).


In a medium bowl, whisk together the cake flour, baking powder, salt, and baking soda. Set aside.

In a small bowl, toss the blueberries or cranberries together with the 1 Tbsp all-purpose flour (and the 1 Tbsp granulated sugar, if you are using cranberries) until the berries are evenly coated. Set the berries aside.

Cream the butter and sugar until fluffy and well-combined. Beat in the two eggs. Stir in the mashed banana. (It’s not necessary to totally mash the banana into mush – leave some chunks in the batter!)

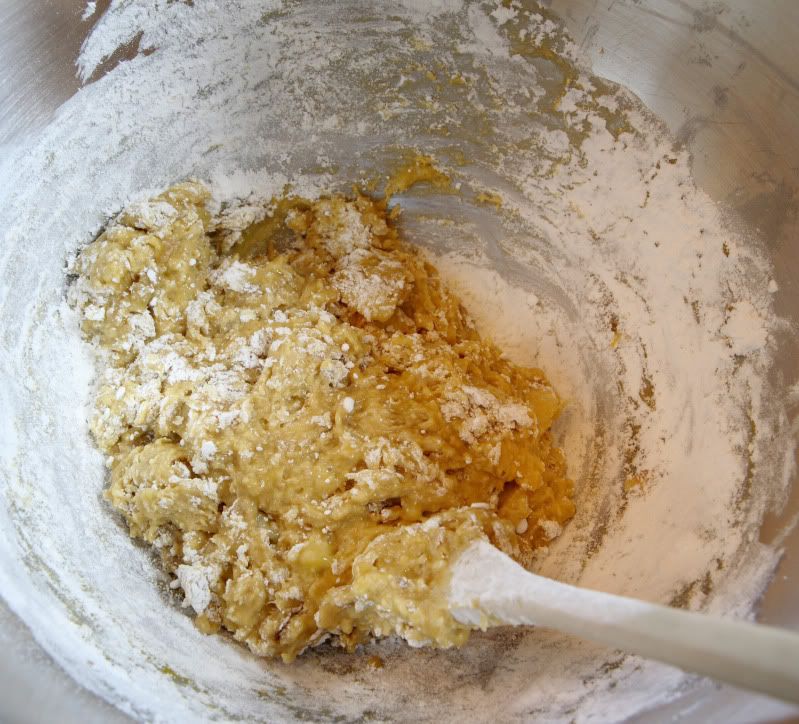
Gently fold the flour mixture into the egg mixture, stirring only until the flour is nearly mixed in. There should still be flour on the sides of the bowl.


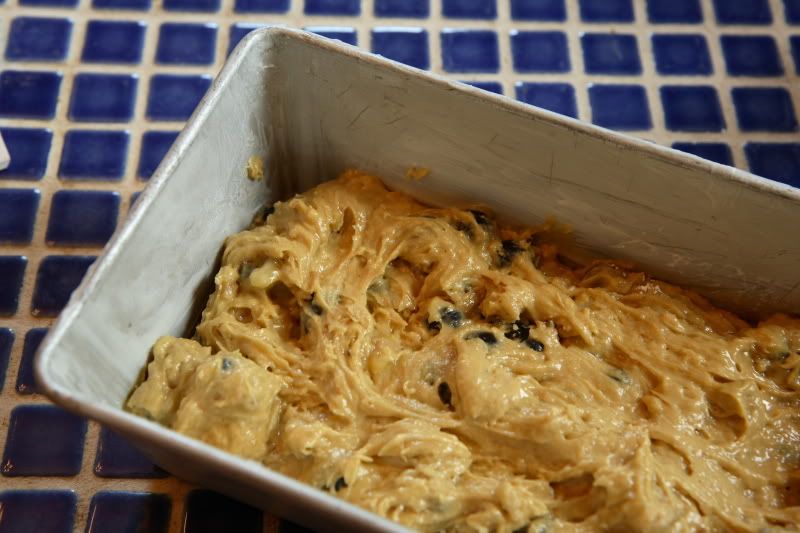
Add the floured berries and the toasted walnuts, folding them into the batter only until they are evenly distributed and the remaining flour has been incorporated. Do not overmix the batter.

Spread the batter into the greased pan.


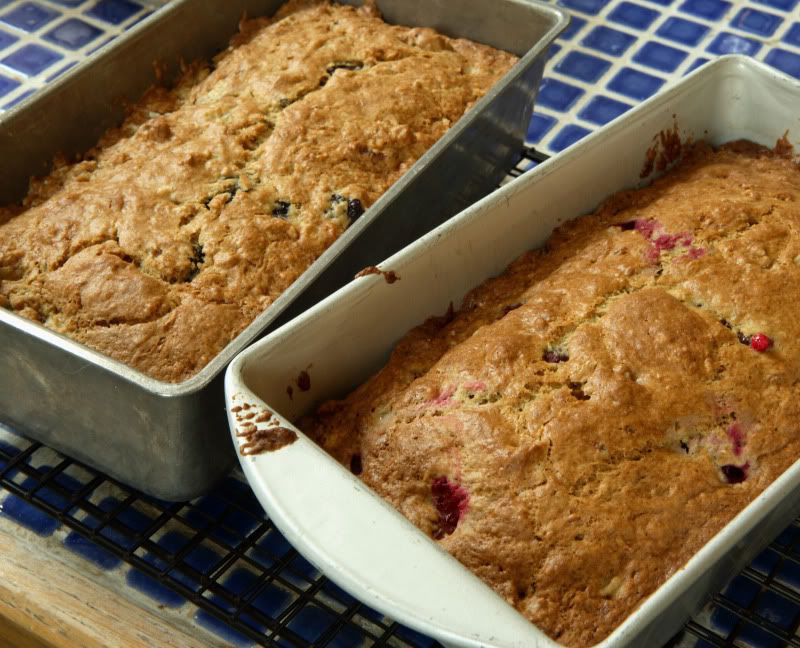
Bake at 350 degrees for 50-55 minutes, or until the bread tests clean when a toothpick is inserted into the center of the bread. Cool the bread inside the pan until you can’t stand to wait anymore (at least wait until you can handle the bread without a hot pad!).


Turn the bread out to a wire rack to cool to room temperature (or eat it!).

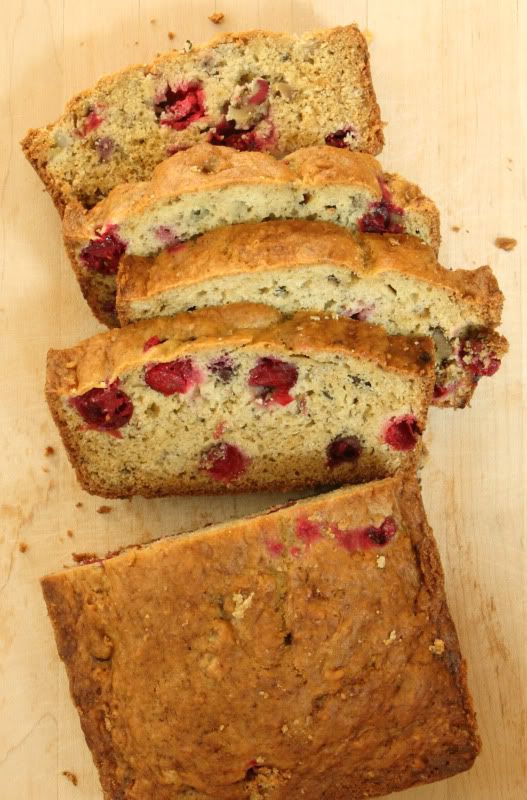
The original recipe recommends waiting a day before eating the bread (to let the flavors meld) but I can hardly wait that long! I think the bread tastes best when it is cut into thick, still-warm slices and topped with firm, cold, unsalted butter bits – the warm bread contrasts nicely with the sweet, cool butter. Yum!

Pretty cranberry bread:

Sunday, July 12, 2009

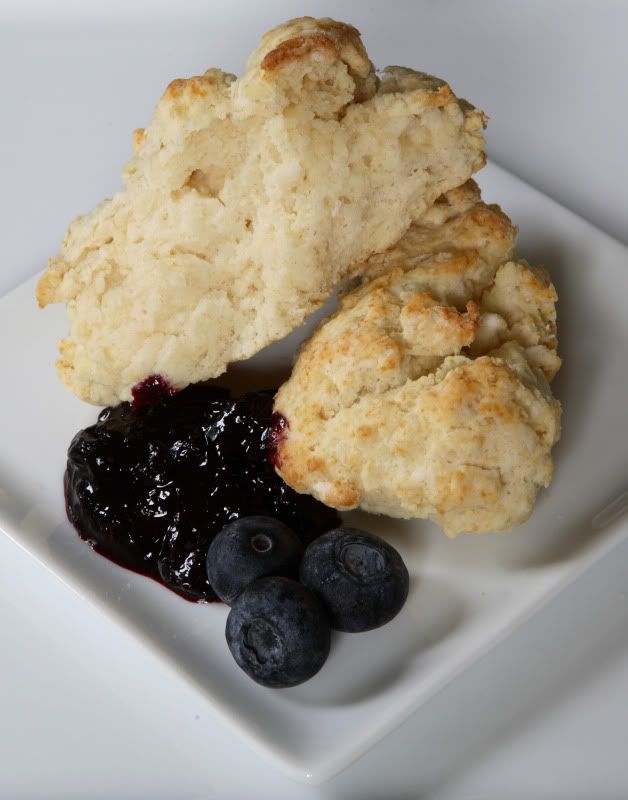
Simple Biscuits and Jam


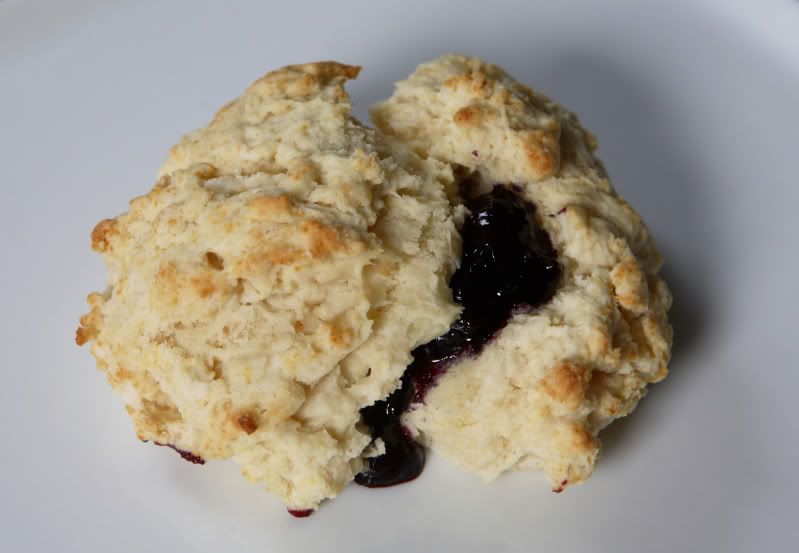
Homemade biscuits are so easy, I never can understand why anyone would want to make them out of Bisquick. These biscuits are tender and soft. They don’t call for butter, so they’re the perfect neutral base for homemade jam. You can easily add a bit of sugar to them to make biscuits for strawberry shortcake.

I served these for breakfast this morning with some homemade blueberry jam, following the same small-batch blueberry pan jam recipe I used for the June Daring Bakers Bakewell Tarts challenge.

Simple Baking Powder Biscuits
Makes 5 to 6 biscuits

2 cups flour
1 tsp salt
4 tsp baking powder
1/4 cup shortening
3/4 cup milk

Preheat the oven to 450 degrees. Cover a cookie sheet with a piece of aluminum foil or parchment paper (or you can grease the sheet if you’d prefer).

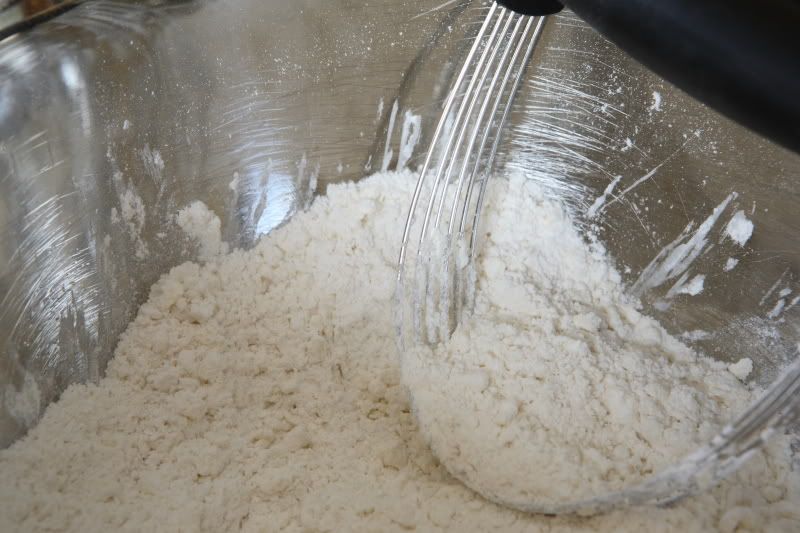
Mix together the flour, salt, and baking powder. Add the shortening and use a knife, fork, or pastry blender to cut in the shortening until small pea-sized pieces are left. The appearance should be very similar to this picture, from the crust for the Bakewell Tarts I made for the June Daring Bakers challenge.

If you’re making homemade pan jam, start it now. Let it slowly simmer while you finish the biscuit dough.

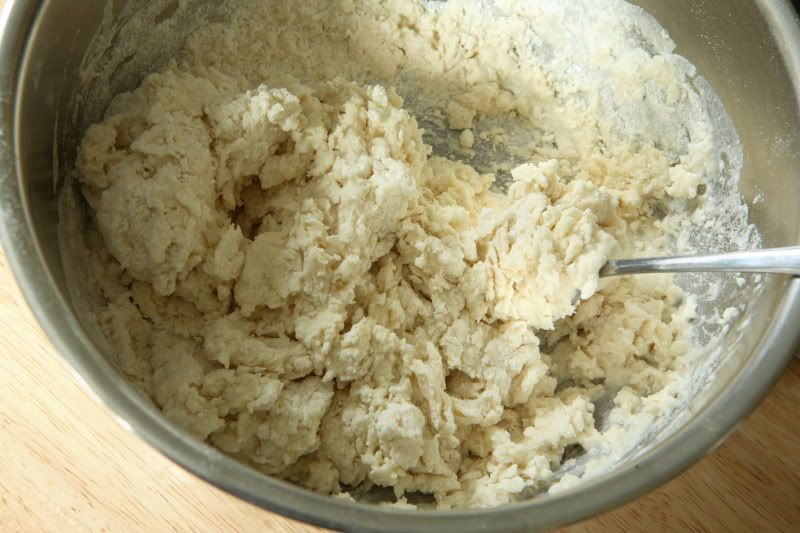
Pour in the milk, and use a fork to mix the dough only until it is barely combined. The dough will appear rough and ragged and some dry bits will be left in the bowl. Do not overmix the dough.


Shape the dough into five or six freeform biscuits and place on the cookie sheet. Bake for 12-15 minutes, until lightly browned, fluffy, and just barely done in the center.


If you’d like to make these as dessert biscuits for strawberry shortcake, add 2 Tbsp of sugar to the dry ingredients in the first mixing step.