Showing posts with label make ahead. Show all posts

Wednesday, October 12, 2011

Homemade Vanilla: An Easy-To-Make Christmas Gift


I love giving a gift that reflects something about the giver.  It helps solidify that connection, the reason for the friendship, whatever it is you have in common with the giver.  This year I’m giving my closest friends and family homemade vanilla – something they can use all year long.  Since I love being in the kitchen and try to make everything I cook or bake from scratch, this gift seems to be the perfect gift for my family and friends.

Regular readers of my blog will know that I’m big on making things homemade, for many reasons, one of which is because you can control what goes into your food.  This vanilla is great because there are no added sugars.  The finished vanilla is simply split good-quality vanilla beans steeped in vodka over a period of time – simple.  Many grocery store vanillas have added sugar and are using God-only-knows-what variety of vanilla beans, and the flavor and quality just isn’t the same.

The other great thing about this vanilla is that the bottle is “never-ending.”  As it is used up, the bottle can be topped off with more vodka.  Just let it sit several weeks before it is used, and it is as good as new.  Give the bottles an occasional shake as they sit.

Oh, and the little flecks of what kind of looks like dirt…those are just the beans inside the pods.  Totally edible, totally delicious – that’s where all the flavor comes from.  Don’t worry if some of the flecks make it into your food – that’s a good thing.

If you’re going to make this in quantity as Christmas presents for several people, you’ll find that you will probably need to purchase most of your supplies online – it will be most cost-effective that way.  I bought four-ounce bottles with caps included from Specialty Bottle.  The shipping cost more than the bottles did, but it was still cheaper than sourcing the bottles locally.  Plus, unlike the bottles I found locally, the ones from Specialty Bottle came with caps, so I didn't have to track down a separate source for the lids.  Also of note, they do sell little shrink-wrap seals for the lids.  I didn’t buy any, but if you want to make your vanilla for sale to the general public, you can buy the seals from the same source as well.


I bought my vanilla beans from Beanilla Trading Company, also an online company.  I was initially only going to buy the Madagascar variety of beans, but saw they had a sale on the Bourbon variety so I grabbed a small package of those beans to see how they differ from the Madagascar variety.  (Incidentally, the Bourbon vanilla bean name has nothing to do with bourbon the alcohol.)  It looks like they also sell empty glass bottles on their website, you may or may not be able to get a better deal through them (they didn't carry them at the time I made my purchase).

The Beanilla website and packaging says Madagascar beans are “Rich, smooth, and creamy.  Madagascar vanilla has a distinctly sweet and buttery aroma.  This is the most popular variety of vanilla in the world.  Perfect for any recipe.”

The package for the Bourbon beans says, “Nutty chocolate and raison (sic).  A hint of tobacco.  One of the smoothest, most popular forms of vanilla in the world.”

In both cases, I would agree with their descriptions!  The Madagascar variety definitely smells sweeter than the Bourbon variety does.  I was trying to describe the difference to someone, and the best way I could do so was to say, the Madagascar variety smells very feminine, while the Bourbon variety smells very masculine.  Sort of a strange way to describe it, but that’s the first thing that came to my mind.

As far as the flavor goes, the Madagascar variety seems more “normal” to me, and probably to most people too, because it is the type used in most high-end grocery store vanillas.  The bourbon kind is certainly good too, but I find that when I’m baking, I reach for the Madagascar variety more frequently, simply because its the flavor the general public is used to.

When considering the quantity of beans to purchase, I made my vanilla with 2.5 beans per four-ounce bottle.  You can probably use slightly more or less without a problem, but I don’t think I’d use too much less or you’ll miss out on the vanilla flavor.

For the vodka, I bought a 1.75 liter bottle of Svedka brand vodka from my grocery store.  Of the brands of vodka that were available in that quantity at my grocery store, its price point seemed to be middle of the road, neither excessively expensive for a project like this, nor so inexpensive it’d taste totally terrible.  I figured, like wine, don’t use something you wouldn’t drink…and a taste test proved it would be satisfactory enough for vanilla-making purposes.  The 1.75 liter bottle was more than enough to make fourteen four-ounce bottles of vanilla – and there are still a few inches in the bottom of the bottle for future taste testing purposes.

In addition to the beans, bottles, bottle caps, and vodka, you'll also need a pair of kitchen scissors and a funnel for this project.


Homemade Vanilla Extract

2.5 vanilla beans per four-ounce bottle
Four ounces of vodka per four-ounce bottle

Use scissors to cut each vanilla bean in half.  Then snip up the length of each half of the bean, cutting it almost in half – almost splitting the bean, making a big V shape out of each bean half.


Stuff five V-shaped bean halves into each bottle.


Use a funnel to pour vodka over the beans, filling the bottle.


Cap the bottle, and store it in a cool dark place for about six weeks.  Approximately two weeks in, give the bottles a little shake.  As the bottles sit, the liquid will turn dark – normal vanilla extract color – and you’ll know its ready for use!  The picture below shows how dark the vanilla gets after just a few weeks' time.


To use, give the bottle a little shake, then just pour off the amount of liquid you need, leaving the beans in the bottle.  You can start to use the vanilla extract in recipes as early as several weeks in, but the longer the vanilla sits, the better the flavor gets.  As the level of the liquid goes down, add more vodka to the bottle and wait a few weeks before using it until the extract has reached the proper vanilla-brown color.  (By the way, vodka keeps indefinitely, so even if you’re not a vodka drinker, you don’t have to worry about it going bad if you want to buy a bottle just for this purpose.)

Labeling the Bottles

To help identify what was inside my bottles, and to help instruct the recipients of my Christmas gifts, I made little labels for each bottle.  You’re welcome to copy them if you want, or make your own.
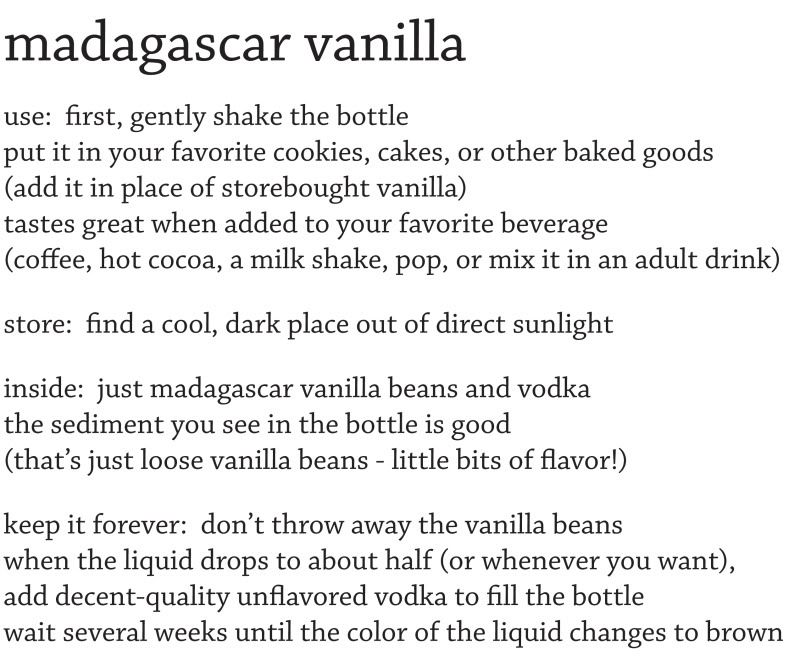


For the longest-lasting labels, I suggest printing them on a laser printer (not an inkjet – the ink would run if it got wet).  I also wanted to have the top surface of the label laminated (but not the back, because then it wouldn’t stick to the bottle very easily).  So, I printed my labels, cut them out, and “laminated” the top surface using a large piece of clear packing tape.  Once the tape was trimmed down, it made a nice shiny surface.

Since I printed my labels on regular paper, not label/sticker stock, I needed a way to attach the labels to the bottle.  I guess I could have taped my labels to the bottle, but instead I pulled out my scrapbooking supplies and used my Xyron glue runner to apply permanent glue to the back sides of the labels.  So far they are sticking sufficiently well to the bottles, and its been about a year since I first did this project.

To add a bit of decoration to each bottle, I tied a chocolate and tan ribbon to the neck of each bottle.  They were cute without being excessively cutesy, and festive enough to give as Christmas gifts without being too Christmasy (after all, the bottles are going to be used throughout the entire year).

It's been about a year since I first did this project, and the jars of vanilla I kept for myself are still working out great for me.  I tend to use quite a bit of vanilla because I bake pretty frequently, and this is a much more cost-effective way for me to use high-quality vanilla than constantly buying expensive vanilla extract from a grocery or cooking supply store.

October or November is the perfect time of the year to get started on this project.  Whether you give your vanilla away as Christmas presents, or just plan to use it in your holiday baking, vanilla started in October or November will be perfect, delicious, and more than ready for use by the end of December!

Printable PDF File (with pictures)
Printable PDF File (text only)

Monday, October 10, 2011

Simple Vanilla Drop Sugar Cookies (or Whoopee Pies?!)


Although I love the simple vanilla flavor of sugar cookies, I hardly ever make them.  I think its because they’re a little pesky to make – they usually require lots of refrigeration time.  The dough must be rolled out on the countertop, and regular readers of this blog will recall from photographs that my kitchen countertop is tiled – its not the usual smooth Formica or granite or whatever surface it is that most people have in their kitchen.  The textured tile countertop makes it basically impossible to roll out cookies.  (Don't ever put a tile countertop in your kitchen.)

If I want to make cut-out sugar cookies, I have to haul the dough and cutters and cookie sheets over to a family member’s house, invade their kitchen, and make them there.  Consequently, I usually only bother with sugar cookies once or twice a year, generally only around a holiday, and make cut-out shapes of Christmas trees and angels or Easter bunnies and tulips over at my Dad’s house with my sisters.

To satisfy my sugar cookie fix during the rest of the year, I’m always looking for a good soft drop sugar cookie recipe.  This one works pretty well – no refrigeration required, and the fact that I don’t have a smooth countertop is irrelevant.  The mixing process is easy enough your kids can put the recipe together.  Unlike most sugar cookie recipes, you don’t need to plan to make the cookies four hours ahead to allow ample time for refrigeration.  The cookies are simply dropped onto the cookie sheet with a cookie scoop.  The addition of sour cream gives the cookies great flavor, and keeps them ultra soft, as long as they don’t get excessively overbaked.  They taste good either frosted or unfrosted.

My mom found the first version of this recipe’s ingredient list and baking times somewhere, it apparently came from compilation cookbook put together by Beta Sigma Phi, “The Millennium Cookbook.”  She might have made a few modifications on her end (the recipe was originally supposed to be a roll-out sugar cookie recipe, but my mom found it to be way too soft to easily roll out).  We thought it might make a good drop cookie recipe, and thus I began experimentation in my kitchen.

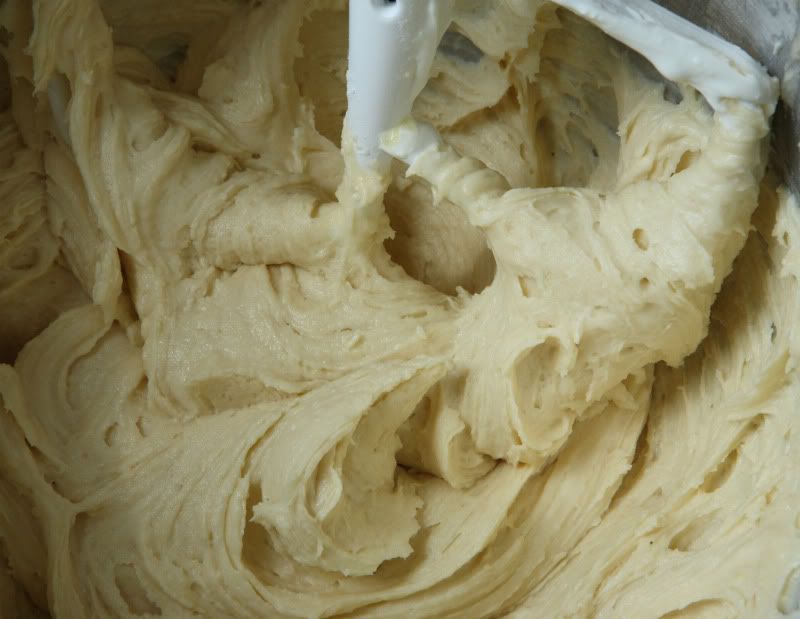
Turns out, the resulting unbaked “dough” IS really soft – its really more like a thick cake batter than it is like any other cookie dough I’ve ever made.


I have no idea how anyone could possibly roll the dough out without making a huge mess - multiple cups of flour would need to be dusted onto the countertop during the rolling process, and the cookies wouldn’t be nearly as tender with the addition of all that extra flour.  The original recipe concept seemed so difficult and inconsistent – the drop cookie method as I’ve written it below is definitely the way to go.

During experimentation, I discovered these cookies work pretty well as the cake portion of a whoopee pie.  Since the cookies are vanilla and are not strongly flavored, they pair well with a tangy lemon curd filling.  I’ve included an easy-to-make lemon curd filling recipe below the cookie recipe in case you want to try that out.  It uses good-quality store-bought lemon curd, and therefore is way less complicated to make than it would be if you were to make the lemon curd yourself.

Soft Vanilla “Drop” Sugar Cookies
Makes about 4 dozen cookies, depending on how big your cookie scoop is

1 cup butter
1-1/2 cups sugar
2 tsp vanilla
3 eggs
Finely grated zest from one small lemon
4 cups flour
1/2 tsp salt
2 tsp baking powder
1 tsp baking soda
One 8-oz. container sour cream (3/4 cup)

Preheat your oven to 350 degrees F.

Using a mixer, cream together the butter and sugar.  Add the vanilla, eggs, and lemon zest; mix until well-combined.

While the mixer is running, in a separate medium bowl, blend together the flour, salt, baking powder, and baking soda.

Mix half of the flour mixture into the butter mixture until batter is well-combined.  Then mix in half of the sour cream until the batter is uniform.  Add the remaining flour mixture, and once it has been mixed in thoroughly, add the remaining sour cream, and mix until the batter is combined.

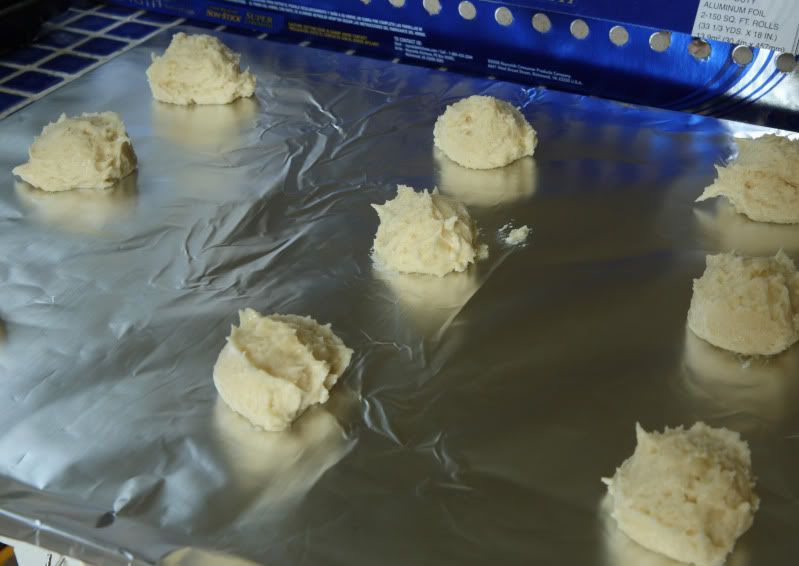
Cover your cookie sheets with aluminum foil.  Use a cookie scoop to drop heaping tablespoons of batter onto the sheet, spacing them several inches apart as they will spread slightly.  (My cookie scoop dropped .75 ounces of dough with each scoop.)


Bake the cookies at 350 for 11-13 minutes.  The cookies will look pillowy and should only be barely browned.


Let the baked cookies rest on the warm cookie sheet for 5 minutes before transferring the sheet of foil to a wire cooling rack.  The cookies will be too soft to remove from the foil at this time, but will firm up as they continue to cool.  Once the cookies have cooled completely, remove them from the foil.  They may need to continue to sit on the racks a bit longer until they are firm enough to move to storage containers.

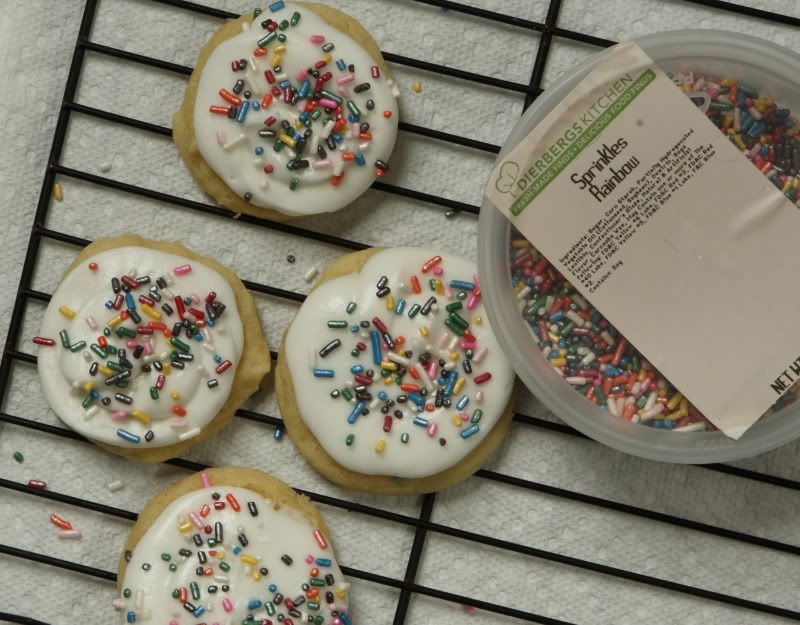
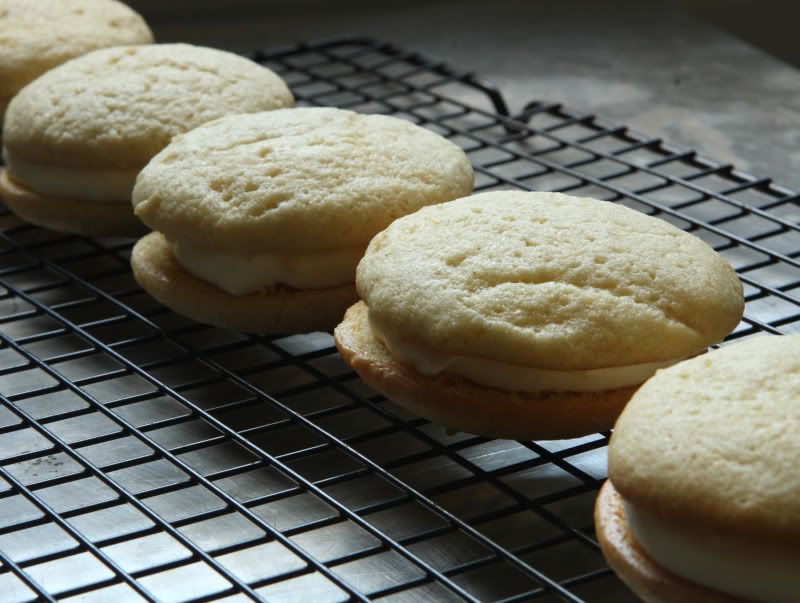
The cooled cookies can be frosted, filled-and-sandwiched into whoopee pies, or just enjoyed plain.


Easy Lemon Curd Filling
in case you want to make whoopee pies out of the cookies

2 cups unwhipped heavy whipping cream
2 Tbsp sugar
1 cup prepared lemon curd, I used storebought Dickinson's brand

In a medium bowl, whip the cream and sugar on high speed until soft peaks form.  Set aside.

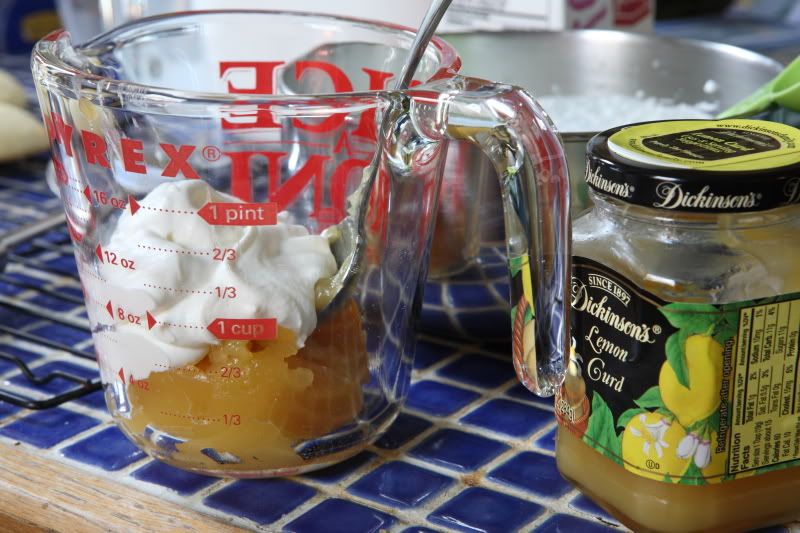
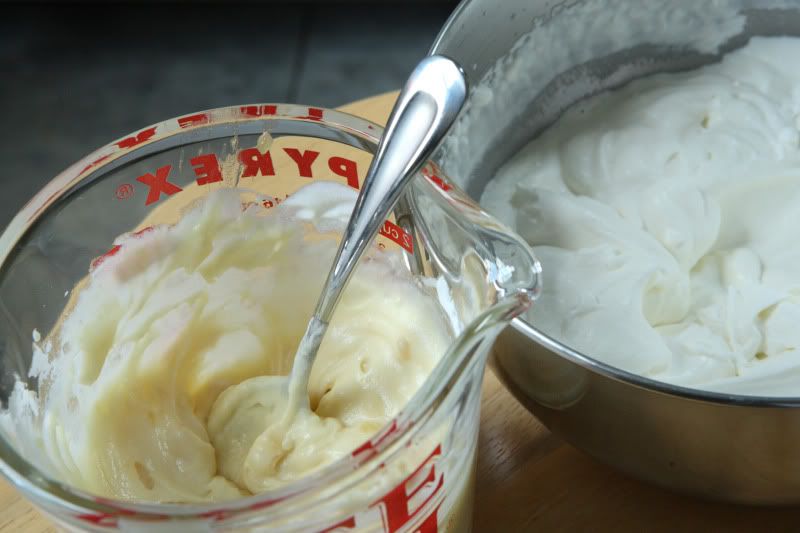
Put the lemon curd in a small bowl (I like to use a 2-cup glass measuring cup).  Spoon in about 1/2 cup of the whipped cream.


Stir vigorously to incorporate the lemon curd into the cream.  It may not be entirely lump-free but stir it until it is mostly smooth.


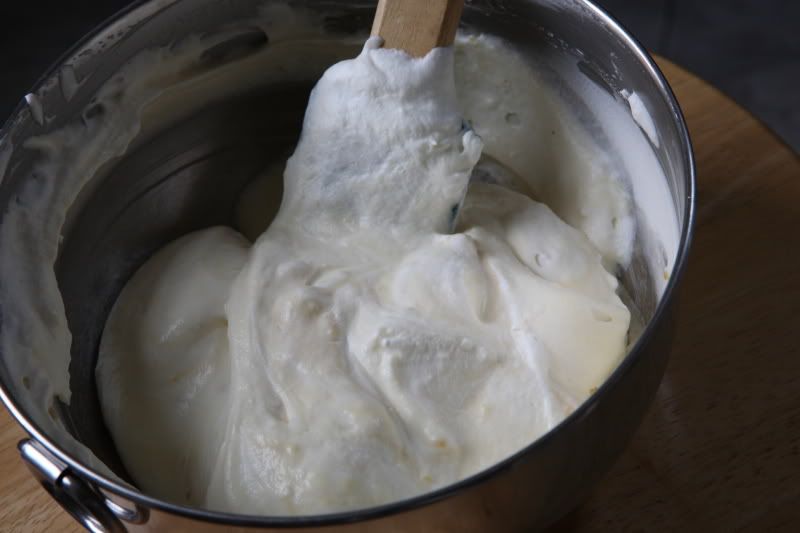
Transfer the lemon mixture into the bowl containing the remaining whipped cream.  Use a spatula to gently fold the lemon mixture into the cream.  Don’t overmix it, just fold it until the color is uniformly lemon yellow.


Pair up your cookies - match them up so you have similarly-shaped pairs, so your finished product looks better.

Dollop the lemon cream mixture onto one of each of the cookie pairs, then sandwich them together.


Since this filling recipe contains cream, you’ll need to refrigerate the cookies if you aren’t planning to serve them right away.  The cream is quite soft at room temperature, but is more firm at refrigerator temperature, and is quite delicious served either way.  I think I preferred the refrigerator temperature personally, but that’s just me.  They will last about a week in the fridge (if you haven’t eaten them all first!).

Printable PDF File (with pictures)
Printable PDF File (text only)

Tuesday, May 24, 2011

Buttered Pasta


I have a weakness for uniquely-shaped pasta. I could buy a box or bag of pasta every time I go to the grocery store. I have an entire cabinet devoted to pasta storage, and even though I already have every shape imaginable, I can’t resist picking more up any time I see something that looks interesting.

To feed my pasta-buying addiction, I visit “The Hill” neighborhood here in St. Louis, the old Italian neighborhood with lots of wonderful restaurants and several fun little grocery stores where good-quality tomatoes, olive oil, wine, and balsamic vinegar are the norm. The pasta selection is outstanding, of course, and you can get a lot of neat shapes I’ve never seen anywhere else, all imported directly from Italy.

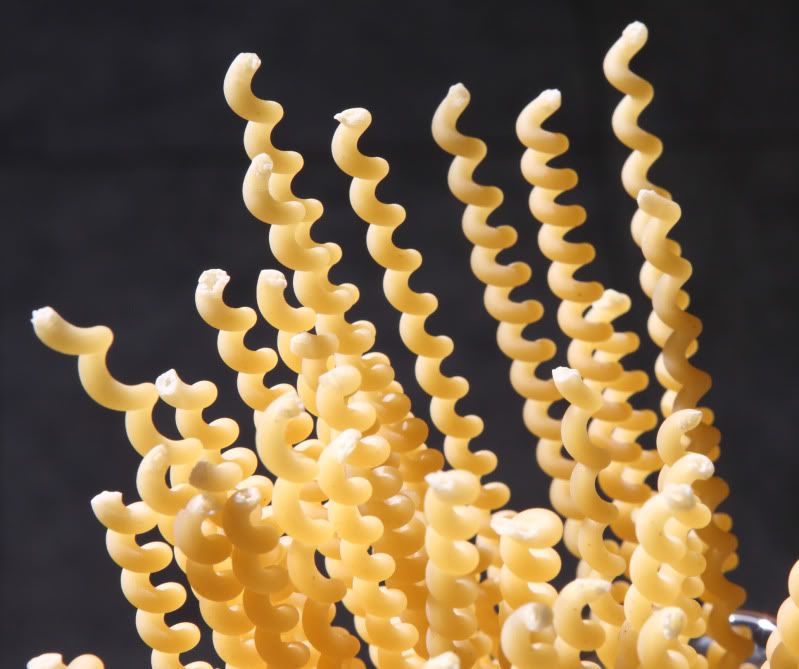
I made this pasta dish with the last half of a bag of fusilli col buco, which is a long, hollow, corkscrew-shaped pasta. It’s thick and chewy and works great in a dish like this, with simple accompaniments, where the pasta really stars. Bucatini (the straight version of what I used) would work great: it has the same chewy texture but is a little harder to eat gracefully because it is just a little too thick to swirl around your fork. If you cannot find either specialty pasta, you can use fettuccini or linguine – something thick and chewy, not thin.


Although these subtly flavored, buttery noodles are a great side dish to go with any Italian entrée, they are the perfect accompaniment to something delicately-flavored like Chicken Piccata, because the noodles and their sauce will not overpower the Piccata sauce. They’re fast and easy to make, and don’t require a lot of expensive ingredients. There’s just a touch of garlic in them, but it, and the butter, salt, and pepper is all secondary to the pasta.

If you have any leftover noodles, take them to work for lunch – they reheat well in the microwave.

Buttered Pasta
Serves 4 as a side dish (smaller portions)

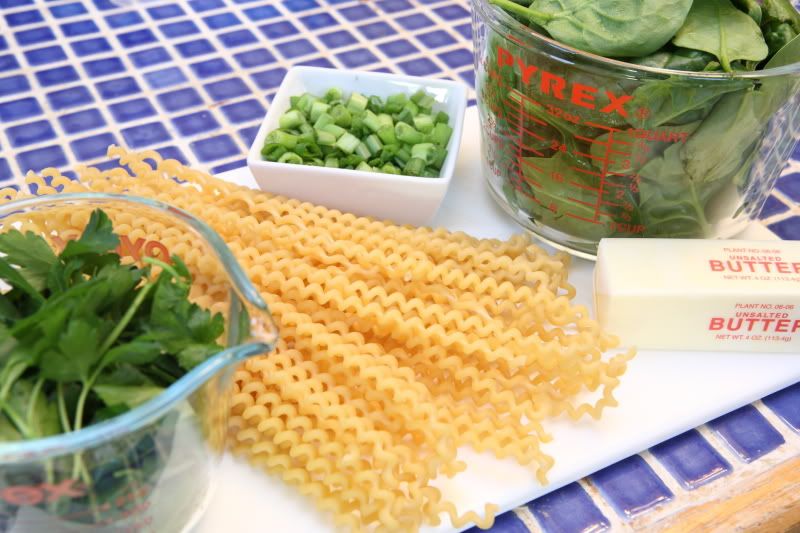
8 oz pasta
5 oz fresh spinach (least expensive if you buy it from the loose spinach bin, not the prebagged/prewashed kind)
1 loosely-packed cup Italian parsley
4 Tbsp butter
Salt and freshly-ground black pepper
Freshly grated nutmeg
2 cloves garlic, finely chopped
1/3 cup snipped green onions


In a large pot (one that has a lid), cook the pasta, uncovered, according to the package directions. Do not overcook the pasta!

Wash and dry the spinach. If the spinach leaves are particularly large, you may wish to roughly chop the spinach. Set it aside.

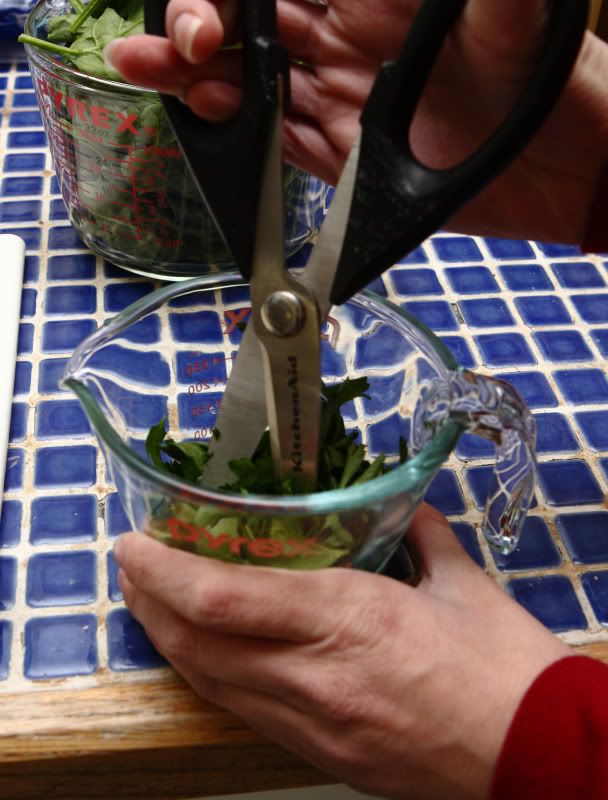
Chop the parsley – I find the easiest way to do this is to just stick my scissors into the measuring cup and snip away until its all uniformly chopped.


Once the pasta has cooked, drain it and set it aside. In the empty pasta pot, melt the butter over medium heat. Add a pinch of salt, a generous quantity of freshly-ground black pepper, and some freshly grated nutmeg (I usually do equal quantities of black pepper and nutmeg).

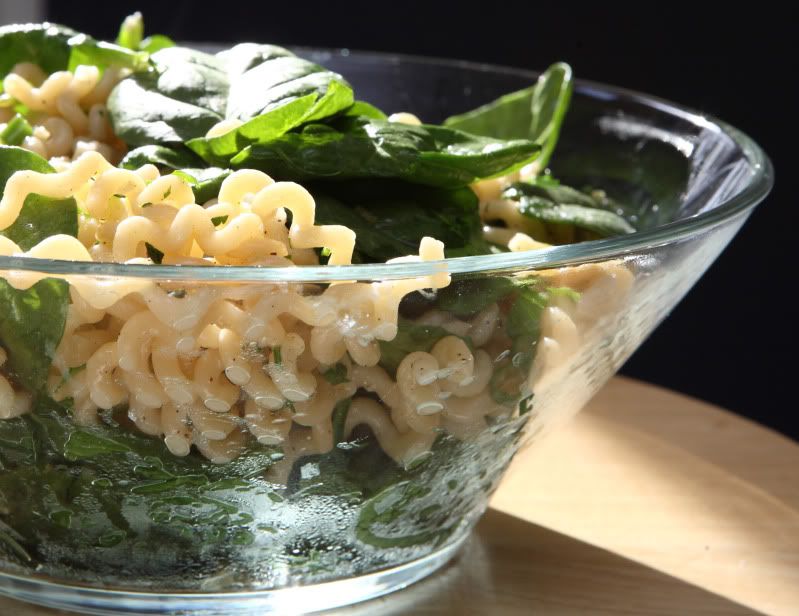
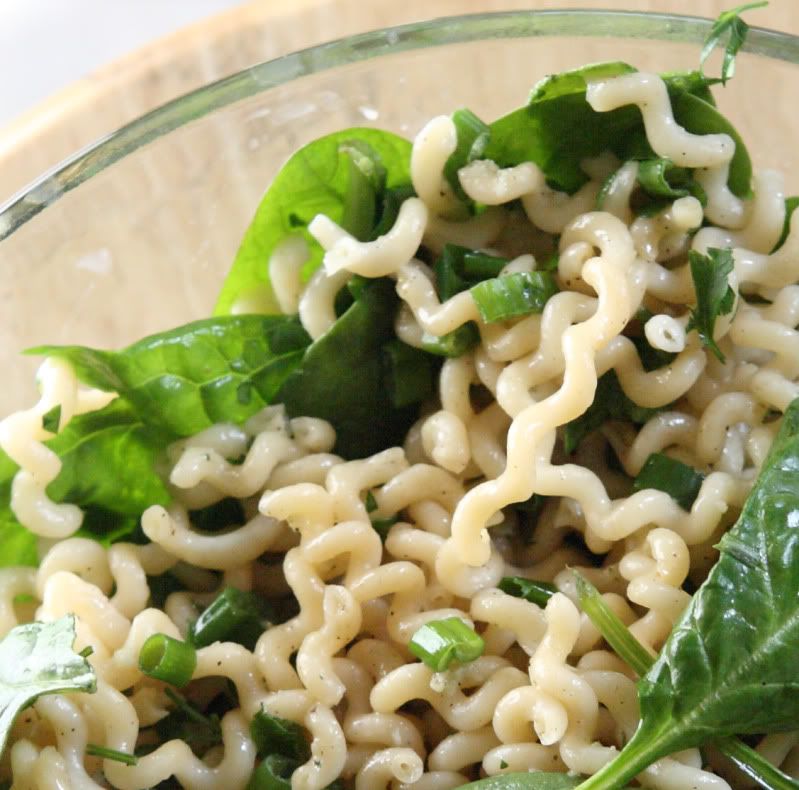
Turn the heat to medium-low. Return the pasta to the pot; add the green onions, spinach, and parsley, and stir to incorporate everything. Taste the pasta and adjust the seasonings…you may need more salt. Cover the pot (still on medium-low heat), and wait several minutes until the spinach has wilted slightly, stirring the pasta once or twice to give it all a chance to cook.


Sunday, March 14, 2010

Homemade Barbeque Sauce

In anticipation of better weather (and in protest of our current not-winter-anymore-but-not-quite-spring-either weather), I've started grilling outdoors.  We have a nice covered porch which makes it easy to use the grill even if it's raining.  Barbequed chicken is pretty easy to make outdoors because it doesn't require much babysitting.  The chicken is brushed with sauce and is placed on the grill.  After a few minutes, it is flipped once, brushed with more sauce, but is otherwise left alone while it cooks.  Pretty simple.

Homemade barbeque sauce is really easy to make. Onions are browned in butter (olive oil can be substituted for a somewhat healthier sauce…but the butter tastes better), then everything else is added and simmered over medium heat. There’s not much to it.


One thing that's great about this sauce: you can make it ahead and freeze it. You can also make it in larger quantities.

Homemade Barbeque Sauce (for chicken)
Makes about 3 cups of sauce

1 small onion, finely chopped (a mini food processor works well!)
2 Tbsp unsalted butter
1/4 cup molasses
1/2 cup freshly-squeezed lemon juice (2 large lemons yielded the proper amount of juice)
1/2 cup dry red wine (I used a Malbec on this particular occasion, but I usually make it with Cabernet Sauvignon or Shiraz)
Several shakes (to taste) of Tabasco or similar hot sauce
1/4 cup ketchup
1/4 cup spicy mustard
2 Tbsp Worcestershire sauce
2 tbsp brown sugar
3 large cloves garlic, minced
1 tsp cumin
1/2 tsp black pepper
1/4 tsp ground cloves
1/2 tsp ancho chili powder (another type will also suffice if you don’t have ancho)
1 cup water

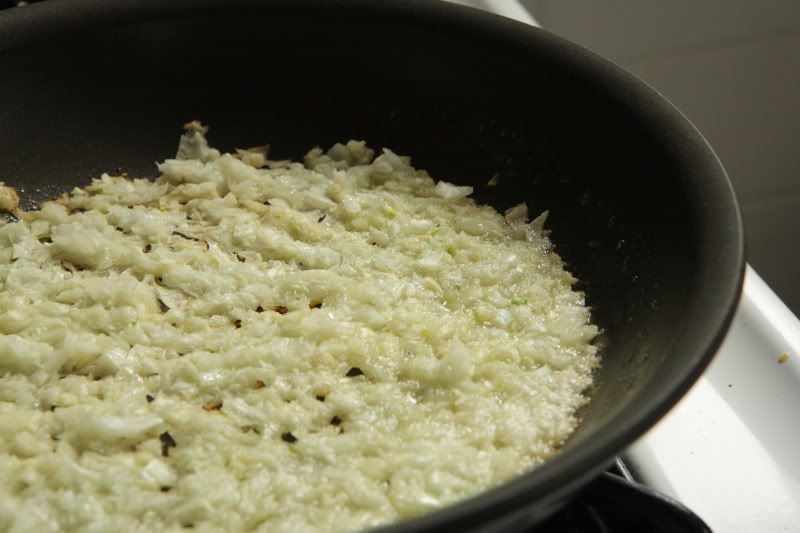
Place the chopped onions and the butter in a medium skillet. Spread out the onions so they cover the bottom of the pan. Turn the heat to medium-low and allow the onions to brown slowly. The moisture will begin to cook out of the pan and the onions will begin to brown at the edges. Avoid stirring the pan until this starts to happen. The pan looks like this when it’s time to stir (see the browned edges?):


Stir the onions and allow them to continue to brown slightly longer, so they are evenly browned. Transfer the browned onions to a medium saucepan and add the remaining ingredients.

Simmer the sauce over medium heat, stirring often, to reduce the sauce by approximately one third.

I usually serve this sauce with grilled chicken. I pour a small amount of the sauce over the chicken pieces as a marinade. The remaining sauce is saved to mop the chicken as it is grilling. (Remember, should any of the reserved basting sauce come into contact with raw meat, be sure to return the sauce to a boil before using it to baste cooked chicken!)


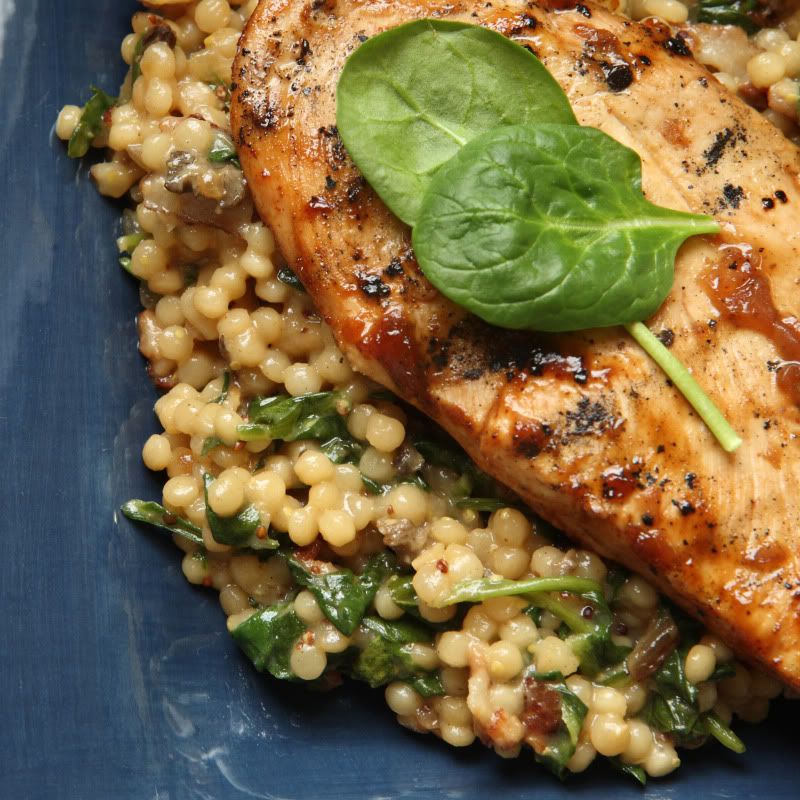
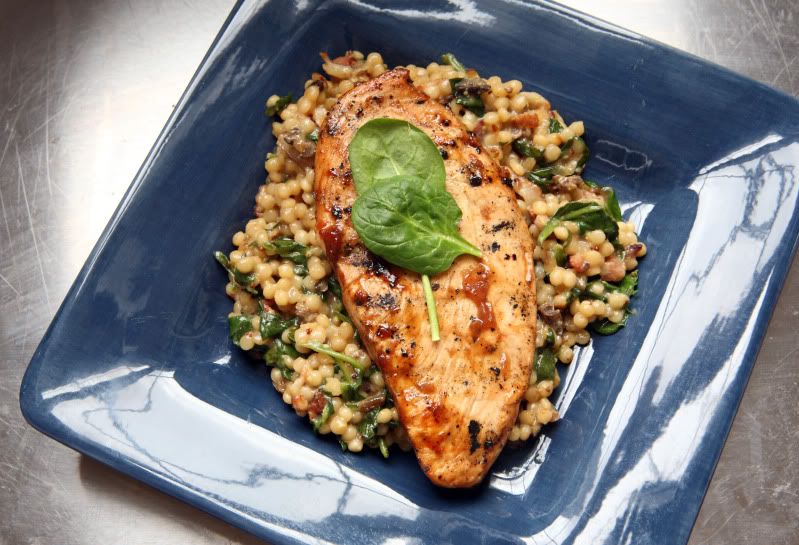
The chicken in these pictures is served with my Bacon and Spinach Couscous. It’s really yummy – give it a try.

Printable PDF file (with pictures)
Printable PDF file (text only)

Sunday, February 28, 2010

Butterscotch Pudding with Salted Whipped Cream


I’ve been on a butterscotch kick lately. It all started with the brown butter blondies I made awhile back – their butter-and-brown sugar flavor profile has had me thinking about butterscotch desserts ever since. A few weeks later, I made a butterscotch sauce to top some ice cream sundaes I served when we had family over to visit. Then I experimented with butterscotch pudding on Super Bowl Sunday, but felt the recipe wasn’t quite there yet, so it didn’t get blogged.

After I had a butterscotch sundae at Ted Drewes last night, I felt sufficiently inspired to try out another butterscotch pudding recipe. I found a different recipe from one of my favorite dessert cookbooks (one you’ve seen before), Diner Desserts, by Tish Boyle. Like every other recipe I’ve made out of that cookbook, it didn’t disappoint me.

Despite the inclusion of the word “scotch” in the name “butterscotch,” there actually isn’t supposed to be any scotch in traditionally-made butterscotch. (If you want, you can add a tablespoon of scotch and make less-traditional butterscotch pudding, but for the most authentic pudding, it should be left out.)

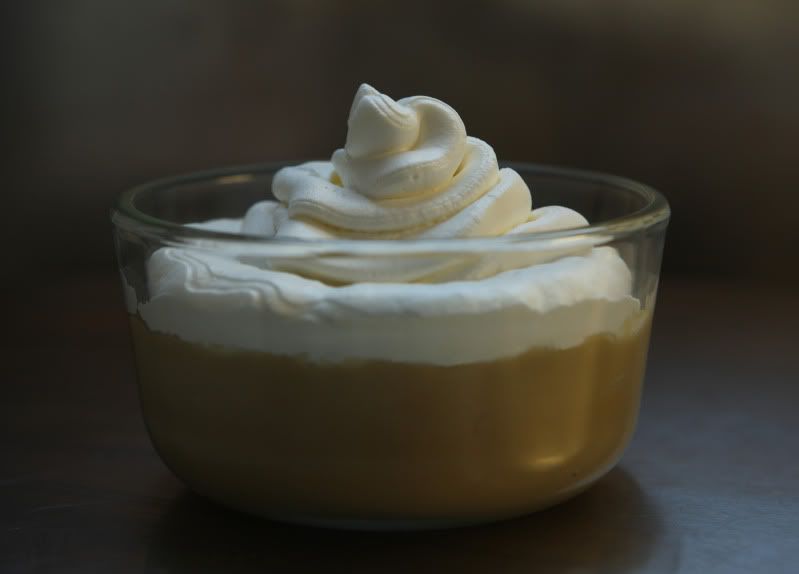
“Real” butterscotch flavor is created by butter and brown sugar. Therefore, any butterscotch-flavored dessert is necessarily going to be rather sweet. To counter all that sugar, the pudding tastes great with a little bit of extra salt. I suggest topping the pudding with salted whipped cream.  You could skip the whipped cream and sprinkle a pinch of sea salt directly on top of each of your puddings just before serving them.

When I’m making pudding, I like to set out all of my ingredients in advance. Making pudding isn’t too difficult, but it requires that you whisk the mixture almost constantly, so you can’t take time to set the whisk down and fuss over the next ingredient.

Butterscotch Pudding with Salted Whipped Cream
6 servings

Pudding ingredients:
3 large egg yolks
3 Tbsp unsalted butter, cut into tablespoons
2 tsp vanilla extract
1/3 cup cornstarch
1 cup packed dark brown sugar
1/2 tsp salt
2 cups whole milk
1 cup half-and-half
1 Tbsp scotch – optional (see above)

Salted Whipped Cream ingredients:
1/2 cup whipping cream
A generous pinch of kosher salt

First, make the pudding. It needs time to chill in your refrigerator prior to serving it, so start it at least three or four hours in advance.

I start by preparing my ingredients. Place the egg yolks in a medium bowl. Use a fork to whisk them together and set the bowl aside for later. You’ll need a one-cup scoop later, so set the scoop near the egg yolks so you’ll have it handy.

Measure out your butter. Go ahead and cut it into tablespoons. Set the butter aside. Keep your bottle of vanilla (and the scotch, if you’re going to use it) nearby because you’ll need to add it when you add the butter.

You’ll need six small dishes for your pudding. Locate them and set them nearby.


In a medium saucepan, off of the heat, stir together the cornstarch, sugar, and salt. The mixture should look very sandy.


Gradually whisk in the milk and the half-and-half. Bring the mixture to a boil over medium-high heat, whisking constantly. (As you’re whisking, the consistency will change from a liquid to a thick pudding.) Once the mixture begins to bubble, remove it from the heat.

Using the one-cup scoop you set aside earlier, ladle out approximately one cup of the milk/sugar mixture into the whisked egg yolks. Vigorously whisk the egg yolk mixture to combine everything, then transfer the egg yolk mixture back to the remaining milk/sugar mixture in the saucepan. Keep whisking everything until it is combined.

(If you don’t whisk constantly, your eggs can cook improperly and leave chunks in your pudding. If this should happen, don’t get too upset, you can pass the pudding through a sieve later. The pudding won’t have the exact same texture, but it’ll still be very edible. But try to keep whisking constantly to avoid the chunks!)

Return the pudding to medium heat - keep whisking - until the mixture comes back to a boil. Continue to boil, whisking constantly, for one minute. Immediately remove the pan from the heat and whisk in the butter pieces until they are completely melted. Whisk in the vanilla and the scotch, if you’re using it.  If you need to strain your pudding, do so now.

Pour the pudding into your serving dishes. Cover the dishes with plastic wrap, pressing the wrap directly onto the surface of the pudding, and refrigerate it for several hours, until it is well-chilled.

Just prior to serving the pudding, make the salted whipped cream:

Place the whipping cream and the salt in a medium bowl. Whip on high speed until soft peaks form. Spoon or pipe the whipped cream onto your pudding.


Monday, February 15, 2010

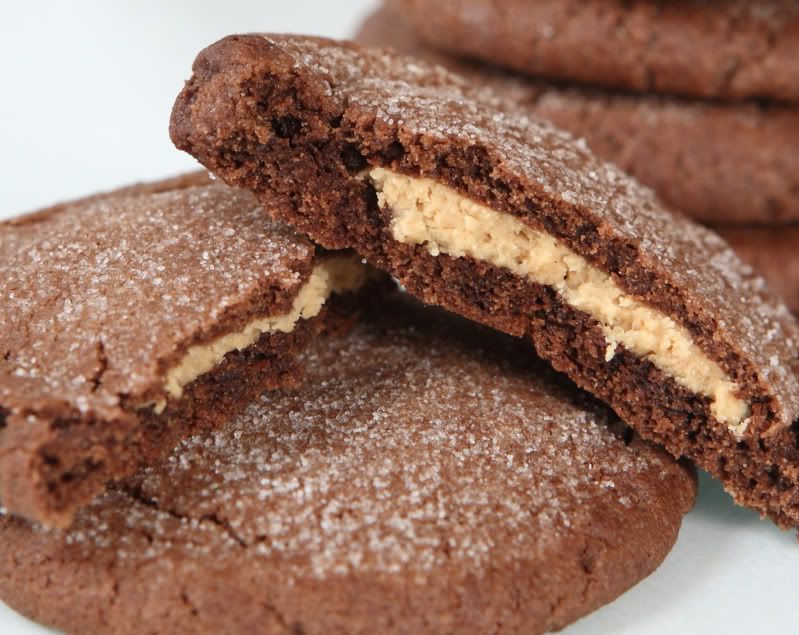
Chocolate Peanut Butter Cookies


I love reading the newspaper. There’s something satisfying about paging through the inky newsprint, sipping on a cup of hot cocoa, catching up on the latest national news, soaking up the details in the local stories, and comparing the weather forecast to reality. I always save the best for last: the comics (Calvin and Hobbes, I miss you!). The same section has the Sudoku puzzle…I love solving those. There’s a certain comforting feeling about tangible print media that cannot be recreated by online news sources.

My absolute favorite section is, of course, the food and cooking section (too bad it only comes once a week!). I love reading about local restaurants, getting ideas for recipes, and looking through the grocery advertisements. I’ve always been a recipe clipper – you’ll never know when you find a recipe that’s a keeper!

This recipe is one of those clipped-out-of-a-newspaper keepers. It was printed when I was ten years old (there are expired coupons for Chex cereal on the back of it!). My mom had this recipe clipping taped to the inside back cover of one of our favorite cookie cookbooks.

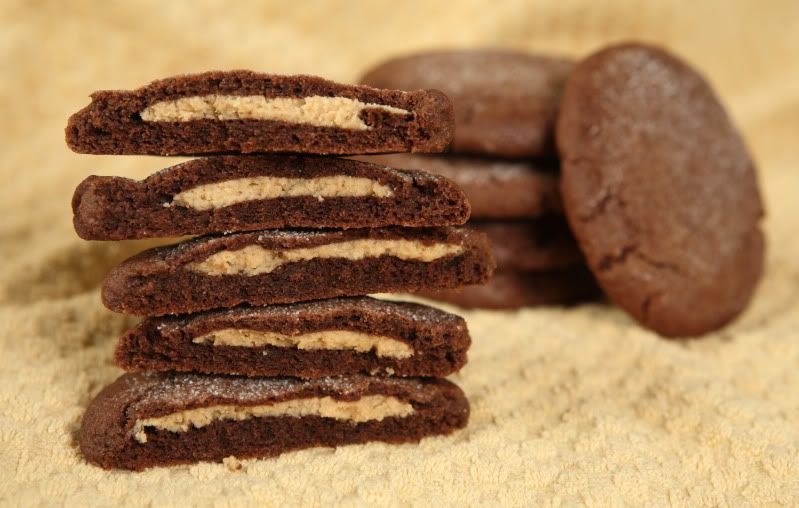
I remember wanting to make the cookies often as a child, partially because I have always loved the combination of chocolate and peanut butter, and partially because the cookies in the accompanying picture had these cute little green and white Christmas trees piped on them – they looked fun to eat. The name they gave the cookies was “Magic Peanut Butter Middles,” a name I always thought fell short (the “Magic” part seemed cool to a ten-year-old, but “Middles”?? Really??  Ok, I guess the name I came up with isn't much better...) Despite the writers’ (and my) halfhearted attempt at a creative title, the cookies were always a hit with me and my sister. Biting into what looks like just a plain old chocolate cookie and finding a delicious, creamy peanut butter filling is fun when you’re ten! (It’s still fun now!)

The recipe is very hands-on, so it’s a little messy, but the method is easy enough that my sister and I made them together when we were young.  You might enjoy making these with your kids.

Be sure you use “kid's” peanut butter, not the all-natural kind that you have to stir up before using. (The Jif/Skippy/Peter Pan/whatever kinds contain solid fats, and the cookie recipe presumably was written and tested with that fat composition in mind because it specifically recommends Skippy brand original creamy peanut butter.) Or, try the natural kind and report back on how it turns out…I have never tried using natural peanut butter in this particular recipe, but I have tried Jif brand original creamy peanut butter, and I can say that it works well.


Chocolate Peanut Butter Cookies
Makes 18 cookies

First, start the cookie dough:

Cookie Dough Ingredients
1-1/2 cups all-purpose flour
1/2 cup unsweetened cocoa
1/2 tsp baking soda
1/2 cup sugar
1/2 cup packed brown sugar
1/2 cup butter
1/4 cup “kid's” peanut butter (not the “natural” kind)
1 tsp vanilla
1 egg

Preheat your oven to 375 degrees F.

In a small bowl, whisk together the flour, cocoa, and baking soda - blend it well. Set it aside.

In a large bowl (I use my stand mixer, but always did this with a wooden spoon when I was a kid), beat together the sugar, brown sugar, butter, and 1/4 cup peanut butter until it is light and fluffy and well-combined. Add the vanilla and egg; beat well.

While the stand mixer is combining the above ingredients, I start mixing together the filling:

Filling Ingredients
1/2 cup “kid's” peanut butter (not the “natural” kind)
1/2 cup powdered sugar

In a medium bowl, combine the 1/2 cup peanut butter and the powdered sugar. It starts out with a rough texture…


…but will come together if you just keep stirring.


Roll the filling into 18 one-inch balls. (Yes, there’s more than 18 here…I made a bigger batch.) Set them aside.


(When I was a kid, I just used my hands, but now that I have better kitchen tools, I use a mini ice cream scoop like this one…


…so much easier! Less mess! It’s exactly one inch in diameter, so it’s the perfect size.)

Back to finishing the cookie dough:

Stir the cocoa mixture into the large bowl containing the creamed butter/sugar mixture until the ingredients are all blended together.

Now start shaping the cookies:

Take a heaping tablespoon-or-so of dough (about the size of a ping pong ball)…


…and use your fingertips to sort of flatten it into a little cupped circle of dough. Put one of the peanut butter balls in the center…


Shape the chocolate dough around the peanut butter to entirely encase it. Roll it around in your hands to make a smooth ball. Place the shaped dough about 2 inches apart on a cookie sheet (the original recipe calls for an ungreased sheet, but I always use parchment paper on my sheets for easier cleanup).


Use the bottom of a drinking glass dipped in granulated sugar to flatten the cookie balls to approximately 1/4-inch thick. (Don’t be too skimpy with the sugar or it’ll all disappear into the cookies as they’re baking.)


Bake at 375 degrees F for 7 to 9 minutes, or until the cookies are barely set and slightly cracked. They should still be soft – do not overbake them or they will be dry.


Leave the baked cookies on the warm cookie sheet for only a few minutes, just until they are firm enough to transfer to wire racks for cooling.

These cookies are soft inside, but have a nice exterior texture due to the sugar on top. With all the peanut butter in these cookies, you’ll definitely need to enjoy these with a tall glass of cold milk! Yum!


Saturday, January 30, 2010

Grilled Pork Tenderloin with Pineapple Ginger Sauce, served with Grilled Pineapple


Have you ever had grilled pineapple? If you haven't had it, try it!  It will totally change your opinion of pineapple. The heat causes the sugars to caramelize slightly, resulting in a deeper flavor, and the grill marks look pretty against the yellow fruit.

Not only does pineapple taste great grilled, but it also makes a great marinade ingredient due to a certain naturally-occurring enzyme. The recipe written here is a fruity pineapple marinade, spiked with ginger and a little garlic. It pairs really well with pork tenderloin, and works great on the grill.

If you’ve never bought or cut up a whole pineapple before, don’t worry, I have provided you with instructions! Give it a try!

How to choose a pineapple at the grocery store:

Pineapples don’t continue to ripen after they’ve been picked, so you’ll want to choose the ripest pineapple available from your grocer. Unless you live in or near Florida and have other locally-grown options available to you, you’re probably buying a pineapple imported from Hawaii. (I guess that statement is only true if you live in the United States…I’m not sure what the pineapple availability is elsewhere.)

Since Hawaiian pineapples are the ripest when they have a bright golden color, pick the pineapple that has the most gold on its skin (but not a mottled brown color, because too much brown = rotten!). Some green skin coloration is ok, but the greener the skin is, the less ripe the pineapple was when it was picked.

The spiky leaves should be stiff and green (again, not brown). Grab the base of the bunch of leaves – it should wiggle slightly…not too much wiggle, but not totally stiff either. One more thing to check: the pineapple was once attached to its plant on the underside of the fruit. Turn the fruit over and look to be sure the place where it was attached to the plant hasn’t turned moldy.

Now that you have your pineapple, you're ready to start making...

Grilled Pork Tenderloin with Pineapple Ginger Sauce, served with Grilled Pineapple
Serves 4

1 fresh pineapple
1/3 cup hoisin sauce
4 tsp peeled, grated fresh ginger
1 large clove of garlic, minced
1 tsp Dijon mustard
1-1/2 pounds pork tenderloin, trimmed of any fat
1 tsp soy sauce
2/3 cup chicken stock

First, cut up the pineapple:

Chop off and discard the leafy crown. A lot of people cut off the bottom of the pineapple at this point, but I usually leave it on because its roughness provides more stability on your cutting board (cut pineapple is slippery!). If its really uneven, though, you might prefer to cut it off. Cut off and discard all of the skin from the sides of the pineapple. If you missed any “eyes” or seeds, cut them out too.


If you haven’t yet, slice off and discard the bottom of the pineapple. With the pineapple standing on its end, cut straight down just next to the core.


Set aside the coreless piece. Mirror the exact same cut on the other side of the core so you have two large coreless pieces and one rectangular piece which still contains the core. Cut off the pineapple on either side of the core. The core is too tough for me to want to eat, so I usually just discard it (although I do know a guy who puts lots of salt on it and eats it anyway…).


You should be left with two smaller pieces of pineapple and two larger slabs of pineapple. Cut the larger slabs of pineapple into 1/2-inch slices. Set these aside – they’ll be grilled later.


The two smaller pieces of pineapple can be cut into chunks – place them in a small food processor. Process the pineapple to make chunky juice. Transfer approximately half of it to a small saucepan and reserve it for later – this will become a sauce to be served with the meat. The rest will be used to create a marinade.

Then, marinate your meat:

The remaining processed pineapple can be transferred to a gallon-sized food storage bag (or whatever vessel you’re going to use to marinate your meat). Add 3 Tbsp hoisin sauce, 2 tsp grated fresh ginger, the minced garlic, the mustard, and the trimmed pork tenderloin. Seal the bag and smash it around a bit to incorporate the ingredients and coat the pork. Let the pork sit a minimum of 15 minutes. (Obviously longer is fine, you can even put this together in the morning before you go to work.)

Then make the sauce:

Near the end of the marinating time, prepare the sauce: In the small saucepan with the reserved processed pineapple, combine 2 Tbsp hoisin sauce, 2 tsp grated fresh ginger, the soy sauce, and the chicken stock. Set the sauce aside until its time to grill the meat.

About grilling big pieces of meat:

When I’m grilling a piece of meat this big, I do several things. One is that I use medium indirect heat. I have a three-burner gas grill. I turn the two outer burners up to medium or medium-high, and the middle burner on low. The pork is placed over the middle low-heat burner.

I also use a heat-safe thermometer. They’re not too expensive to buy from the kitchen section of your grocery store. You just put it in the meat and leave it there during the entire cooking time. The thermometer beeps when it reaches the proper temperature. Easy, and totally worth the nominal cost. Go buy one while your meat’s marinating. (Just remember, use a hot pad to remove it when you’re done with it…it’s hot. Yes, that’s personal experience talking. Doh!)

Grill the pork tenderloin over medium indirect heat, with the grill covered, turning it once, until it reaches 155 degrees internally. The exact time varies (there’s a lot of variables), but count on around 20 minutes.


While the meat is grilling:

While the meat is cooking, bring the sauce to a simmer over medium heat, then turn it to low heat until serving time. The sauce will thicken as it bubbles – if necessary, add another splash of chicken stock if the pan gets too dry. I pour a few tablespoons of the sauce over the meat at the halfway point of the grilling time – just after turning it over. (Careful, don’t contaminate the sauce with raw meat…and if you do, bring it back up to a boil before serving it.)


Half-way through the pork's cooking time, add the reserved pineapple slices to the warmer part of the grill. Cook them over medium direct heat, turning them once, until the pineapple is soft and warm, with nice grill marks on each side. Each side should take just a few minutes at the most. When they’re done, you can move them to a cooler spot on the grill, or transfer them to a plate and cover them with foil to keep them warm.


When the meat has reached 155 degrees internally, remove it from the heat and cover it with aluminum foil. Let it rest for about five minutes before slicing it (the temperature will rise to 160 as it rests).

To serve, thinly slice the pork into medallions. Serve it alongside the grilled pineapple slices, topped with the sauce. I like to serve this meal with rice…it’s a great way to soak up the sauce!