...delicious...my favorite kind to use in baking!
a collection of recipes, with and without chocolate
Showing posts with label pork. Show all posts
Saturday, January 30, 2010
Grilled Pork Tenderloin with Pineapple Ginger Sauce, served with Grilled Pineapple
Have you ever had grilled pineapple? If you haven't had it, try it! It will totally change your opinion of pineapple. The heat causes the sugars to caramelize slightly, resulting in a deeper flavor, and the grill marks look pretty against the yellow fruit.
Not only does pineapple taste great grilled, but it also makes a great marinade ingredient due to a certain naturally-occurring enzyme. The recipe written here is a fruity pineapple marinade, spiked with ginger and a little garlic. It pairs really well with pork tenderloin, and works great on the grill.
If you’ve never bought or cut up a whole pineapple before, don’t worry, I have provided you with instructions! Give it a try!
How to choose a pineapple at the grocery store:
Pineapples don’t continue to ripen after they’ve been picked, so you’ll want to choose the ripest pineapple available from your grocer. Unless you live in or near Florida and have other locally-grown options available to you, you’re probably buying a pineapple imported from Hawaii. (I guess that statement is only true if you live in the United States…I’m not sure what the pineapple availability is elsewhere.)
Since Hawaiian pineapples are the ripest when they have a bright golden color, pick the pineapple that has the most gold on its skin (but not a mottled brown color, because too much brown = rotten!). Some green skin coloration is ok, but the greener the skin is, the less ripe the pineapple was when it was picked.
The spiky leaves should be stiff and green (again, not brown). Grab the base of the bunch of leaves – it should wiggle slightly…not too much wiggle, but not totally stiff either. One more thing to check: the pineapple was once attached to its plant on the underside of the fruit. Turn the fruit over and look to be sure the place where it was attached to the plant hasn’t turned moldy.
Now that you have your pineapple, you're ready to start making...
Grilled Pork Tenderloin with Pineapple Ginger Sauce, served with Grilled Pineapple
Serves 4
1 fresh pineapple
1/3 cup hoisin sauce
4 tsp peeled, grated fresh ginger
1 large clove of garlic, minced
1 tsp Dijon mustard
1-1/2 pounds pork tenderloin, trimmed of any fat
1 tsp soy sauce
2/3 cup chicken stock
First, cut up the pineapple:
Chop off and discard the leafy crown. A lot of people cut off the bottom of the pineapple at this point, but I usually leave it on because its roughness provides more stability on your cutting board (cut pineapple is slippery!). If its really uneven, though, you might prefer to cut it off. Cut off and discard all of the skin from the sides of the pineapple. If you missed any “eyes” or seeds, cut them out too.
If you haven’t yet, slice off and discard the bottom of the pineapple. With the pineapple standing on its end, cut straight down just next to the core.
Set aside the coreless piece. Mirror the exact same cut on the other side of the core so you have two large coreless pieces and one rectangular piece which still contains the core. Cut off the pineapple on either side of the core. The core is too tough for me to want to eat, so I usually just discard it (although I do know a guy who puts lots of salt on it and eats it anyway…).
You should be left with two smaller pieces of pineapple and two larger slabs of pineapple. Cut the larger slabs of pineapple into 1/2-inch slices. Set these aside – they’ll be grilled later.
The two smaller pieces of pineapple can be cut into chunks – place them in a small food processor. Process the pineapple to make chunky juice. Transfer approximately half of it to a small saucepan and reserve it for later – this will become a sauce to be served with the meat. The rest will be used to create a marinade.
Then, marinate your meat:
The remaining processed pineapple can be transferred to a gallon-sized food storage bag (or whatever vessel you’re going to use to marinate your meat). Add 3 Tbsp hoisin sauce, 2 tsp grated fresh ginger, the minced garlic, the mustard, and the trimmed pork tenderloin. Seal the bag and smash it around a bit to incorporate the ingredients and coat the pork. Let the pork sit a minimum of 15 minutes. (Obviously longer is fine, you can even put this together in the morning before you go to work.)
Then make the sauce:
Near the end of the marinating time, prepare the sauce: In the small saucepan with the reserved processed pineapple, combine 2 Tbsp hoisin sauce, 2 tsp grated fresh ginger, the soy sauce, and the chicken stock. Set the sauce aside until its time to grill the meat.
About grilling big pieces of meat:
When I’m grilling a piece of meat this big, I do several things. One is that I use medium indirect heat. I have a three-burner gas grill. I turn the two outer burners up to medium or medium-high, and the middle burner on low. The pork is placed over the middle low-heat burner.
I also use a heat-safe thermometer. They’re not too expensive to buy from the kitchen section of your grocery store. You just put it in the meat and leave it there during the entire cooking time. The thermometer beeps when it reaches the proper temperature. Easy, and totally worth the nominal cost. Go buy one while your meat’s marinating. (Just remember, use a hot pad to remove it when you’re done with it…it’s hot. Yes, that’s personal experience talking. Doh!)
Grill the pork tenderloin over medium indirect heat, with the grill covered, turning it once, until it reaches 155 degrees internally. The exact time varies (there’s a lot of variables), but count on around 20 minutes.
While the meat is grilling:
While the meat is cooking, bring the sauce to a simmer over medium heat, then turn it to low heat until serving time. The sauce will thicken as it bubbles – if necessary, add another splash of chicken stock if the pan gets too dry. I pour a few tablespoons of the sauce over the meat at the halfway point of the grilling time – just after turning it over. (Careful, don’t contaminate the sauce with raw meat…and if you do, bring it back up to a boil before serving it.)
Half-way through the pork's cooking time, add the reserved pineapple slices to the warmer part of the grill. Cook them over medium direct heat, turning them once, until the pineapple is soft and warm, with nice grill marks on each side. Each side should take just a few minutes at the most. When they’re done, you can move them to a cooler spot on the grill, or transfer them to a plate and cover them with foil to keep them warm.
When the meat has reached 155 degrees internally, remove it from the heat and cover it with aluminum foil. Let it rest for about five minutes before slicing it (the temperature will rise to 160 as it rests).
To serve, thinly slice the pork into medallions. Serve it alongside the grilled pineapple slices, topped with the sauce. I like to serve this meal with rice…it’s a great way to soak up the sauce!
Saturday, July 4, 2009
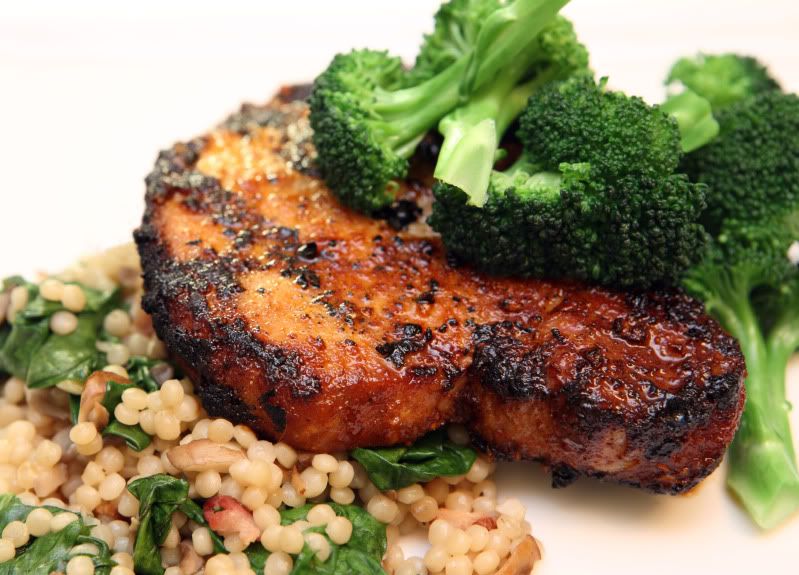
Strawberry Pecan Pork

I have recently rediscovered pecans. I didn’t think I cared for them much (pecan pie still doesn’t do anything for me), but after eating them on top of a strawberry poppyseed salad at a certain lunchtime restaurant here in town, I have been enjoying their nutty, crunchy taste.
This recipe not only makes use of pecans, but it also makes use of some of the two giant trays of strawberries I bought at the store today. (We’ll be having strawberries in *everything* until I get those things cut up and frozen…)
This recipe involves coating pork chops in ground pecans. I use three small cereal bowls to hold the flour, egg, and pecans. If your cereal bowls are too deep, it might be easier for you to use pie tins. You could also use large zip lock bags – that has worked well for me in the past, particularly when I’ve made pecan-encrusted pork for large groups.
Strawberry Pecan Pork
Serves 4
2 cups pecans, chopped
3 cups strawberries, hulls removed
1 Tbsp brown sugar
2 Tbsp balsamic vinegar
Approximately 1-1/2 cups all-purpose flour
Pinch of salt
1 egg
4 thin-cut boneless pork chops
1 to 2 Tbsp olive oil
In a small skillet, lightly toast the pecans over medium heat until they become fragrant and just barely begin to brown. Reserve a few tablespoons of the nuts to use as a garnish. Turn the rest of the toasted nuts out into the small work bowl of a food processor; reserve the small skillet. Process the nuts until finely ground – but not so much that they turn into nut butter.

While the nuts are toasting, slice the strawberries into chunks. Place the sliced strawberries in the empty small skillet. Add the brown sugar and balsamic vinegar. Don't start cooking the strawberries yet - just set the skillet aside until you’re ready to start the cooking process.
You will need three small cereal bowls or similar vessels. Place the flour and a pinch of salt in one bowl. In the second small bowl, lightly beat the egg and 2 Tbsp of water. Place the ground pecans in the third small bowl. Place a wire rack (like what you’d use to cool cookies) over a large plate – this will be the holding spot for the encrusted pork.
Use a pair of tongs to dip a pork chop into the flour mixture. Turn it, patting flour onto it to be sure it is evenly coated. Shake off any excess flour and transfer the meat to the egg mixture. Use the tongs to push the pork into the egg mixture, covering the entire piece. Allow any excess egg mixture to run off, then transfer the pork into the pecans. Gently pat the pecans onto the surface of the pork, coating the surface evenly. Transfer the encrusted pork to the wire rack. Repeat with the remaining pieces of pork. (Use tongs or something similar - try not to use your fingers – you’ll be picking gluey pecan bits out of your fingernails for hours.)
In a large skillet, heat the olive oil over medium-high heat. Add the pork, cooking it in batches if necessary. Handle the pork as infrequently as possible, or you’ll risk damaging the pecan coating. Panfry over medium high heat until the pork is cooked through, turning it only once. The cooking time will vary depending on the thickness of the meat, but you can expect 3 to 5 minutes per side.
After you flip the pork and begin to cook it on it’s second side, place the skillet with the strawberries over medium heat. Give them a stir every so often. They should soften up and begin to release their juices – it will just take a few minutes. Once they begin to soften, turn the heat down to low.
After the pork has finished cooking, transfer it to a serving plate, reserving the large skillet. If it’s cool in your kitchen, you might want to tent the pork with foil to keep it warm. Turn the heat off of both pans.
Transfer the strawberry mixture to the still-hot large skillet, reserving the small skillet. The liquid in the strawberries will start to deglaze the pan. (It will bubble up, so use caution!) Add a quick splash of water – maybe 1/4 cup at the most – just enough to keep the strawberry mixture from totally boiling down and burning. Stir the strawberries, scraping the bottom of the pan to deglaze any browned bits. (This all just takes a few seconds.) Once the browned bits are incorporated into the strawberry sauce, transfer the strawberries and sauce back into the small pan where it is cooler – again, this will keep the strawberries from burning.
Serve the pork topped with the strawberries and sauce. Garnish with the reserved nuts. I served it alongside some asparagus, too, because that’s one of my favorite veggies!
Friday, July 3, 2009
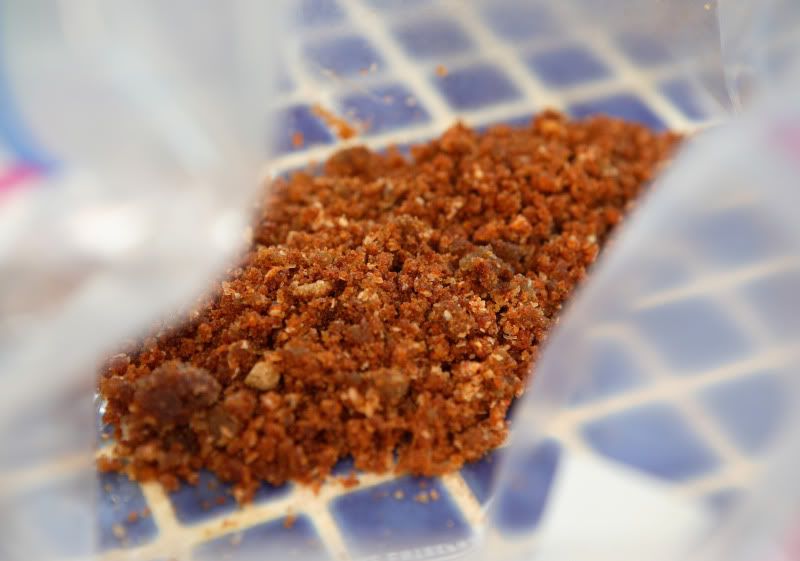
Grilled Pork Chops with Paprika Rub
This spice rub is so easy to make and it tastes great. The prep is quick, but it does need time to sit in the refrigerator to let the meat take on the flavors. I usually make it in my mini food processor so I don't have to cut up the garlic - especially if I'm multiplying this recipe to feed a lot of people.
A lot of my weeknight meals are inspired by recipes in Everyday Food magazine…this is modified from their July/August 2009 issue.
Grilled Pork Chops with Paprika Rub
Serves 4
4 cloves garlic
3 Tbsp vegetable oil
2 Tbsp brown sugar
2 tsp coarse salt
2 tsp sweet Hungarian paprika
½ tsp hot Hungarian paprika (cayenne pepper will work if you don’t have hot paprika)
½ tsp ground black pepper
4 bone-in pork chops
Place all of the ingredients except the pork in a small food processor bowl. Process until the garlic is finely chopped and the ingredients are all incorporated. Scrape the mixture into a gallon-sized thick plastic bag.

Add pork chops to the bag. Seal the bag up, squeezing out any excess air, and gently knead the bag to coat the meat with the spice rub. Refrigerate at least one hour, up to overnight.
Grill over medium-high heat until pork is cooked through. Cooking times will vary depending on the thickness of your pork, but you’re probably looking at 3 to 5 minutes per side. Pork is considered “medium” when the center is at 160 degrees F – don’t overcook it or it’ll be dry and tough.
If you’re not into pork, try this on beef. This past Father’s Day, I served this spice rub on ribeye steaks and it was a hit. I’m sure it’d be good on chicken too.
If you’re looking for something to take along on a camping trip, toss this together in a thick baggie and freeze it before you leave home. Stick the baggie in a watertight container and let it sit in the ice in your cooler, thawing little by little over the course of your camping trip until it’s soft enough to successfully grill over your campfire. It’ll be delicious, I guarantee!
Sunday, June 14, 2009
Chinese Potsticker Dumplings - The Daring Cooks June Challenge

I first learned how to make Chinese dumplings during a college-sponsored trip to China nearly ten years ago. I participated in a study abroad program and spent the better part of a summer travelling around China with 12 classmates and two teachers. It was a great experience – one of our teachers was born in rural China so he took us to all of the places he used to go to as a child and young adult. Thus, it was a better experience than what I imagine most tourists’ visits might be like – less emphasis on the commercialized tourist-oriented sites and more emphasis on actually learning about Chinese culture. We stayed in our host college’s dormitories and our daily activities were more like those of a Chinese college student’s rather than those of an American tourist.
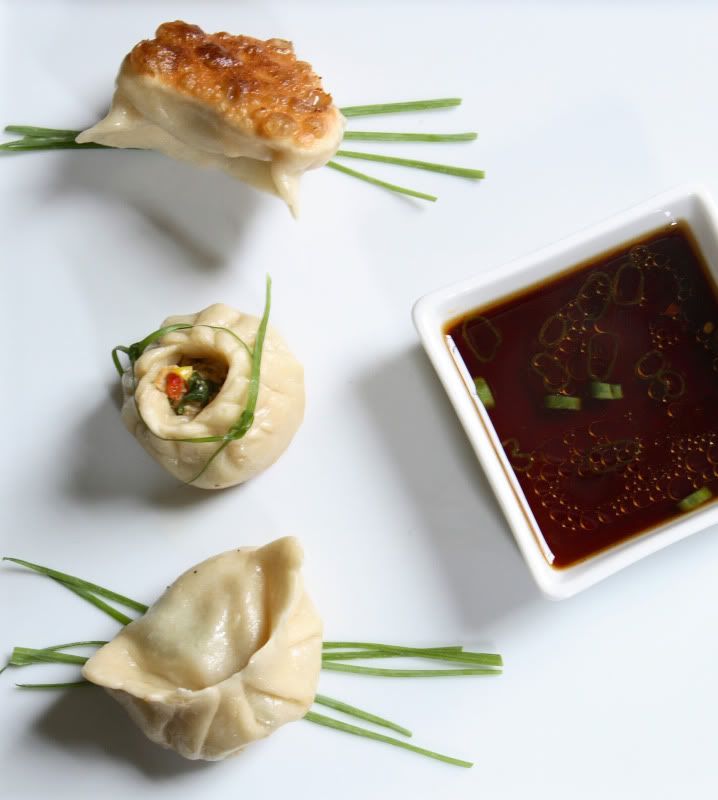
One day our Chinese friends taught us how to make dumplings – we were taught that the Mandarin Chinese word was jiao tze. We watched as they expertly rolled out each dumpling skin into a perfect circle (our attempts were not nearly as beautiful nor as efficiently done!). They filled their dumplings with a pork and cabbage mixture, and in the blink of an eye, pleated each dumpling into a perfectly ridged half-moon shape. They also demonstrated a different shape of dumpling – I don’t remember what the Mandarin word to describe them was, but the English translation was Beggar’s Purses, and they painstakingly tied thin threads of Chinese scallions around the tops of each dumpling. Beautiful – but not something I’d want to do for a weeknight supper! The dumplings were all placed in a bamboo steamer to gently steam the dumplings.
After returning to the US, I searched for and found a recipe that was fairly close to what I remembered eating in China, and have been making steamed dumplings on a regular basis ever since then.
I was excited when I learned that the Daring Cooks June Challenge was Chinese dumplings and potstickers, hosted by Jen from use real butter. Since I have never made potstickers, I decided to try making them instead of following my usual method of steaming the dumplings. Their crispy bottoms are a delicious contrast from the soft texture of the rest of the dumpling wrapper.
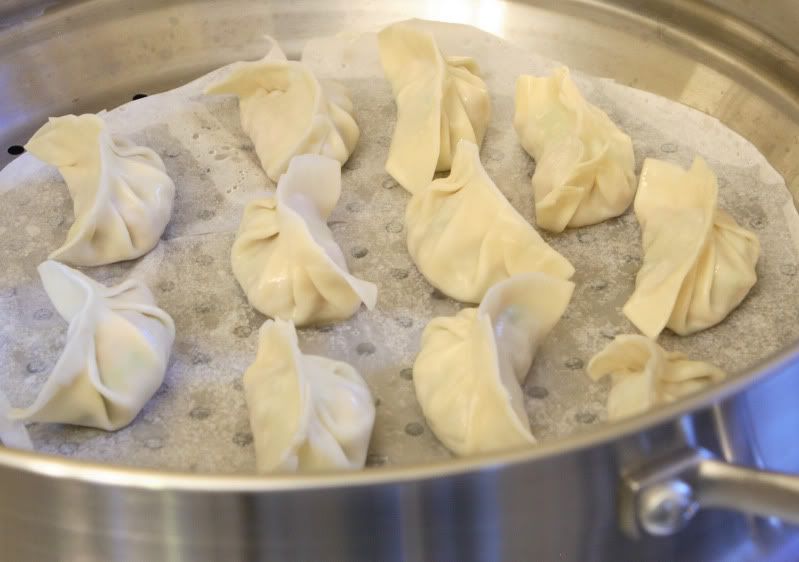
I actually made steamed dumplings about a week prior to the announcement of June’s challenge recipe, but I did not make homemade dumpling wrappers. The only stipulation of this month’s challenge recipe was that we make our own homemade dumpling wrappers. Therefore, my previous effort would not “count” towards fulfilling the Daring Cook’s challenge. However, I have included a few photos from that endeavor because they illustrate steaming the dumplings, and the method is the same regardless of the type of dumpling skin used.
You could use storebought wrappers – again, the method is the same, except you will require a small amount of water as “glue” – dab it on the edges of the skins before you start to fold the wrappers. But I encourage you to give the homemade wrappers a shot – they taste much better!
Dumpling Wrappers
Yields 25-50 dumplings, depending on how large you make each wrapper
4 cups all-purpose flour
1 cup warm water (as hot as your tap will go)
Flour for work surface
Note: Depending on how large your food processor is, you might need to mix this in two batches. A Kitchen Aid 12 cup processor can do it in one batch. Use your judgement based on that... Place the flour in the work bowl of a food processor with the dough blade. Run the processor and pour the warm water in until incorporated. Knead the dough with the food processor for several minutes until the dough travels around the bowl with the blade. (You may need to add additional flour or water to achieve the proper results.) The dough should be firm and silky to the touch and not sticky. [Note: it’s better to have a moist dough and have to incorporate more flour than to have a dry and pilling dough and have to incorporate more water).
Cover the dough with a damp towel for 15 minutes.
Meanwhile, make your filling. I have provided you with two choices – each option makes enough to fill one batch of dumpling wrappers.
Pork and Cabbage Filling
1/2 lb napa cabbage
3/4 lb unseasoned coarsely ground pork
1 Tbsp finely minced ginger
1/4 cup coarsely chopped green and white scallions
1 Tbsp soy sauce
1 Tbsp Chinese rice wine or dry sherry
1 Tbsp sesame oil
1 tsp coarse kosher salt
1/4 tsp ground black pepper
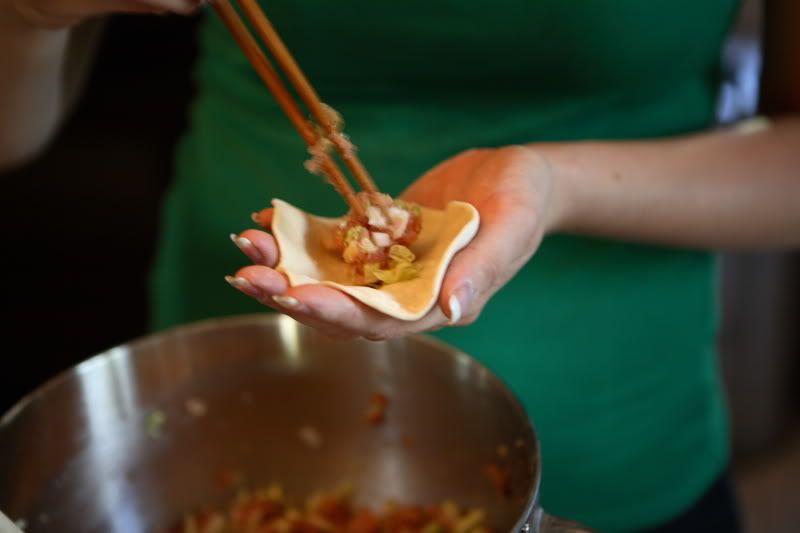
Chop the cabbage until it is pea-sized. Place in a large bowl. Add the ground pork and sprinkle the remaining ingredients on top. Stir until well blended – but don’t overstir it and create mush.
Veal, Fire-Roasted Corn, and Red Pepper Filling
2 ears corn – do not shuck – leave the husks on!
2 red bell peppers
6-8 large shitake mushroom caps
1 lb ground veal
3 cloves garlic, pressed
1 Tbsp ginger, minced
3 ounces spinach, finely chopped
4 tsp soy sauce
1/4 tsp coarse kosher salt
1/4 tsp ground black pepper
1 Tbsp sesame oil
1 Tbsp Chinese rice wine or dry sherry
2 tsp brown sugar
Preheat your grill to obtain medium-high heat. Run the corn – husks and all – under cool water. Grill, turning as necessary, until the husks have blackened and the corn is tender, about 10 minutes.
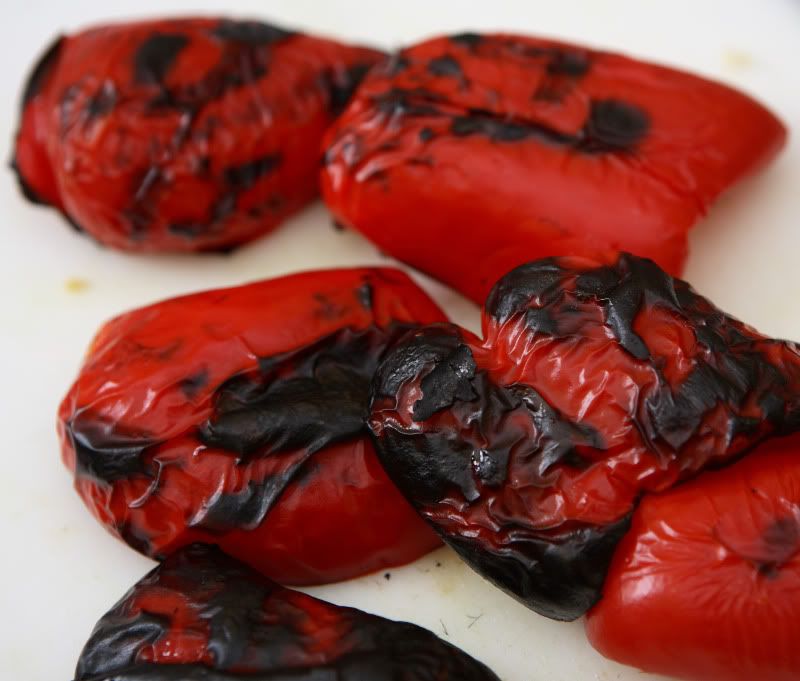
Meanwhile, quarter the bell peppers. Discard the seeds and ribs. Grill until the skin is blackened and the peppers are tender, 5-8 minutes.

During the last five minutes of grilling time, grill the shitake mushroom caps on the coolest part of the grill until they are tender, about 5 minutes.
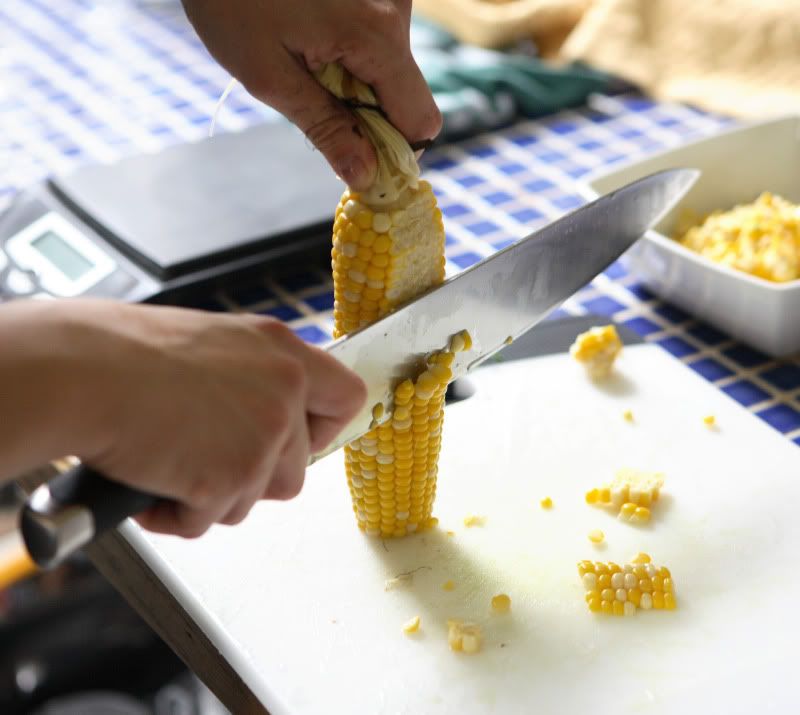
Allow the grilled vegetables to cool slightly. Pull the husks and silks back off of the corn – but do not remove the husks from the corncob. Carefully cut the corn kernels off of the corn cobs. The easiest way to do this is to cut off the last inch of the tip of the corncob opposite of the stalk, creating a flat end. Place the end flat on your cutting board and use a large, sharp knife to carefully cut straight down the cob, using the husks/stalk as a handle. CUT CAREFULLY! Place the corn kernels in a large bowl.

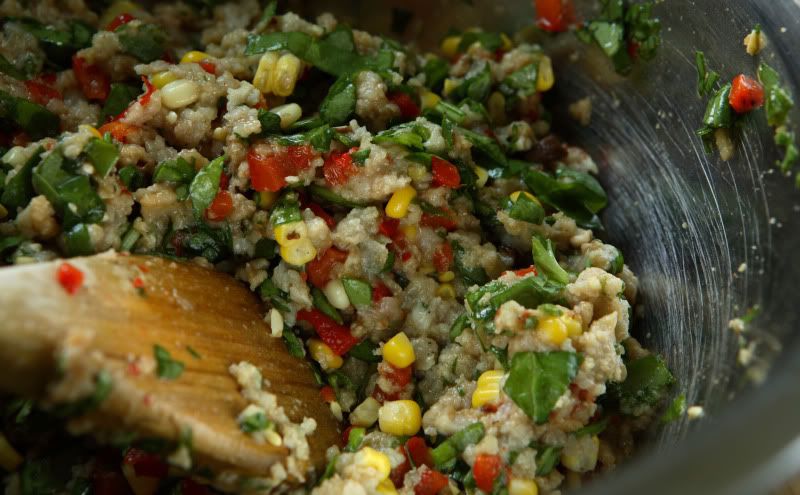
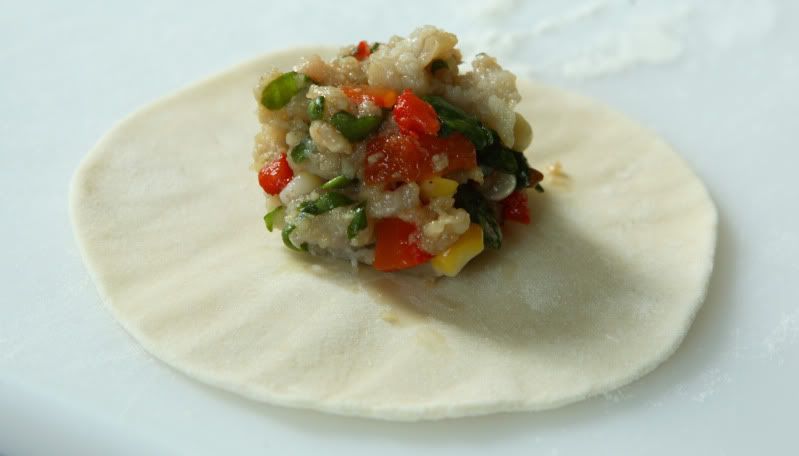
Carefully use your fingertips or a knife to remove the skins from the red peppers. Roughly chop the peppers and the mushrooms, and add them to the corn. Add the remaining filling ingredients and stir to combine. Don’t overstir or you’ll end up with mush.

A note for vegetarians: I think this filling recipe would be a great starting point to create a meatless dumpling. I'd suggest increasing the mushroom quantity and possibly adding some firm tofu (panfried before finely dicing for a little added flavor?)
To roll out the wrappers and fill the dough:
Take the dough and form a flattened dome. Cut into strips about 1 1/2 to 2 inches wide. Shape the strips into rounded long cylinders. On a floured surface, cut the strips into either 1/2-ounce or 1-ounce pieces (larger dumplings are easier to make if you’re a dumpling newbie). The recipe will yield approximately 50 dumplings if you use a 1/2-ounce size, or approximately 25 dumplings if your wrappers weigh 1 ounce each. Keep the waiting dough underneath a cloth to prevent it from drying out.
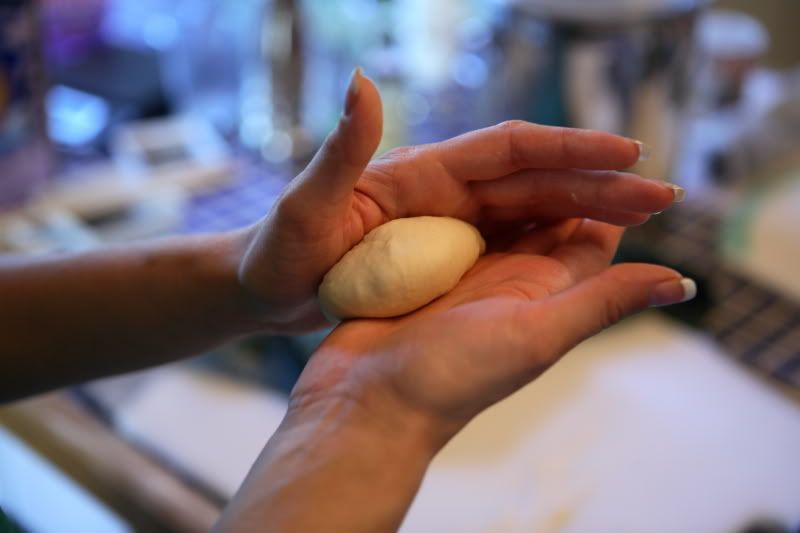
To roll out the wrappers, knead a dough piece in your hands for a few minutes until it is smooth.

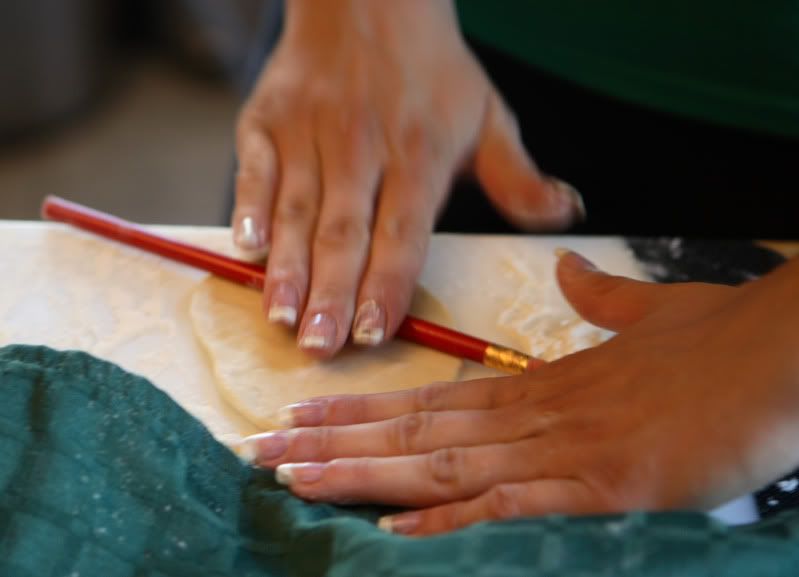
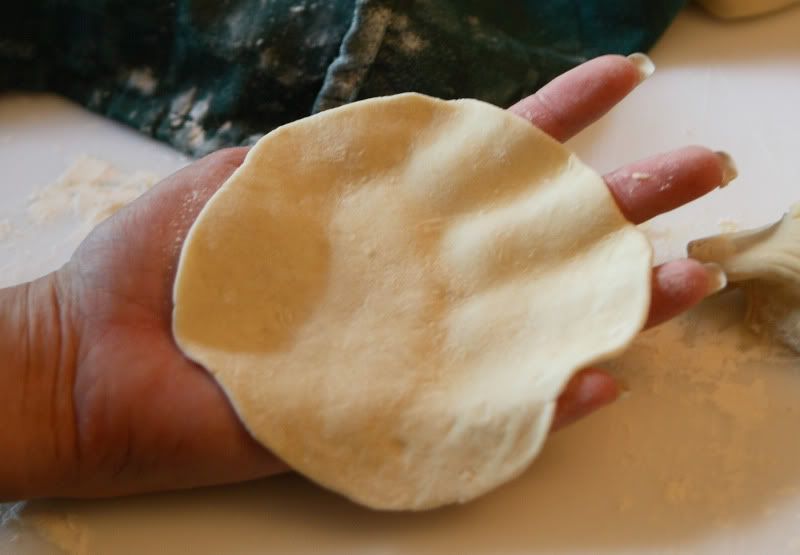
Press your palm down on each piece to form a flat circle. With a straight (not tapered) rolling pin, roll out a circular wrapper from each flat disc. (I recommend using a thick dowel rod, or in absence of that, even a round, unsharpened pencil will work as a rolling pin - that's what I used in my pictures. A larger, standard-sized pastry rolling pin is too bulky to use. Take care not to roll out the skins too thinly or the dumplings might break - about 1/16th inch.

Leave the centers slightly thicker than the edges. Your wrappers will be between three and four inches in diameter.

Place 1/2 ounce to 1 ounce of filling in the center of each wrapper (depending on the size of your wrapper).


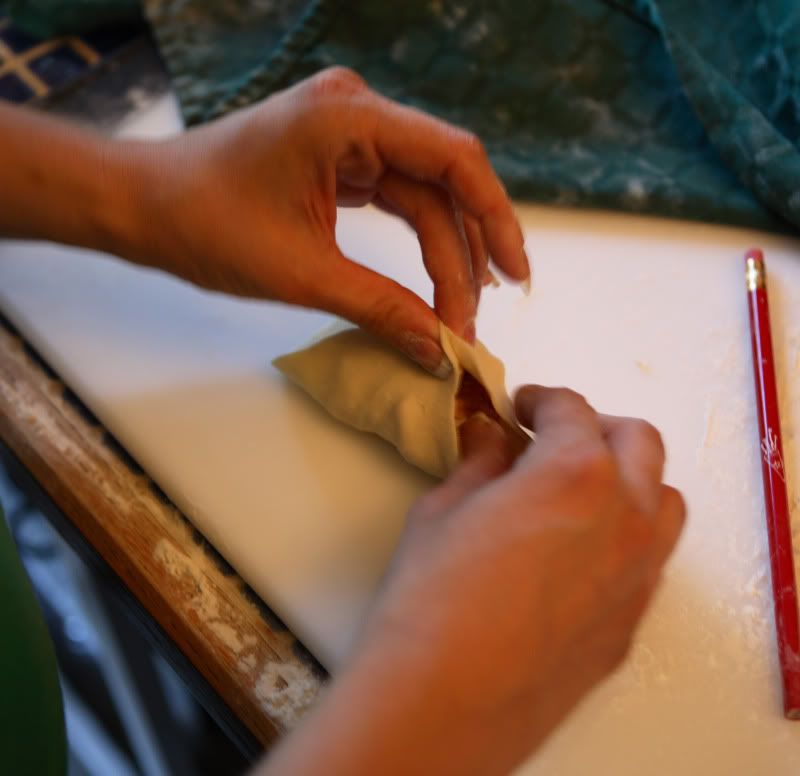
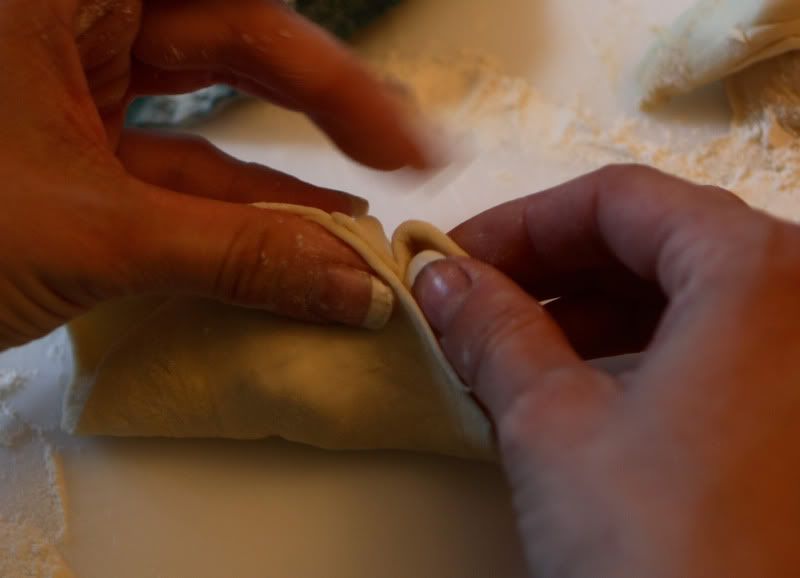
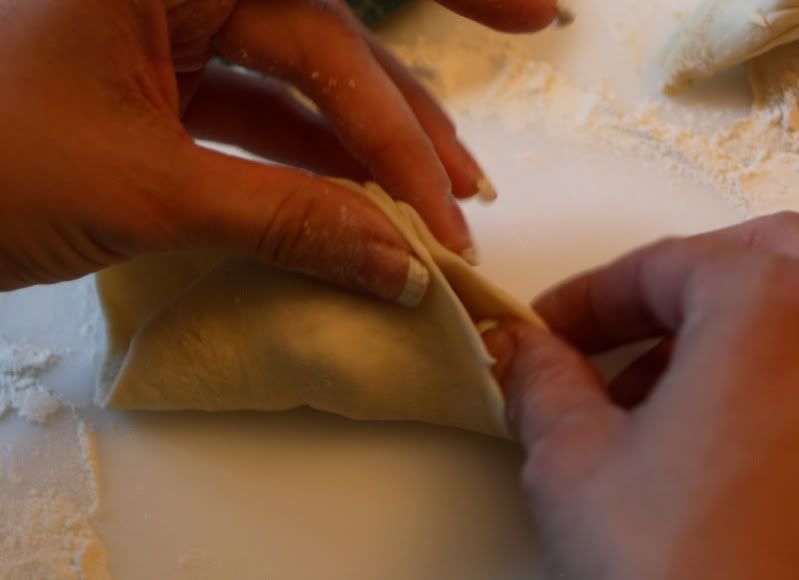
There’s lots of different ways to pleat a dumpling. Here’s the way I was taught in China. Create the top of the dumpling by pinching the dough together at the top, leaving the sides open.

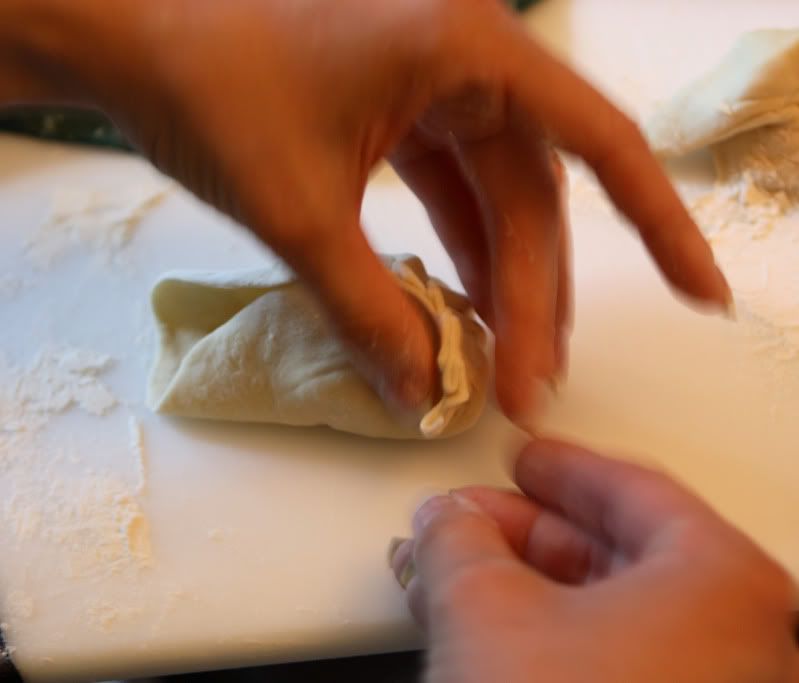
Make three or four pleats along one side of the dough by folding the dough up, one pleat at a time, and pressing it flat.


Work from the center of the dumpling out towards the right to complete one side, then return to the center and work out towards the left to create the other side of pleats.

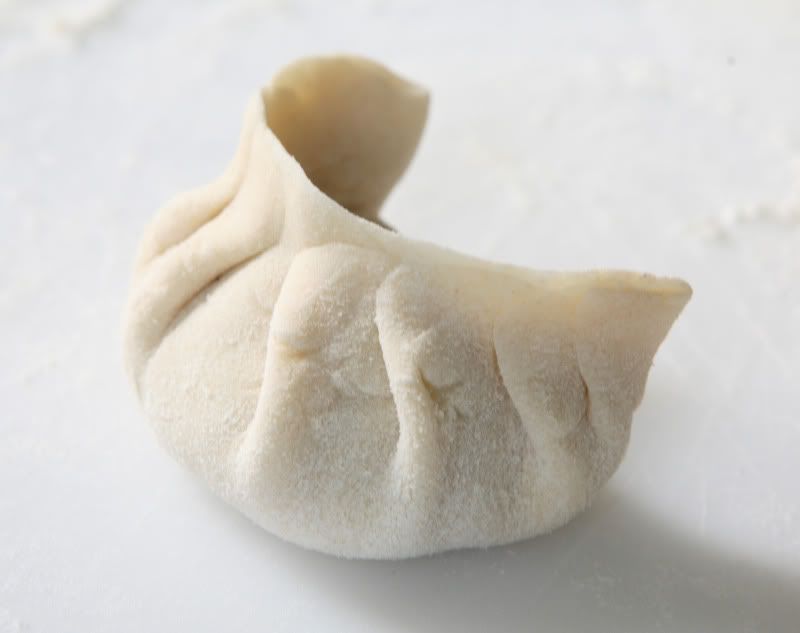
One side of the dumpling should have pleats, the other side should remain flat – this gives the dumpling its crescent shape. The dumpling should rest upright on a flat bottom, with a crescent ridge of pleats pointing up.

This month’s Daring Cooks host, Jen, uses a very similar pleating method to mine – you might want to check her website out to see how she does it.
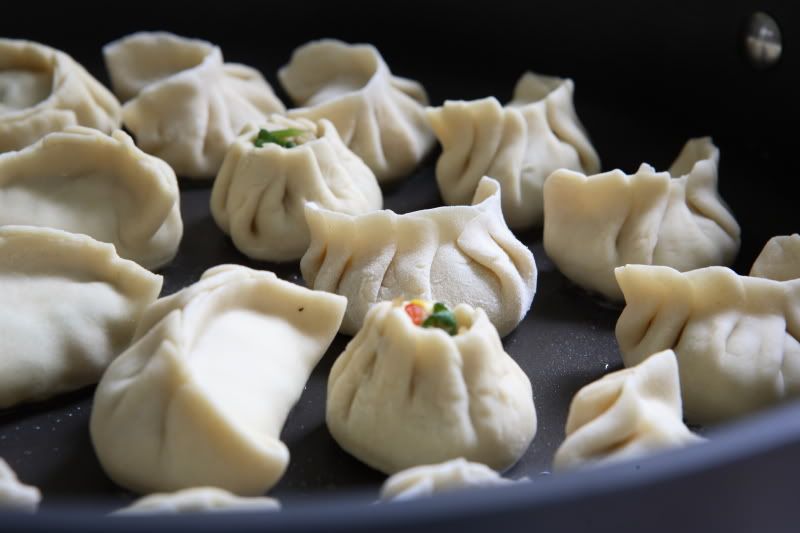
You could also create a beggar’s purse by pleating in a circular fashion around the entire circumference of the dough. Some of the filling should be visible out of the top. Press in slightly to create an area where you can later tie a thread of scallion around the dumpling. They kind of look like little volcanoes! (I’m sure I have not refined the technique nearly as well as my Chinese classmates, who showed me how to make these ten years ago, have!)

Place the shaped and filled dumplings on a nonstick surface, such as a piece of parchment paper, until you are ready to cook the dumplings. If you desire, you can freeze the dumplings at this point and cook them from frozen later.
Choose a cooking method:
To make potstickers:
In a large nonstick sauté pan with high sides and a lid, heat 2 Tbsp oil over medium-high heat, uncovered. Add the dumplings – do not let them touch. Let them cook uncovered for approximately 2 minutes – long enough to begin to brown the bottoms of the dumplings.

Add 1/2 cup of water (careful, the pan will spatter) and immediately put the lid on the pan. Cook covered until the water has boiled away, then uncover and reduce the heat to medium-low. Let the dumplings cook another 2 minutes and then remove them from the heat and serve with dipping sauce.
To make steamed dumplings:
Line a steamer. I usually use a piece of parchment paper with a few holes poked through it. You could also use a single layer of cabbage leaves. Place the dumplings in the steamer basket – don’t let them touch one another.

Place the steamer over boiling water and cover – let them steam for about six minutes. Serve with dipping sauce.
Dipping Sauce
1/4 cup soy sauce
2 Tbsp white vinegar or unseasoned Chinese rice vinegar
2 tsp sesame oil
1/2 tsp Asian chili sauce (or more to taste)
1 tsp white sugar
2 Tbsp thinly cut green and white scallion rings
Stir to combine all ingredients. Serve at room temperature.
Sunday, April 26, 2009
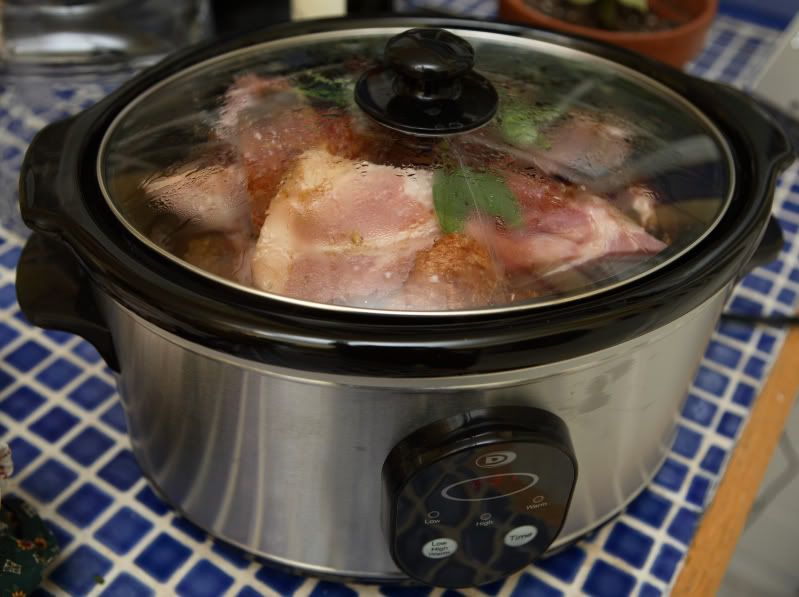
Crockpot Ham
This ham recipe is so easy to make for a crowd because you can throw it all in the crockpot in the morning, let it go all morning, and it will be done in time for an afternoon Easter or Christmas dinner.
You could also make a smaller portion in a little crockpot, turn it on before you go to work, and dinner will be ready by the time you get home in the evening.
The "secret" ingredients in this recipe are important. Don't omit the ground cardamom even though it's kind of expensive. (Throw the cardamom in your freezer and it will last longer!) And if you can find fresh bay leaves, they are better than dried (although whole dried bay leaves will do the trick too). Look for apple cider (not apple juice), but if it's the wrong time of the year and you absolutely cannot find cider, apple juice will suffice. Or, you could substitute chicken stock, but you'll miss out on the apple flavor the cider brings.
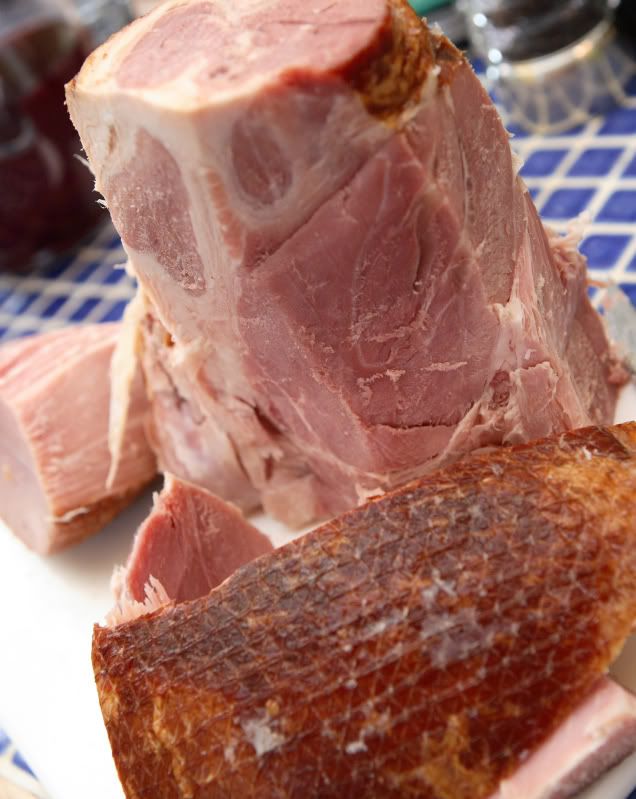
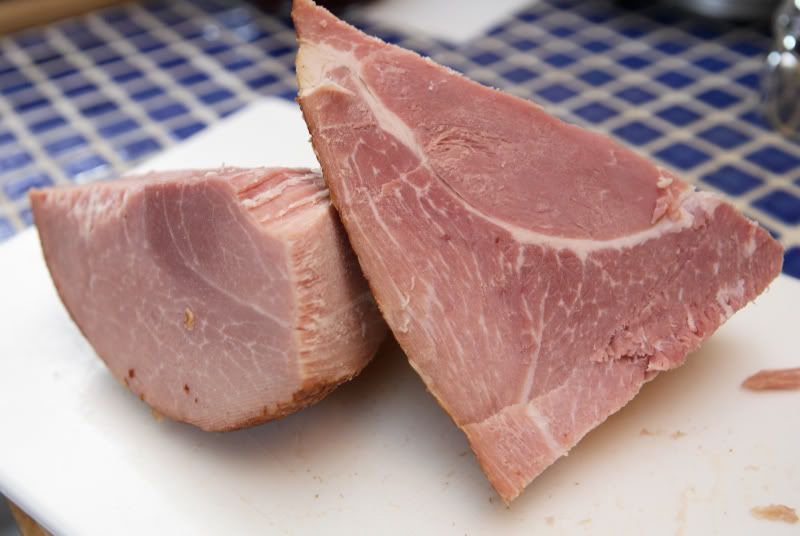
My favorite type of ham to buy is the Kirkland brand ham from Costco. They're large - I just cut it down if I don't need the entire ham at once. They actually taste like ham (not just like salt) and the texture of the meat is better than the oval-shaped hams I usually see at the regular grocery store. You can make the recipe with any kind of fully-cooked ham, though.
Crockpot Ham
The number of servings will vary based on ham size
1 large ham, fully cooked
1 1/2 cups apple cider
1 Tbsp ground cardamom
1 Tbsp whole fennel seeds
2 Tsp ground cinnamon
1 Tbsp ground ginger
1 cup prepared mustard
2 cups packed dark brown sugar
2 Tbsp light corn syrup
2 Tbsp unsulfured molasses
2 Tbsp whole cloves
4 fresh bay leaves
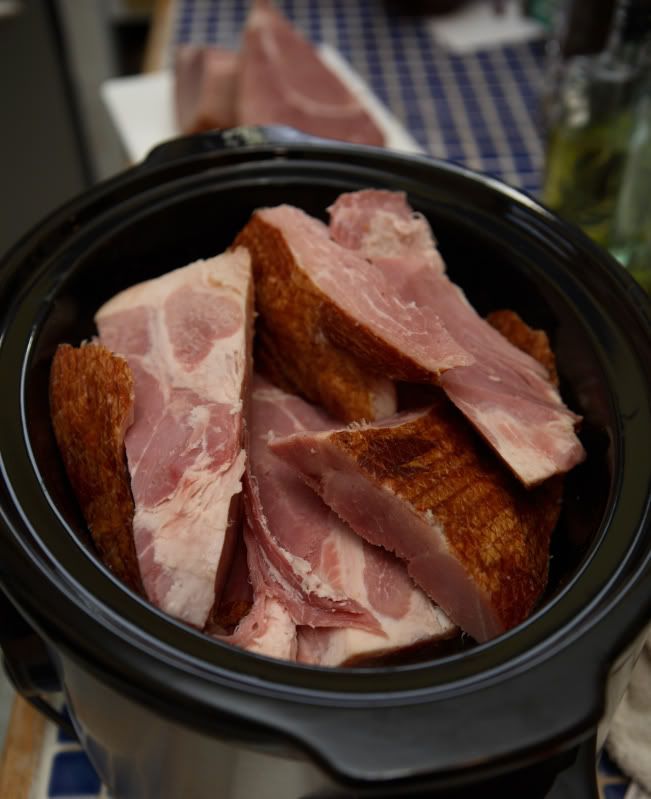
If your ham fits inside your crockpot, you can skip this first step. If the ham is to large to fit inside your crockpot, cut it up into manageable pieces. If your ham comes with a bone, and if it will fit in your crockpot, include it! Don't throw it away! (If the bone won't fit, save the bone for ham and bean soup or for some other purpose!)


Place ham pieces inside a large crock pot.

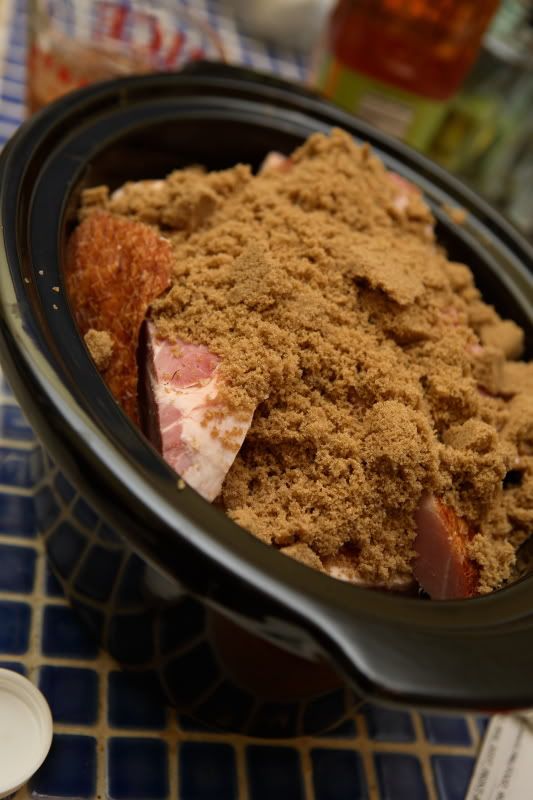
Sprinkle the brown sugar over the ham.

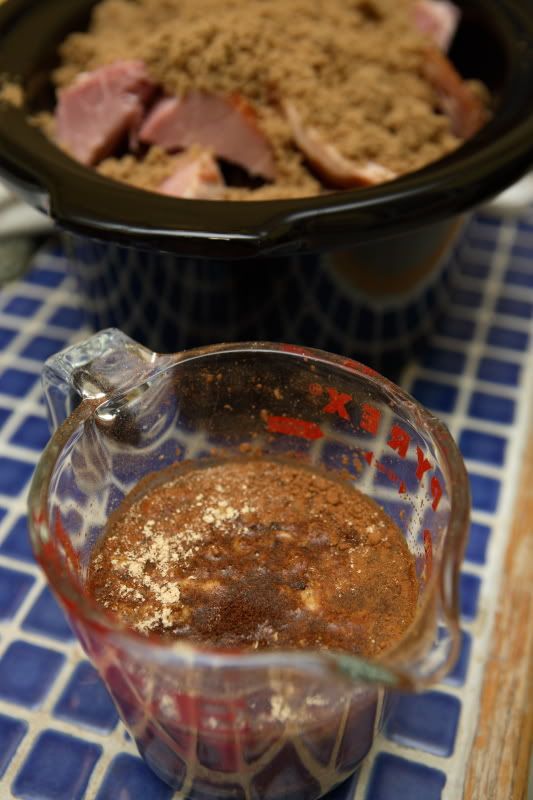
In a small bowl, mix the apple cider, cardamom, fennel seeds, cinnamon, ginger, mustard, corn syrup, molasses, and cloves.

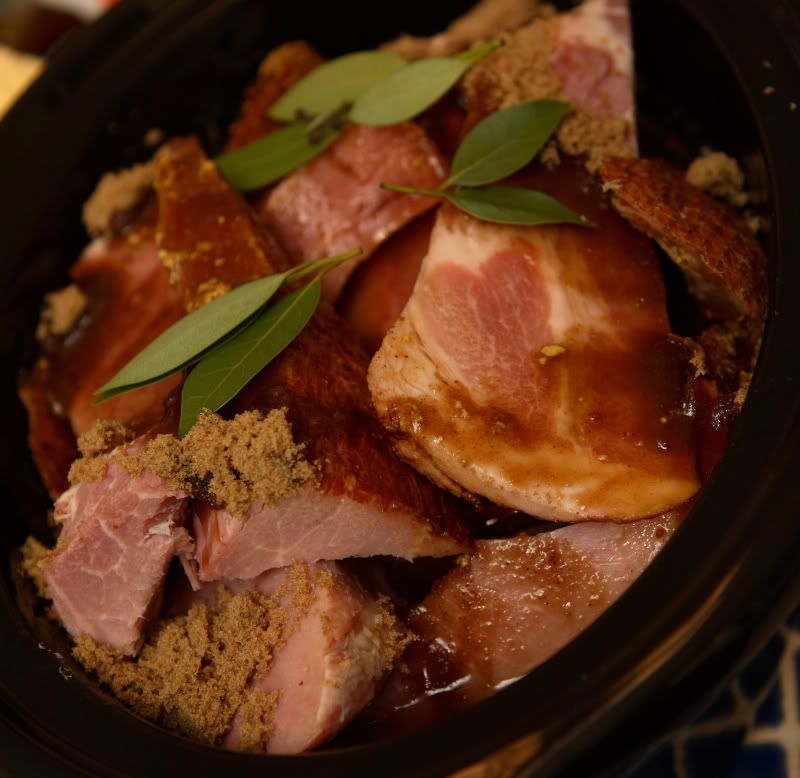
Pour cider mixture over the ham. Lay the bay leaves on top of the ham.

Cover and cook on low for 4-6 hours. Do not remove the lid during the cooking time.

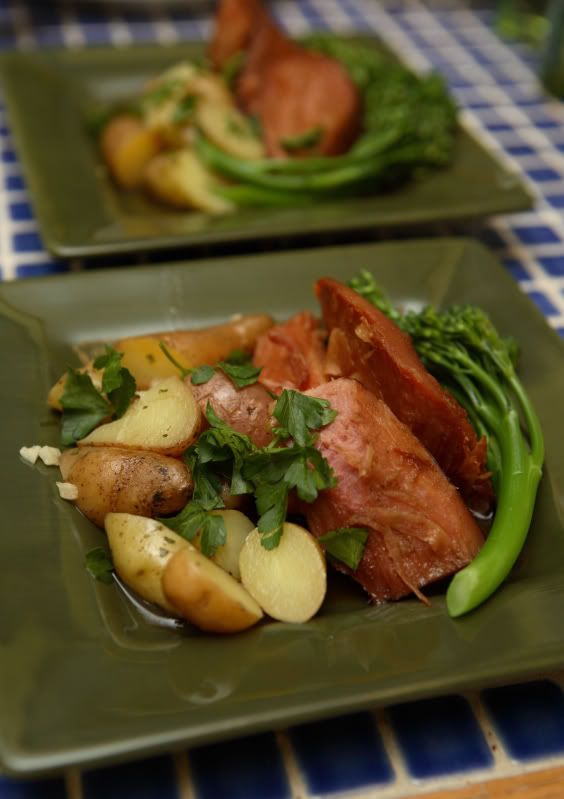
Prior to carving, ladle some of the juices over the meat. Serve moistened with juices.
You could also make a smaller portion in a little crockpot, turn it on before you go to work, and dinner will be ready by the time you get home in the evening.
The "secret" ingredients in this recipe are important. Don't omit the ground cardamom even though it's kind of expensive. (Throw the cardamom in your freezer and it will last longer!) And if you can find fresh bay leaves, they are better than dried (although whole dried bay leaves will do the trick too). Look for apple cider (not apple juice), but if it's the wrong time of the year and you absolutely cannot find cider, apple juice will suffice. Or, you could substitute chicken stock, but you'll miss out on the apple flavor the cider brings.
My favorite type of ham to buy is the Kirkland brand ham from Costco. They're large - I just cut it down if I don't need the entire ham at once. They actually taste like ham (not just like salt) and the texture of the meat is better than the oval-shaped hams I usually see at the regular grocery store. You can make the recipe with any kind of fully-cooked ham, though.
Crockpot Ham
The number of servings will vary based on ham size
1 large ham, fully cooked
1 1/2 cups apple cider
1 Tbsp ground cardamom
1 Tbsp whole fennel seeds
2 Tsp ground cinnamon
1 Tbsp ground ginger
1 cup prepared mustard
2 cups packed dark brown sugar
2 Tbsp light corn syrup
2 Tbsp unsulfured molasses
2 Tbsp whole cloves
4 fresh bay leaves
If your ham fits inside your crockpot, you can skip this first step. If the ham is to large to fit inside your crockpot, cut it up into manageable pieces. If your ham comes with a bone, and if it will fit in your crockpot, include it! Don't throw it away! (If the bone won't fit, save the bone for ham and bean soup or for some other purpose!)


Place ham pieces inside a large crock pot.

Sprinkle the brown sugar over the ham.

In a small bowl, mix the apple cider, cardamom, fennel seeds, cinnamon, ginger, mustard, corn syrup, molasses, and cloves.

Pour cider mixture over the ham. Lay the bay leaves on top of the ham.

Cover and cook on low for 4-6 hours. Do not remove the lid during the cooking time.

Prior to carving, ladle some of the juices over the meat. Serve moistened with juices.
Wednesday, February 20, 2008
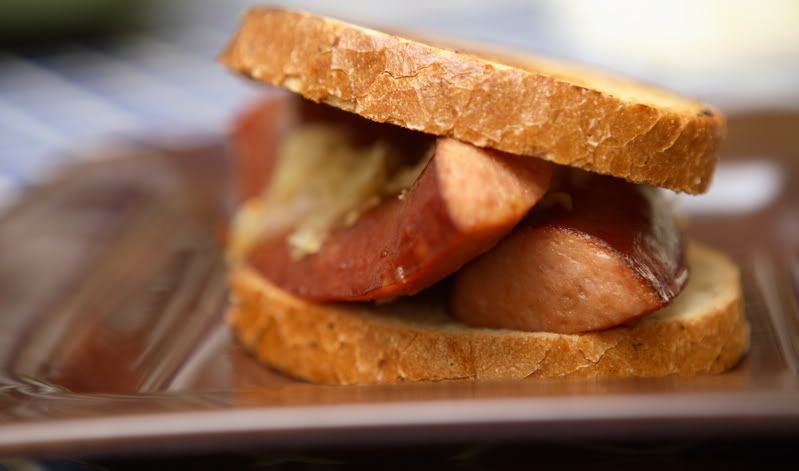
A Quick Kielbasa and Sauerkraut Sandwich Dinner
I needed a quick dinner tonight, so I made sausage and sauerkraut sandwiches. I sliced fully-cooked kielbasa in half lengthwise and placed it in a sauté-style frying pan (a frying pan with taller-than-normal edges). I added about 1 cup of apple juice (apple cider would work even better if you have it!) and mixed in about a tablespoon of grainy mustard. Then I simmered the mixture over medium heat until the apple juice was slightly reduced and the sausages were heated through. I added sauerkraut to the pan and heated it through.
Meanwhile I “grilled” some rye bread: I did this similarly to how I would make a grilled cheese sandwich, but minus the cheese. I spread one side of the bread with reduced-fat mayonnaise (you might be used to using butter - I've never heard of anyone else using mayo to make grilled sandwiches besides me and my family). Then I placed the bread in a frying pan over medium-high heat, mayo-side down, and fried the it until it was a nice, golden brown.
To assemble the sandwich, I spread the ungrilled side of the bread with mustard, then topped it with the kielbasa and sauerkraut. Yum!
Meanwhile I “grilled” some rye bread: I did this similarly to how I would make a grilled cheese sandwich, but minus the cheese. I spread one side of the bread with reduced-fat mayonnaise (you might be used to using butter - I've never heard of anyone else using mayo to make grilled sandwiches besides me and my family). Then I placed the bread in a frying pan over medium-high heat, mayo-side down, and fried the it until it was a nice, golden brown.
To assemble the sandwich, I spread the ungrilled side of the bread with mustard, then topped it with the kielbasa and sauerkraut. Yum!
Subscribe to:
Posts (Atom)