Showing posts with label herbs. Show all posts

Tuesday, May 24, 2011

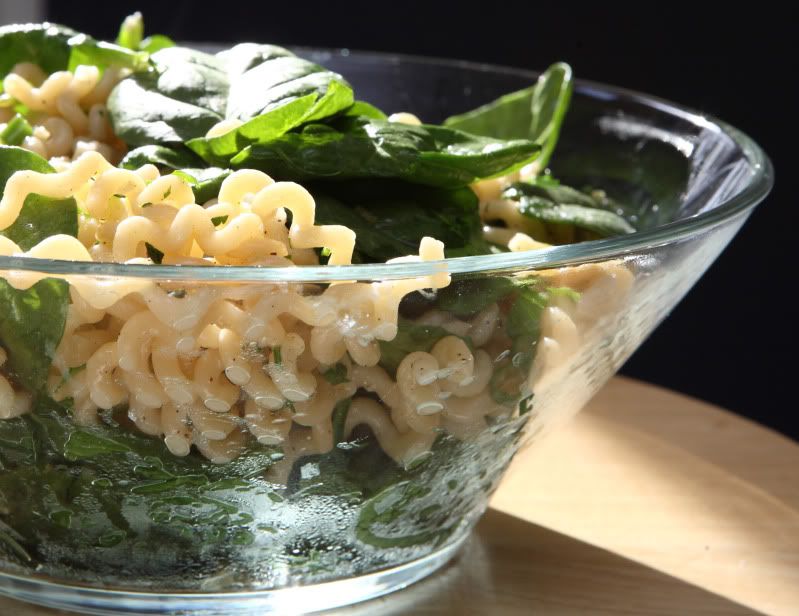
Buttered Pasta


I have a weakness for uniquely-shaped pasta. I could buy a box or bag of pasta every time I go to the grocery store. I have an entire cabinet devoted to pasta storage, and even though I already have every shape imaginable, I can’t resist picking more up any time I see something that looks interesting.

To feed my pasta-buying addiction, I visit “The Hill” neighborhood here in St. Louis, the old Italian neighborhood with lots of wonderful restaurants and several fun little grocery stores where good-quality tomatoes, olive oil, wine, and balsamic vinegar are the norm. The pasta selection is outstanding, of course, and you can get a lot of neat shapes I’ve never seen anywhere else, all imported directly from Italy.

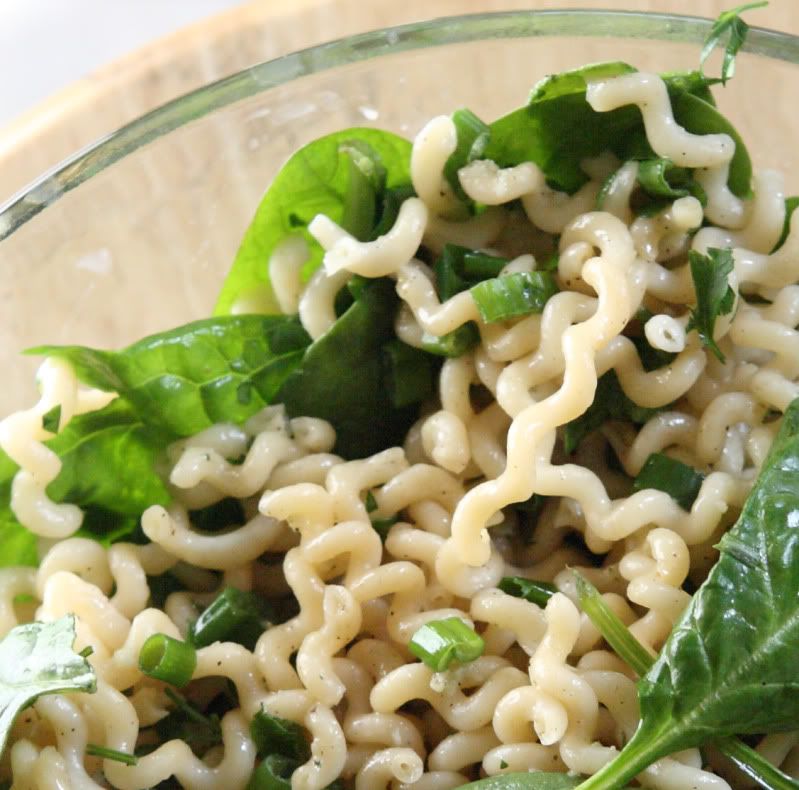
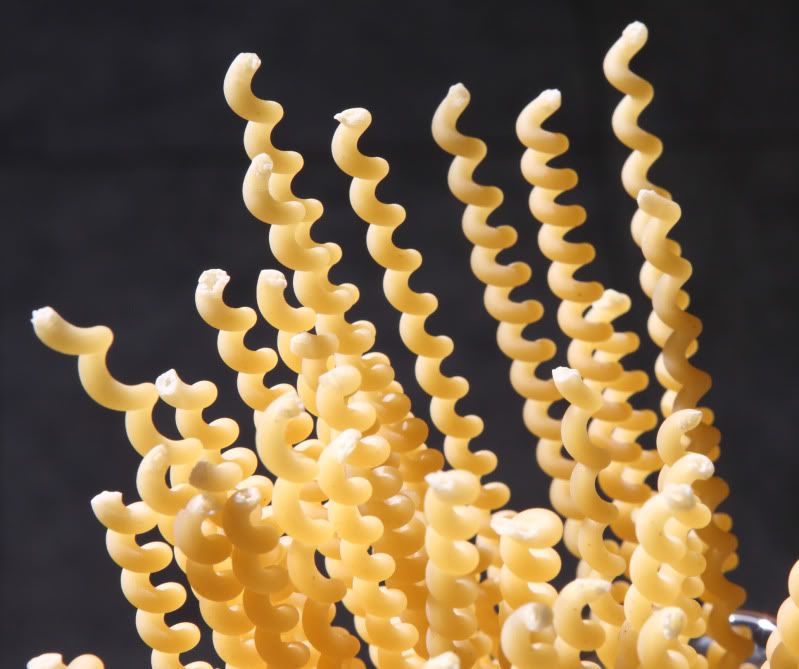
I made this pasta dish with the last half of a bag of fusilli col buco, which is a long, hollow, corkscrew-shaped pasta. It’s thick and chewy and works great in a dish like this, with simple accompaniments, where the pasta really stars. Bucatini (the straight version of what I used) would work great: it has the same chewy texture but is a little harder to eat gracefully because it is just a little too thick to swirl around your fork. If you cannot find either specialty pasta, you can use fettuccini or linguine – something thick and chewy, not thin.


Although these subtly flavored, buttery noodles are a great side dish to go with any Italian entrée, they are the perfect accompaniment to something delicately-flavored like Chicken Piccata, because the noodles and their sauce will not overpower the Piccata sauce. They’re fast and easy to make, and don’t require a lot of expensive ingredients. There’s just a touch of garlic in them, but it, and the butter, salt, and pepper is all secondary to the pasta.

If you have any leftover noodles, take them to work for lunch – they reheat well in the microwave.

Buttered Pasta
Serves 4 as a side dish (smaller portions)

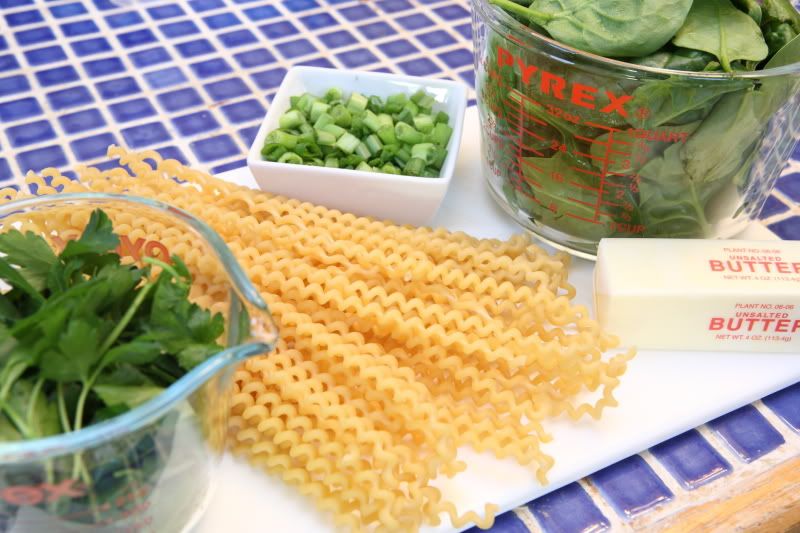
8 oz pasta
5 oz fresh spinach (least expensive if you buy it from the loose spinach bin, not the prebagged/prewashed kind)
1 loosely-packed cup Italian parsley
4 Tbsp butter
Salt and freshly-ground black pepper
Freshly grated nutmeg
2 cloves garlic, finely chopped
1/3 cup snipped green onions


In a large pot (one that has a lid), cook the pasta, uncovered, according to the package directions. Do not overcook the pasta!

Wash and dry the spinach. If the spinach leaves are particularly large, you may wish to roughly chop the spinach. Set it aside.

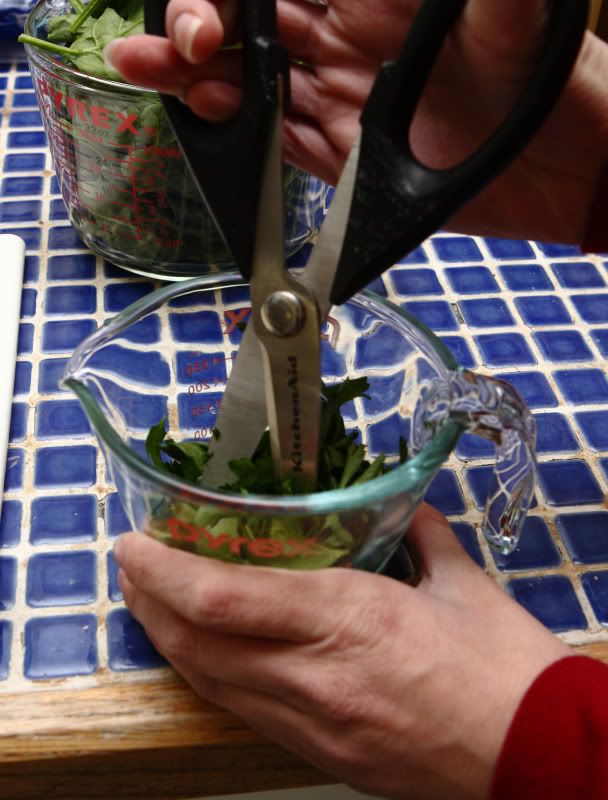
Chop the parsley – I find the easiest way to do this is to just stick my scissors into the measuring cup and snip away until its all uniformly chopped.


Once the pasta has cooked, drain it and set it aside. In the empty pasta pot, melt the butter over medium heat. Add a pinch of salt, a generous quantity of freshly-ground black pepper, and some freshly grated nutmeg (I usually do equal quantities of black pepper and nutmeg).

Turn the heat to medium-low. Return the pasta to the pot; add the green onions, spinach, and parsley, and stir to incorporate everything. Taste the pasta and adjust the seasonings…you may need more salt. Cover the pot (still on medium-low heat), and wait several minutes until the spinach has wilted slightly, stirring the pasta once or twice to give it all a chance to cook.


Wednesday, February 24, 2010

Lemon-Sage Cornish Game Hens with Porcini Tomato Sauce


There are several good reasons you should try this chicken recipe. For one, its pretty easy to make, considering it involves whole chickens. (When I first started learning to cook, whole birds seemed kind of intimidating to me…but the truth is, whole birds sound a whole lot more complicated than they actually are. And this particular recipe is fairly easy.)

The second reason you should make this recipe is that it tastes quite good. The chicken is baked at a high temperature, so the skin becomes nice and crispy while the chicken stays juicy and tasty. Lemons are stuffed in the chicken – they give a bright but subtle counterpoint to the umami flavor present in the mushroom tomato sauce.

This recipe is made with Cornish game hens (sometimes known as "rock" hens...they're basically just smaller-sized whole chickens). In my household, one large Cornish game hen will serve two people…but we’re used to moderately-sized portions. If you have big eaters, or if you want to have leftovers, you might want to allow one small hen per person.

Lemon-Sage Cornish Game Hens with Porcini Tomato Sauce
Serves up to 4

Chicken Ingredients:
Two to four 1-1/4 to 1-1/2 pound Cornish game hens (see the note above)
For each hen, you'll need...
1 medium lemon
2 large fresh sage sprigs (left whole), plus 1 Tbsp chopped fresh sage
1 Tbsp olive oil
salt and pepper

Sauce Ingredients (makes enough for four servings)
2 Tbsp olive oil
3/4 cup hot water
1/2 ounce dried porcini mushrooms
2 large cloves garlic, finely chopped
one 14.5-ounce can diced tomatoes, with juices

First, prepare the chicken:

Preheat the oven to 450 degrees Fahrenheit. You’ll need a roasting pan large enough to hold the birds.

Remove the giblets. (They’re usually contained in a little plastic baggie stuck inside the chicken cavity, but sometimes they’re just loose inside the bird.) They can be discarded or saved for another use. Rinse the chicken (inside and out). Pick off any stray feathers or any giant clumps of fat. Pat the chicken dry with paper towels.

Cut each lemon in half. Save half of each lemon (we’ll squeeze it on the meat later). Cut the remaining lemon halves into rough wedges. Stuff the lemon wedges and the two large sage sprigs inside the cavity of each bird. Put the stuffed birds in your roasting pan. I like to roast them breast-side-down, because the juices from the bird will help keep the meat moist and flavorful.

Drizzle one tablespoon of olive oil over each bird. Squeeze the juice from the remaining lemon halves over each bird. Sprinkle each bird with a generous pinch of salt and several generous turns of freshly-ground black pepper. Scatter 1 tablespoon of chopped sage over each bird.


Roast the birds at 450 degrees F until they are cooked through and the juices run clear when thickest part of thigh is pierced. (It should take approximately 45-50 minutes.) Transfer the birds to a platter (or a cutting surface if you want to cut them in half – use heavy-duty kitchen scissors to snip them in half); tent them with foil to keep them warm. Reserve the pan drippings.

While birds are roasting, start the sauce...and...

...I highly recommend that you serve this with creamy polenta…that's what the chicken is served with in the photo at the top of this post.  Follow your polenta package directions to make a creamy polenta. If you decide to make polenta, you’ll probably want to start it now, as it probably takes awhile to make…

Combine 3/4 cup of hot tap water and the porcini mushrooms in a small bowl. Let them stand until the mushrooms soften, about 30 minutes. Remove the mushrooms from the soaking liquid, reserving the soaking liquid. Roughly chop the mushrooms; set the mushrooms and the soaking liquid aside.

Heat 2 tablespoons of olive oil in a large saucepan over medium heat. Add 1 tablespoon of chopped fresh sage and the garlic; sauté them until they are fragrant, about one minute. Add the tomatoes, the chopped mushrooms, and the mushroom soaking liquid. Bring the sauce to a simmer – it can simmer on low heat until the birds are done roasting.

Once birds are done roasting, pour the pan drippings into a small measuring cup. Skim the fat off of the top, then stir the remaining drippings into the tomato mixture. Simmer the tomato mixture two minutes to blend the flavors. Serve the chicken with the sauce.

Sunday, July 19, 2009

Tilapia and Green Beans, with Home-Dried Powders - the July Daring Cooks Challenge


This month’s Daring Cooks recipe was pretty unusual – at least, compared to what I usually cook for my family. The July challenge recipe was hosted by Sketchy, of Sketchy’s Kitchen. He chose a skate recipe from the Alinea Cookbook, which is to be served with “powdered traditional flavors” – more on exactly what that means in a minute.

First, the original recipe called for skate, a creature similar in appearance to a stingray. Many Daring Cooks chose to substitute other types of seafood because skate is on the “avoid” list. (According to the Monterey Bay Aquarium and other similar websites, skates have been overfished, and most are caught by a method that results in high levels of accidental catch of other fish. The fishing method also results in substantial damage to the seafloor.)

So, I substituted US farmed Tilapia for the skate, and thought the results were delicious. I suggest you do the same! (Please check out the rest of the list and try to make good seafood choices when you prepare seafood in the future!)

Besides the controversial main ingredient, the recipe brings up another interesting topic. For one, it touches on molecular gastronomy, a modern method of cooking that I have not, until now, had a chance to experience. This version of MG involves home-drying an assortment of foods to be pulverized into flavorful powders. Thus, the flavors of the dish are intense and very concentrated. The powders are served alongside the main course – seafood poached in a velvety butter sauce – and the fish is dipped into the assortment of powders as it is eaten. The result is really a taste explosion in your mouth – it’s delicious. Definitely something I’m not used to eating, though!

The recipe does require some special equipment. Best results will be achieved if you own a dehydrator. Some Daring Cooks were able to duplicate the results in a microwave. It’s also possible to use an oven set on a very low temperature – but it takes a very long time. You’ll also need some way to grind the dehydrated foods. Many people used coffee grinders or a mortar and pestle. I used a food processor and sifted the powders through a fine mesh strainer.

I wasn’t certain if I was going to be able to complete this month’s challenge. For one, I don’t own a dehydrator or a microwave. Nor do I have a coffee grinder or a mortar and pestle. And, it’s been 90+ degrees nearly every day lately, so I wasn’t too excited about running my oven all day to complete the challenge. To top it all off, I have had a problem with my back lately, so I have been moving around more slowly than usual.

However, my mother owns an awesome dehydrator and I was able to talk her into shipping some dehydrated food to me. (Thanks, Mom!) In addition to her contributions, I dried some of the thinnest of the required ingredients in my oven, purchased some already-dried items from the grocery store, and pulled a few spices out of my pantry to come up with the rest of the ingredients. Sorry, with this bad back, that was the best I could do!

I’m glad I did what I could to put together the challenge. Like I said, the food was so flavorful and delicious. Definitely different, and definitely outside of my usual comfort zone of cooking – but that’s why I joined the Daring Kitchen. If you’ve got a dehydrator and haven’t tried a recipe like this yet, give it a shot. It’s really not too difficult at all.

The version I’m posting here reflects the changes I made to the original recipe. There were a few ingredients I was unable to source, so I left them out of this post. Check out Sketchy’s blog if you want to see how the challenge recipe was originally written for us. His blog also includes instructions for using a microwave or an oven to dry the powders.

Tilapia and Green Beans, with Home-Dried Powders
Serves 4

1 red onion, trimmed and thinly sliced
30 grams capers (in brine, not oil-packed)
1 cup fresh Italian parsley (left intact)
1/4 cup fresh cilantro (left intact)
1 ounce dried lemon peel (I used the brand Melissa’s, which is sweetened)
3 Tbsp dried instant milk powder
1 Tbsp brown sugar
1 lb butter (4 sticks)
300 grams fresh green beans
Salt, to taste
4 tilapia fillets
2 bananas (neither overripe nor underripe)
Juice of 1 lemon

Optional
Pink peppercorns
Ground white pepper
Sweet Hungarian paprika
Any other ground flavoring you have or want to make that you think will match the flavors of the dish

First, the onions and capers need to be dehydrated and ground. Special thanks to my Mom, who dried these for me using her dehydrator. See Sketchy’s blog if you want to try a different dehydration method.

Dry the red onion slices in a dehydrator at 135 degrees until they are brittle, about twelve hours.
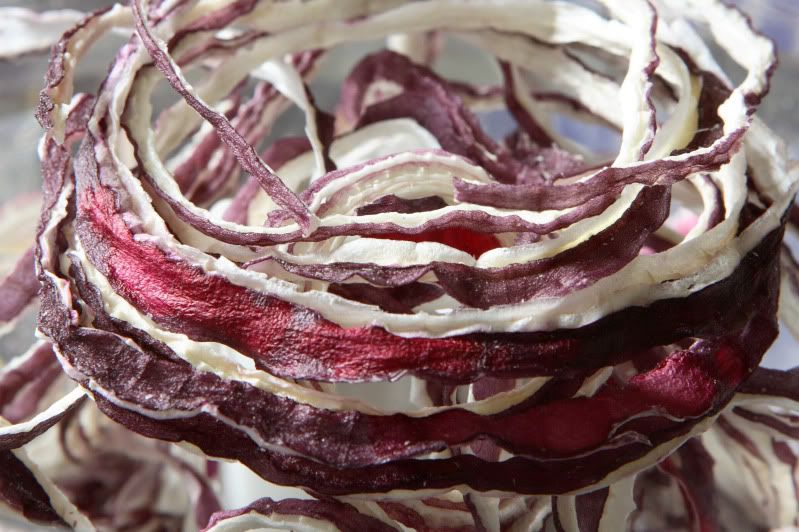


Use a food processor, mortar and pestle, or coffee grinder to grind the brittle onions. Pass the ground onions through a fine strainer and store the powder in an airtight container.

Rinse the capers under water. Use a towel to remove as much water as possible. Dry the capers at 135 degrees until dry, about 12 hours. Use a clean grinding implement to grind the capers. Pass them through a fine strainer and store the powder in an airtight container.

The parsley and cilantro also need to be dried, but they don’t take nearly as long. I used my oven to dry these. You can use a dehydrator if you’ve got one.
Preheat the oven to the lowest setting possible (mine only goes down to 200 degrees, so that’s what I used). Cover a cookie sheet with a piece of parchment paper. Bring some water to a boil in a small saucepan. Blanch the cilantro and parsley in the boiling water for one second, then transfer them to ice water to stop the cooking process. (You don’t have to keep the two herbs from mixing.) Pat the herbs dry with paper towels. Lay the cooled cilantro and parsley out on the parchment paper as flat as possible. Don’t let the leaves touch one another, or they won’t dry properly.
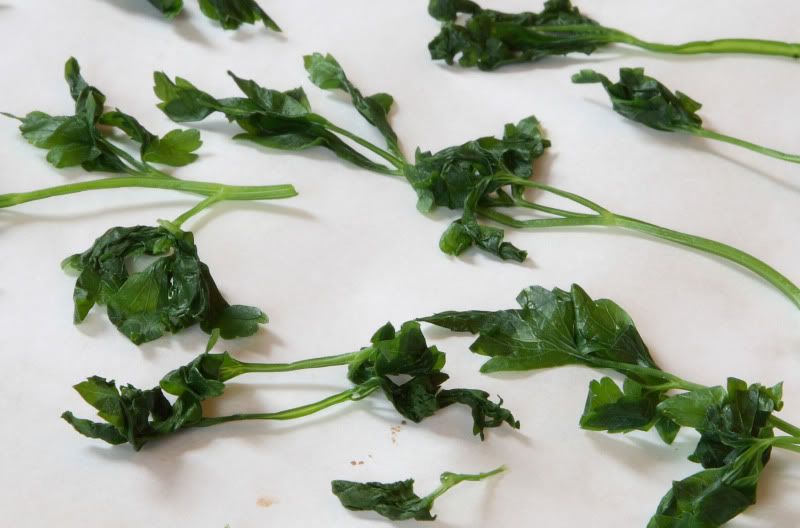


Dry the herbs in the oven, turning them over once, until they are brittle. At 200 degrees, I left them in for 15 minutes on each side. Nearly all of the pieces were sufficiently dried, except for the thickest stems and a few clumps of leaves I missed. I just crunched them up a little bit, picked out the couple of pieces that weren’t brittle enough, and ground the rest up. Use a clean grinding implement to grind up the cilantro and parsley (again, you can mix it together, no need to keep it separate).
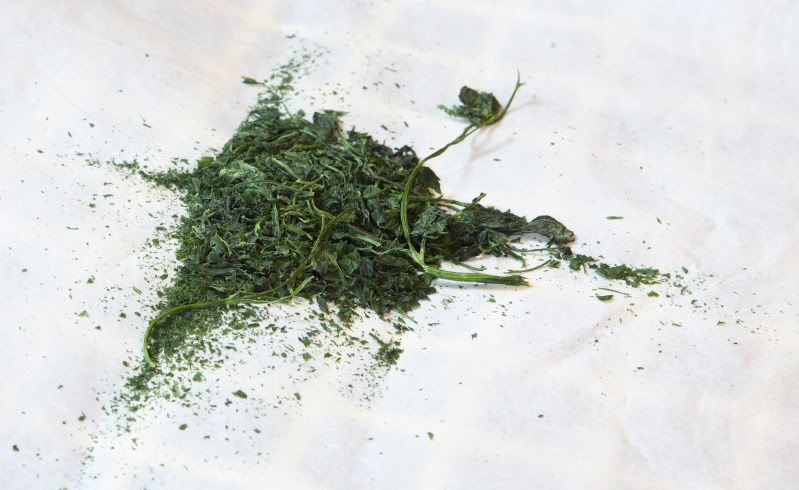


Pass the ground herbs through a fine strainer and store the powder in an airtight container.


In a clean bowl of a food processor, grind the lemon peel until it is as small as possible. (It won’t pulverize like the other dried things will, but it’ll do. It will bring an interesting variation in texture to the final dish.) Store it in an airtight container.

In a small skillet, toast the dried milk powder over medium heat, stirring occasionally. (Be cautious not to burn it!) Turn it out into a small bowl and allow it to come to room temperature. Mix the brown sugar into the cooled milk powder. Store it in an airtight container.

The recipe may be made ahead to this point.

Before we start cooking fish and green beans, we’ll first make a beurre monte, a buttery liquid we’ll use for poaching. Heat 60 grams of water in a large saucepan to a boil. Meanwhile, cut the butter into rough cubes (approximately 1 Tbsp each). Once the water has reached a boil, turn the heat down to low. Stir in one cube of butter at a time, waiting to add the next cube until the last one has melted. Keep this liquid heated, but do not allow it to exceed 195 degrees F.

Now we’ll divide up the beurre monte. Three-fourths of the finished beurre monte will stay in the large saucepan over low heat. One fourth of the finished beurre monte should be transferred to a medium saucepan over low heat. After you've divided it up, add water to the each beurre monte to double it’s volume – this doesn’t have to be exact and can be “eyeballed” up the side of the pan. Or, if you’re more comfortable doing so, you can pour each portion of butter sauce into a liquid measuring cup and add an equivalent amount of water. Again, keep the liquids heated, but not above 195 degrees.

Decorate your serving plates:
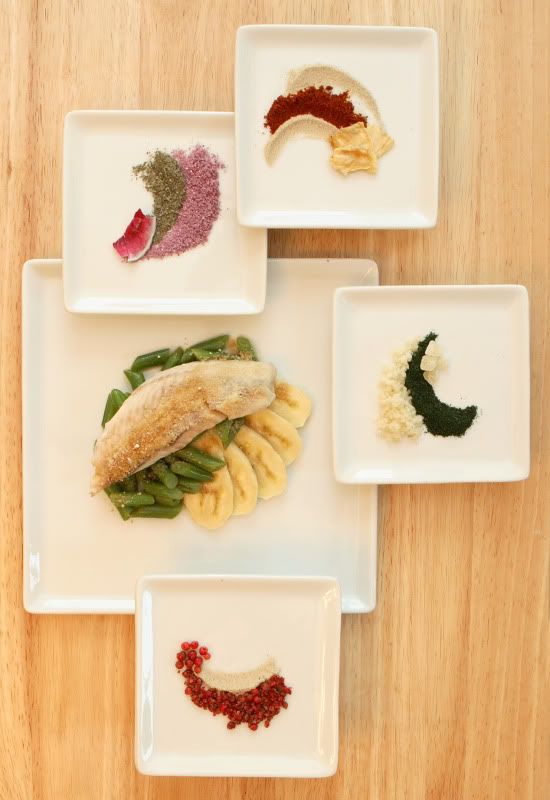
The powders are to be plated alongside the fish, swirled in a decorative fashion. Since my back was causing problems and I wasn’t physically up for a lengthy trial-and-error process, I plated the powders on several smaller plates. (Much easier, because if you screw it up, you’re not out a whole plate of multiple powders.) You can check out other Daring Cooks' photos for more plating ideas.

I plated crushed pink peppercorns and ground white pepper (both storebought), garnished with whole pink peppercorns


the ground red onion and capers, garnished with a chip of dried red onion,


ground white pepper and sweet Hungarian paprika (also storebought), garnished with several chips of dried pineapple (another dried item my mom shipped - and they were delicious, but wouldn’t pulverize well enough to use in this recipe),


and the powdered parsley/cilantro and the sweetened lemon peel, garnished with a few of the larger, unground pieces of peel,
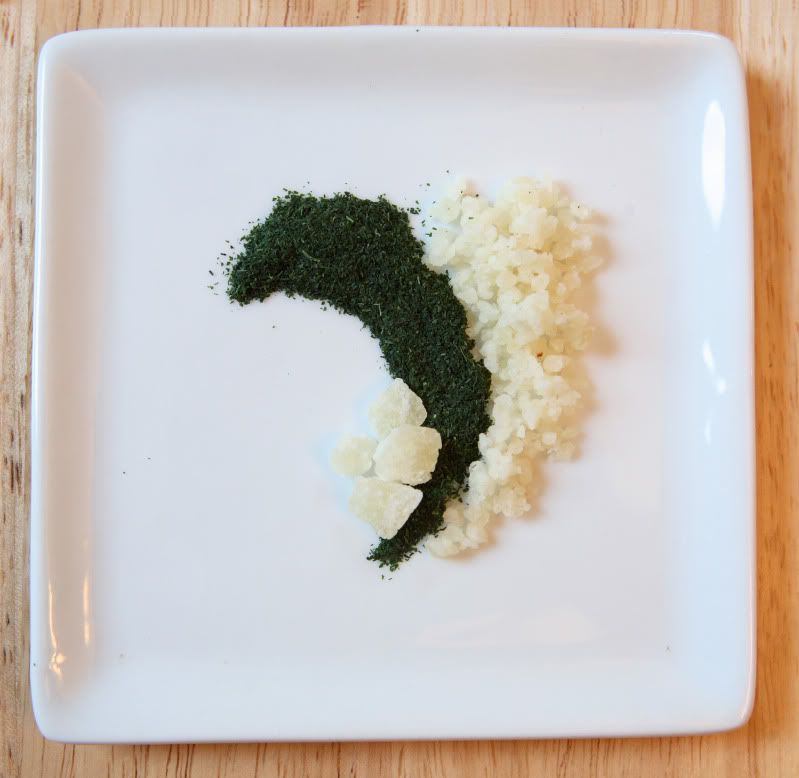


It is much easier to decorate the empty plates now, rather than waiting until after the fish is cooked. Otherwise the fish will get cold while you fumble with the various powders. Just be sure you leave room for the fish later!

We’re ready to start cooking:
Cut the green beans diagonally into bite-sized pieces. Add them to the smaller portion of beurre monte. Turn the heat to medium and poach the beans until they are done to your liking. Taste the beans and season them with salt.

While the beans are poaching, turn the heat of the larger saucepan up to medium. Add the tilapia fillets (you might need to do this in batches) and poach, turning once, until the fish turns white and easily flakes apart. (That should only take a few minutes on each side.) Be careful to avoid overhandling the fish, or it might fall apart. After you’ve removed the cooked fish, season it with salt.

Meanwhile, thinly slice two bananas diagonally. Squeeze the lemon juice over them to prevent browning. Fan several banana slices on each serving plate. Top the bananas with the drained green beans. Top the beans with a fish fillet. Sprinkle the milk powder/brown sugar mixture on top of the fish.


Serve the fish piping hot. Encourage your eaters to dip the fish in the various powders, experimenting with different flavor combinations. My favorite was definitely the capers and the red onions!
Saturday, June 6, 2009

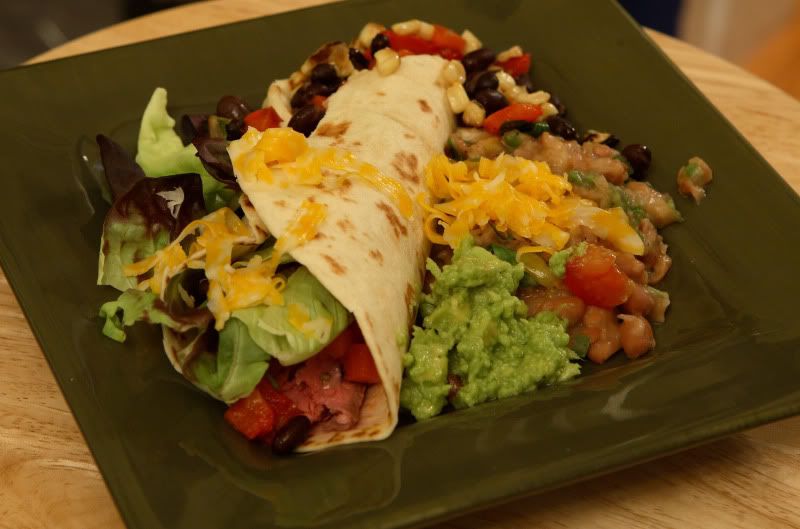
Steak Tacos, Red Pepper and Corn Salsa, Homemade Refried Beans, and Guacamole

Craving steak tacos?

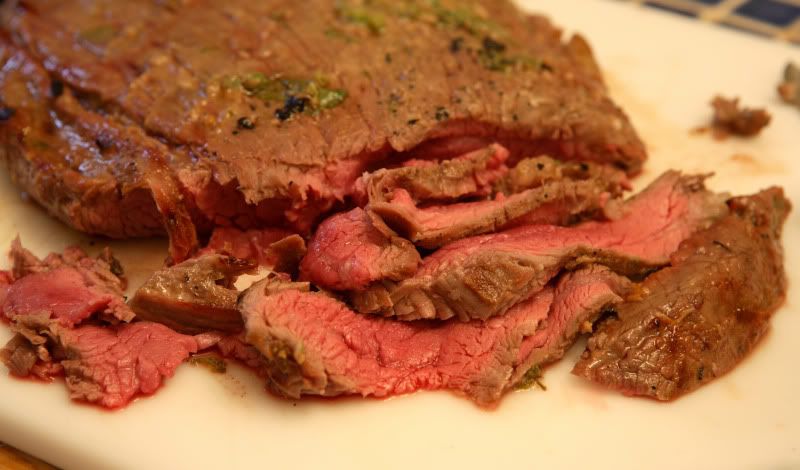
Thinly-sliced, lime-and-cilantro-flavored steak
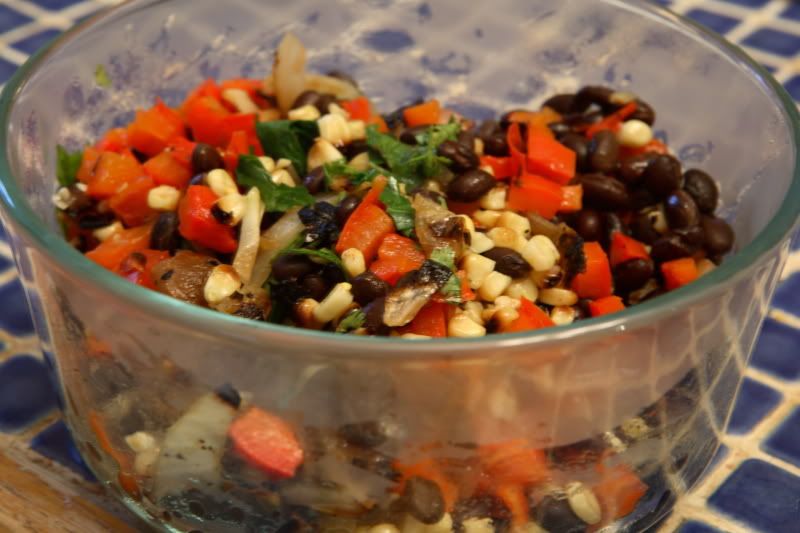
Fire-roasted red pepper and corn salsa
Spicy jalapeno pinto beans
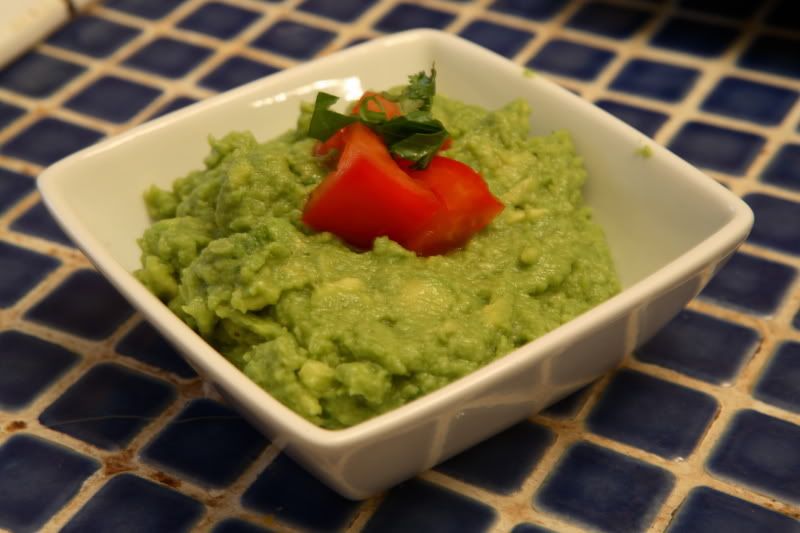
Cool and refreshing guacamole


I know I am!

Let's get cooking! Many of the ingredients can be prepared ahead of time. Some items can be cooked ahead and simply reheated, or kept warm over a low grill (that’s what I do at home when I’m just cooking for the family), or in a slow oven (that works well if you’re cooking on a larger scale). I have written the recipes below as if I’m serving them to my family immediately.

All quantities below will serve four people


Steak Marinade
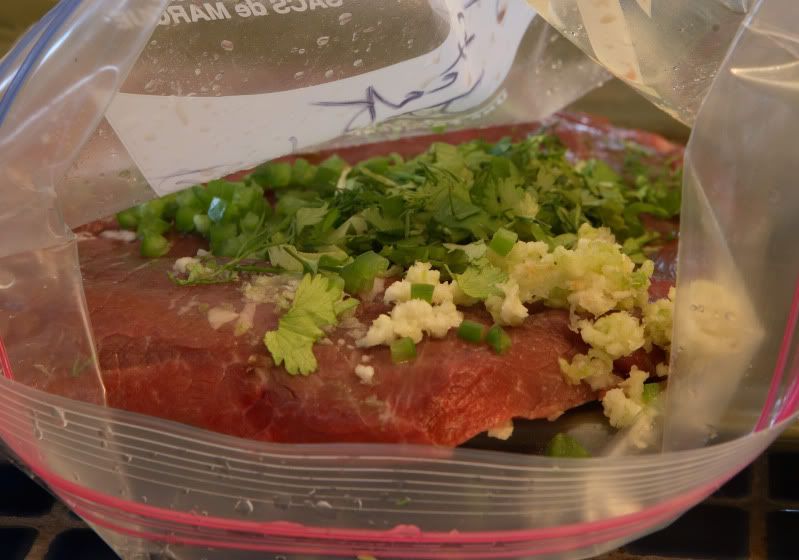
1 lb flank steak, left unsliced
Juice of 2 limes
3 cloves garlic, ran through a garlic press, or chopped
½ of a jalapeno, seeds and ribs removed, chopped (more or less to taste)
2 Tbsp fresh cilantro, chopped
¼ cup olive oil
½ tsp ground cumin
¼ tsp ground paprika

Place the flank steak in a resealable container or heavy zip-lock bag. Add the remaining marinade ingredients and let rest for several hours, or as long as overnight. Turn/shake the bag occasionally to coat everything evenly.


Meanwhile, start the salsa – it needs to go on the grill first.

Fire-roasted Red Pepper and Corn Salsa

2 red peppers, seeds and ribs removed, cut into thirds
1 onion, peeled and quartered
1 Tbsp olive oil
Salt and pepper
2 ears corn, shucked, but with as much of the stems left intact as possible.
One 16-ounce can black beans, rinsed and drained
1 tsp cumin
1 Tbsp fresh flat-leaved Italian parsley, chopped
2 Tbsp fresh cilantro, chopped


Prepare your grill to obtain medium to medium-low heat.

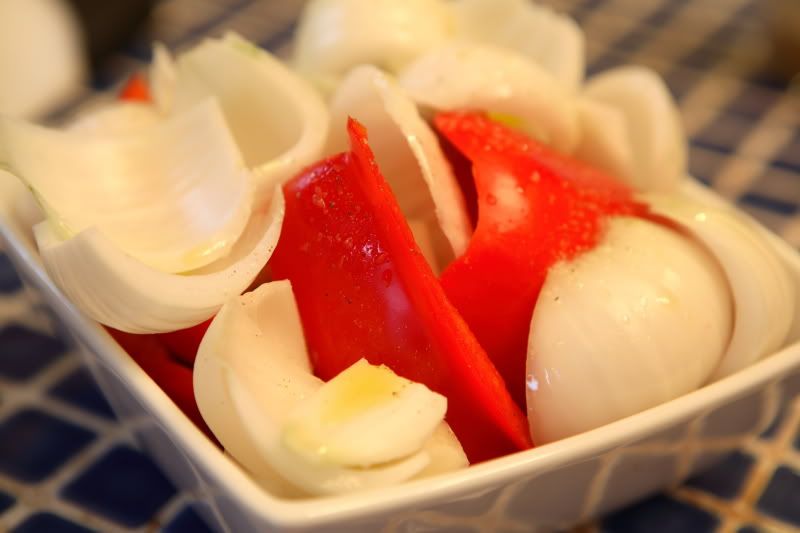
Place the red peppers in a medium bowl. Add the onion, separating each quarter into individual pieces. Drizzle olive oil over the onion mixture; sprinkle with salt and pepper. Toss to coat all pieces.


Carefully place the onion mixture on your grill (you might experience a brief flare-up due to the olive oil). Put the shucked corn on the grill at this time, too. Grill over medium to medium-low heat, turning often, until the skin of the peppers starts to blister and the vegetables are cooked through and lightly charred. (Yes, charred skin is ok!)

If you’re making the homemade refried beans, start the first step of that recipe while you’re waiting for the peppers and corn to grill. Depending on how fast you are, you might also find this is also a good time to mix up guacamole.

Remove the cooked veggies to a flat working surface, such as a heat-resistant cutting board. Allow the vegetables to cool slightly, then carefully use your fingers or a knife to remove the skins of the peppers and any other excessively charred portions of the vegetables. Roughly chop the peppers and onions, then place them in a large bowl.

Carefully cut the corn kernels off of the corn cobs. The easiest way to do this is to cut off the last inch of the tip of the corncob opposite of the stalk, creating a flat end. Place the end flat on your cutting board and use a large, sharp knife to carefully cut straight down the cob. Oh, and if you left the stalk on the end of the corncob, you’ve got yourself a nice handle that usually works out pretty well. CUT CAREFULLY! Did I mention that you should be careful while cutting that corn off? Hey, you could also go out and buy a gadget that accomplishes this task for you…but I’ve never tried it so I can’t comment on its real-world practicality. Once you get those corn kernels off of that cob, add the kernels to the onion mixture.

Add the rinsed and drained black beans, cumin, parsley, and cilantro to the onion mixture and gently stir to incorporate everything. If you’re not ready to serve the salsa yet, I recommend putting it into a foil packet and placing it in a cooler spot on your grill. It can be moved to a warmer spot and reheated right before serving. Although I prefer the salsa served warm, it is good either hot or cold, so you could refrigerate it if you didn’t want to mess around with trying to keep it warm.


Homemade Refried Beans
1 onion, processed or chopped into small pieces
1 Tbsp olive oil
1 jalapeno, seeds and ribs removed, finely chopped
One 16-ounce can pinto beans, undrained
2 Tbsp fresh flat-leaved Italian parsley, chopped
1 Tbsp fresh cilantro, chopped
1 tomato, roughly chopped


Step one: (which I recommend you complete while you’re waiting for your veggies to grill if you’re making the salsa…) Place the chopped onion and olive oil in a large frying pan with deep sides. Over medium-low heat, cook the onion until it begins to brown, stirring occasionally. If your heat is low enough, this shouldn’t require too much babysitting, so go back up and finish that salsa…

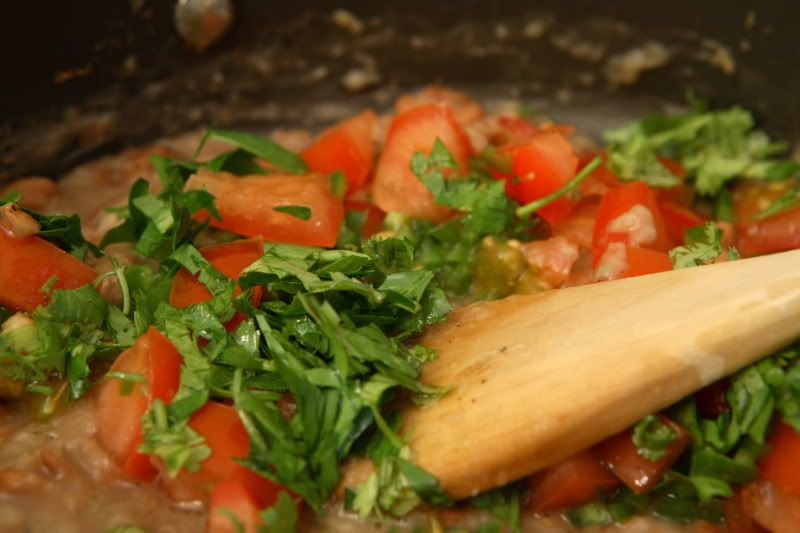
The rest of the recipe: (This only needs to heat through…so you can do this last step right before serving time.) Add the chopped jalapeno and undrained pinto beans to the pan. Use a potato masher or the back of a spatula to mash and stir up the beans. I mash about half of the beans for a variation in texture. Stir in the parsley, cilantro, and tomatoes.


For the tacos
Lettuce
Tomato, chopped
Grated cheese (I usually use Colby-jack)
Soft tortilla shells (I usually use something from the La Tortilla Factory lineup – they’re a little healthier than most tortilla options I’ve seen)


Guacamole
2 ripe avocados, halved and pitted.
Salt and pepper
Juice of ½ to 1 lime (to taste)


Use a large spoon to scoop the avocado flesh out of the skins. Add salt, pepper, and lime juice to taste. I don’t have a large mortar/pestle, so I just use a big wooden spoon to mash it all up until it’s smooth.


Once you’ve got everything above done, grill up that steak! Prepare your grill to obtain medium high heat. Flank steak is best served rare or medium-rare. Times will vary, but if you're grilling over medium-high heat, you’re probably looking at three or four minutes on each side. Spoon a little of that leftover marinade over the meat as it’s cooking (you boiled that marinade first to avoid those germies, didn’t you?).

Flank steak has a really obvious striated appearance. Thinly slice the cooked steak perpendicular ACROSS the stripes, NOT parallel to the stripes.


Assemble those tacos and eat! (These tacos are so filling, I find rice and tortilla chips aren’t necessary.)


Oh, and if you're a vegetarian, just omit the meat. The beans would be great spooned into the tacos, or try grilling up some marinated portabellas...

Sunday, May 17, 2009

"Pineapple Mint" Chicken

A friend of mine was surfing the internet recently and found this recipe for Mojito Chicken, by Guy Fieri of Food Network fame. We agreed the recipe needed a few changes (Baking marinated chicken? Obviously it should be GRILLED!) but we both thought the basic idea sounded good. My friend apparently went home and made the recipe for his family, although I’m not sure what kind of changes he made to it. He did mention he cut back on the amount of mint suggested in Guy’s original recipe, and I know he grilled the chicken.

I studied the original recipe further, read the accompanying reviews, and came to the conclusion that the recipe was probably too salty, too minty for my taste, and was a lot more elaborate than necessary.

I made one other conclusion: regular grocery store mint just wasn’t going to cut it. I never much cared for the strong mint flavor of the stuff the grocer carries, anyway.

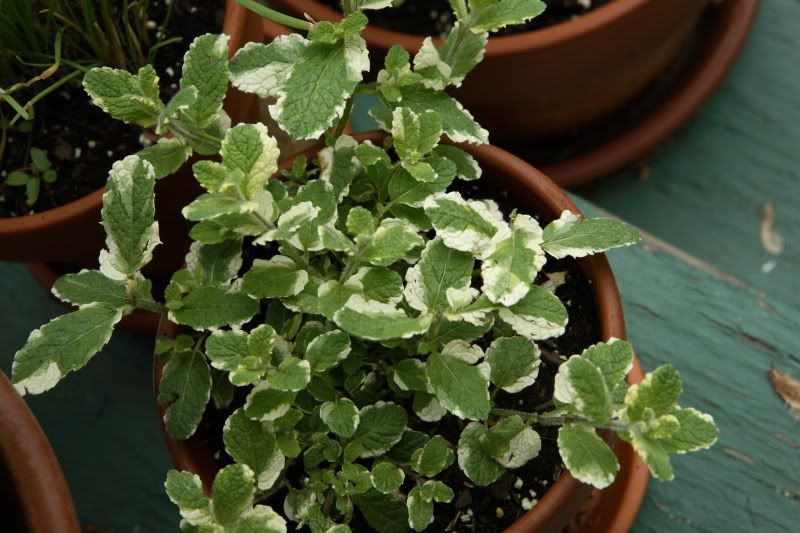
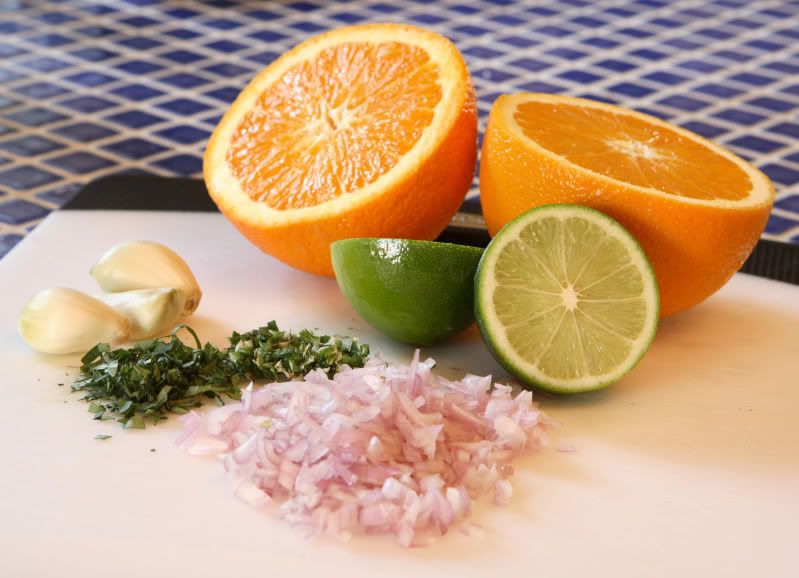
The last time I was at the greenhouse/nursery, I saw some interesting varieties of herbs, including a variety of mint called “Pineapple Mint.” It’s beautiful, as far as herbs go, and has fuzzy stems, with ivory and green leaves. True to its name, its leaves have the unmistakable aroma of freshly-cut pineapple. I initially passed on the plant because I was already over budget as it was. But when I saw this recipe and thought of the possibilities presented by Mojito Chicken, I immediately knew I’d have to go back and buy the Pineapple Mint plant for the sole purpose of trying it with this recipe.


$3.50 well spent. Delicious. Not overwhelmingly minty, just right.

I’d totally recommend picking up some of this plant if you ever see it around!

So, I ended up modifying quite a bit of the original recipe – same basic flavors, but different quantities and different method. It’s a lot easier now – mix up some ingredients and wait for the marinade to do its magic. There's no pineapple in the recipe because there wasn't any in Guy Fieri's original recipe, so the recipe title is only a reference to the variety of mint I used.

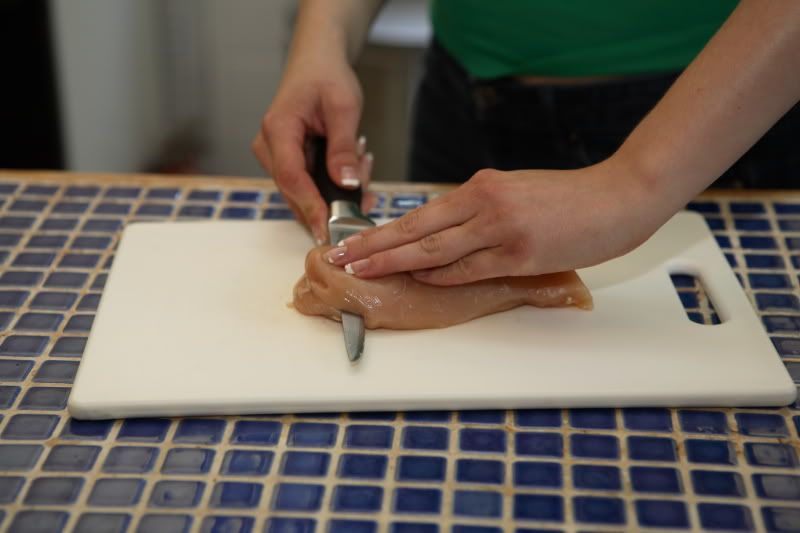
Usually when I’m grilling chicken breast halves, I slice them horizontally into two flat, thin pieces. They cook more evenly (no dried out, overcooked edges or undercooked centers!). If you have a long, thin, sharp boning knife, give it a try. (Carefully! Don’t cut yourself!) You can use a chef’s knife too, but a boning knife is easier because there's less knife surface area to stick to the meat. This also helps with portion control...it looks like you're eating a full half of a breast, but you're not.


“Pineapple Mint” Chicken
Serves 4-6

2 to 4 halves chicken breast
3 large cloves garlic, pressed or finely chopped
1 large shallot, finely chopped
1/4 tsp cumin
1 Tbsp fresh oregano, finely snipped
1/2 tsp kosher salt
1 tsp freshly ground black pepper
1 tsp paprika
1 Tbsp fresh Pineapple Mint, or another mint variety
2 oranges, juiced
1 lime, juiced
1/4 cup rum (If you’re anti-rum, you could sub it out for chicken stock, but the taste won’t be the same.)
1/4 cup olive oil

Place the chicken pieces in a dish or heavy plastic bag – something you can use to hold them while they marinate.


In a medium bowl, mix together remaining ingredients. Pour over chicken. Allow chicken to marinate at least two hours, up to eight hours.

Grill chicken over medium-high heat only until chicken is no longer pink. Turn once. While chicken is grilling, bring the leftover marinade to a boil (kill the germs!). Spoon boiled marinade over chicken as it is grilling.

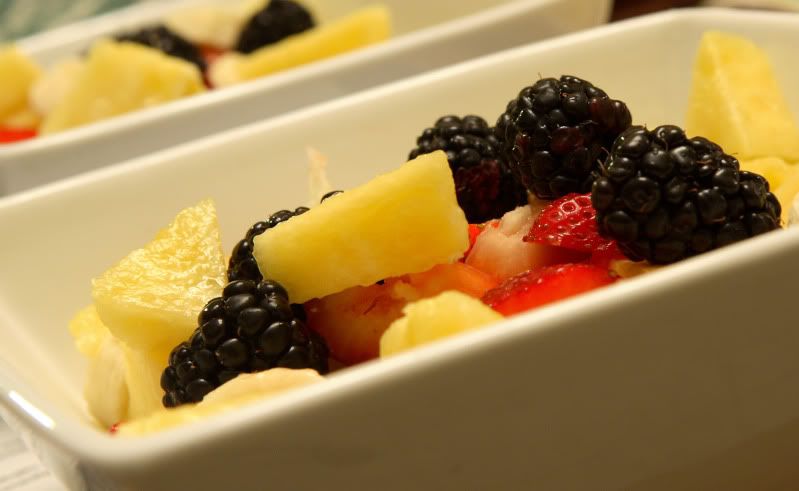
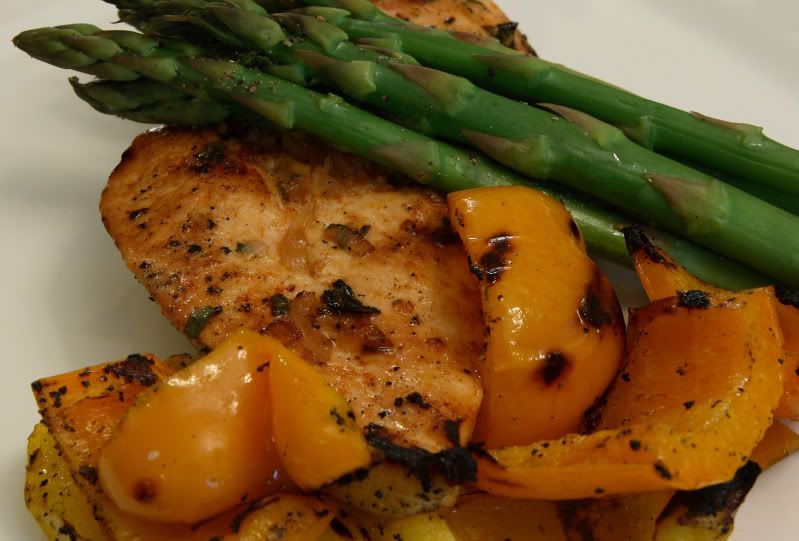
I served this with a fruit salad (pineapple, strawberries, blackberries, and bananas!) and grilled asparagus and bell peppers. Simple and delicious!


Saturday, May 16, 2009

Herbs - My Kitchen "Garden"

I happen to NOT have much of a green thumb. Not that I maybe couldn’t learn how to garden, but I am not sure I’d have time available to keep up with a garden. But I do like fresh herbs, and I am too cheap to buy them from the grocery store every time I want to make dinner.

So I compromise.

I pick up these cute little plugs of already-started plants from my local greenhouse. The hard part – getting the things to grow in the first place – is already done. Now I just have to try not to kill them.

I put these little guys into pots, not into the ground, because I am not a fan of weeding.

When comparing my costs to the cost of buying herbs at the grocer, as long as I get two meals’ worth of yield out of each plant, I come out ahead financially.

The other advantage of growing your own herbs is that you are no longer limited to making an entrée that involves only whatever herbs the grocer happens to have in stock.

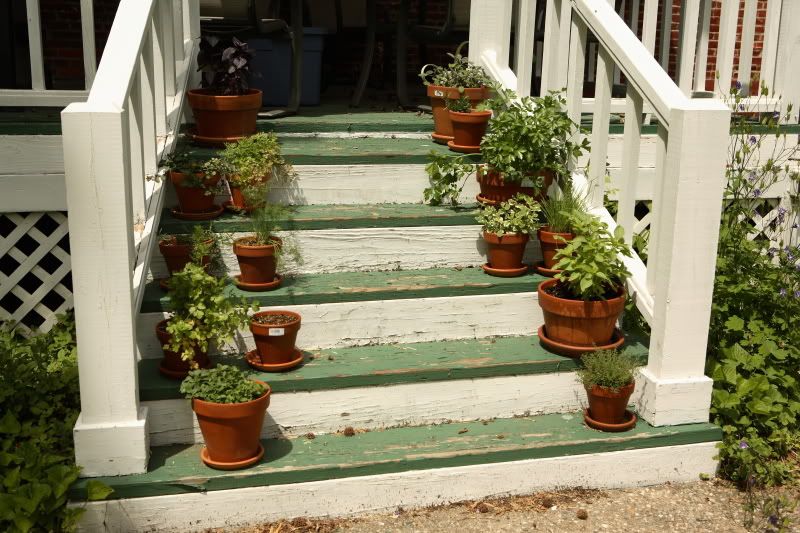
Here’s a sample of what I’m trying to keep alive this summer:


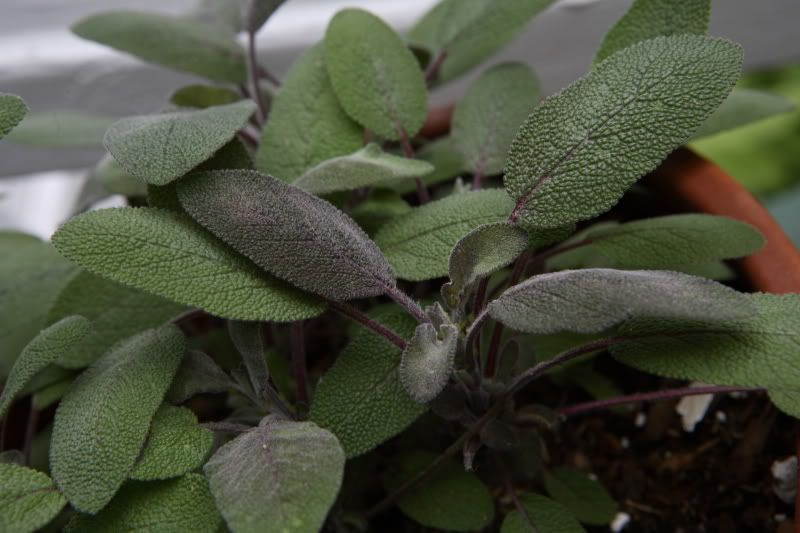
Purple Sage
I tried this last year for the first time, and it really boosted the flavor of my Brown Butter Pasta Sauce recipe. So far, this year’s is just as good!


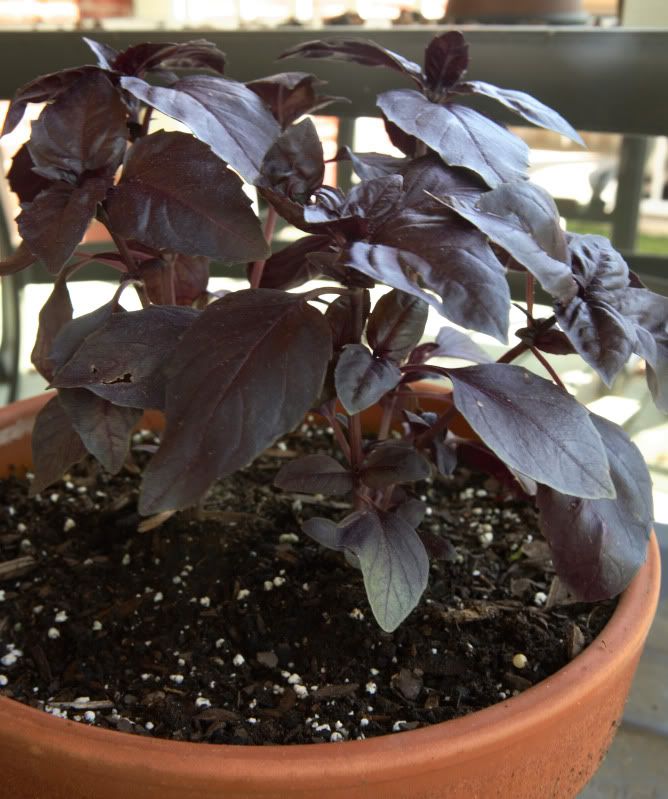
Purple Basil
I love basil, and I especially like experimenting with something other than comparatively boring green basil! The purple basil is so pretty! Last year’s purple basil didn’t fare too well, so I’m hoping this year’s will last a little longer.


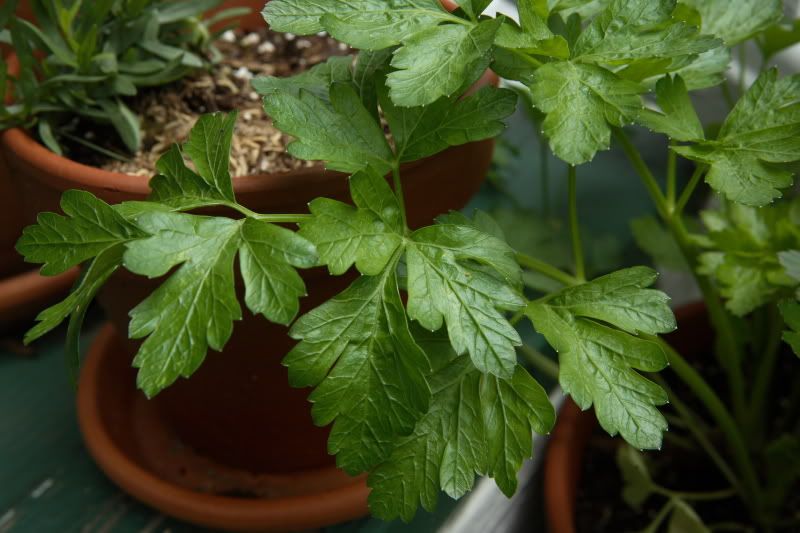
Italian Parsley
I can’t cook without parsley!


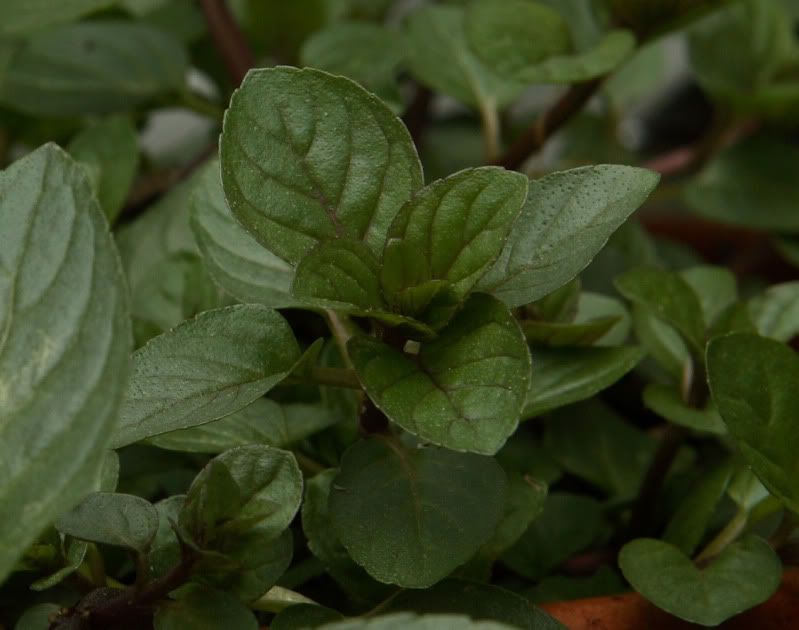
Chocolate Mint
This is an awesome plant. It really and truly tastes like a York Peppermint Patty! I’m not usually a huge mint fan, but I keep this one around so I can use it as garnish on chocolate desserts! And it’s a great conversation piece.


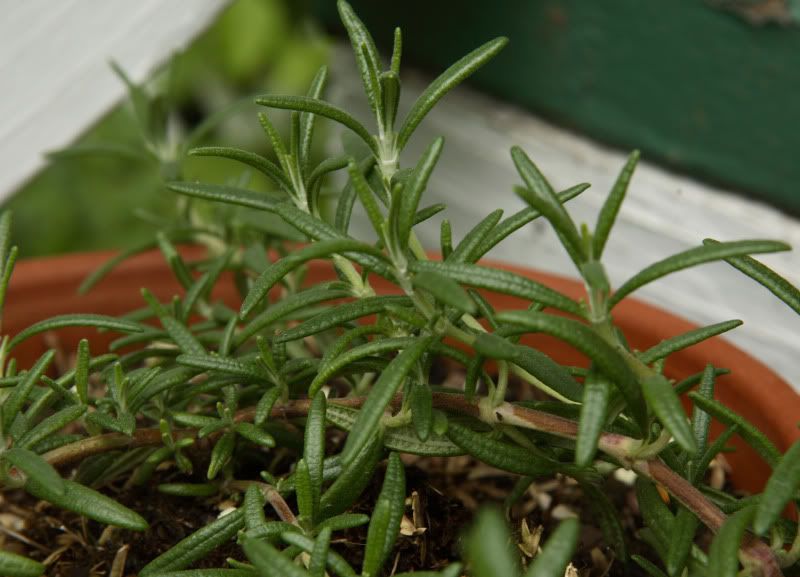
Rosemary
Another staple in my kitchen. I love using this in marinades, or using the branches as skewers for kebobs. Although, this year I bought Creeping Rosemary, and it doesn’t look like the stems will work as skewers because they’re a lot more flexible than regular rosemary.


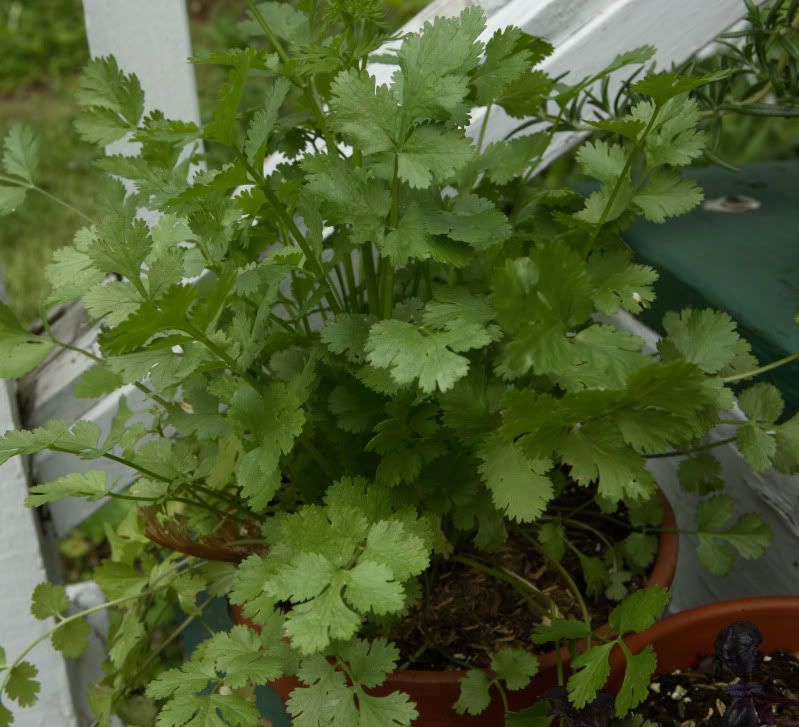
Cilantro
Fresh cilantro really makes Mexican food outstanding!


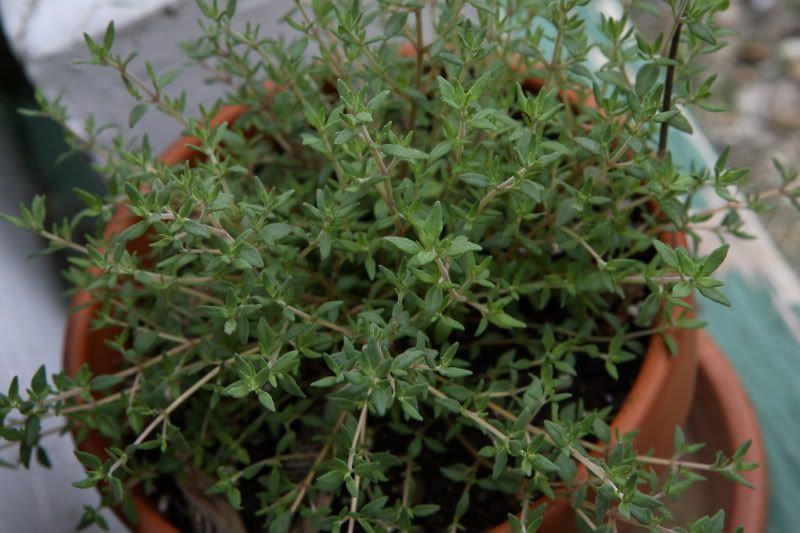
Thyme
Another great herb, so many uses! This one goes right along with rosemary in many of my marinades!


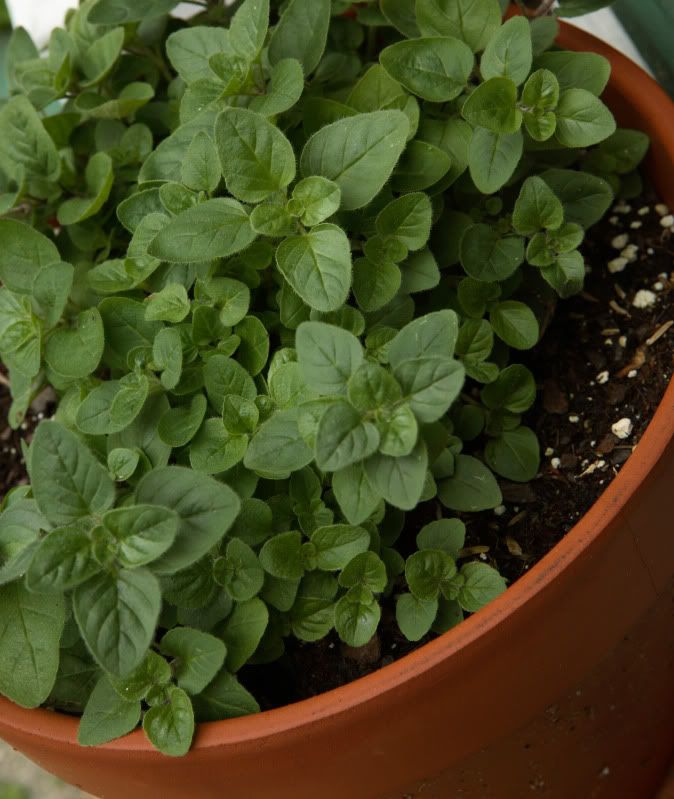
Oregano
So much more than just a pizza herb!


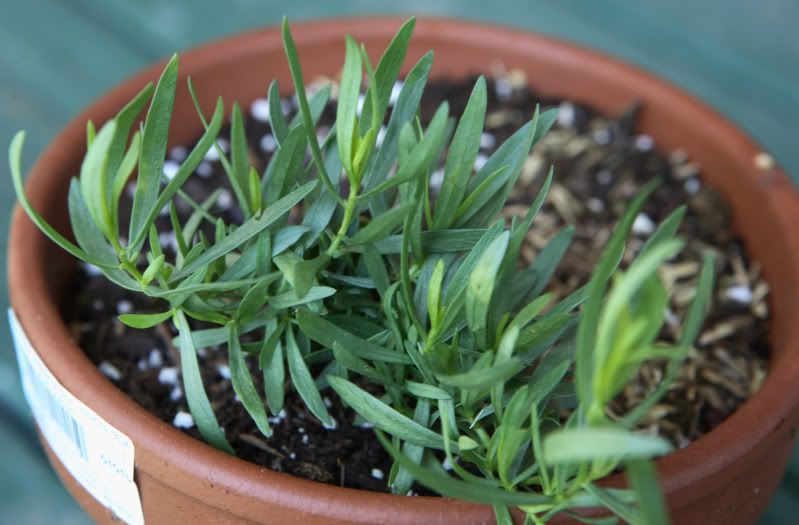
French Tarragon
Unfortunately last year's plant died before I could do anything with it. I'm hoping for better results this year!


Lemon Basil
This makes killer pesto! I can’t wait until these babies are full enough to make pesto sauce without totally decimating the plant! Last year I bought Lime Basil because they were out of lemon, and while it was good, the flavor just wasn’t the same. Plus, Lemon Pesto leaves grow larger, and are easier to harvest.

Speaking of harvesting leaves, here's some tips for those of you that are beginning herb gardeners:

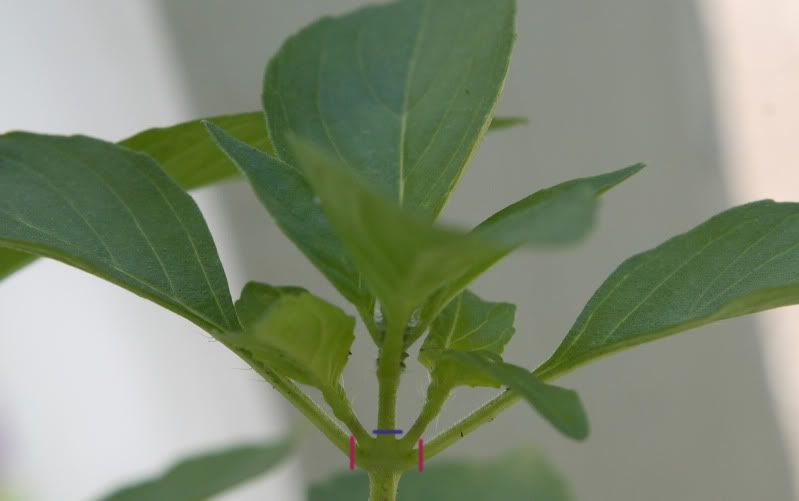
Don’t strip the stem bare (if you really must take all the leaves off of a stem, snip the stem off, don’t just pick the leaves off). If you're snipping part of the stem off, cut above new growth, leaving it behind to replace what you just took off. In the Lemon Basil photo shown below, you'd be cutting at the blue line. Or, on many herbs, there are often larger leaves that have grown just underneath where the newest leaves are growing. You can take those larger leaves off too. Cut at the pink lines in the photo below. But, leave behind the new growth - in this photo, that's the two stems in between the blue and pink lines..


If you pick more than you need, stand the herbs up in a cup of water in your fridge. Or, if they’re too small to “stand,” wrap them up in a moist paper towel and use them up in tomorrow’s supper.

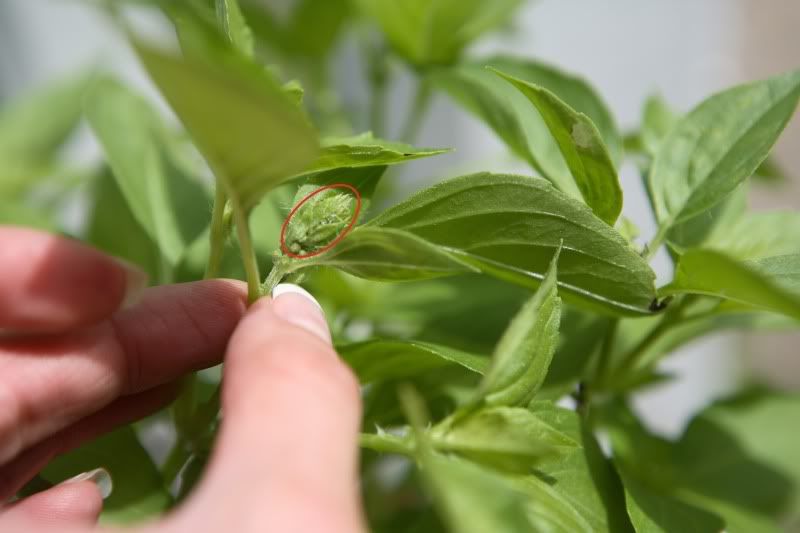
To channel your plant’s efforts into new plant growth, pick off any flowers that start to grow. It takes awhile for the buds to look like actual flowers, but as soon as you see a fuzzy green bud, pinch it off. I circled the bud in red in the photo below.


Now, I need a tip from YOU! A cute little rabbit has made a home under the tree in my backyard. I don't mind having him there, but he keeps nibbling away at my plants! How can I convince him that this isn't his own personal buffet? A fence isn't really feasible because the pots are set on my porch steps, a high traffic area. And I don't really want to spray the plants with a bunch of chemicals I don't want to eat myself.


Oh, apparently I already managed to kill one of the plants. I bought a curly-leaved purple basil variety, and it didn't last long. I didn't even get a picture of it! Actually, in all honesty, I think the rabbit ate it, because the plant is just clean gone.

Thursday, May 14, 2009

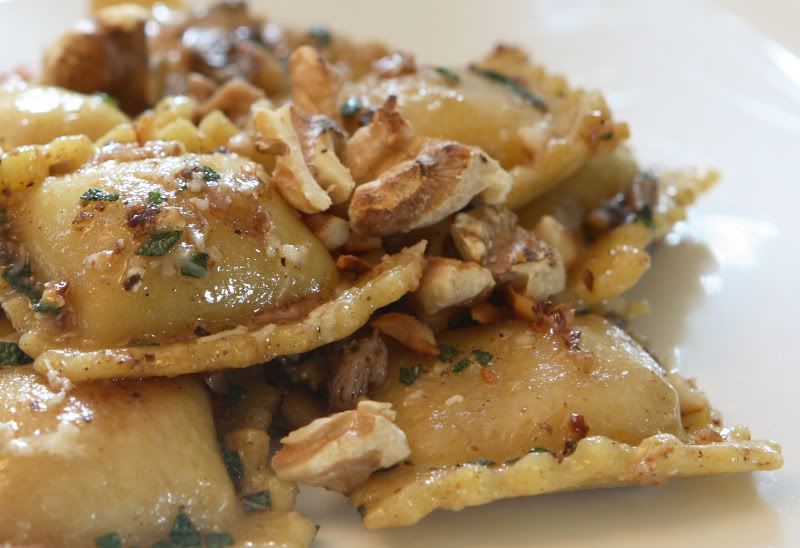
Brown Butter Pasta Sauce on Butternut Squash Ravioli

Have you ever had brown butter pasta sauce? It’s less common, at least, around here (I can’t recall seeing it in a restaurant recently). I do love it, partially because it’s delicious, partially because it’s a nice change of pace from marinara or alfredo sauce, and partially because it’s one of the easiest pasta sauces to make.

That said, to be successful with the finished product, have all of your ingredients ready to go by the time the pasta is done cooking. You’ll need to be able to dump it all into the pot at the appropriate time and if you take too long, your pasta will cool off too much. But that’s the most difficult thing about it. (To alleviate that problem, you could make the sauce in a different pan as the pasta is cooking...but that means you'll have more clean-up...I'm lazy...)

Another thing – yeah, this isn’t exactly health food... It is called Brown BUTTER Sauce for a reason!

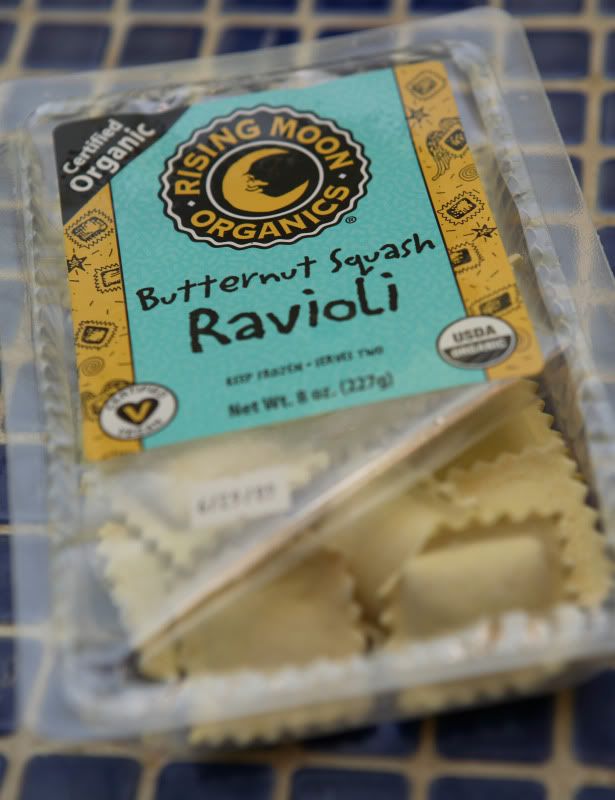
We like the Rising Moon brand of ravioli – they have a wide variety of flavors to try. My favorite is the Butternut Squash kind, especially when served with this sauce. Most of the flavors I’ve tried are pretty good, though.


This is easy to make vegetarian – just omit the prosciutto. Add a pinch of coarse salt if you do that, though, because prosciutto’s very salty!

Brown Butter Pasta Sauce on Butternut Squash Ravioli
Serves 4

2 8-ounce packages butternut squash-filled ravioli (16 ounces total)
1/2 cup walnuts, roughly chopped
About 3 ounces thinly sliced prosciutto, finely diced
1 Tbsp fresh sage, finely chopped
1/4 cup freshly grated Parmesan cheese, plus more for garnish
1/4 tsp freshly grated nutmeg
4 Tbsp butter
1/4 cup finely diced portabella mushroom
Freshly ground black pepper


Cook the pasta according to package directions.

Meanwhile, prepare the sauce ingredients:

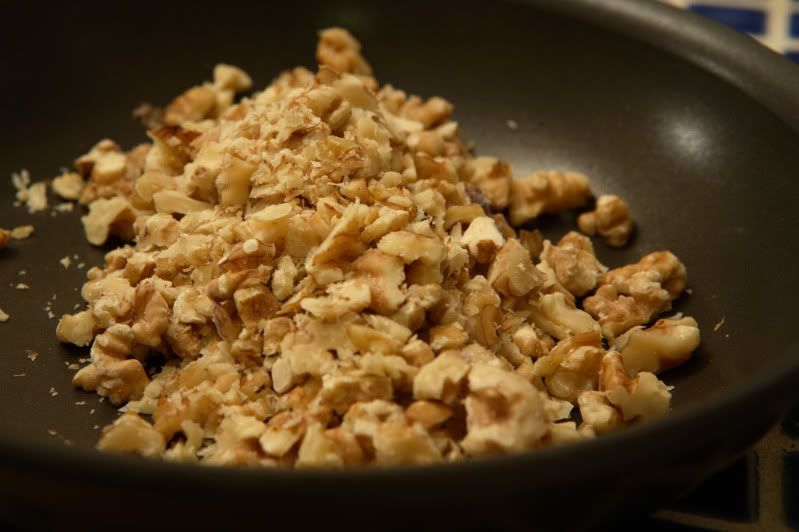
Roughly chop the walnuts. Toast them in a skillet over medium heat, stirring often, until aromatic and lightly browned. Remove the nuts from the heat and set them aside.


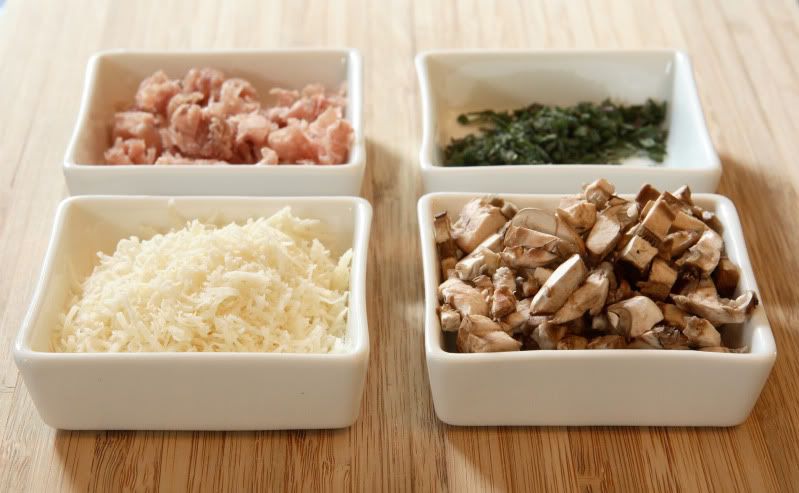
Finely dice the prosciutto; set it aside. Finely chop the sage; set it aside. Grate the cheese. Keep your nutmeg and it's grater close at hand, so it's ready to go too.


Once the pasta has cooked, drain it well and set it aside. Add the butter to the empty pasta pot. Stir it over medium heat until it has melted. Continue to cook the butter, stirring frequently, until it begins to turn golden brown – this will take just a few minutes. As soon as it begins to become golden brown, add the mushrooms, grated nutmeg, black pepper, diced prosciutto, and chopped sage. Over low heat, stir to heat through; the mushrooms will cook very rapidly in the hot butter.

Return the pasta to the pot. Sprinkle the parmesan over the pasta and gently stir to distribute the cheese evenly and coat the pasta with the sauce. Garnish with additional grated parmesan cheese and the toasted nuts.

Sunday, February 24, 2008

Fettuccine with Spinach Pesto


This is one of my favorite recipes to make on a Monday night – the busiest night of my week, since I have a class to attend that night. I don’t have much time to make dinner that night, so we often have this since it is so quick to prepare!

I love this dish – it’s so bright, flavorful, and easy!

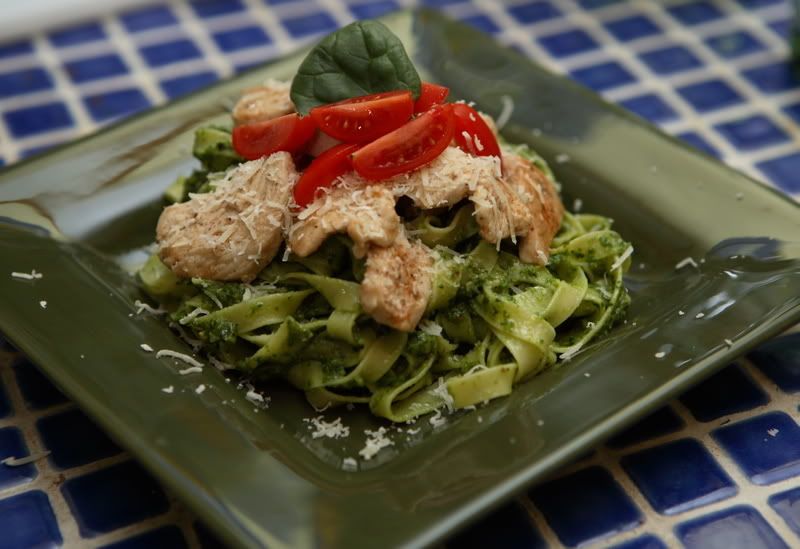
In the version shown below, I used turkey breast tenderloin, but I usually just make it with chicken breast. Either choice is delicious.

The original recipe came from the March 2007 issue of Everyday Food magazine. I make this recipe so often that I don’t even look at the original version anymore, so the recipe I’ve posted here reflects any changes I have made.

Fettuccine with Spinach Pesto
Serves 4

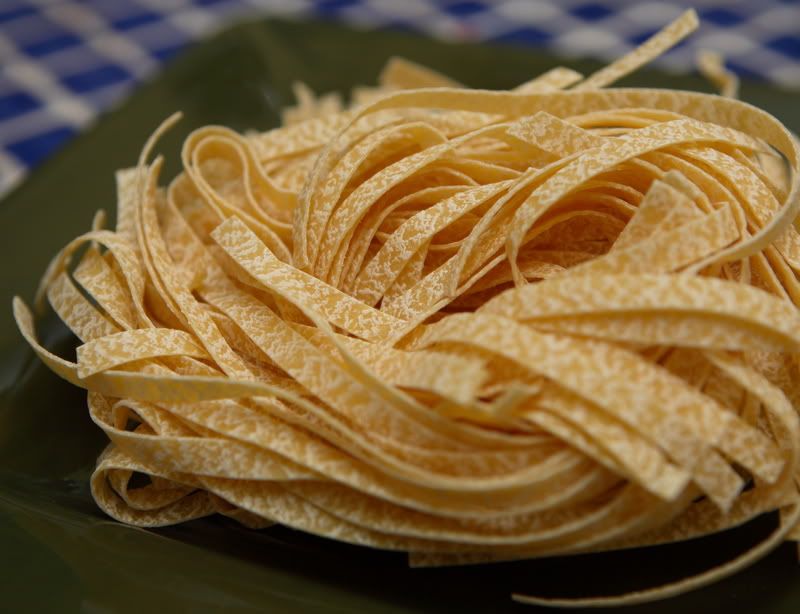
12 ounces fettuccine
2 boneless, skinless chicken breast halves, or an equivalent amount of turkey breast
¼ cup pine nuts
10 ounces fresh baby spinach
3 ounces Parmigiano-Reggiano cheese, cut into chunks, plus a small additional amount for garnish
3 cloves garlic
Zest and juice from one lemon

Cook pasta according to package directions.


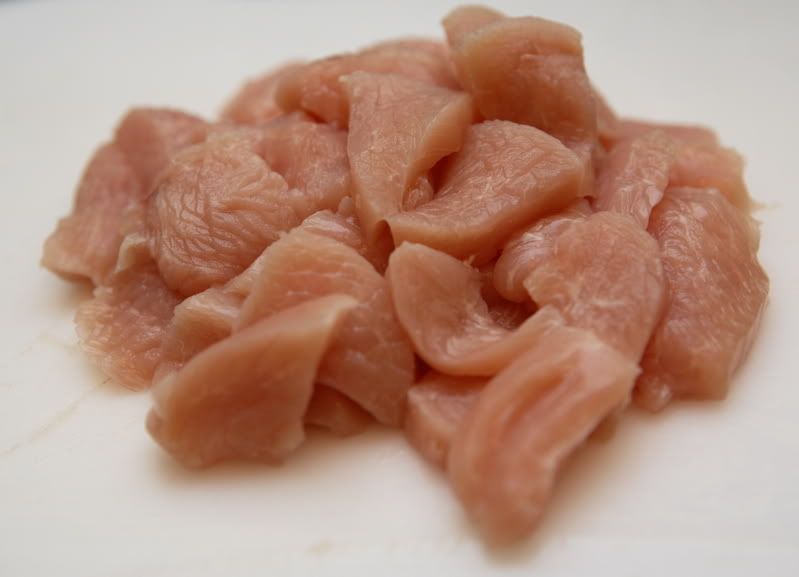
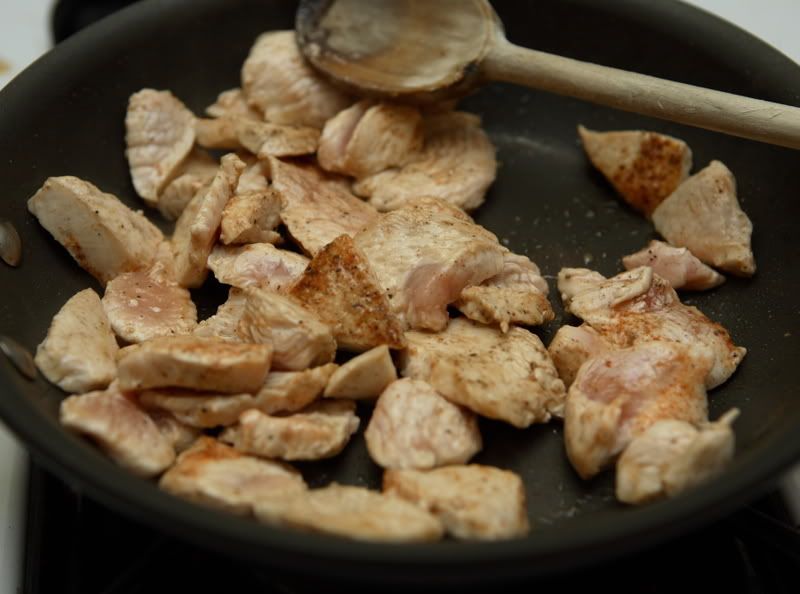
Meanwhile, chop poultry into bite-sized pieces.


Sprinkle poultry with salt and pepper. In a large skillet, cook the meat over medium-high heat until it is barely done


In a small skillet, toast the pine nuts over medium heat, stirring them constantly and watching them carefully to ensure they do not burn. Once they turn golden brown and start to smell toasted, remove them from the pan; set them aside to cool. Reserve 1 tablespoon for garnish.

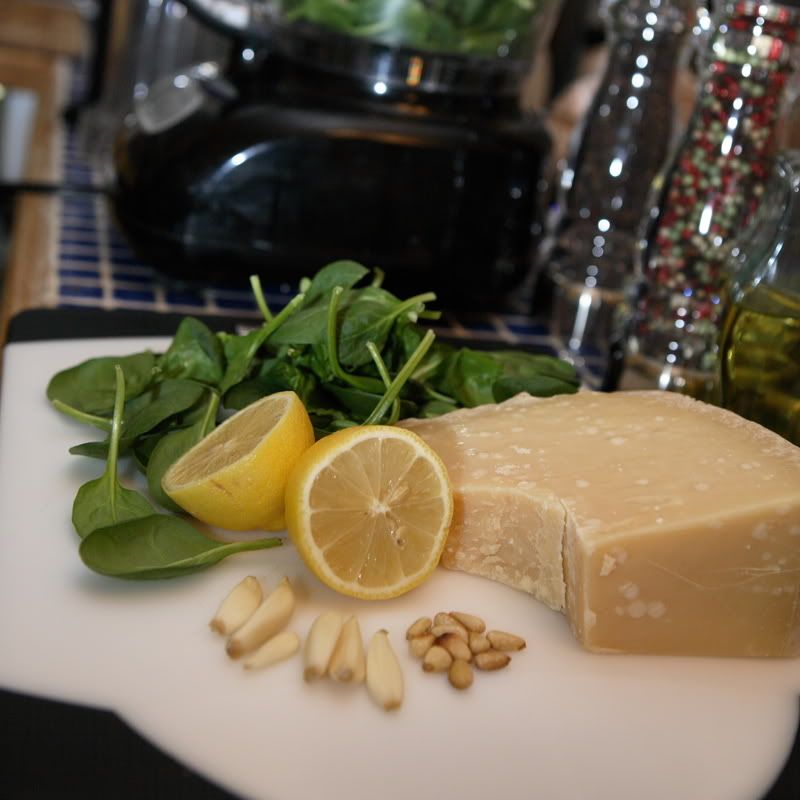
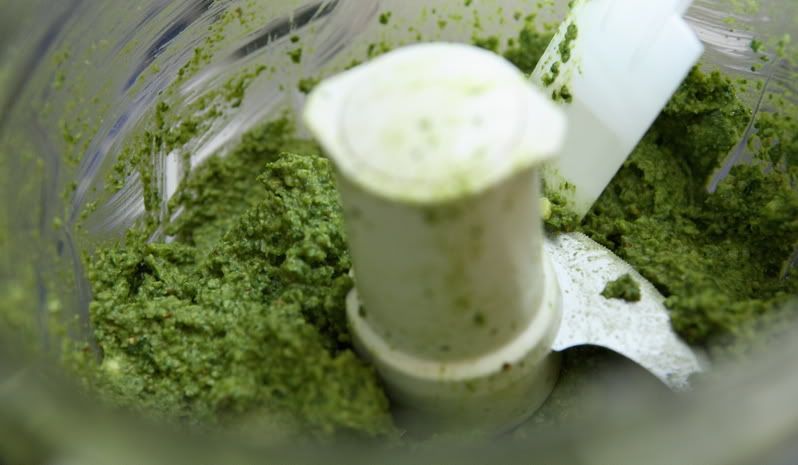
In the bowl of a large food processor, place the spinach, parmesan, 3 tablespoons toasted pine nuts, garlic, lemon zest, olive oil, and lemon juice. Process until everything is finely chopped, scraping the bowl as needed to ensure everything is evenly chopped.


While pasta is draining, place processed spinach mixture in the empty pasta pot over medium heat. Stirring constantly, cook mixture for 1 or 2 minutes, until the sauce is heated through. Add the drained, cooked pasta; stir to coat evenly. Garnish with the remaining tablespoon of pine nuts and parmesan cheese.

I also chopped up some cherry tomatoes and used them alongside a spinach leaf for garnish.