I know it’s still a little early to talk Christmas (I don’t like seeing the Santa Claus and Christmas tree decorations in stores while I'm shopping for a Halloween costume either), but today is November 1, and if you are the type who likes to hand-make your Christmas cards, you’ve got to start thinking about them kind of early. If you’re hand-making cards this year, if you haven’t already started on them, you’ll need to start soon.
I love to make handmade greeting cards. If I had all the time in the world, I’d hand make all my Christmas cards, and I’d write personalized notes inside each one. In recent years, I haven’t had time to do all of that...life has just been too crazy busy lately.
Several years ago I felt particularly ambitious. I decided it would be cute to make little Christmas cards with an original recipe included. Fortunately I decided this early enough in the year that I had time to pull it all together.
I chose to feature a cookie recipe primarily because of space limitations. Cookie recipes are usually pretty straightforward: cream the fat and sugar, add the wet ingredients, then stir in the dry ingredients, followed by anything chunky like chocolate chips or nuts. There are usually not a lot of complex instructions to write out (no primer on whipping egg whites, for example), so the recipe is short enough in length that it doesn’t take up much physical space on a small index card.
Another reason I chose a cookie recipe: baking cookies is a classic Christmas activity for my family. My sister and I make batches upon batches every year. A cookie recipe enclosed in a Christmas card just seemed to “fit.”
So, I needed a good recipe – chocolate, of course. I came up with this triple-chocolate cookie recipe. I tested and retested it several times in my kitchen because I have several great cooks spread throughout my family, and I didn’t want to give them something that would end up flopping in their kitchen. (I think I even asked my mom to test the recipe in her kitchen, too.) After a little bit of adjustment here and there, the recipe was ready to go. Now I just needed a way to present the recipe, and a greeting card to go along with it.
I thought long and hard about exactly what the Christmas card should look like. I have always liked the retro look of polka dots, and since the cookies were chocolate, a chocolate-colored card with some kind of polka-dotted paper seemed to fit the bill. But I couldn’t find any polka dotted paper that was just right (all the dots were either too large or too small for what I envisioned).
Rather than settle for something less satisfactory, I ended up designing my own polka-dotted paper in Photoshop. I printed it out on my color laser printer, deckled the edges, and wrapped it around chocolate brown cardstock I got for free from Archiver’s (if you shop there often, you’ll know they have those great Free Cardstock! coupons). Bonus, the Christmas cards didn’t cost too much to make!
I baked up one last batch of cookies and shot a few pictures, one of which I Photoshopped alongside an as-abbreviated-as-possible version of the recipe. I used brown papercrafting rivets to attach the printouts to the front and back sides of recipe card-sized cardstock. Voila, my recipe card insert to my Christmas greeting card.
Unfortunately it’s been several years since I did this project, so I don’t have any of the finished cards left. (Silly me, I mailed them all.) If you were one of the recipients of those cards, and still have it floating around somewhere, let me know so I can borrow it and take a picture of it! Therefore, as of right now, I have no pictures, so you’ll just have to imagine the card in your brain. Aside from what I’ve already described, it was cute, but pretty basic: just a fold-over card with a place to write a Christmas greeting. The thickness of the cardstock protected the enclosed recipe card from the mail sorting machines at the Post Office.
For your viewing pleasure, I do have the file of the polka dot paper saved (I made two color variations).


I also still have the Photoshop files I used to do the card layout.
If you’re not into making a zillion Christmas cards but want a nice hostess gift for someone, you could make up a batch of the cookies, type up or handwrite a cute recipe card, and package it all in a cute Christmas tin.
Or just forget the crafty stuff and make the cookies anyway! Yum!
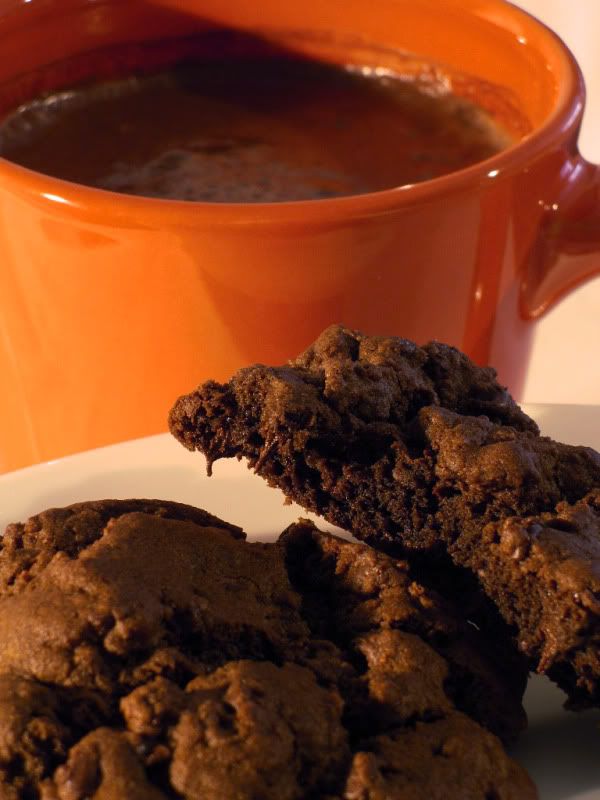
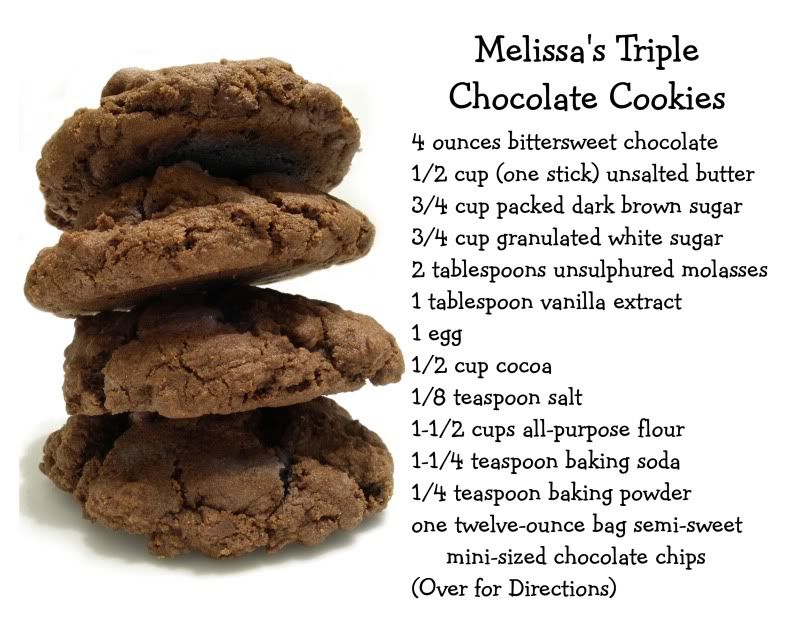
Triple Chocolate Chip Cookies
Makes 2 dozen cookies
4 ounces 70% cacao dark chocolate (In my most recent batch, I used Lindt, but I have made it with both Scharffen-Berger 70% and with Baker's brand chocolate.)
1/2 cup unsalted butter
3/4 cup packed dark brown sugar
3/4 cup granulated sugar
2 Tbsp unsulphured molasses
1 Tbsp vanilla
1 egg
1/2 cup cocoa
1/8 tsp salt
1-1/2 cups all-purpose flour
1-1/4 tsp baking soda
1/4 tsp baking powder
12 ounces semi-sweet mini chocolate chips
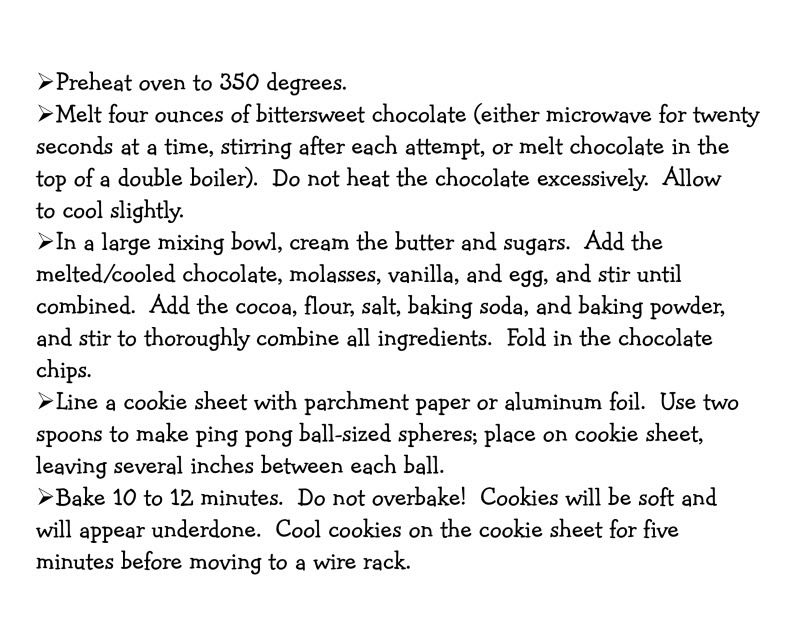
Preheat oven to 350 degrees F. Roughly chop the chocolate.
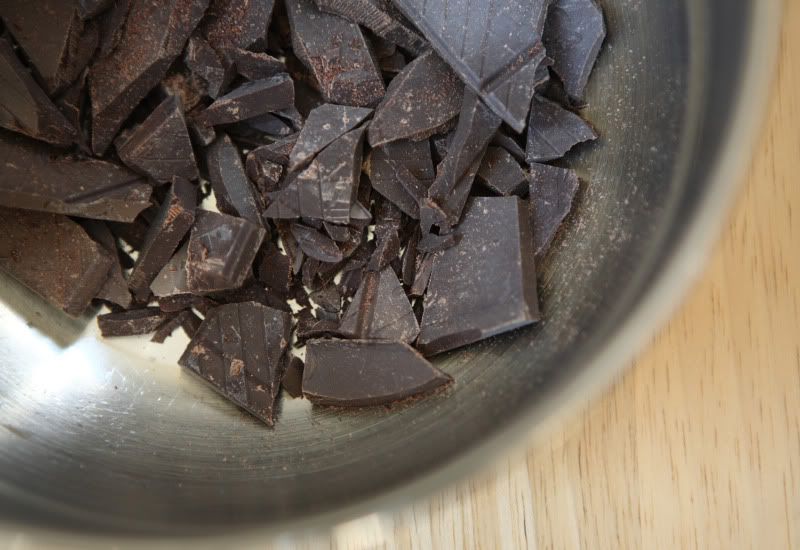
In the top half of a double boiler, melt the chocolate, stirring frequently. Do not heat the chocolate excessively. Set it aside and allow it to cool slightly.
In a clean large mixing bowl, cream together the butter, brown sugar, and granulated sugar. Add the melted and cooled chocolate, molasses, vanilla and egg, and beat until combined.
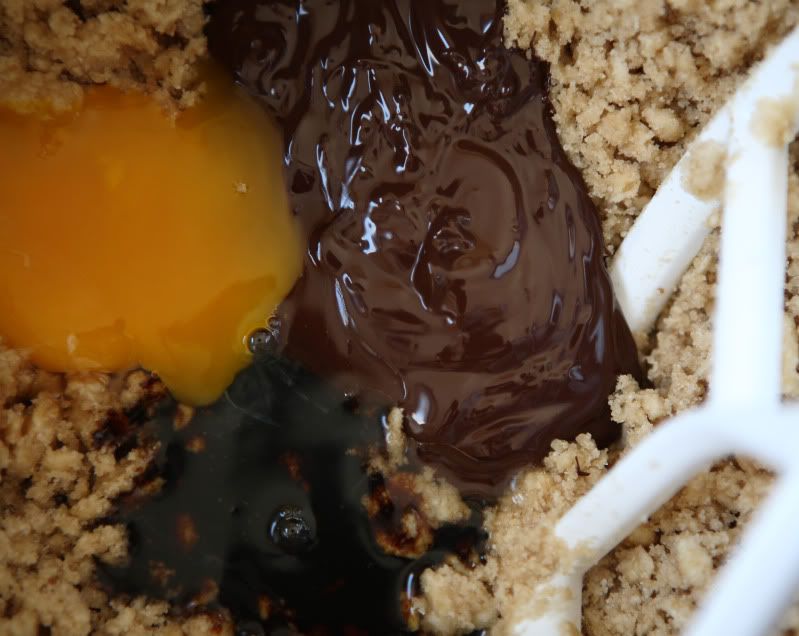
Add the cocoa, salt, flour, baking soda, and baking powder. Stir to thoroughly combine all ingredients. The dough will be stiff and might seem overly dry, but will hold shape when pressed together. Add the chocolate chips; stir to distribute evenly throughout the dough.
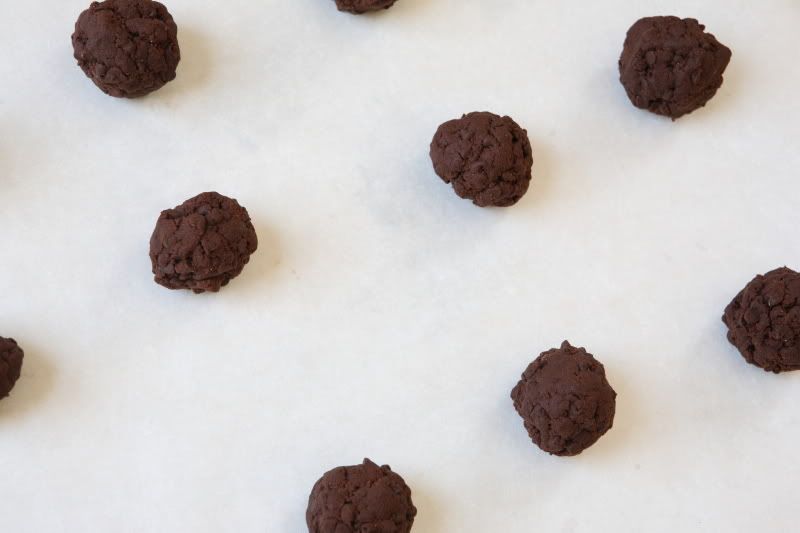
Press dough together into ping pong ball-sized spheres on a cookie sheet lined with foil or parchment paper, spacing them several inches apart. Each ball of dough should weigh approximately 1.5 ounces.
Bake 10-12 minutes. Whatever you do, DON’T overbake the cookies! They will still be soft – almost too soft - when they are done.
Cool the cookies five minutes on the cookie sheet before transferring the foil/parchment to a wire rack. As the cookies firm up, they can be transferred directly to the rack to complete the cooling process. Store them in an airtight container.
No comments:
Post a Comment