Monday, December 27, 2010

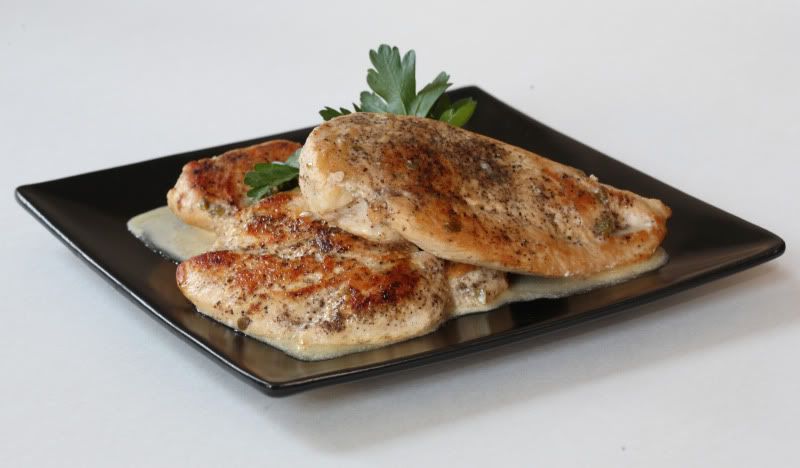
Chicken Picatta


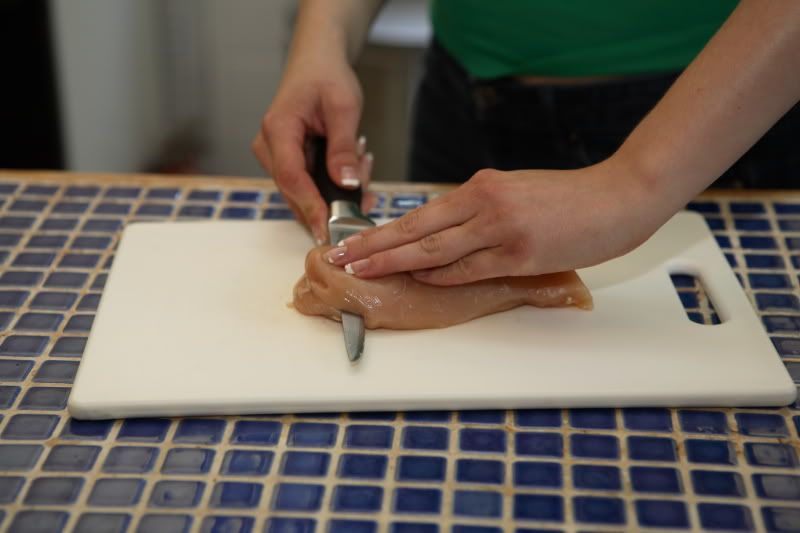
Want to know a secret I use to help with portion control?  This particular recipe involves chicken, but my little secret also works well with pork chops or even steaks.  And although I have mentioned it before on this blog, I only devoted a few sentences to it, so it is worth mentioning again.    Whenever possible, I slice my chicken breasts in half horizontally, like this:


The end result:  Two roughly equal-sized pieces of meat.  One serving of meat has become two.  Yes, they are thinner servings, but because the cut still looks (from the top) like it’s the same sized piece of meat, your brain is fooled into thinking you’re eating the same quantity of meat even though you’ve reduced the size by 50%.  Sometimes, if I’m feeling particularly hungry and one cutlet just isn’t going to be enough, I’ll make both halves and have “seconds” (which still really isn’t overeating).  Or, I’ll just add some pasta or a salad to the menu to help fill me up.  Slicing the meat in half is also a great way to stretch your food dollar – you’ll get twice as many servings out of one package of chicken breasts.

This recipe is another super easy one to make.  It is delicious served with a bit of buttered noodles, something that is a rather neutral (but still delicious) side dish.  (The acidity in a tomato sauce would compete with the lemons, and a cream sauce would be too heavy and would mask the bright flavor of the Piccata sauce.  The buttery noodles complement rather than compete with the lemon-caper flavor.)

You can substitute veal for the chicken, if you like.  A veal cutlet might take slightly less time to cook than a chicken cutlet (and neither option takes particularly long to cook because both are very thin) so be prepared to pull it out of the pan pretty quickly.  There are no other changes to the recipe ingredients or preparation, so its easy to make the substitution.

When choosing a wine to use for this dish, pick something you’d drink (NOT a grocery store “cooking wine”).  Choose something dry, and not particularly sweet, because the sweet flavor will be further concentrated during the cooking process.  I usually use pinot grigio because that’s usually what I keep in the house, but you could also use a sauvignon blanc or any other dry white wine.  Plan to serve the remainder of the bottle with dinner, then you’re not opening a huge bottle of wine for one small recipe quantity.

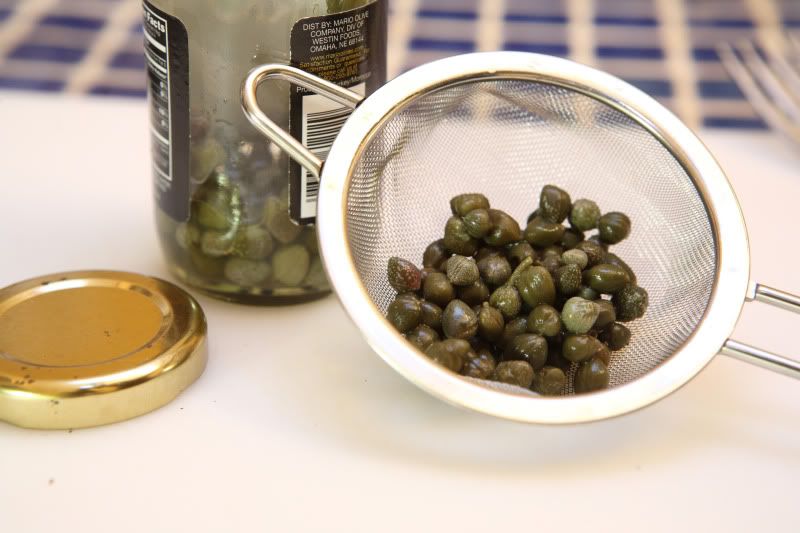
The recipe has one ingredient in it that you may or may not be familiar with:  capers.  My grocery store usually stocks these in the same aisle as the pickles, olives, mustard, and other condiments.  Capers look like this:


…and you should not omit them from this dish.  I know they seem unusual if you’ve never had them, but give them a shot because they are necessary to produce the proper flavor for the sauce (otherwise its not “piccata,” its just a lemon and butter sauce).  Capers will keep in your refrigerator for a very long time, so don’t worry about them going bad before you can use them up.  Before you add them to the dish, capers should be rinsed under cool water because they are packed in a salty brine.  I put the necessary quantity in a little sieve and run them under the tap for a few seconds.

Chicken Piccata
Serves 4

salt & pepper
4 thin, boneless, skinless chicken breast cutlets (cut from two breast halves, see the photo above)
2 Tbsp olive oil
2 Tbsp capers, rinsed & drained
1-1/2 cups dry white wine
juice of two smallish lemons
2 Tbsp butter
1/4 cup unwhipped heavy cream (not coffee creamer), or you can use half-and-half if you're out

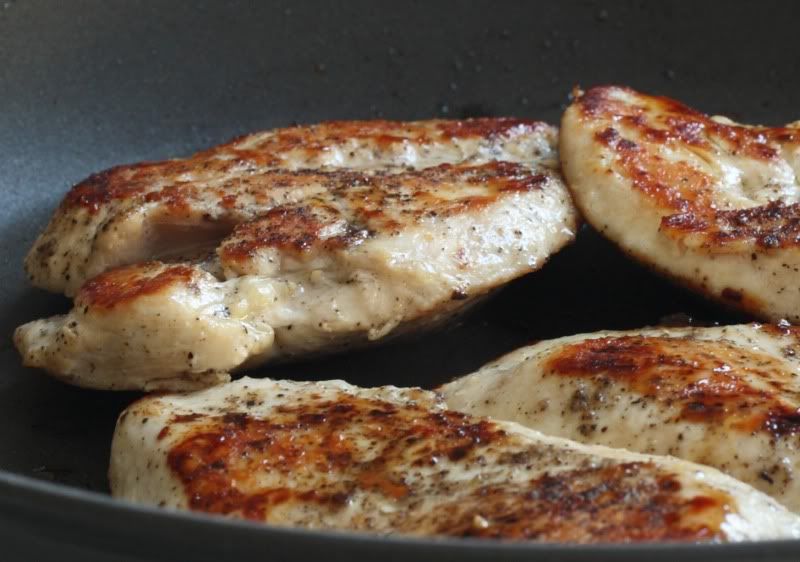
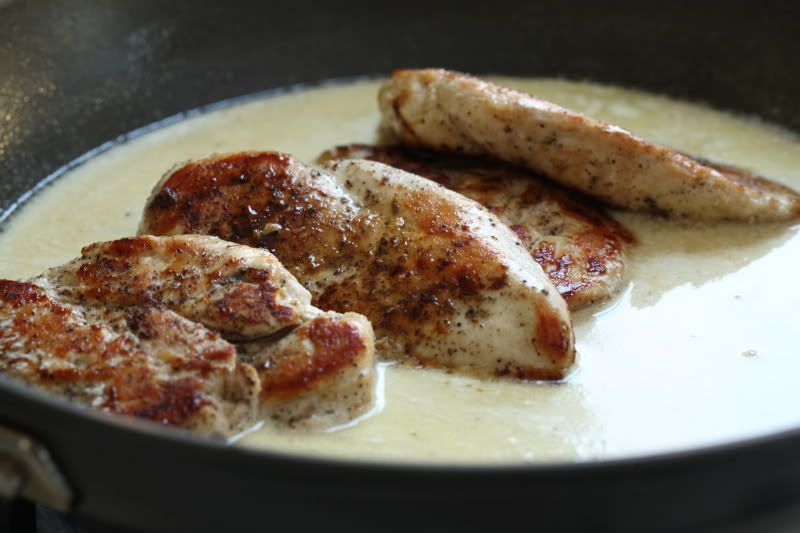
Sprinkle salt and pepper over the surface of the chicken cutlets.  In a deep skillet, over medium-high heat, sauté the cutlets in the olive oil, turning once, until they are lightly browned on both sides and the chicken is just barely cooked through.  (Don’t overcook the chicken - err on the side of slightly less done because later we’ll return the chicken to the pan to reheat it.)  Remove the chicken and set it aside.  Reduce the heat under the pan to medium.


(Anyone who says you cannot brown in a nonstick pan hasn't tried these nonstick pans.  They're awesome.  Love my Anolon Advanced cookware.)

While the chicken is cooking, place your capers in a small sieve and rinse them under cool running water.  Drain them, then give them a rough chop.  Set the chopped capers aside for later.

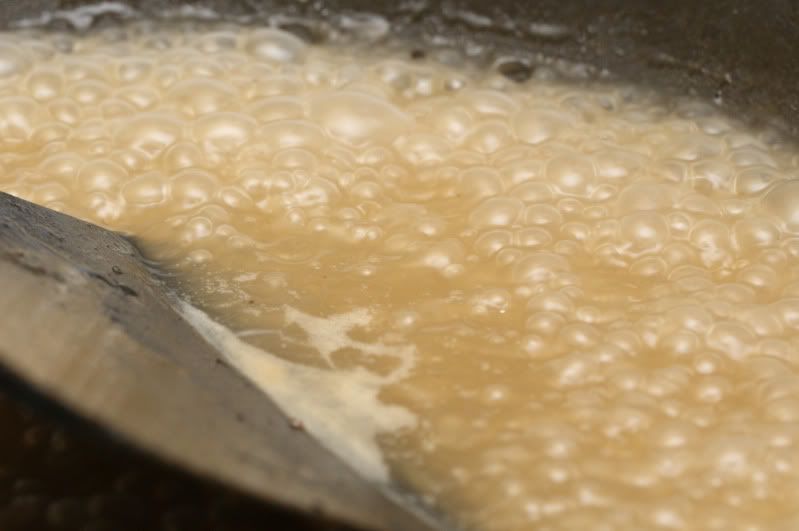
Add the wine and lemon juice to the same skillet, stirring to scrape up any browned bits.  It will probably be bubbly and noisy when you add the liquid – keep stirring the pan!  Cook the liquid for several minutes over medium heat until it has reduced by about half.  


Reduce the heat to low.  Add the butter, rinsed capers, and the cream or half-and-half. Stir to incorporate the ingredients and melt the butter. Once the dairy products have been added to the pan, take care to avoid allowing it to boil (you may need to reduce the heat further).

Return the cooked chicken to the pan and heat it through, just long enough to bring the chicken back up to the proper serving temperature.


Wednesday, April 21, 2010

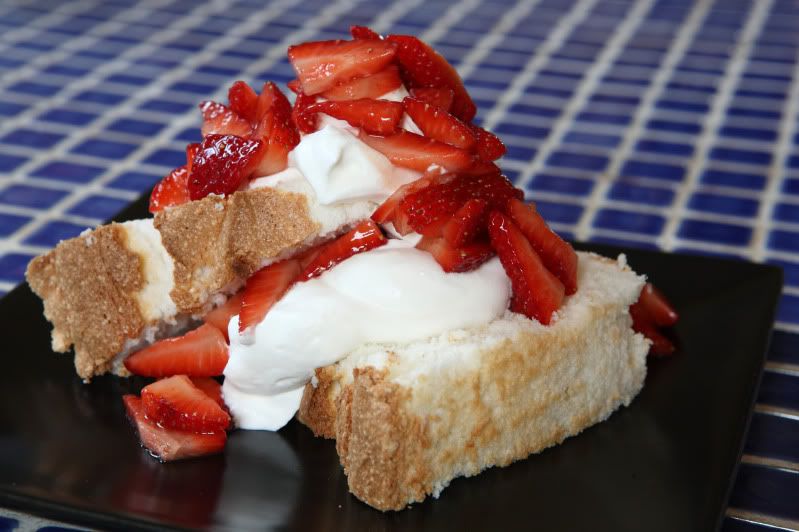
Strawberry Shortcake (with Angel Food Cake)

Strawberry shortcake is sort of the epitome of summertime desserts. The sweet-but-slightly-tart berries, swirls of whipped cream, and yummy shortcake make for one delicious dessert. (And it has fruit in it, so it’s good for you, right?)

There are several schools of thought on the proper base for strawberry shortcake. Some people like it served with sweetened biscuits. Some like it with sponge cake. Some like it with pound cake. Those are all good, but my favorite way to serve strawberry shortcake is with angel food cake.


This particular angel food cake recipe comes from Betty Crocker, circa the 1960’s. Yeah, the cookbook is a little outdated, but this recipe is a keeper...unlike some of the other ones in the book. There are a bunch of angel food cake variations on the same page, and they all require gelatin and something called “dessert topping mix” Fortunately this recipe steers clear of all of that. It is a standard angel food cake recipe, tried-and-true, and I’ve made this exact cake for many birthdays, a few graduation parties, and on many, many other occasions over the years.

If you don’t have an angel food cake pan and are planning to buy one, you should select your pan carefully.

  • An angel food cake pan should NOT be nonstick. (Angel food cake keeps itself risen by climbing up and sticking to the sides of the pan, and a nonstick pan prevents this from happening. The cake won’t have the proper height and the texture will suffer if the pan is nonstick.)
  • For almost all of my baking, I prefer light-colored pans because it keeps the food from over-browning. Angel food cake is no exception: try to find a light-colored pan.
  • The pan doesn’t need to be insulated or have any other fancy technology.
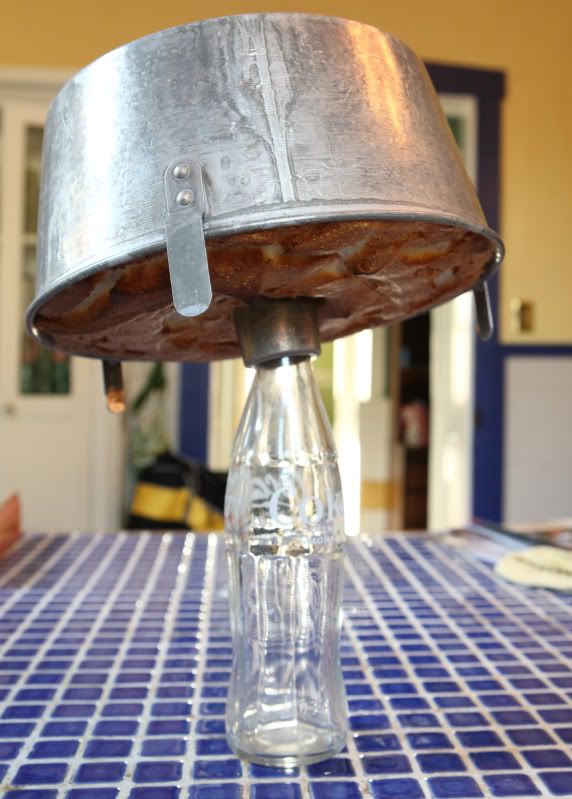
  • It does, however, need to have a way to stand upside down during the cooling process. My angel food cake pan has a tall central tube and little aluminum feet sticking off the top of the pan, which hold the cake off the countertop when the pan is inverted. This will cool the cake properly, but for even better air circulation, I stick a coke bottle in the central tube and turn the pan over balanced on the bottle (you’ll see pictures below). So, you’ll need either a pan that has feet, or you’ll need to come up with a way to invert it without smashing the cake. A wine bottle works too.
  • The best pans are two-part pans. Angel food cake needs to be cut out of its pan, and its basically impossible to do that with a one-piece pan. (That’s why they started making the one-piece pans nonstick, but we already went over why nonstick is a bad idea…) The one-piece pans work well for other things (pound cake!) but not well for angel food cake.
It’s really hard to find a good angel food cake pan at the kitchen store. Most properly-shaped pans are nonstick or made of dark-colored aluminum, neither of which I want. Last time I needed another angel food cake pan (before the days of the internet), I hit up the garage sales until I found an old one for a buck. The pan can be dinged up slightly and it won’t hurt anything. It’s not supposed to be a water-tight pan (properly-made angel food cake batter isn’t runny and shouldn’t leak through the pan), so don’t worry if the bottom doesn’t fit absolutely flat into the sides of the pan. Now that we are in the days of internet shopping, you can buy a new one from Amazon that meets all the specifications I’ve mentioned and it should work just as well as all of my Garage Sale Specials have worked for me.

Angel Food Cake
Makes one cake 10” in diameter and 4” tall

1 cup cake flour
3/4 cup plus 2 Tbsp granulated sugar
12 egg whites (about 1-1/2 cups)
1-1/2 tsp cream of tartar
1/4 tsp salt
3/4 cup granulated sugar
1-1/2 tsp vanilla
1 tsp almond extract

Preheat your oven to 375 degrees F.

In a medium mixing bowl, whisk together the flour and 3/4 cup plus 2 Tbsp granulated sugar. Set the mixture aside.

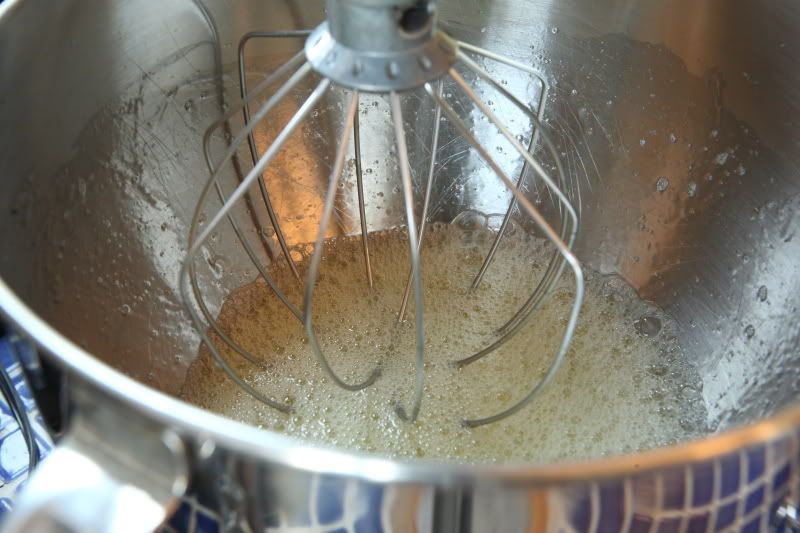
In a large mixer bowl, use the wire whip attachment to beat together the egg whites, cream of tartar, and salt until foamy.


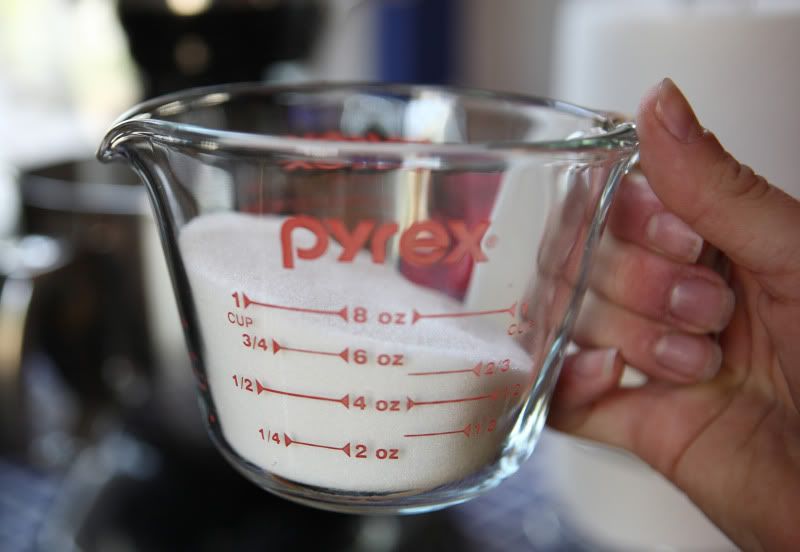
While this is happening, measure 3/4 cup granulated sugar into a spouted cup similar to this one:


With the mixer on the highest speed, slowly shake in a very small stream of granulated sugar into the egg white mixture. Continue to add the sugar very slowly as the mixer is whipping the whites. Do not dump in large quantities of sugar at once. As the whites whip up, they will increase in volume. The goal is to shake all of the sugar into the egg whites in about the same amount of time it takes for the whites to be beaten to the “stiff peak” stage. You’ll know the whites are “stiff peaks” when you lift the beater out of the bowl and the whites hold shape and don’t slump back down into the mixture. But, use caution to avoid over whipping the whites – they’ll become chunky and that’s not what we’re looking for either.

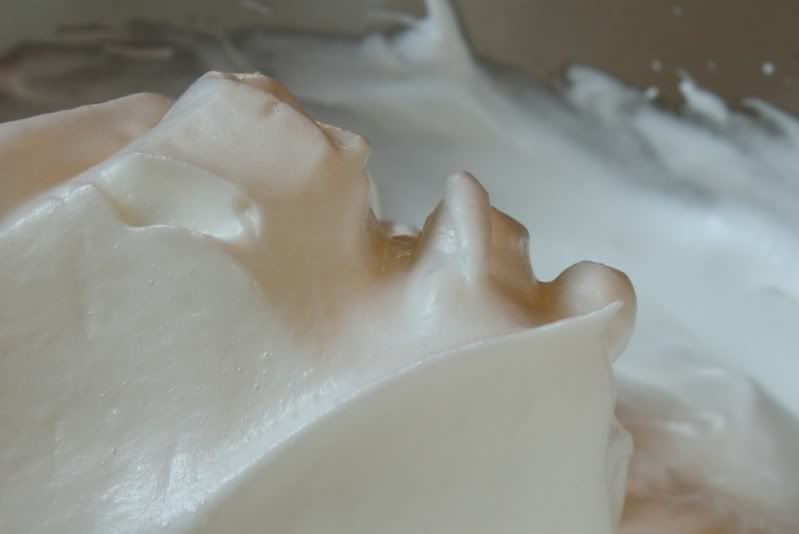
Properly whipped egg whites are smooth and stand up like this:


Once you’ve finished beating the egg whites, take the bowl off of the mixer. The rest of the steps must be mixed by hand or you’ll deflate the batter. I like to use a large flat rubber spatula, but before I owned that particular piece of kitchen equipment, I used to use a flat wooden spoon with nearly-as-good results. Whatever you use, you’ll need to have something with a fairly long handle because in case you haven't noticed, there’s a lot of volume in that bowl now.

Add the vanilla and almond extracts. Use your rubber spatula or flat spoon to gently fold them into the egg whites. Don’t stir the batter or you’ll deflate it. Fold it. (I wish I had a video camera – I’d demonstrate it…sorry.) To fold, cut the spatula down the center of the egg whites, then run it along the bottom of the bowl, up the side, and down into the center again. Rotate the bowl and repeat the motion.

Sprinkle approximately 1/4 of the flour mixture over the surface of the flour. Fold it gently into the egg white mixture just until the flour mixture disappears into the batter. Add another fourth of the flour mixture and repeat the folding-and-adding process until you’ve folded all of the flour mixture into the egg whites.

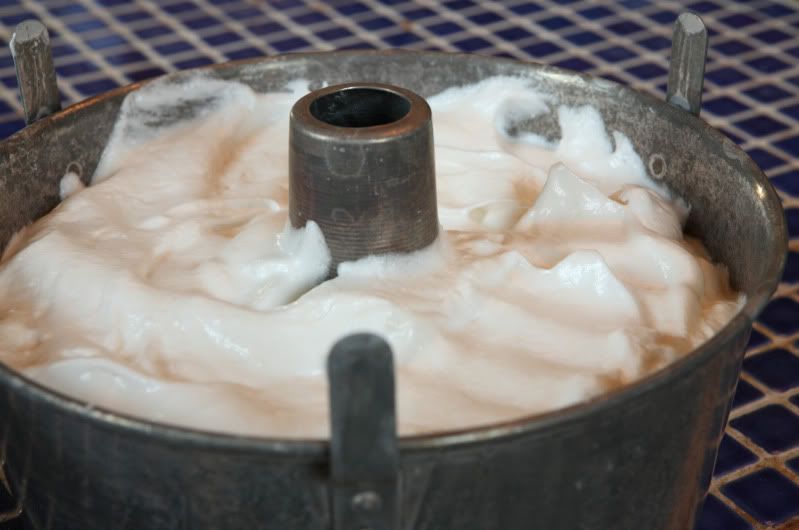
Spoon the batter into an ungreased angel food cake pan, 10” x 4.” Tap your rubber spatula straight down through the batter to help remove any air bubbles from the cake.


Bake the cake approximately 30-35 minutes. How can you tell when angel food cake is done baking? The top should be lightly browned. “Betty" tells you it should “spring back when touched lightly with a finger,” whatever that means. Here’s how I tell: as the cake bakes, the top surface cracks, exposing lighter-colored cake interior. When that lighter colored section of the cake is dry and no longer sticky, the cake is properly baked. I use the point of a knife or my fingernail to scrape just a tiny bit of crumb out of one of the lighter areas and see if it is still moist and sticky or if it is dry. If it’s still sticky, give it another 3 to 5 minutes in the oven. The top will be nicely browned and any peaked areas will be an even deeper, nearly-toasty brown.
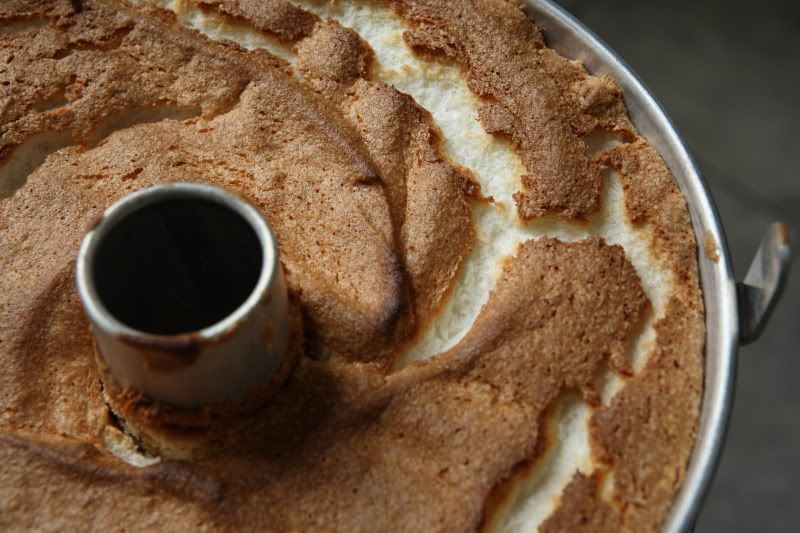


As soon as the cake comes out of the oven, the pan must be inverted or the cake will sink. As I mentioned above, I use the coke bottle cooling method, but if your pan has feet, you can simply turn it upside down. The cake must be entirely cooled before it is removed from the pan. If you come back to your cake in fifteen minutes and find it has fallen out all over the countertop, you under baked it and didn’t give it enough time in the oven. Take notes for next time and try again. I promise, if it’s completely baked, and if you used the proper pan, it won’t fall out despite the fact that it's sitting upside down.


A side story… Once, earlier in my baking days, I decided I wanted to make lots of angel food cake for a party. I baked a whole bunch of these cakes in sort of an assembly line, one cake after another. I was running out of countertop space in my kitchen and had nowhere to cool the cakes. So I looked around my small apartment for somewhere else to balance my coke-bottle-cake-pan setup for an hour or so, and saw the flat surface of my bedroom dresser. Unfortunately I was in such a rush to get these cakes baked, I slightly under baked the cake – but I was new enough to baking that I didn’t realize it at the time. After I thought the cake had a sufficient amount of time to cool, I went back to my bedroom to bring it back to the kitchen…and found cake EVERYWHERE. (Since it was under baked, it fell out of the pan.) What a mess! Cake all over the top-of-the-dresser knick-knacks! Cake all over my clothes! Cake on the carpet! Cake all over the cat (who was very interested in it). And because it was under baked, it was sticky and sugary and very messy to clean up - and the last thing I wanted to do while running around making last-minute preparations for a party. Lesson learned:  be sure the cake is completely baked. Don’t get in a hurry to get it out of the oven!

While the cake is cooling, you can prepare the strawberries for the shortcake:

Macerated Strawberries

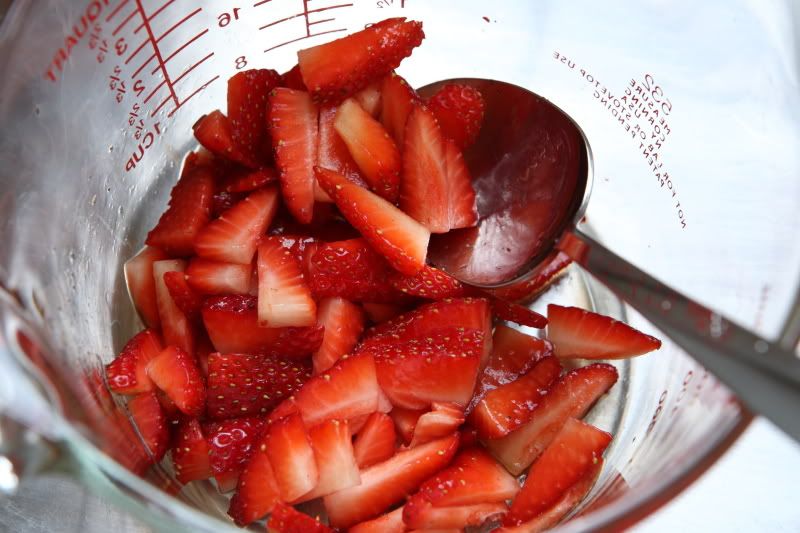
16 ounces strawberries, tops discarded, fruit sliced
2 to 3 Tbsp of granulated sugar
1 to 2 tsp best-quality balsamic vinegar

The measurements above are somewhat approximate because the amount of sugar necessary will depend on how sweet your strawberries are. I recommend mixing the smaller quantity of sugar and vinegar in with the berries first. Let it all sit for about 20 minutes, then taste it and adjust the flavoring as necessary. (You can always add more sugar and vinegar, but you cannot take it out!) I like them on the tart side, but you might like them sweeter than even what I’ve written above.


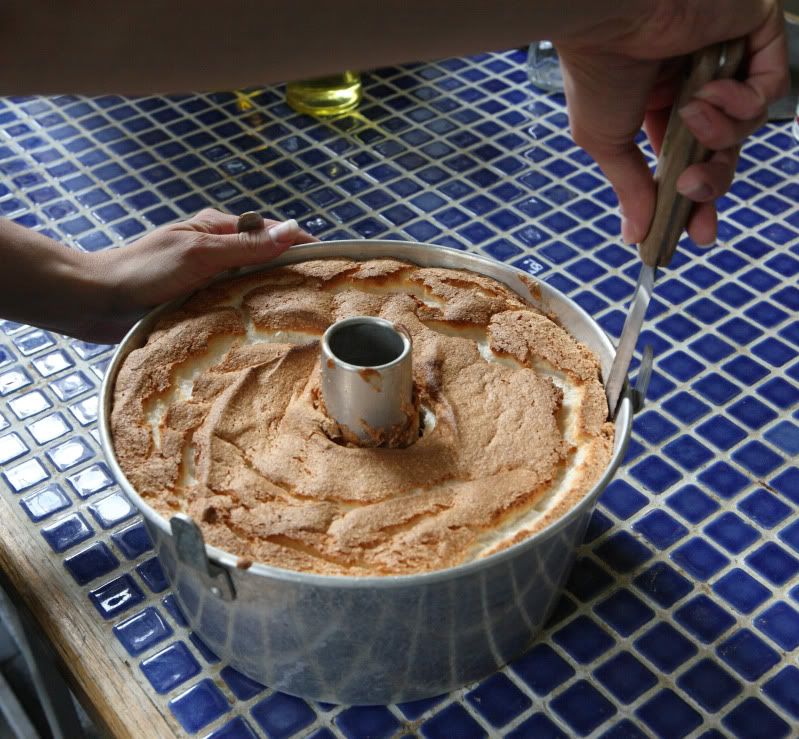
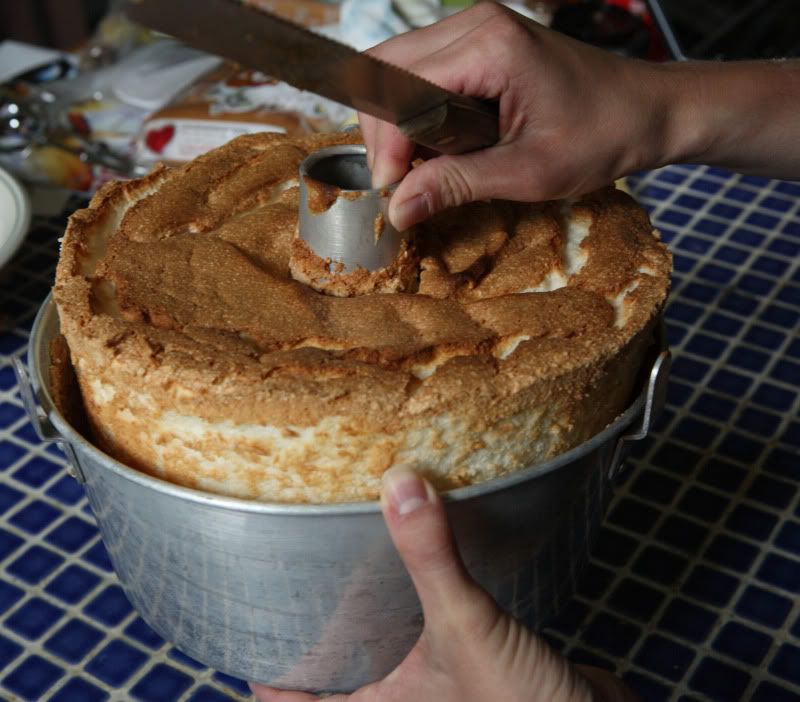
After the cake has cooled completely, the cake will need to be cut out of the pan. You’ll need a long serrated knife. First, holding the knife vertically, cut around the outside edge of the cake.  Use a sawing motion with the knife.  Then cut around the center tube in the pan. If you miss a spot, the cake will rip when you try to remove the pan, so be sure you are thorough in your cutting.


As long as you haven’t missed any spots, if you lift up on the center tube, you should be able to ease the side of the pan away from the cake.


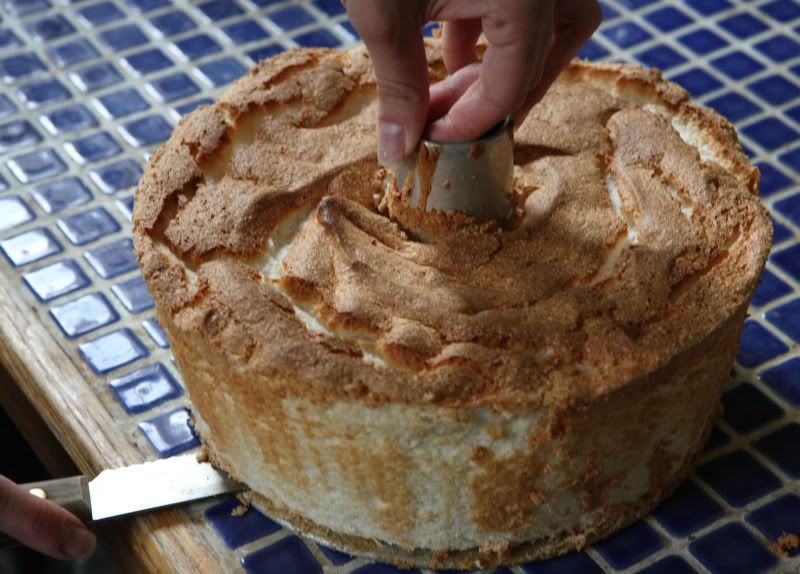
Hold the cake pan by the center tube. Place the knife horizontally and cut between the bottom of the cake and the base of the pan. Rotate the pan as you work so you get all areas of the pan. Double check to be sure your center tube is thoroughly cut free.


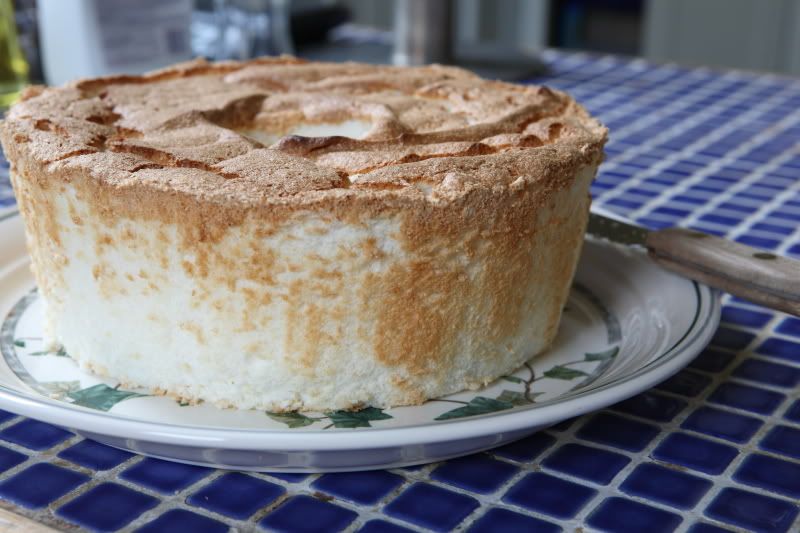
Once everything has been cut away from the pan, invert the cake onto a plate or a wire rack – the center piece should come right out.


(I turned mine out onto a rack, then flipped it over onto a plate because I thought the crackly top was prettier than the squared off bottom was.)


Immediately prior to serving, whip the cream

1 cup heavy whipping cream, more or less
1 Tbsp granulated sugar

Place the cream and sugar in a small bowl - one large enough to accommodate a hand mixer. Use a hand mixer to beat the cream on high speed until soft peaks form.

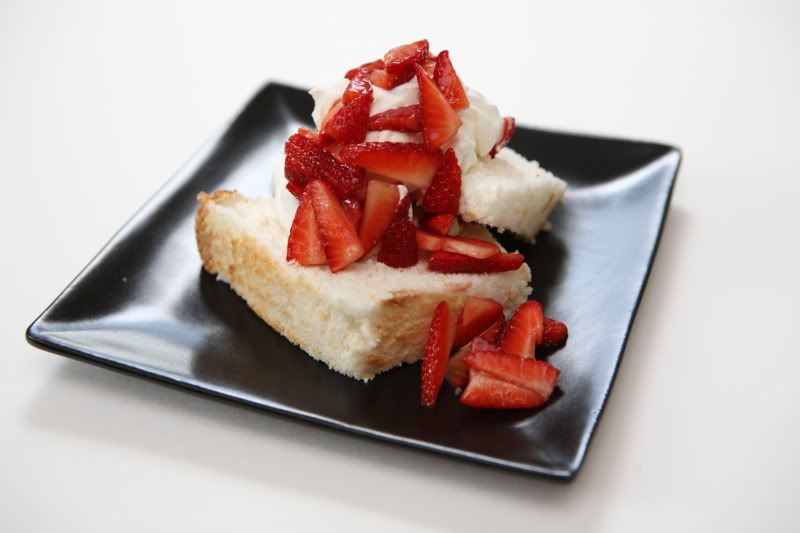
Assemble the strawberry shortcake from the angel food cake, berries, and whipping cream. Yum!


A note:  Angel food cake tastes best when it's served the same day it's baked.  If you must store it for another day, loosely cover it or put it under a cake dome.  Since the cake is mostly sugar and egg whites, it breaks down quickly if it gets moist, so it won't last too long, especially in a humid environment.  It doesn't last too long in my household anyway because it tastes pretty good...

Printable PDF file (with pictures)
Printable PDF file (recipe text only)
Sunday, March 14, 2010

Homemade Barbeque Sauce

In anticipation of better weather (and in protest of our current not-winter-anymore-but-not-quite-spring-either weather), I've started grilling outdoors.  We have a nice covered porch which makes it easy to use the grill even if it's raining.  Barbequed chicken is pretty easy to make outdoors because it doesn't require much babysitting.  The chicken is brushed with sauce and is placed on the grill.  After a few minutes, it is flipped once, brushed with more sauce, but is otherwise left alone while it cooks.  Pretty simple.

Homemade barbeque sauce is really easy to make. Onions are browned in butter (olive oil can be substituted for a somewhat healthier sauce…but the butter tastes better), then everything else is added and simmered over medium heat. There’s not much to it.


One thing that's great about this sauce: you can make it ahead and freeze it. You can also make it in larger quantities.

Homemade Barbeque Sauce (for chicken)
Makes about 3 cups of sauce

1 small onion, finely chopped (a mini food processor works well!)
2 Tbsp unsalted butter
1/4 cup molasses
1/2 cup freshly-squeezed lemon juice (2 large lemons yielded the proper amount of juice)
1/2 cup dry red wine (I used a Malbec on this particular occasion, but I usually make it with Cabernet Sauvignon or Shiraz)
Several shakes (to taste) of Tabasco or similar hot sauce
1/4 cup ketchup
1/4 cup spicy mustard
2 Tbsp Worcestershire sauce
2 tbsp brown sugar
3 large cloves garlic, minced
1 tsp cumin
1/2 tsp black pepper
1/4 tsp ground cloves
1/2 tsp ancho chili powder (another type will also suffice if you don’t have ancho)
1 cup water

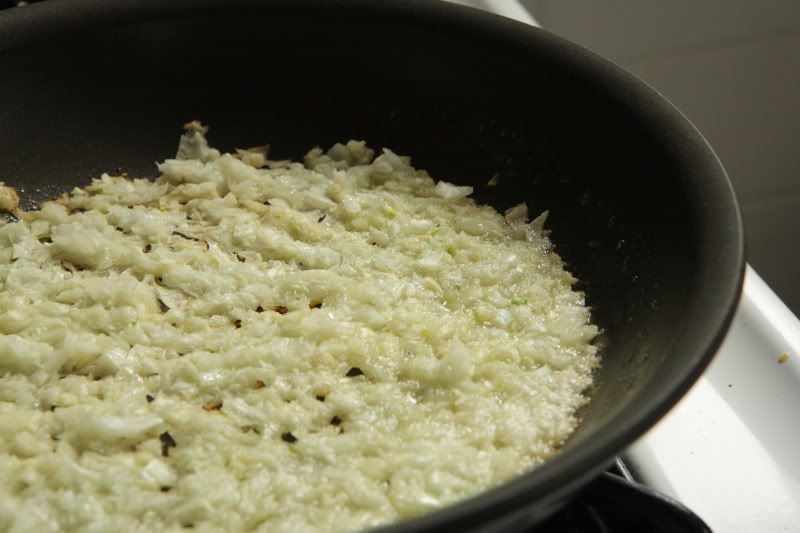
Place the chopped onions and the butter in a medium skillet. Spread out the onions so they cover the bottom of the pan. Turn the heat to medium-low and allow the onions to brown slowly. The moisture will begin to cook out of the pan and the onions will begin to brown at the edges. Avoid stirring the pan until this starts to happen. The pan looks like this when it’s time to stir (see the browned edges?):


Stir the onions and allow them to continue to brown slightly longer, so they are evenly browned. Transfer the browned onions to a medium saucepan and add the remaining ingredients.

Simmer the sauce over medium heat, stirring often, to reduce the sauce by approximately one third.

I usually serve this sauce with grilled chicken. I pour a small amount of the sauce over the chicken pieces as a marinade. The remaining sauce is saved to mop the chicken as it is grilling. (Remember, should any of the reserved basting sauce come into contact with raw meat, be sure to return the sauce to a boil before using it to baste cooked chicken!)


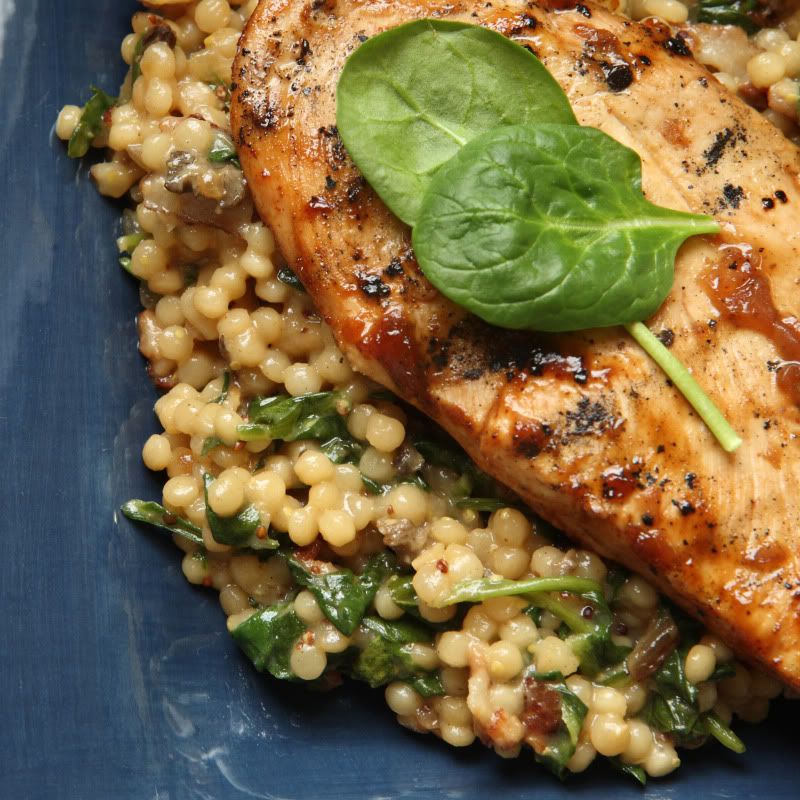
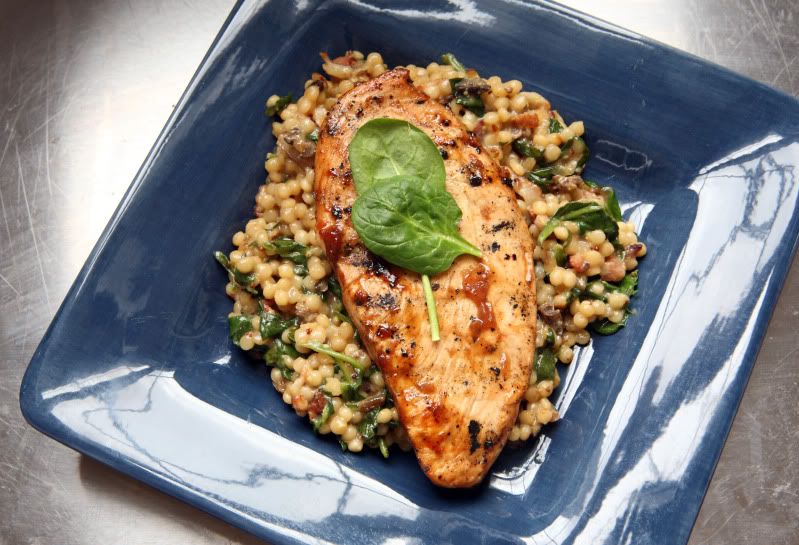
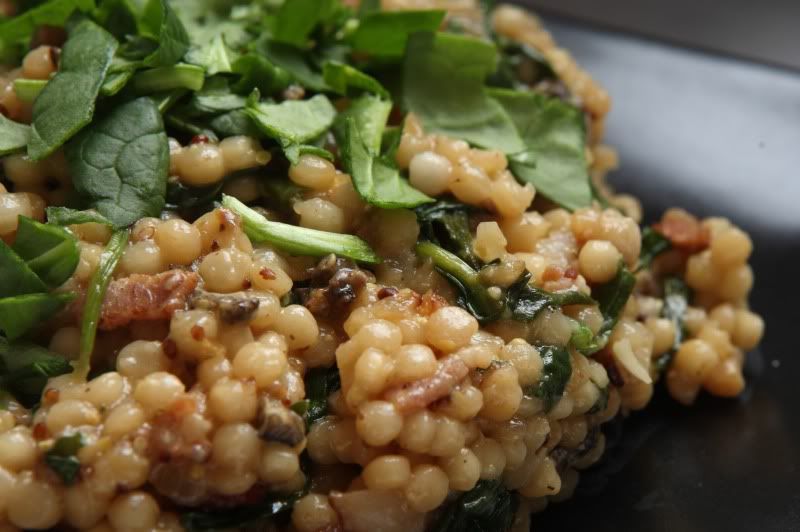
The chicken in these pictures is served with my Bacon and Spinach Couscous. It’s really yummy – give it a try.

Printable PDF file (with pictures)
Printable PDF file (text only)

Wednesday, March 10, 2010

Bacon and Spinach Couscous


I’ve been in search of a new couscous recipe. I love my cranberry and spinach couscous recipe, but I make it so often that I’d like to try something different for a change of pace.

This couscous recipe is full of flavor and is easy to make. It’s especially easy if you have a mini food-processor (you can use it to cut up the onion and garlic). The couscous is flavored by bacon, has a touch of sweetness due to applesauce, and is embellished with a bit of cheddar cheese. The combination of flavors results in a pretty tasty side dish.

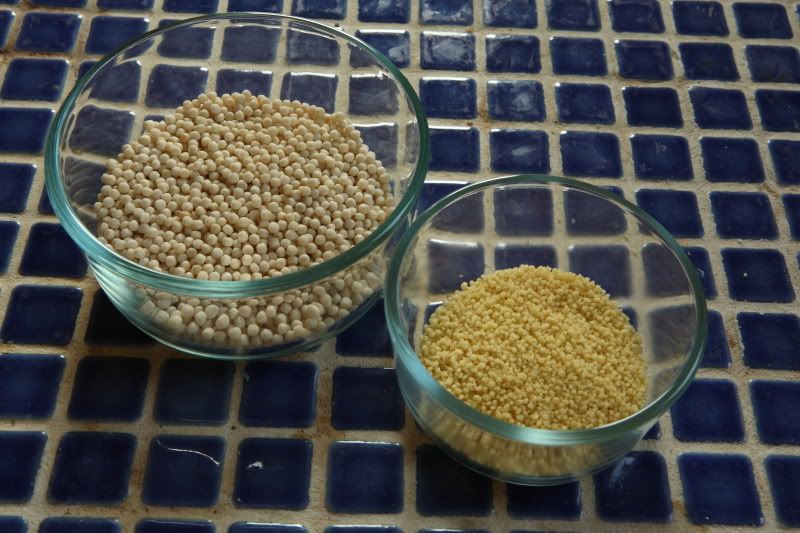
As with my other favorite couscous recipe, this recipe also uses Israeli couscous, a.k.a. pearl couscous. It is larger in size than regular couscous and the resulting texture and taste is completely different. If you think you don’t like couscous and the only kind you’ve tried is the standard small-size couscous, you should give this type of couscous a try. Here’s what the two types of couscous look like – you can see that there’s quite a difference in size between the two.


Bacon and Spinach Couscous
Serves 3-4 as a side dish

4 thickly-sliced strips of bacon
1 medium onion, finely chopped
3 cloves garlic, finely chopped
3 ounces mushrooms, roughly chopped (I splurged and used morels because they were available at the grocery store, but you can use baby portabellas with good results)
1 cup Israeli (pearl) couscous
1 tbsp grainy Dijon mustard
1/4 cup unflavored applesauce
1-1/2 cups chicken stock
3 ounces baby spinach, roughly chopped
3/4 cup shredded white cheddar cheese

You’ll need a deep, wide sauté pan that has a lid. If your frying pan has a lid, that should work.

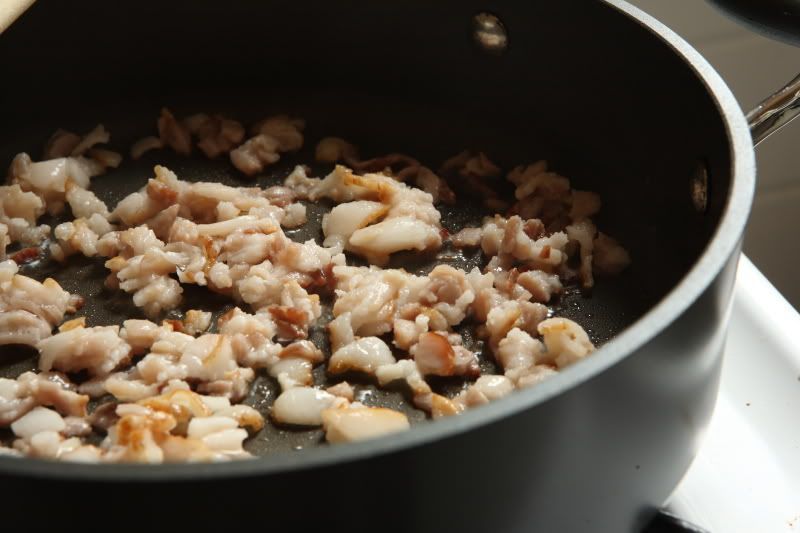
First, dice the bacon. Place it in your deep sauté pan and cook it over medium heat until the fat has started to render but the bacon is still not crisp. Caution: don’t let the bacon crisp up just yet! Give it a stir every now and then.


While the bacon is cooking, chop the onion and garlic. I like to put them together into a mini food processor because it’s easy!

As I've indicated above, we don’t want to let the bacon crisp up just yet. Once the bacon has released fat into the pan (but before it turns crisp), carefully pour or spoon out as much fat as you can. You can discard it or save it for another purpose. Add the chopped onion and garlic to the pan. Continue to cook over medium heat several minutes until the onions begin to brown – the bacon will start to brown too, and that’s fine. Just give it a stir periodically to keep it from sticking and burning.

While the onion mixture is cooking, chop your mushrooms; stir them into the pan.


Pour in the couscous and stir to combine. Continue to cook over medium heat while you complete the next step…

In a small bowl (I like to use a 2-cup liquid measure), stir together the mustard, applesauce, and chicken stock. Pour the mixture into the pan – stir it to combine the ingredients. Bring it to a simmer over medium heat.

Once the liquid begins to simmer, cover it with the lid. Reduce the heat to low and cook it for 10 minutes, or until the couscous has absorbed the liquid.

While the couscous cooks, roughly chop the spinach and set it aside. Grate the cheese and set it aside.

Once the couscous has completed its cooking time, remove the lid. Stir in the spinach (you may need to stir it in two additions – it seems like a lot of spinach, but it will wilt down to practically nothing). Sprinkle the cheese over the couscous; stir it in to combine it and melt it.

Printable PDF File (with pictures)
Printable PDF File (text only)

Sunday, February 28, 2010

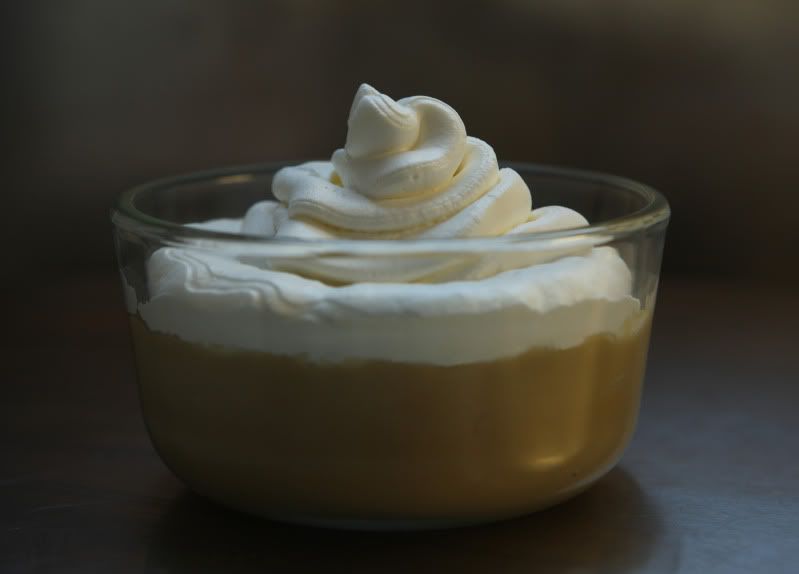
Butterscotch Pudding with Salted Whipped Cream


I’ve been on a butterscotch kick lately. It all started with the brown butter blondies I made awhile back – their butter-and-brown sugar flavor profile has had me thinking about butterscotch desserts ever since. A few weeks later, I made a butterscotch sauce to top some ice cream sundaes I served when we had family over to visit. Then I experimented with butterscotch pudding on Super Bowl Sunday, but felt the recipe wasn’t quite there yet, so it didn’t get blogged.

After I had a butterscotch sundae at Ted Drewes last night, I felt sufficiently inspired to try out another butterscotch pudding recipe. I found a different recipe from one of my favorite dessert cookbooks (one you’ve seen before), Diner Desserts, by Tish Boyle. Like every other recipe I’ve made out of that cookbook, it didn’t disappoint me.

Despite the inclusion of the word “scotch” in the name “butterscotch,” there actually isn’t supposed to be any scotch in traditionally-made butterscotch. (If you want, you can add a tablespoon of scotch and make less-traditional butterscotch pudding, but for the most authentic pudding, it should be left out.)

“Real” butterscotch flavor is created by butter and brown sugar. Therefore, any butterscotch-flavored dessert is necessarily going to be rather sweet. To counter all that sugar, the pudding tastes great with a little bit of extra salt. I suggest topping the pudding with salted whipped cream.  You could skip the whipped cream and sprinkle a pinch of sea salt directly on top of each of your puddings just before serving them.

When I’m making pudding, I like to set out all of my ingredients in advance. Making pudding isn’t too difficult, but it requires that you whisk the mixture almost constantly, so you can’t take time to set the whisk down and fuss over the next ingredient.

Butterscotch Pudding with Salted Whipped Cream
6 servings

Pudding ingredients:
3 large egg yolks
3 Tbsp unsalted butter, cut into tablespoons
2 tsp vanilla extract
1/3 cup cornstarch
1 cup packed dark brown sugar
1/2 tsp salt
2 cups whole milk
1 cup half-and-half
1 Tbsp scotch – optional (see above)

Salted Whipped Cream ingredients:
1/2 cup whipping cream
A generous pinch of kosher salt

First, make the pudding. It needs time to chill in your refrigerator prior to serving it, so start it at least three or four hours in advance.

I start by preparing my ingredients. Place the egg yolks in a medium bowl. Use a fork to whisk them together and set the bowl aside for later. You’ll need a one-cup scoop later, so set the scoop near the egg yolks so you’ll have it handy.

Measure out your butter. Go ahead and cut it into tablespoons. Set the butter aside. Keep your bottle of vanilla (and the scotch, if you’re going to use it) nearby because you’ll need to add it when you add the butter.

You’ll need six small dishes for your pudding. Locate them and set them nearby.


In a medium saucepan, off of the heat, stir together the cornstarch, sugar, and salt. The mixture should look very sandy.


Gradually whisk in the milk and the half-and-half. Bring the mixture to a boil over medium-high heat, whisking constantly. (As you’re whisking, the consistency will change from a liquid to a thick pudding.) Once the mixture begins to bubble, remove it from the heat.

Using the one-cup scoop you set aside earlier, ladle out approximately one cup of the milk/sugar mixture into the whisked egg yolks. Vigorously whisk the egg yolk mixture to combine everything, then transfer the egg yolk mixture back to the remaining milk/sugar mixture in the saucepan. Keep whisking everything until it is combined.

(If you don’t whisk constantly, your eggs can cook improperly and leave chunks in your pudding. If this should happen, don’t get too upset, you can pass the pudding through a sieve later. The pudding won’t have the exact same texture, but it’ll still be very edible. But try to keep whisking constantly to avoid the chunks!)

Return the pudding to medium heat - keep whisking - until the mixture comes back to a boil. Continue to boil, whisking constantly, for one minute. Immediately remove the pan from the heat and whisk in the butter pieces until they are completely melted. Whisk in the vanilla and the scotch, if you’re using it.  If you need to strain your pudding, do so now.

Pour the pudding into your serving dishes. Cover the dishes with plastic wrap, pressing the wrap directly onto the surface of the pudding, and refrigerate it for several hours, until it is well-chilled.

Just prior to serving the pudding, make the salted whipped cream:

Place the whipping cream and the salt in a medium bowl. Whip on high speed until soft peaks form. Spoon or pipe the whipped cream onto your pudding.


Wednesday, February 24, 2010

Lemon-Sage Cornish Game Hens with Porcini Tomato Sauce


There are several good reasons you should try this chicken recipe. For one, its pretty easy to make, considering it involves whole chickens. (When I first started learning to cook, whole birds seemed kind of intimidating to me…but the truth is, whole birds sound a whole lot more complicated than they actually are. And this particular recipe is fairly easy.)

The second reason you should make this recipe is that it tastes quite good. The chicken is baked at a high temperature, so the skin becomes nice and crispy while the chicken stays juicy and tasty. Lemons are stuffed in the chicken – they give a bright but subtle counterpoint to the umami flavor present in the mushroom tomato sauce.

This recipe is made with Cornish game hens (sometimes known as "rock" hens...they're basically just smaller-sized whole chickens). In my household, one large Cornish game hen will serve two people…but we’re used to moderately-sized portions. If you have big eaters, or if you want to have leftovers, you might want to allow one small hen per person.

Lemon-Sage Cornish Game Hens with Porcini Tomato Sauce
Serves up to 4

Chicken Ingredients:
Two to four 1-1/4 to 1-1/2 pound Cornish game hens (see the note above)
For each hen, you'll need...
1 medium lemon
2 large fresh sage sprigs (left whole), plus 1 Tbsp chopped fresh sage
1 Tbsp olive oil
salt and pepper

Sauce Ingredients (makes enough for four servings)
2 Tbsp olive oil
3/4 cup hot water
1/2 ounce dried porcini mushrooms
2 large cloves garlic, finely chopped
one 14.5-ounce can diced tomatoes, with juices

First, prepare the chicken:

Preheat the oven to 450 degrees Fahrenheit. You’ll need a roasting pan large enough to hold the birds.

Remove the giblets. (They’re usually contained in a little plastic baggie stuck inside the chicken cavity, but sometimes they’re just loose inside the bird.) They can be discarded or saved for another use. Rinse the chicken (inside and out). Pick off any stray feathers or any giant clumps of fat. Pat the chicken dry with paper towels.

Cut each lemon in half. Save half of each lemon (we’ll squeeze it on the meat later). Cut the remaining lemon halves into rough wedges. Stuff the lemon wedges and the two large sage sprigs inside the cavity of each bird. Put the stuffed birds in your roasting pan. I like to roast them breast-side-down, because the juices from the bird will help keep the meat moist and flavorful.

Drizzle one tablespoon of olive oil over each bird. Squeeze the juice from the remaining lemon halves over each bird. Sprinkle each bird with a generous pinch of salt and several generous turns of freshly-ground black pepper. Scatter 1 tablespoon of chopped sage over each bird.


Roast the birds at 450 degrees F until they are cooked through and the juices run clear when thickest part of thigh is pierced. (It should take approximately 45-50 minutes.) Transfer the birds to a platter (or a cutting surface if you want to cut them in half – use heavy-duty kitchen scissors to snip them in half); tent them with foil to keep them warm. Reserve the pan drippings.

While birds are roasting, start the sauce...and...

...I highly recommend that you serve this with creamy polenta…that's what the chicken is served with in the photo at the top of this post.  Follow your polenta package directions to make a creamy polenta. If you decide to make polenta, you’ll probably want to start it now, as it probably takes awhile to make…

Combine 3/4 cup of hot tap water and the porcini mushrooms in a small bowl. Let them stand until the mushrooms soften, about 30 minutes. Remove the mushrooms from the soaking liquid, reserving the soaking liquid. Roughly chop the mushrooms; set the mushrooms and the soaking liquid aside.

Heat 2 tablespoons of olive oil in a large saucepan over medium heat. Add 1 tablespoon of chopped fresh sage and the garlic; sauté them until they are fragrant, about one minute. Add the tomatoes, the chopped mushrooms, and the mushroom soaking liquid. Bring the sauce to a simmer – it can simmer on low heat until the birds are done roasting.

Once birds are done roasting, pour the pan drippings into a small measuring cup. Skim the fat off of the top, then stir the remaining drippings into the tomato mixture. Simmer the tomato mixture two minutes to blend the flavors. Serve the chicken with the sauce.

Monday, February 15, 2010

Chocolate Peanut Butter Cookies


I love reading the newspaper. There’s something satisfying about paging through the inky newsprint, sipping on a cup of hot cocoa, catching up on the latest national news, soaking up the details in the local stories, and comparing the weather forecast to reality. I always save the best for last: the comics (Calvin and Hobbes, I miss you!). The same section has the Sudoku puzzle…I love solving those. There’s a certain comforting feeling about tangible print media that cannot be recreated by online news sources.

My absolute favorite section is, of course, the food and cooking section (too bad it only comes once a week!). I love reading about local restaurants, getting ideas for recipes, and looking through the grocery advertisements. I’ve always been a recipe clipper – you’ll never know when you find a recipe that’s a keeper!

This recipe is one of those clipped-out-of-a-newspaper keepers. It was printed when I was ten years old (there are expired coupons for Chex cereal on the back of it!). My mom had this recipe clipping taped to the inside back cover of one of our favorite cookie cookbooks.

I remember wanting to make the cookies often as a child, partially because I have always loved the combination of chocolate and peanut butter, and partially because the cookies in the accompanying picture had these cute little green and white Christmas trees piped on them – they looked fun to eat. The name they gave the cookies was “Magic Peanut Butter Middles,” a name I always thought fell short (the “Magic” part seemed cool to a ten-year-old, but “Middles”?? Really??  Ok, I guess the name I came up with isn't much better...) Despite the writers’ (and my) halfhearted attempt at a creative title, the cookies were always a hit with me and my sister. Biting into what looks like just a plain old chocolate cookie and finding a delicious, creamy peanut butter filling is fun when you’re ten! (It’s still fun now!)

The recipe is very hands-on, so it’s a little messy, but the method is easy enough that my sister and I made them together when we were young.  You might enjoy making these with your kids.

Be sure you use “kid's” peanut butter, not the all-natural kind that you have to stir up before using. (The Jif/Skippy/Peter Pan/whatever kinds contain solid fats, and the cookie recipe presumably was written and tested with that fat composition in mind because it specifically recommends Skippy brand original creamy peanut butter.) Or, try the natural kind and report back on how it turns out…I have never tried using natural peanut butter in this particular recipe, but I have tried Jif brand original creamy peanut butter, and I can say that it works well.


Chocolate Peanut Butter Cookies
Makes 18 cookies

First, start the cookie dough:

Cookie Dough Ingredients
1-1/2 cups all-purpose flour
1/2 cup unsweetened cocoa
1/2 tsp baking soda
1/2 cup sugar
1/2 cup packed brown sugar
1/2 cup butter
1/4 cup “kid's” peanut butter (not the “natural” kind)
1 tsp vanilla
1 egg

Preheat your oven to 375 degrees F.

In a small bowl, whisk together the flour, cocoa, and baking soda - blend it well. Set it aside.

In a large bowl (I use my stand mixer, but always did this with a wooden spoon when I was a kid), beat together the sugar, brown sugar, butter, and 1/4 cup peanut butter until it is light and fluffy and well-combined. Add the vanilla and egg; beat well.

While the stand mixer is combining the above ingredients, I start mixing together the filling:

Filling Ingredients
1/2 cup “kid's” peanut butter (not the “natural” kind)
1/2 cup powdered sugar

In a medium bowl, combine the 1/2 cup peanut butter and the powdered sugar. It starts out with a rough texture…


…but will come together if you just keep stirring.


Roll the filling into 18 one-inch balls. (Yes, there’s more than 18 here…I made a bigger batch.) Set them aside.


(When I was a kid, I just used my hands, but now that I have better kitchen tools, I use a mini ice cream scoop like this one…


…so much easier! Less mess! It’s exactly one inch in diameter, so it’s the perfect size.)

Back to finishing the cookie dough:

Stir the cocoa mixture into the large bowl containing the creamed butter/sugar mixture until the ingredients are all blended together.

Now start shaping the cookies:

Take a heaping tablespoon-or-so of dough (about the size of a ping pong ball)…


…and use your fingertips to sort of flatten it into a little cupped circle of dough. Put one of the peanut butter balls in the center…


Shape the chocolate dough around the peanut butter to entirely encase it. Roll it around in your hands to make a smooth ball. Place the shaped dough about 2 inches apart on a cookie sheet (the original recipe calls for an ungreased sheet, but I always use parchment paper on my sheets for easier cleanup).


Use the bottom of a drinking glass dipped in granulated sugar to flatten the cookie balls to approximately 1/4-inch thick. (Don’t be too skimpy with the sugar or it’ll all disappear into the cookies as they’re baking.)


Bake at 375 degrees F for 7 to 9 minutes, or until the cookies are barely set and slightly cracked. They should still be soft – do not overbake them or they will be dry.


Leave the baked cookies on the warm cookie sheet for only a few minutes, just until they are firm enough to transfer to wire racks for cooling.

These cookies are soft inside, but have a nice exterior texture due to the sugar on top. With all the peanut butter in these cookies, you’ll definitely need to enjoy these with a tall glass of cold milk! Yum!


Sunday, January 31, 2010

Chicken Strips with Honey Mustard Dipping Sauce


It’s always more fun to eat food when you can dip it into a sauce or condiment. I guess that’s why hand-held, dip-able things like chicken nuggets are always on children’s menus at fast food restaurants. (If its fun to eat, kids will ask for it, right? Sales!)

Of course, they’re on the grown-up McMenu too, because you definitely don’t have to be a kid to enjoy using your hands to eat food. Since I do not usually include foods with the prefix “Mc” in my meal plan (but still like eating chicken strips), I just periodically make them at home.

Although my chicken strips are not quite as speedy as running through a drive-thru, they’re not too difficult to make and they taste much better. Plus, you know exactly what you’re putting into your homemade chicken strips. They’re much lower in sodium and they’re not deep fried, so they’re better for you.

Look for panko in the Asian foods aisle of your grocery store. If you cannot find it, you can substitute regular unseasoned bread crumbs, but you’ll have the best, crispiest texture with panko.

If you’re looking for something to serve at a Super Bowl party next weekend, give these chicken strips a try! The honey mustard sauce tastes good with other things, too – I accidentally discovered asparagus spears are delicious when dipped in the sauce.

First make the dipping sauce:

Honey Mustard Dipping Sauce
Makes about 3/4 cup

1/4 cup light mayonnaise
2 Tbsp honey
1/3 cup Dijon mustard
A pinch of kosher salt
1/4 tsp garlic hot sauce, or to taste

Mix all of the ingredients. Taste the sauce and adjust the spicy/sweet/tangy ingredients as necessary. Refrigerate the sauce until serving time.

Then make the chicken:

Homemade Chicken Strips
Serves 4 as an appetizer (add a few side dishes to serve it as an entrée)

2 chicken breast halves
1 cup all-purpose flour
A pinch of salt
A pinch of pepper
2 eggs
2 Tbsp water
Approximately 2 cups panko crumbs
Olive oil, for panfrying

Slice the chicken breasts in half horizontally into two flat, thin pieces.


Then cut the chicken into “fingers.”

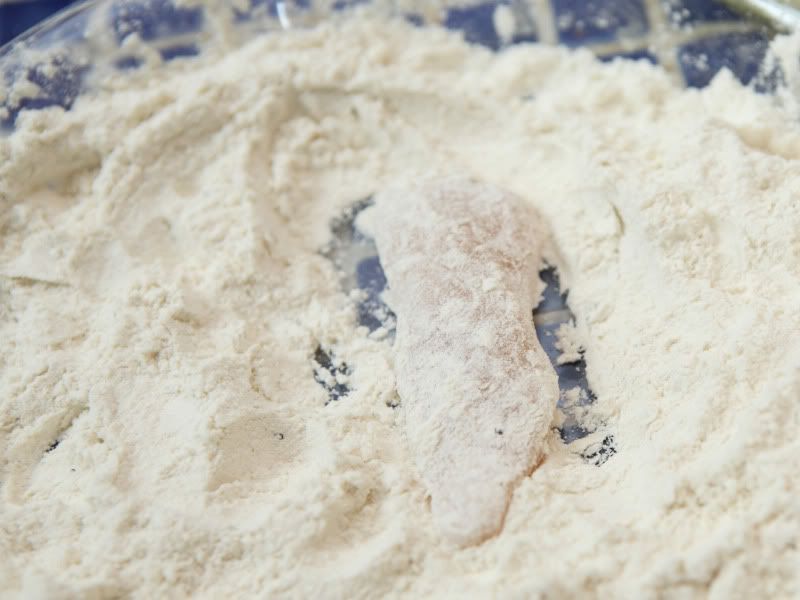
You will need three small bowls (cereal bowls, pie pans, small mixing bowls, whatever…all work well). In one bowl, place the flour, salt, and pepper. Stir it with a fork to combine the ingredients. In the second bowl, whisk together the eggs and water.

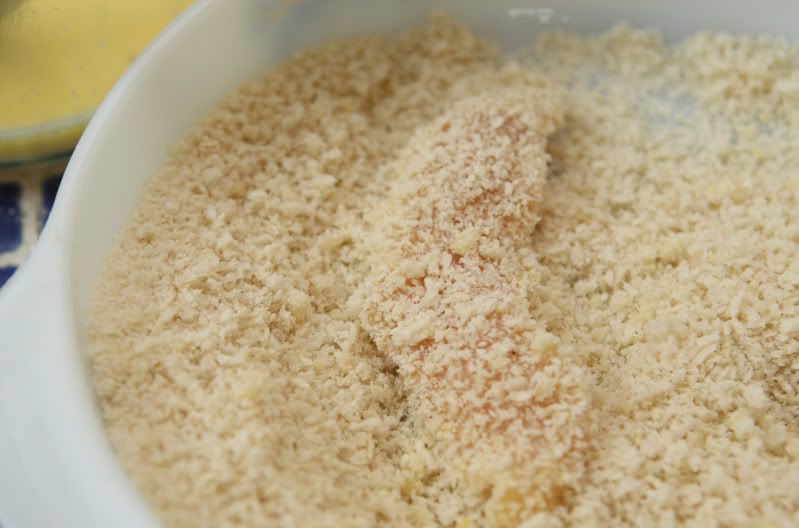
In the third bowl, place the panko. Since panko is kind of expensive, you might want to start with a smaller quantity and add more to the bowl only as you need it. I start with one cup and add a little more as I work, for a total usage of approximately two cups.

Bread the chicken:

When I bread meat, I usually use tongs. It is kind of messy. If you get flour and eggs on your hands, you’ll have a gluey mess that is difficult to wash off. Tongs are much easier to clean – if they get too gluey, just use a utensil to scrape the yuck off.

Each piece of chicken should be dipped first into the flour…


…then into the egg wash, and then into the panko.


Be sure you have coated all parts of the chicken each time you dip – that’s especially important with the egg and the panko. Use the flat part of the tongs to pat the panko crumbs firmly onto the chicken pieces.

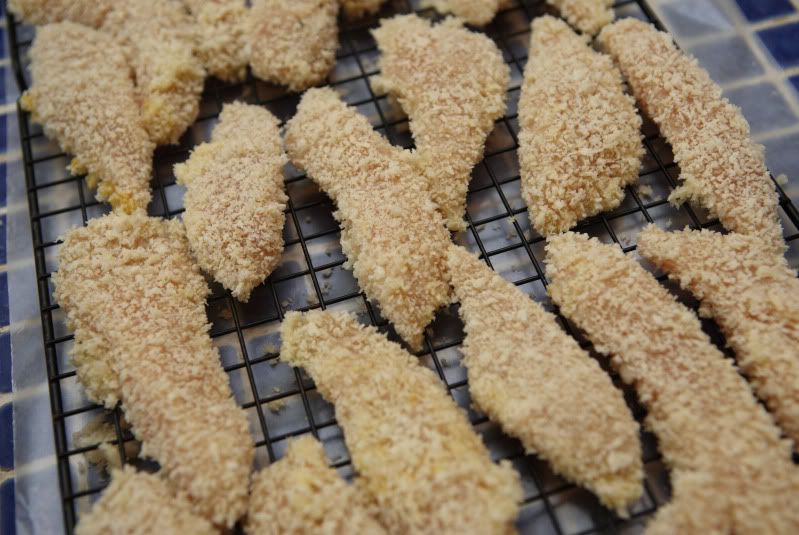
I transfer the breaded chicken to a rack set over a piece of waxed paper (to catch the crumbs) until its time to start cooking.


Once you’ve breaded a fair amount of chicken, you can start to cook it while you continue to bread the remaining meat.

To cook the chicken:

In a large nonstick skillet, heat a few teaspoons of olive oil over medium-high heat. Lay in several strips of chicken, enough to cover the bottom of the pan – but don’t let the chicken pieces touch each other. Cook the chicken for several minutes on each side until the breading is golden brown and the chicken is cooked through. Continue with the remaining chicken (you will probably need to add additional oil as you work). I drain my chicken pieces on paper towels after they’re cooked.

Serve the chicken with honey mustard sauce. Yum!

Saturday, January 30, 2010

Grilled Pork Tenderloin with Pineapple Ginger Sauce, served with Grilled Pineapple


Have you ever had grilled pineapple? If you haven't had it, try it!  It will totally change your opinion of pineapple. The heat causes the sugars to caramelize slightly, resulting in a deeper flavor, and the grill marks look pretty against the yellow fruit.

Not only does pineapple taste great grilled, but it also makes a great marinade ingredient due to a certain naturally-occurring enzyme. The recipe written here is a fruity pineapple marinade, spiked with ginger and a little garlic. It pairs really well with pork tenderloin, and works great on the grill.

If you’ve never bought or cut up a whole pineapple before, don’t worry, I have provided you with instructions! Give it a try!

How to choose a pineapple at the grocery store:

Pineapples don’t continue to ripen after they’ve been picked, so you’ll want to choose the ripest pineapple available from your grocer. Unless you live in or near Florida and have other locally-grown options available to you, you’re probably buying a pineapple imported from Hawaii. (I guess that statement is only true if you live in the United States…I’m not sure what the pineapple availability is elsewhere.)

Since Hawaiian pineapples are the ripest when they have a bright golden color, pick the pineapple that has the most gold on its skin (but not a mottled brown color, because too much brown = rotten!). Some green skin coloration is ok, but the greener the skin is, the less ripe the pineapple was when it was picked.

The spiky leaves should be stiff and green (again, not brown). Grab the base of the bunch of leaves – it should wiggle slightly…not too much wiggle, but not totally stiff either. One more thing to check: the pineapple was once attached to its plant on the underside of the fruit. Turn the fruit over and look to be sure the place where it was attached to the plant hasn’t turned moldy.

Now that you have your pineapple, you're ready to start making...

Grilled Pork Tenderloin with Pineapple Ginger Sauce, served with Grilled Pineapple
Serves 4

1 fresh pineapple
1/3 cup hoisin sauce
4 tsp peeled, grated fresh ginger
1 large clove of garlic, minced
1 tsp Dijon mustard
1-1/2 pounds pork tenderloin, trimmed of any fat
1 tsp soy sauce
2/3 cup chicken stock

First, cut up the pineapple:

Chop off and discard the leafy crown. A lot of people cut off the bottom of the pineapple at this point, but I usually leave it on because its roughness provides more stability on your cutting board (cut pineapple is slippery!). If its really uneven, though, you might prefer to cut it off. Cut off and discard all of the skin from the sides of the pineapple. If you missed any “eyes” or seeds, cut them out too.


If you haven’t yet, slice off and discard the bottom of the pineapple. With the pineapple standing on its end, cut straight down just next to the core.


Set aside the coreless piece. Mirror the exact same cut on the other side of the core so you have two large coreless pieces and one rectangular piece which still contains the core. Cut off the pineapple on either side of the core. The core is too tough for me to want to eat, so I usually just discard it (although I do know a guy who puts lots of salt on it and eats it anyway…).


You should be left with two smaller pieces of pineapple and two larger slabs of pineapple. Cut the larger slabs of pineapple into 1/2-inch slices. Set these aside – they’ll be grilled later.


The two smaller pieces of pineapple can be cut into chunks – place them in a small food processor. Process the pineapple to make chunky juice. Transfer approximately half of it to a small saucepan and reserve it for later – this will become a sauce to be served with the meat. The rest will be used to create a marinade.

Then, marinate your meat:

The remaining processed pineapple can be transferred to a gallon-sized food storage bag (or whatever vessel you’re going to use to marinate your meat). Add 3 Tbsp hoisin sauce, 2 tsp grated fresh ginger, the minced garlic, the mustard, and the trimmed pork tenderloin. Seal the bag and smash it around a bit to incorporate the ingredients and coat the pork. Let the pork sit a minimum of 15 minutes. (Obviously longer is fine, you can even put this together in the morning before you go to work.)

Then make the sauce:

Near the end of the marinating time, prepare the sauce: In the small saucepan with the reserved processed pineapple, combine 2 Tbsp hoisin sauce, 2 tsp grated fresh ginger, the soy sauce, and the chicken stock. Set the sauce aside until its time to grill the meat.

About grilling big pieces of meat:

When I’m grilling a piece of meat this big, I do several things. One is that I use medium indirect heat. I have a three-burner gas grill. I turn the two outer burners up to medium or medium-high, and the middle burner on low. The pork is placed over the middle low-heat burner.

I also use a heat-safe thermometer. They’re not too expensive to buy from the kitchen section of your grocery store. You just put it in the meat and leave it there during the entire cooking time. The thermometer beeps when it reaches the proper temperature. Easy, and totally worth the nominal cost. Go buy one while your meat’s marinating. (Just remember, use a hot pad to remove it when you’re done with it…it’s hot. Yes, that’s personal experience talking. Doh!)

Grill the pork tenderloin over medium indirect heat, with the grill covered, turning it once, until it reaches 155 degrees internally. The exact time varies (there’s a lot of variables), but count on around 20 minutes.


While the meat is grilling:

While the meat is cooking, bring the sauce to a simmer over medium heat, then turn it to low heat until serving time. The sauce will thicken as it bubbles – if necessary, add another splash of chicken stock if the pan gets too dry. I pour a few tablespoons of the sauce over the meat at the halfway point of the grilling time – just after turning it over. (Careful, don’t contaminate the sauce with raw meat…and if you do, bring it back up to a boil before serving it.)


Half-way through the pork's cooking time, add the reserved pineapple slices to the warmer part of the grill. Cook them over medium direct heat, turning them once, until the pineapple is soft and warm, with nice grill marks on each side. Each side should take just a few minutes at the most. When they’re done, you can move them to a cooler spot on the grill, or transfer them to a plate and cover them with foil to keep them warm.


When the meat has reached 155 degrees internally, remove it from the heat and cover it with aluminum foil. Let it rest for about five minutes before slicing it (the temperature will rise to 160 as it rests).

To serve, thinly slice the pork into medallions. Serve it alongside the grilled pineapple slices, topped with the sauce. I like to serve this meal with rice…it’s a great way to soak up the sauce!