Wednesday, October 12, 2011

Homemade Vanilla: An Easy-To-Make Christmas Gift


I love giving a gift that reflects something about the giver.  It helps solidify that connection, the reason for the friendship, whatever it is you have in common with the giver.  This year I’m giving my closest friends and family homemade vanilla – something they can use all year long.  Since I love being in the kitchen and try to make everything I cook or bake from scratch, this gift seems to be the perfect gift for my family and friends.

Regular readers of my blog will know that I’m big on making things homemade, for many reasons, one of which is because you can control what goes into your food.  This vanilla is great because there are no added sugars.  The finished vanilla is simply split good-quality vanilla beans steeped in vodka over a period of time – simple.  Many grocery store vanillas have added sugar and are using God-only-knows-what variety of vanilla beans, and the flavor and quality just isn’t the same.

The other great thing about this vanilla is that the bottle is “never-ending.”  As it is used up, the bottle can be topped off with more vodka.  Just let it sit several weeks before it is used, and it is as good as new.  Give the bottles an occasional shake as they sit.

Oh, and the little flecks of what kind of looks like dirt…those are just the beans inside the pods.  Totally edible, totally delicious – that’s where all the flavor comes from.  Don’t worry if some of the flecks make it into your food – that’s a good thing.

If you’re going to make this in quantity as Christmas presents for several people, you’ll find that you will probably need to purchase most of your supplies online – it will be most cost-effective that way.  I bought four-ounce bottles with caps included from Specialty Bottle.  The shipping cost more than the bottles did, but it was still cheaper than sourcing the bottles locally.  Plus, unlike the bottles I found locally, the ones from Specialty Bottle came with caps, so I didn't have to track down a separate source for the lids.  Also of note, they do sell little shrink-wrap seals for the lids.  I didn’t buy any, but if you want to make your vanilla for sale to the general public, you can buy the seals from the same source as well.


I bought my vanilla beans from Beanilla Trading Company, also an online company.  I was initially only going to buy the Madagascar variety of beans, but saw they had a sale on the Bourbon variety so I grabbed a small package of those beans to see how they differ from the Madagascar variety.  (Incidentally, the Bourbon vanilla bean name has nothing to do with bourbon the alcohol.)  It looks like they also sell empty glass bottles on their website, you may or may not be able to get a better deal through them (they didn't carry them at the time I made my purchase).

The Beanilla website and packaging says Madagascar beans are “Rich, smooth, and creamy.  Madagascar vanilla has a distinctly sweet and buttery aroma.  This is the most popular variety of vanilla in the world.  Perfect for any recipe.”

The package for the Bourbon beans says, “Nutty chocolate and raison (sic).  A hint of tobacco.  One of the smoothest, most popular forms of vanilla in the world.”

In both cases, I would agree with their descriptions!  The Madagascar variety definitely smells sweeter than the Bourbon variety does.  I was trying to describe the difference to someone, and the best way I could do so was to say, the Madagascar variety smells very feminine, while the Bourbon variety smells very masculine.  Sort of a strange way to describe it, but that’s the first thing that came to my mind.

As far as the flavor goes, the Madagascar variety seems more “normal” to me, and probably to most people too, because it is the type used in most high-end grocery store vanillas.  The bourbon kind is certainly good too, but I find that when I’m baking, I reach for the Madagascar variety more frequently, simply because its the flavor the general public is used to.

When considering the quantity of beans to purchase, I made my vanilla with 2.5 beans per four-ounce bottle.  You can probably use slightly more or less without a problem, but I don’t think I’d use too much less or you’ll miss out on the vanilla flavor.

For the vodka, I bought a 1.75 liter bottle of Svedka brand vodka from my grocery store.  Of the brands of vodka that were available in that quantity at my grocery store, its price point seemed to be middle of the road, neither excessively expensive for a project like this, nor so inexpensive it’d taste totally terrible.  I figured, like wine, don’t use something you wouldn’t drink…and a taste test proved it would be satisfactory enough for vanilla-making purposes.  The 1.75 liter bottle was more than enough to make fourteen four-ounce bottles of vanilla – and there are still a few inches in the bottom of the bottle for future taste testing purposes.

In addition to the beans, bottles, bottle caps, and vodka, you'll also need a pair of kitchen scissors and a funnel for this project.


Homemade Vanilla Extract

2.5 vanilla beans per four-ounce bottle
Four ounces of vodka per four-ounce bottle

Use scissors to cut each vanilla bean in half.  Then snip up the length of each half of the bean, cutting it almost in half – almost splitting the bean, making a big V shape out of each bean half.


Stuff five V-shaped bean halves into each bottle.


Use a funnel to pour vodka over the beans, filling the bottle.


Cap the bottle, and store it in a cool dark place for about six weeks.  Approximately two weeks in, give the bottles a little shake.  As the bottles sit, the liquid will turn dark – normal vanilla extract color – and you’ll know its ready for use!  The picture below shows how dark the vanilla gets after just a few weeks' time.


To use, give the bottle a little shake, then just pour off the amount of liquid you need, leaving the beans in the bottle.  You can start to use the vanilla extract in recipes as early as several weeks in, but the longer the vanilla sits, the better the flavor gets.  As the level of the liquid goes down, add more vodka to the bottle and wait a few weeks before using it until the extract has reached the proper vanilla-brown color.  (By the way, vodka keeps indefinitely, so even if you’re not a vodka drinker, you don’t have to worry about it going bad if you want to buy a bottle just for this purpose.)

Labeling the Bottles

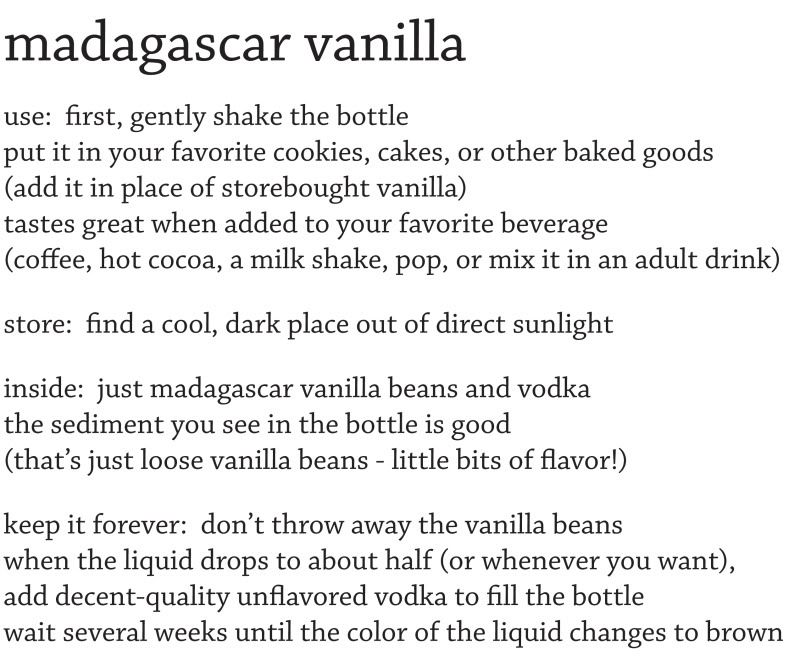
To help identify what was inside my bottles, and to help instruct the recipients of my Christmas gifts, I made little labels for each bottle.  You’re welcome to copy them if you want, or make your own.


For the longest-lasting labels, I suggest printing them on a laser printer (not an inkjet – the ink would run if it got wet).  I also wanted to have the top surface of the label laminated (but not the back, because then it wouldn’t stick to the bottle very easily).  So, I printed my labels, cut them out, and “laminated” the top surface using a large piece of clear packing tape.  Once the tape was trimmed down, it made a nice shiny surface.

Since I printed my labels on regular paper, not label/sticker stock, I needed a way to attach the labels to the bottle.  I guess I could have taped my labels to the bottle, but instead I pulled out my scrapbooking supplies and used my Xyron glue runner to apply permanent glue to the back sides of the labels.  So far they are sticking sufficiently well to the bottles, and its been about a year since I first did this project.

To add a bit of decoration to each bottle, I tied a chocolate and tan ribbon to the neck of each bottle.  They were cute without being excessively cutesy, and festive enough to give as Christmas gifts without being too Christmasy (after all, the bottles are going to be used throughout the entire year).

It's been about a year since I first did this project, and the jars of vanilla I kept for myself are still working out great for me.  I tend to use quite a bit of vanilla because I bake pretty frequently, and this is a much more cost-effective way for me to use high-quality vanilla than constantly buying expensive vanilla extract from a grocery or cooking supply store.

October or November is the perfect time of the year to get started on this project.  Whether you give your vanilla away as Christmas presents, or just plan to use it in your holiday baking, vanilla started in October or November will be perfect, delicious, and more than ready for use by the end of December!

Printable PDF File (with pictures)
Printable PDF File (text only)

Monday, October 10, 2011

Simple Vanilla Drop Sugar Cookies (or Whoopee Pies?!)


Although I love the simple vanilla flavor of sugar cookies, I hardly ever make them.  I think its because they’re a little pesky to make – they usually require lots of refrigeration time.  The dough must be rolled out on the countertop, and regular readers of this blog will recall from photographs that my kitchen countertop is tiled – its not the usual smooth Formica or granite or whatever surface it is that most people have in their kitchen.  The textured tile countertop makes it basically impossible to roll out cookies.  (Don't ever put a tile countertop in your kitchen.)

If I want to make cut-out sugar cookies, I have to haul the dough and cutters and cookie sheets over to a family member’s house, invade their kitchen, and make them there.  Consequently, I usually only bother with sugar cookies once or twice a year, generally only around a holiday, and make cut-out shapes of Christmas trees and angels or Easter bunnies and tulips over at my Dad’s house with my sisters.

To satisfy my sugar cookie fix during the rest of the year, I’m always looking for a good soft drop sugar cookie recipe.  This one works pretty well – no refrigeration required, and the fact that I don’t have a smooth countertop is irrelevant.  The mixing process is easy enough your kids can put the recipe together.  Unlike most sugar cookie recipes, you don’t need to plan to make the cookies four hours ahead to allow ample time for refrigeration.  The cookies are simply dropped onto the cookie sheet with a cookie scoop.  The addition of sour cream gives the cookies great flavor, and keeps them ultra soft, as long as they don’t get excessively overbaked.  They taste good either frosted or unfrosted.

My mom found the first version of this recipe’s ingredient list and baking times somewhere, it apparently came from compilation cookbook put together by Beta Sigma Phi, “The Millennium Cookbook.”  She might have made a few modifications on her end (the recipe was originally supposed to be a roll-out sugar cookie recipe, but my mom found it to be way too soft to easily roll out).  We thought it might make a good drop cookie recipe, and thus I began experimentation in my kitchen.

Turns out, the resulting unbaked “dough” IS really soft – its really more like a thick cake batter than it is like any other cookie dough I’ve ever made.


I have no idea how anyone could possibly roll the dough out without making a huge mess - multiple cups of flour would need to be dusted onto the countertop during the rolling process, and the cookies wouldn’t be nearly as tender with the addition of all that extra flour.  The original recipe concept seemed so difficult and inconsistent – the drop cookie method as I’ve written it below is definitely the way to go.

During experimentation, I discovered these cookies work pretty well as the cake portion of a whoopee pie.  Since the cookies are vanilla and are not strongly flavored, they pair well with a tangy lemon curd filling.  I’ve included an easy-to-make lemon curd filling recipe below the cookie recipe in case you want to try that out.  It uses good-quality store-bought lemon curd, and therefore is way less complicated to make than it would be if you were to make the lemon curd yourself.

Soft Vanilla “Drop” Sugar Cookies
Makes about 4 dozen cookies, depending on how big your cookie scoop is

1 cup butter
1-1/2 cups sugar
2 tsp vanilla
3 eggs
Finely grated zest from one small lemon
4 cups flour
1/2 tsp salt
2 tsp baking powder
1 tsp baking soda
One 8-oz. container sour cream (3/4 cup)

Preheat your oven to 350 degrees F.

Using a mixer, cream together the butter and sugar.  Add the vanilla, eggs, and lemon zest; mix until well-combined.

While the mixer is running, in a separate medium bowl, blend together the flour, salt, baking powder, and baking soda.

Mix half of the flour mixture into the butter mixture until batter is well-combined.  Then mix in half of the sour cream until the batter is uniform.  Add the remaining flour mixture, and once it has been mixed in thoroughly, add the remaining sour cream, and mix until the batter is combined.

Cover your cookie sheets with aluminum foil.  Use a cookie scoop to drop heaping tablespoons of batter onto the sheet, spacing them several inches apart as they will spread slightly.  (My cookie scoop dropped .75 ounces of dough with each scoop.)


Bake the cookies at 350 for 11-13 minutes.  The cookies will look pillowy and should only be barely browned.


Let the baked cookies rest on the warm cookie sheet for 5 minutes before transferring the sheet of foil to a wire cooling rack.  The cookies will be too soft to remove from the foil at this time, but will firm up as they continue to cool.  Once the cookies have cooled completely, remove them from the foil.  They may need to continue to sit on the racks a bit longer until they are firm enough to move to storage containers.

The cooled cookies can be frosted, filled-and-sandwiched into whoopee pies, or just enjoyed plain.


Easy Lemon Curd Filling
in case you want to make whoopee pies out of the cookies

2 cups unwhipped heavy whipping cream
2 Tbsp sugar
1 cup prepared lemon curd, I used storebought Dickinson's brand

In a medium bowl, whip the cream and sugar on high speed until soft peaks form.  Set aside.

Put the lemon curd in a small bowl (I like to use a 2-cup glass measuring cup).  Spoon in about 1/2 cup of the whipped cream.


Stir vigorously to incorporate the lemon curd into the cream.  It may not be entirely lump-free but stir it until it is mostly smooth.


Transfer the lemon mixture into the bowl containing the remaining whipped cream.  Use a spatula to gently fold the lemon mixture into the cream.  Don’t overmix it, just fold it until the color is uniformly lemon yellow.


Pair up your cookies - match them up so you have similarly-shaped pairs, so your finished product looks better.

Dollop the lemon cream mixture onto one of each of the cookie pairs, then sandwich them together.


Since this filling recipe contains cream, you’ll need to refrigerate the cookies if you aren’t planning to serve them right away.  The cream is quite soft at room temperature, but is more firm at refrigerator temperature, and is quite delicious served either way.  I think I preferred the refrigerator temperature personally, but that’s just me.  They will last about a week in the fridge (if you haven’t eaten them all first!).

Printable PDF File (with pictures)
Printable PDF File (text only)