Wednesday, May 27, 2009

Apple Strudel - The Daring Bakers May Challenge

As I previously mentioned, I joined a group called The Daring Kitchen: I am now a Daring Baker! I’ve wanted to join them for a very long time – almost the entire time they’ve existed! But time constraints kept me from pursuing it…until now.

I am really glad I joined this month, because the challenge recipe is something I have always wanted to make, but never have until now. The May Daring Bakers’ challenge was hosted by Linda of make life sweeter! and Courtney of Coco Cooks. They chose Apple Strudel from the recipe book Kaffeehaus: Exquisite Desserts from the Classic Cafés of Vienna, Budapest and Prague by Rick Rodgers.

The rules of The Daring Kitchen require you to follow the recipe pretty much exactly (substitutions allowed in case of allergy/diet/religion/etc., but you’re supposed to stick to the overall recipe as much as possible). The hosts can decide to allow certain substitutions. In this case, we were required to follow the strudel dough recipe as exactly as possible, but we were allowed to be creative with filling and shaping the dough.

I made a double-batch of dough because I wanted to have plenty of dough for practice. I then divided it into thirds. In the future, I’d still make a double batch, because I probably still need more practice! The recipe below is a double batch already, so you don’t need to double it unless you want LOTS of practice!

I made apple filling for the first and second portions of my dough. Most apple strudel filling recipes call for raisins and nuts, and I’m not particularly into that, so I left them out. If you’re into that, you can try the apple filling suggested in the original recipe.

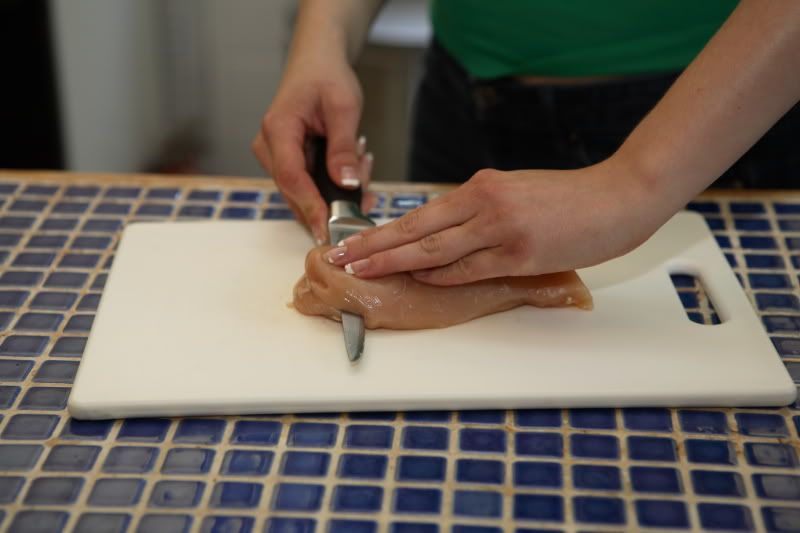
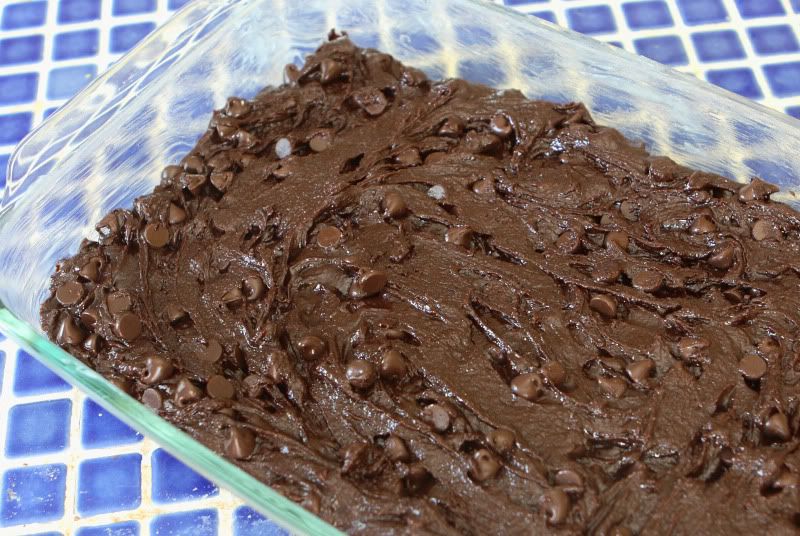
Also, although the original recipe calls for the dough to be kneaded by hand, I needed to use my stand mixer to perform that task. Regular visitors to this blog have certainly noticed by now my ugly “country blue” tiled countertop...not a favorable surface for kneading dough. (If you’re ever thinking about installing a tiled countertop in your kitchen, DON’T! Mine came with the house. And once funding becomes available, it be ripped out and replaced.)

The first step is to make the strudel dough, since it needs to rest for an extended period of time.

Double Batch Strudel Dough

Adapted from “Kaffeehaus – Exquisite Desserts from the Classic Cafés of Vienna, Budapest and Prague” by Rick Rodgers
Makes two large strudel or three smaller strudel


2 2/3 cups (400 g) unbleached flour
1/4 teaspoon salt
14 tablespoons (210 ml) water, plus more if needed
4 tablespoons (60 ml) vegetable oil, plus additional for coating the dough
1 teaspoon cider vinegar

Combine the flour and salt in a stand-mixer fitted with the dough hook attachment. Mix the water, oil and vinegar in a measuring cup. Add the water/oil mixture to the flour with the mixer on low speed. You will get a soft dough. Make sure it is not too dry or too wet, add a little more water or flour if necessary. It should be soft and slightly sticky. Knead the dough in the mixer for about five minutes.


Shape the dough into a ball and transfer it to a plate. Oil the top of the dough ball lightly. Cover the ball tightly with plastic wrap. Allow to stand as long as possible, at least 30-90 minutes. (Mine stood for about seven hours before I started rolling and stretching the dough.)

It would be best if you have a work area that you can walk around on all sides like a 36 inch (90 cm) round table or a work surface of 23 x 38 inches (60 x 100 cm). Cover your working area with cotton tablecloth, dust it with flour and rub it into the fabric.


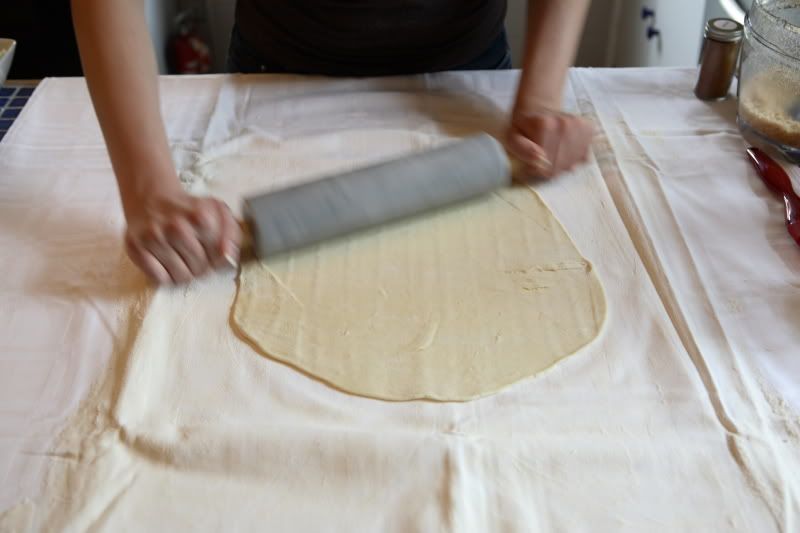
If you’re making two strudel, cut the dough ball in half. Put half in the middle of the tablecloth and use a rolling pin to roll it out as much as you can, turning the dough frequently to avoid sticking.


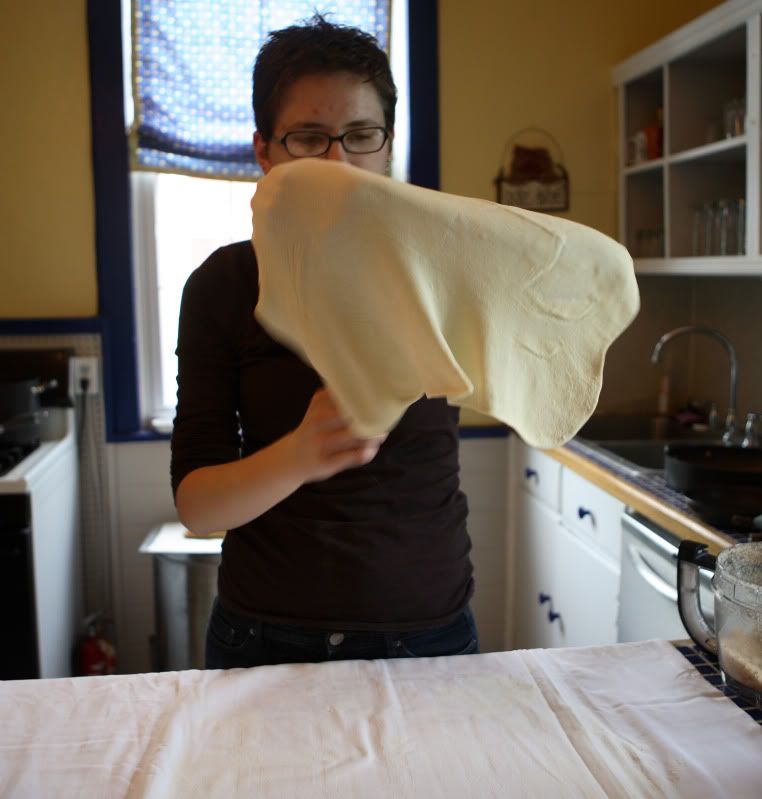
Pick the dough up by holding it by an edge. This way the weight of the dough and gravity can help stretching it as it hangs. Using the back of your hands to gently stretch and pull the dough. If you hold it by your fingertips, you will poke through the dough.


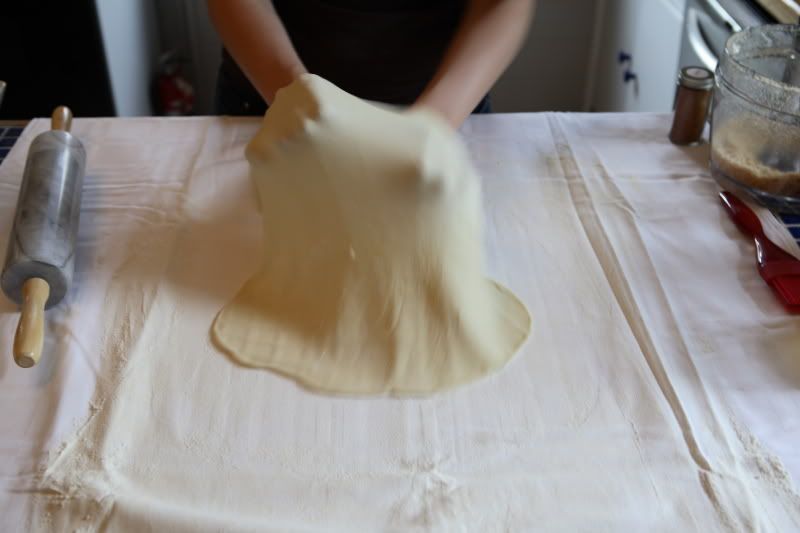
You can also use your forearms to support it.


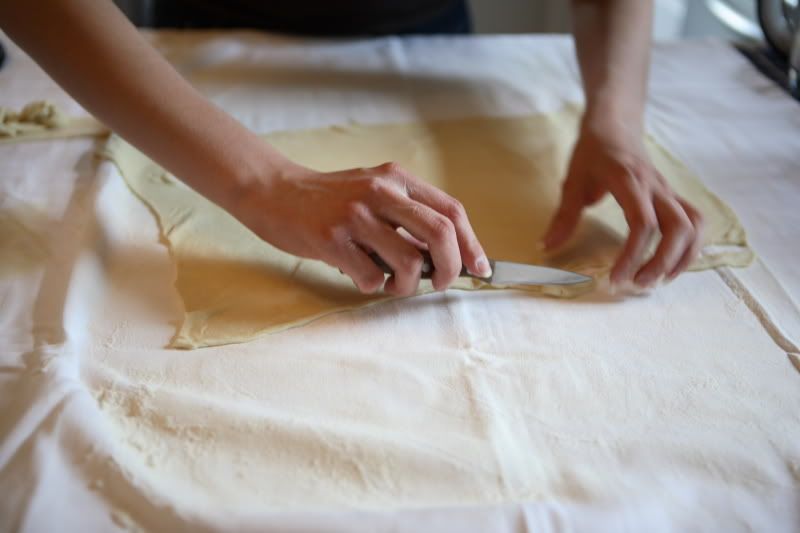
The dough will become too large to hold. Put it on your work surface. If it hangs off the edge, that’s fine, and even preferable. Place your hands underneath the dough, and stretch and pull the dough thinner using the backs of your hands. Stretch and pull the dough until it's about 2 feet (60 cm) wide and 3 feet (90 cm) long (that's if you're using half of the dough), it will be tissue-thin by this time. (My dough is smaller because I used about a third of it instead of half of it.) Cut away the thick dough around the edges with scissors or a sharp knife. The dough is now ready to be filled.


Regardless of what kind of filling you make, you’ll need toasted breadcrumbs and melted butter:

3 Tbsp butter, plus 8 Tbsp butter
1 1/2 cups (350 ml) fresh bread crumbs, finely processed

In a medium skillet, heat 3 Tbsp butter. Add the fresh bread crumbs and stir to toast. Allow to cool before using in strudel.

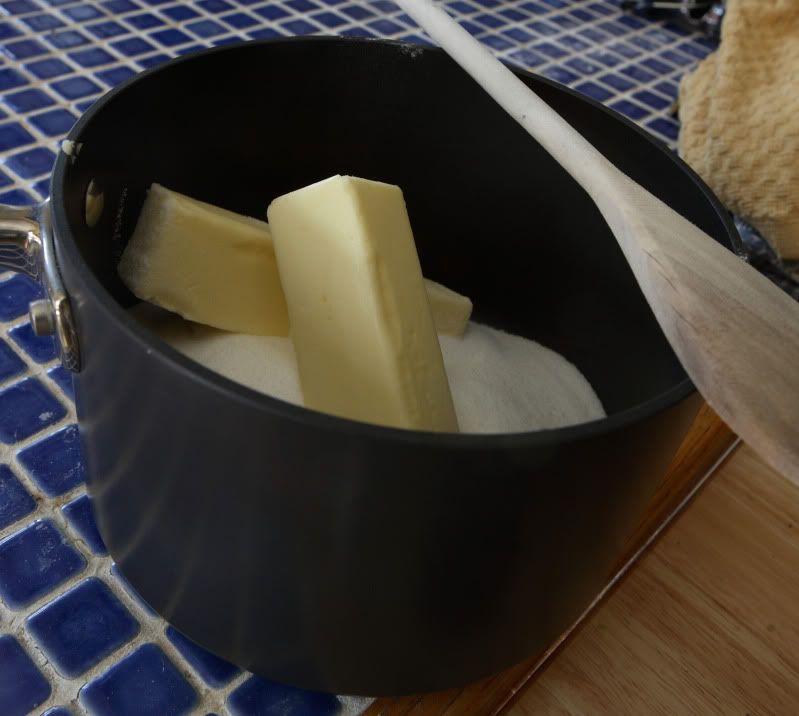
In a small saucepan or in the microwave, heat 8 Tbsp butter to melt. Set aside to cool slightly.

The next step is to prepare your filling. The following recipe is what I used for my apple filling. It should yield enough filling to fill an entire double batch of dough:

Apple Strudel Filling
Makes enough to fill a double batch of dough

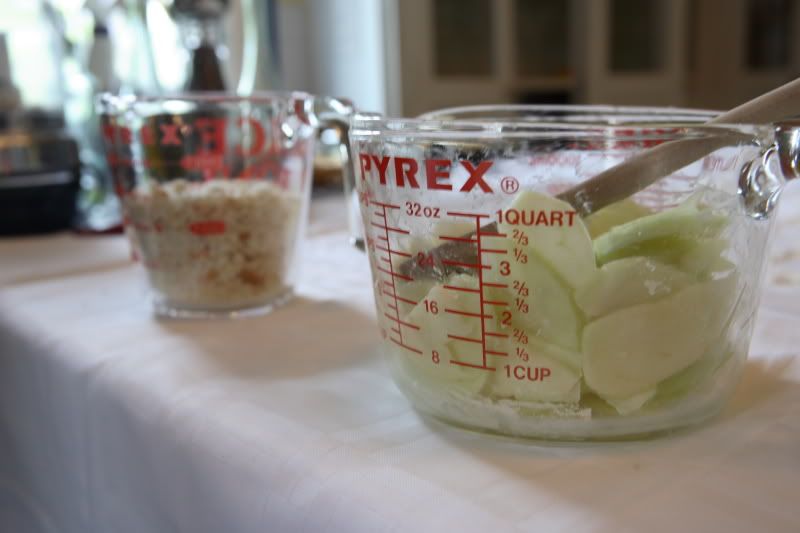
2 large apples, peeled, cored, and thinly sliced to about 1/8-inch thick
Juice of half of a lemon
1 Tbsp flour
3/4 tsp ground cinnamon
3/4 tsp ground nutmeg
1 tsp granulated sugar

Mix the apples, lemon juice, and flour together. Set the remaining ingredients aside, as they should be sprinkled on top of the apples as you’re filling the strudel dough.


With the third portion of dough I made rhubarb strudel. Since I just needed enough for one small strudel, I only made a little bit, but the recipe below will probably make enough to fill a double batch of dough if you really like rhubarb!

Rhubarb Strudel Filling
Makes enough to fill a double batch of dough

2 cups diced rhubarb, red portions only
1 Tbsp sugar
3/4 tsp ground cinnamon

Sprinkle ingredients on strudel dough individually.

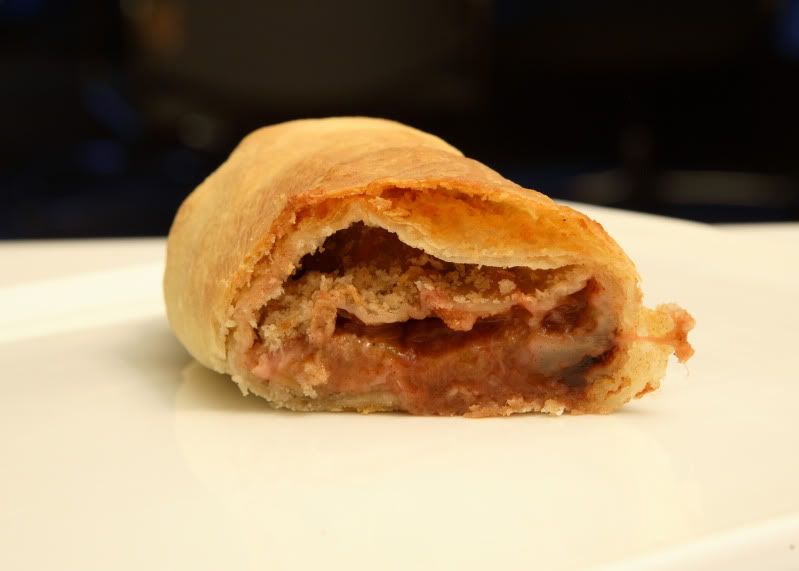
My experience with rhubarb is pretty limited. I never have particularly cared for it...until I tried this rhubarb strudel! Wow, I think I like it even better than the apple variety! Now I feel inspired to try rhubarb in other things!

Once your filling ingredients are prepped, you’re ready to fill the rolled and stretched strudel dough.

First, preheat your oven to 400 degrees F. Place a piece of parchment paper on a large baking sheet.

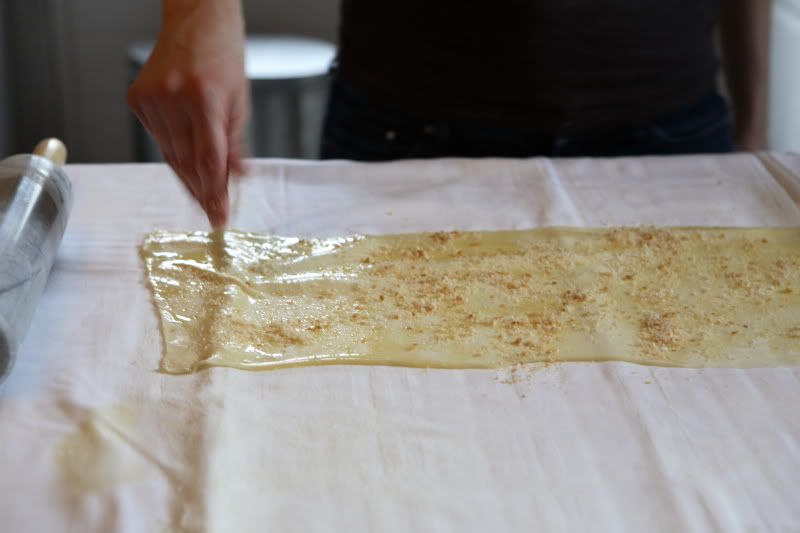
To fill the dough, first brush a thin coat of melted butter over the strudel dough. Then sprinkle bread crumbs evenly over the surface.


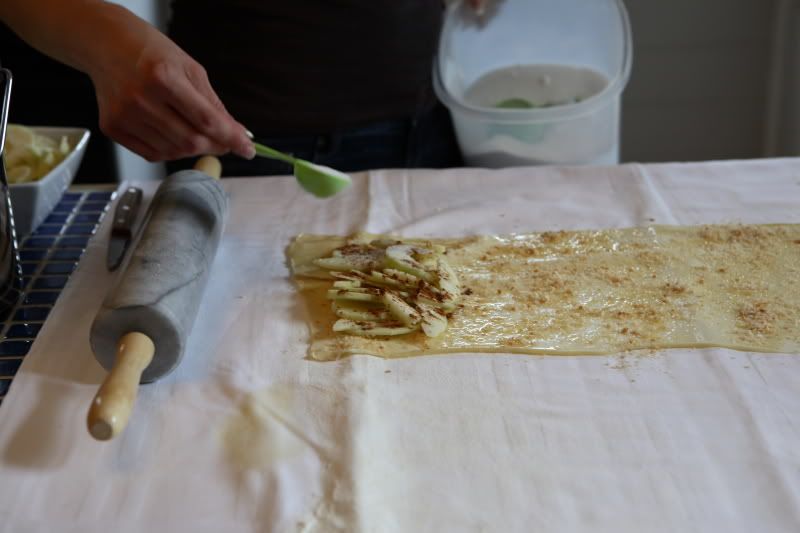
Place your filling ingredients to one side of the dough, sprinkling with the sugar and spices as appropriate for your filling. Leave approximately an inch margin around the sides closest to the edge.


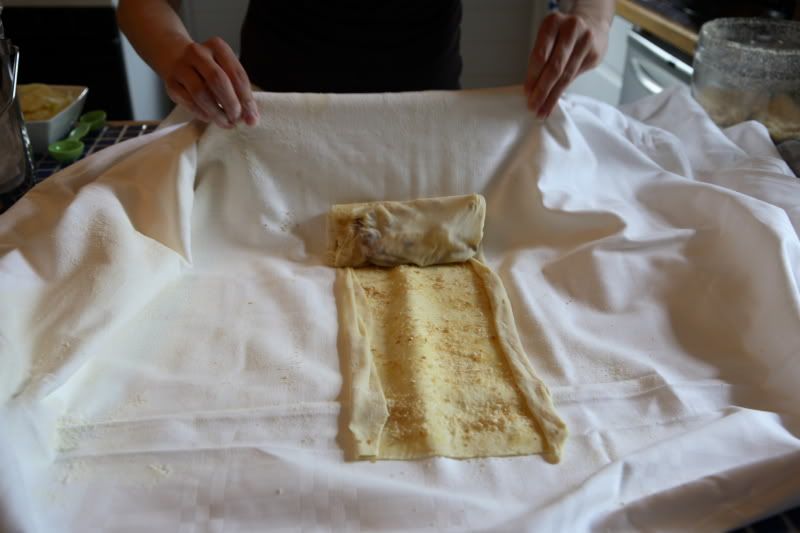
When rolling the dough into a log, use the tablecloth to manipulate the dough. If you handle it with your fingertips, you will puncture the dough.

First, use the tablecloth to fold over the edges along the two sides (length) of the dough.


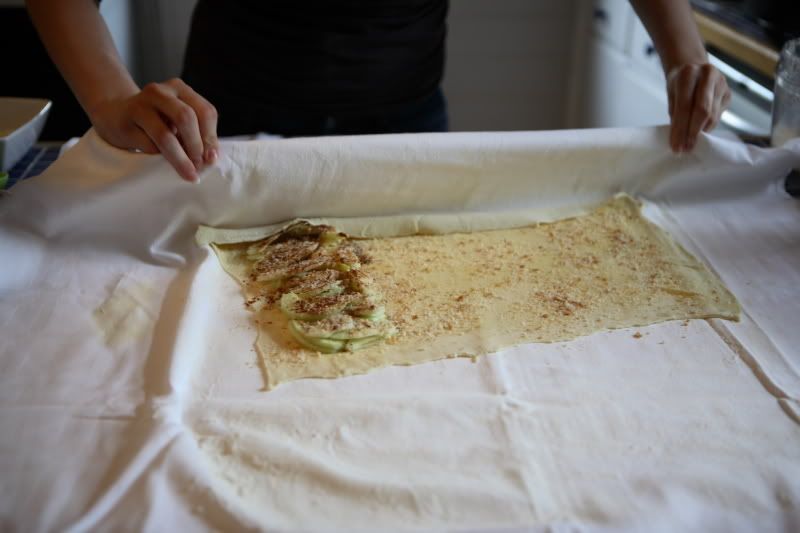
Then, use the tablecloth to nudge the filling over itself to roll up the dough into a log.


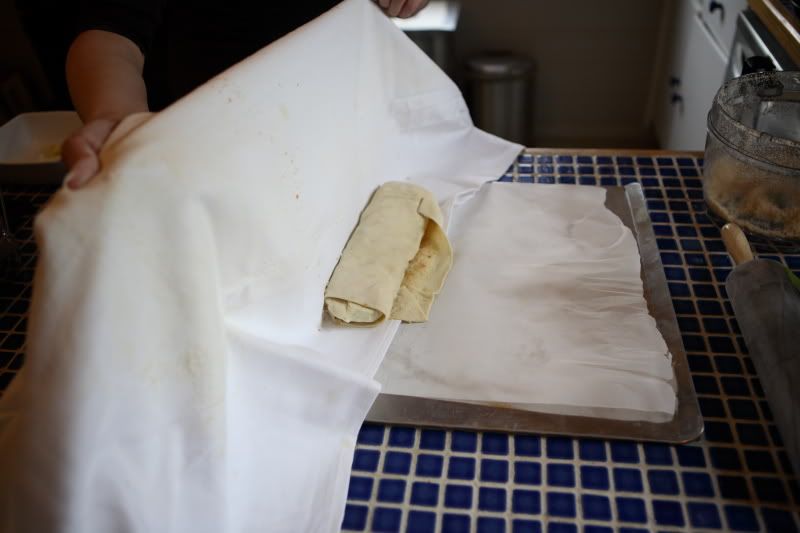
Use the tablecloth as a sling to transport the strudel if it is necessary to carry it from one work surface to another. Roll the dough out of the tablecloth onto your parchment-papered baking sheet. If the strudel is too large for the baking sheet, curve it into a horseshoe shape to make it fit.


Bake at 400 degrees for 20-30 minutes, depending on the size of your strudel and the thickness of your ingredients. The dough should be golden brown and crispy, any leaking juices should be bubbly, and the filling ingredients should be tender. (My smaller strudels were done at 20, 23, and 27 minutes, depending on their size. Larger strudels might take a little longer.)


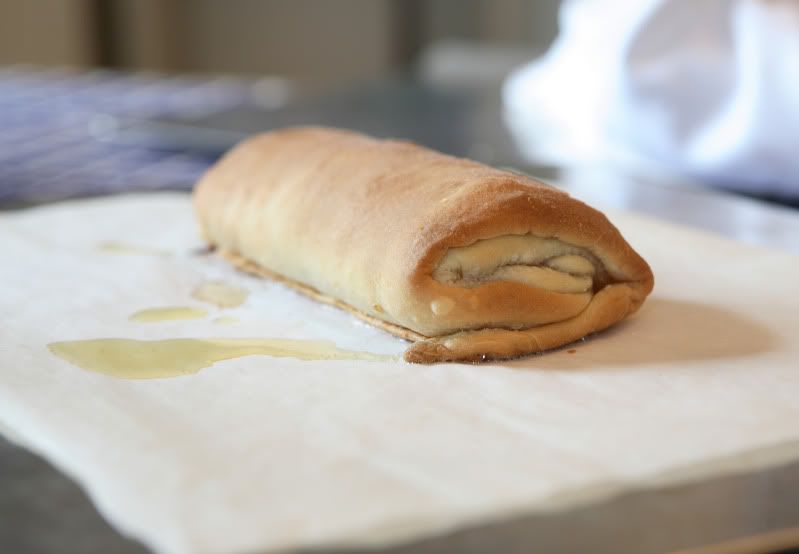
Once the strudel is done, slide a wire cooling rack under the parchment paper and remove the strudel from the warm cookie sheet. Allow the strudel to cool completely before serving. Slice with a sharp serrated knife.

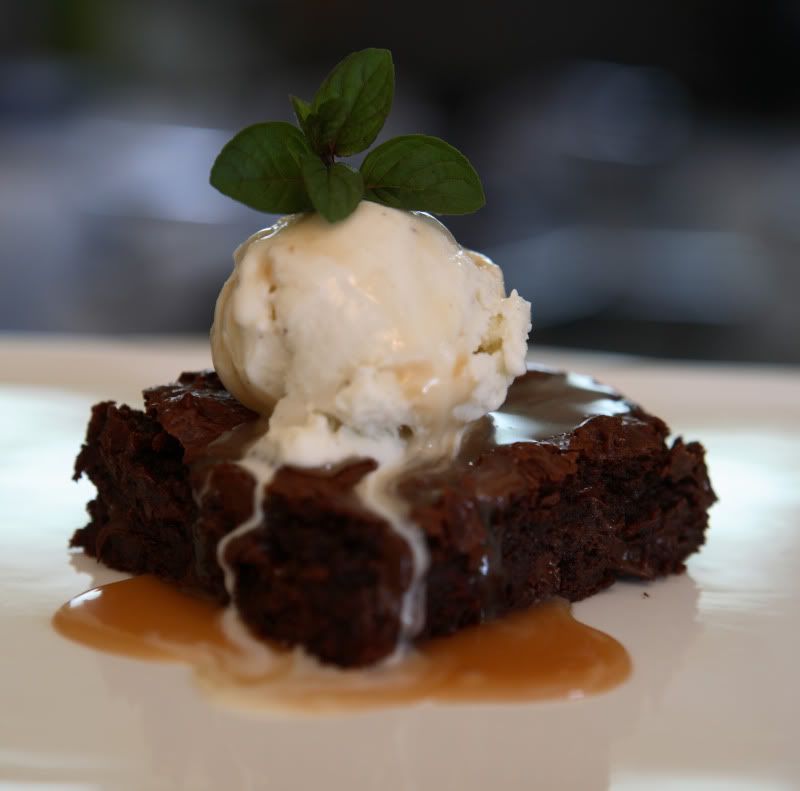
I made a caramel sauce to top the baked apple strudel, and sprinkled it with powdered sugar just before serving time.


The rhubarb strudel:

Thursday, May 21, 2009

Mint Chocolate Cheesecake

I never did care much for cheesecake. – at least, not the kind that is made out of Philly cream cheese. Sometimes I’ll be at a restaurant and inadvertently order cheesecake, masqueraded as a chocolate torte, a cake, or a mousse cake, whatever. I tend to dislike cheesecake so much that I usually just pick the crust off the bottom of it and give the remaining filling to my husband.

I know, I know, I can’t think of a single other person who doesn’t like cheesecake either.

Consequently, I hardly ever make it. In fact, I’ve made it maybe twice in my life.

But, I recently joined The Daring Kitchen (until recently known as The Daring Bakers). I won’t be able to post the results of my first challenge recipe (which isn’t cheesecake) until May 27. So, to tide you over until then, I made last month’s challenge, which WAS cheesecake.

I decided I really wanted to make it because I rarely make cheesecake (might as well improve my baking skills), and because maybe, just maybe, I’ll actually like it. The Daring Kitchen is all about doing something new and different, so I am going to do just that.

What kind of cheesecake should I make? That’s a no-brainer. In effort to increase the chances that my results will be something I would actually enjoy eating, the cheesecake will be chocolate.

What about the crust? While I do like the standard-issue graham cracker crust, I almost always prefer something chocolaty (you can never have too much of a good thing).

Fortunately, Girl Scout Cookie season ended just a few months ago. I always buy extra boxes of their chocolate mint cookies for exactly this kind of purpose. (Have you ever had cookies & cream ice cream made with crushed mint chocolate Girl Scout cookies? Try it sometime. It’s surprisingly amazing.) At any rate, I happened to have a box of cookies left! They became my crust.


The original recipe was written as a vanilla cheesecake. I added melted 62% cacao Scharffen Berger chocolate and a few tablespoons of crème de menthe (the clear variety) to the cake batter, and used nearly an entire box of Girl Scout cookies as the crust. Although I saved six cookies in case I decided I wanted to use them as garnish, I forgot about the cookies when it came time to garnish the cheesecake...oh well.

Turns out cheesecake is really easy to make! The hardest part is being patient - it takes nearly an hour to bake, plus an hour of resting time inside the oven, plus time to cool to room temperature on your countertop, plus time to chill in the refrigerator. If you don't rush things and use the hot water bath described below, your cheesecake won't crack.

Thanks to Abbey and Jenny, I now have made a cheesecake I actually like! Thanks for converting me, ladies!

The April 2009 challenge is hosted by Jenny from Jenny Bakes. She has chosen Abbey's Infamous Cheesecake as the challenge. You can find the original recipe at either of their blogs. The version below includes my modifications

Mint Chocolate Cheesecake
Makes one 9-inch cheesecake

8 ounces 62% cacao chocolate, roughly chopped
180 g crushed chocolate mint girl scout cookies, or oreos
2 tbsp. / 24 g sugar
1 stick / 4 oz butter, melted
1 tsp. vanilla extract
3 sticks of cream cheese, 8 oz each (total of 24 oz) at room temperature
1 cup / 210 g sugar
3 large eggs
1 cup / 8 oz heavy cream
2 Tbsp crème de menthe liqueur

Preheat oven to 350 degrees F. Begin to boil a large pot of water for the water bath. Wrap the bottom/sides of a 9-inch springform pan with aluminum foil, keeping the foil watertight.


Place pan inside a larger roasting pan and set aside.


In the top of a double boiler set over simmering water, melt the chocolate, stirring frequently. Once the chocolate has melted, remove it from the heat and set it aside.

In a food processor, finely process the cookies and sugar. Add the melted butter and vanilla and process to combine the ingredients. Press into the prepared springform pan, being careful to avoid ripping the aluminum foil. Return the pan to the roasting pan and set it aside.

Combine chocolate, cream cheese, and sugar in the bowl of a stand-mixer (or in a large bowl if using a hand-mixer) and cream together until smooth. Add eggs, one at a time, fully incorporating each before adding the next. Make sure to scrape down the bowl in between each egg. Add heavy cream and crème de menthe and blend until smooth and creamy.

Scrape the batter into the prepared crust and tap the pan on the counter a few times to bring all air bubbles to the surface. Place pan into the roasting pan and pour boiling water into the larger pan until halfway up the side of the cheesecake pan.

Bake 45 to 55 minutes, until it is almost done - this can be hard to judge, but you're looking for the cake to hold together, but still have a lot of jiggle to it in the center. You don't want it to be completely firm at this stage. Close the oven door, turn the heat off, and let rest in the cooling oven for one hour. This lets the cake finish cooking and cool down gently enough so that it won't crack on the top. After one hour, remove cheesecake from oven and lift carefully out of water bath. Let it finish cooling on the counter, and then cover and put in the fridge to chill. Once fully chilled, it is ready to serve.


Sunday, May 17, 2009

"Pineapple Mint" Chicken

A friend of mine was surfing the internet recently and found this recipe for Mojito Chicken, by Guy Fieri of Food Network fame. We agreed the recipe needed a few changes (Baking marinated chicken? Obviously it should be GRILLED!) but we both thought the basic idea sounded good. My friend apparently went home and made the recipe for his family, although I’m not sure what kind of changes he made to it. He did mention he cut back on the amount of mint suggested in Guy’s original recipe, and I know he grilled the chicken.

I studied the original recipe further, read the accompanying reviews, and came to the conclusion that the recipe was probably too salty, too minty for my taste, and was a lot more elaborate than necessary.

I made one other conclusion: regular grocery store mint just wasn’t going to cut it. I never much cared for the strong mint flavor of the stuff the grocer carries, anyway.

The last time I was at the greenhouse/nursery, I saw some interesting varieties of herbs, including a variety of mint called “Pineapple Mint.” It’s beautiful, as far as herbs go, and has fuzzy stems, with ivory and green leaves. True to its name, its leaves have the unmistakable aroma of freshly-cut pineapple. I initially passed on the plant because I was already over budget as it was. But when I saw this recipe and thought of the possibilities presented by Mojito Chicken, I immediately knew I’d have to go back and buy the Pineapple Mint plant for the sole purpose of trying it with this recipe.


$3.50 well spent. Delicious. Not overwhelmingly minty, just right.

I’d totally recommend picking up some of this plant if you ever see it around!

So, I ended up modifying quite a bit of the original recipe – same basic flavors, but different quantities and different method. It’s a lot easier now – mix up some ingredients and wait for the marinade to do its magic. There's no pineapple in the recipe because there wasn't any in Guy Fieri's original recipe, so the recipe title is only a reference to the variety of mint I used.

Usually when I’m grilling chicken breast halves, I slice them horizontally into two flat, thin pieces. They cook more evenly (no dried out, overcooked edges or undercooked centers!). If you have a long, thin, sharp boning knife, give it a try. (Carefully! Don’t cut yourself!) You can use a chef’s knife too, but a boning knife is easier because there's less knife surface area to stick to the meat. This also helps with portion control...it looks like you're eating a full half of a breast, but you're not.


“Pineapple Mint” Chicken
Serves 4-6

2 to 4 halves chicken breast
3 large cloves garlic, pressed or finely chopped
1 large shallot, finely chopped
1/4 tsp cumin
1 Tbsp fresh oregano, finely snipped
1/2 tsp kosher salt
1 tsp freshly ground black pepper
1 tsp paprika
1 Tbsp fresh Pineapple Mint, or another mint variety
2 oranges, juiced
1 lime, juiced
1/4 cup rum (If you’re anti-rum, you could sub it out for chicken stock, but the taste won’t be the same.)
1/4 cup olive oil

Place the chicken pieces in a dish or heavy plastic bag – something you can use to hold them while they marinate.


In a medium bowl, mix together remaining ingredients. Pour over chicken. Allow chicken to marinate at least two hours, up to eight hours.

Grill chicken over medium-high heat only until chicken is no longer pink. Turn once. While chicken is grilling, bring the leftover marinade to a boil (kill the germs!). Spoon boiled marinade over chicken as it is grilling.

I served this with a fruit salad (pineapple, strawberries, blackberries, and bananas!) and grilled asparagus and bell peppers. Simple and delicious!


Saturday, May 16, 2009

Herbs - My Kitchen "Garden"

I happen to NOT have much of a green thumb. Not that I maybe couldn’t learn how to garden, but I am not sure I’d have time available to keep up with a garden. But I do like fresh herbs, and I am too cheap to buy them from the grocery store every time I want to make dinner.

So I compromise.

I pick up these cute little plugs of already-started plants from my local greenhouse. The hard part – getting the things to grow in the first place – is already done. Now I just have to try not to kill them.

I put these little guys into pots, not into the ground, because I am not a fan of weeding.

When comparing my costs to the cost of buying herbs at the grocer, as long as I get two meals’ worth of yield out of each plant, I come out ahead financially.

The other advantage of growing your own herbs is that you are no longer limited to making an entrée that involves only whatever herbs the grocer happens to have in stock.

Here’s a sample of what I’m trying to keep alive this summer:


Purple Sage
I tried this last year for the first time, and it really boosted the flavor of my Brown Butter Pasta Sauce recipe. So far, this year’s is just as good!


Purple Basil
I love basil, and I especially like experimenting with something other than comparatively boring green basil! The purple basil is so pretty! Last year’s purple basil didn’t fare too well, so I’m hoping this year’s will last a little longer.


Italian Parsley
I can’t cook without parsley!


Chocolate Mint
This is an awesome plant. It really and truly tastes like a York Peppermint Patty! I’m not usually a huge mint fan, but I keep this one around so I can use it as garnish on chocolate desserts! And it’s a great conversation piece.


Rosemary
Another staple in my kitchen. I love using this in marinades, or using the branches as skewers for kebobs. Although, this year I bought Creeping Rosemary, and it doesn’t look like the stems will work as skewers because they’re a lot more flexible than regular rosemary.


Cilantro
Fresh cilantro really makes Mexican food outstanding!


Thyme
Another great herb, so many uses! This one goes right along with rosemary in many of my marinades!


Oregano
So much more than just a pizza herb!


French Tarragon
Unfortunately last year's plant died before I could do anything with it. I'm hoping for better results this year!


Lemon Basil
This makes killer pesto! I can’t wait until these babies are full enough to make pesto sauce without totally decimating the plant! Last year I bought Lime Basil because they were out of lemon, and while it was good, the flavor just wasn’t the same. Plus, Lemon Pesto leaves grow larger, and are easier to harvest.

Speaking of harvesting leaves, here's some tips for those of you that are beginning herb gardeners:

Don’t strip the stem bare (if you really must take all the leaves off of a stem, snip the stem off, don’t just pick the leaves off). If you're snipping part of the stem off, cut above new growth, leaving it behind to replace what you just took off. In the Lemon Basil photo shown below, you'd be cutting at the blue line. Or, on many herbs, there are often larger leaves that have grown just underneath where the newest leaves are growing. You can take those larger leaves off too. Cut at the pink lines in the photo below. But, leave behind the new growth - in this photo, that's the two stems in between the blue and pink lines..


If you pick more than you need, stand the herbs up in a cup of water in your fridge. Or, if they’re too small to “stand,” wrap them up in a moist paper towel and use them up in tomorrow’s supper.

To channel your plant’s efforts into new plant growth, pick off any flowers that start to grow. It takes awhile for the buds to look like actual flowers, but as soon as you see a fuzzy green bud, pinch it off. I circled the bud in red in the photo below.


Now, I need a tip from YOU! A cute little rabbit has made a home under the tree in my backyard. I don't mind having him there, but he keeps nibbling away at my plants! How can I convince him that this isn't his own personal buffet? A fence isn't really feasible because the pots are set on my porch steps, a high traffic area. And I don't really want to spray the plants with a bunch of chemicals I don't want to eat myself.


Oh, apparently I already managed to kill one of the plants. I bought a curly-leaved purple basil variety, and it didn't last long. I didn't even get a picture of it! Actually, in all honesty, I think the rabbit ate it, because the plant is just clean gone.

Thursday, May 14, 2009

Brown Butter Pasta Sauce on Butternut Squash Ravioli

Have you ever had brown butter pasta sauce? It’s less common, at least, around here (I can’t recall seeing it in a restaurant recently). I do love it, partially because it’s delicious, partially because it’s a nice change of pace from marinara or alfredo sauce, and partially because it’s one of the easiest pasta sauces to make.

That said, to be successful with the finished product, have all of your ingredients ready to go by the time the pasta is done cooking. You’ll need to be able to dump it all into the pot at the appropriate time and if you take too long, your pasta will cool off too much. But that’s the most difficult thing about it. (To alleviate that problem, you could make the sauce in a different pan as the pasta is cooking...but that means you'll have more clean-up...I'm lazy...)

Another thing – yeah, this isn’t exactly health food... It is called Brown BUTTER Sauce for a reason!

We like the Rising Moon brand of ravioli – they have a wide variety of flavors to try. My favorite is the Butternut Squash kind, especially when served with this sauce. Most of the flavors I’ve tried are pretty good, though.


This is easy to make vegetarian – just omit the prosciutto. Add a pinch of coarse salt if you do that, though, because prosciutto’s very salty!

Brown Butter Pasta Sauce on Butternut Squash Ravioli
Serves 4

2 8-ounce packages butternut squash-filled ravioli (16 ounces total)
1/2 cup walnuts, roughly chopped
About 3 ounces thinly sliced prosciutto, finely diced
1 Tbsp fresh sage, finely chopped
1/4 cup freshly grated Parmesan cheese, plus more for garnish
1/4 tsp freshly grated nutmeg
4 Tbsp butter
1/4 cup finely diced portabella mushroom
Freshly ground black pepper


Cook the pasta according to package directions.

Meanwhile, prepare the sauce ingredients:

Roughly chop the walnuts. Toast them in a skillet over medium heat, stirring often, until aromatic and lightly browned. Remove the nuts from the heat and set them aside.


Finely dice the prosciutto; set it aside. Finely chop the sage; set it aside. Grate the cheese. Keep your nutmeg and it's grater close at hand, so it's ready to go too.


Once the pasta has cooked, drain it well and set it aside. Add the butter to the empty pasta pot. Stir it over medium heat until it has melted. Continue to cook the butter, stirring frequently, until it begins to turn golden brown – this will take just a few minutes. As soon as it begins to become golden brown, add the mushrooms, grated nutmeg, black pepper, diced prosciutto, and chopped sage. Over low heat, stir to heat through; the mushrooms will cook very rapidly in the hot butter.

Return the pasta to the pot. Sprinkle the parmesan over the pasta and gently stir to distribute the cheese evenly and coat the pasta with the sauce. Garnish with additional grated parmesan cheese and the toasted nuts.

Sunday, May 10, 2009

Chocolate Chip Brownies

These are my go-to brownies for when I have company over to visit. They are not too fudgy, not too cakey, and shouldn’t turn out dry, as long as you don’t over bake them (that’s entirely up to you!). The brownies still pack a chocolaty punch, and shouldn’t disappoint chocolate lovers.

The recipe was originally a back-of-the-flour-bag KA recipe (their all-purpose flour bag, if you’ve got one around), but you can also find a very similar version of the recipe online. I can’t leave well enough alone, so I usually make it as I’ve written it below.

This recipe calls for a full two cups of chocolate chips. The cheapest way to accomplish this is to buy your chocolate chips in a giant 72-ounce bag:


For the ultimate in brownie decadence, make them into brownie sundaes with some ice cream and homemade caramel sauce!

If you like nuts, add a handful of walnuts – toasted! – at the same time the chocolate chips are stirred in. Or, I've substituted butterscotch chips for the chocolate chips with great results.

Chocolate Chip Brownies
Makes one 9x13 pan

1 cup (2 sticks) unsalted butter
2 1/4 cups sugar
4 large eggs
1 1/4 cups cocoa
1 teaspoon salt
1 teaspoon baking powder
1 tablespoon vanilla extract
1 1/2 cups all-purpose Flour
2 cups chocolate chips

Preheat oven to 350 degrees F. Grease a 9x13 pan.

In a medium saucepan, melt the butter and sugar, stirring to combine. The mixture will become shiny-looking.


Transfer the mixture to a large bowl and add the cocoa, stirring until smooth.

Add the eggs, one at a time, stirring well after each addition. Then stir in the vanilla.

Add the salt, baking powder, and flour, stirring only until barely smooth - a few traces of flour should be left, like this:


Then stir in the chocolate chips.


Spread the batter into a lightly greased 9x13 pan


Bake in preheated oven for about 30 minutes, or until a cake tester comes out with just a few moist crumbs.

Cool the pan on a wire rack before serving.