...delicious...my favorite kind to use in baking!
a collection of recipes, with and without chocolate
Showing posts with label pudding. Show all posts
Sunday, February 28, 2010
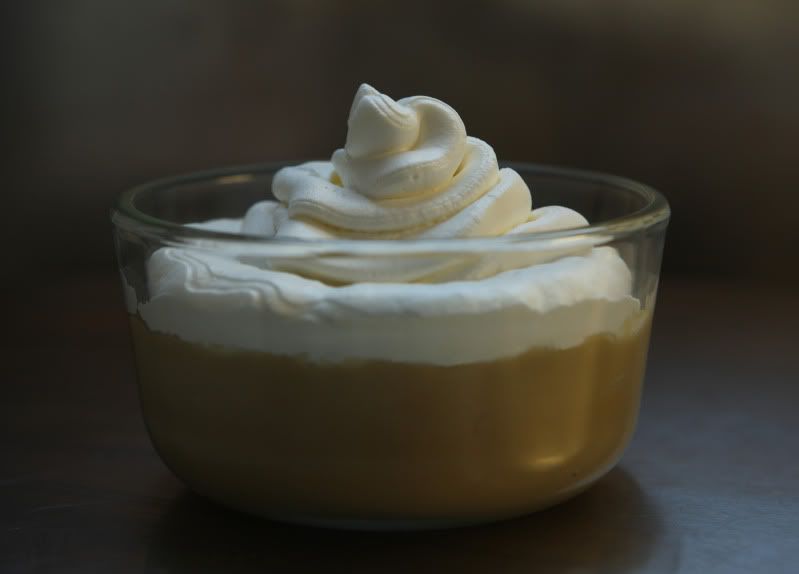
Butterscotch Pudding with Salted Whipped Cream
I’ve been on a butterscotch kick lately. It all started with the brown butter blondies I made awhile back – their butter-and-brown sugar flavor profile has had me thinking about butterscotch desserts ever since. A few weeks later, I made a butterscotch sauce to top some ice cream sundaes I served when we had family over to visit. Then I experimented with butterscotch pudding on Super Bowl Sunday, but felt the recipe wasn’t quite there yet, so it didn’t get blogged.
After I had a butterscotch sundae at Ted Drewes last night, I felt sufficiently inspired to try out another butterscotch pudding recipe. I found a different recipe from one of my favorite dessert cookbooks (one you’ve seen before), Diner Desserts, by Tish Boyle. Like every other recipe I’ve made out of that cookbook, it didn’t disappoint me.
Despite the inclusion of the word “scotch” in the name “butterscotch,” there actually isn’t supposed to be any scotch in traditionally-made butterscotch. (If you want, you can add a tablespoon of scotch and make less-traditional butterscotch pudding, but for the most authentic pudding, it should be left out.)
“Real” butterscotch flavor is created by butter and brown sugar. Therefore, any butterscotch-flavored dessert is necessarily going to be rather sweet. To counter all that sugar, the pudding tastes great with a little bit of extra salt. I suggest topping the pudding with salted whipped cream. You could skip the whipped cream and sprinkle a pinch of sea salt directly on top of each of your puddings just before serving them.
When I’m making pudding, I like to set out all of my ingredients in advance. Making pudding isn’t too difficult, but it requires that you whisk the mixture almost constantly, so you can’t take time to set the whisk down and fuss over the next ingredient.
Butterscotch Pudding with Salted Whipped Cream
6 servings
Pudding ingredients:
3 large egg yolks
3 Tbsp unsalted butter, cut into tablespoons
2 tsp vanilla extract
1/3 cup cornstarch
1 cup packed dark brown sugar
1/2 tsp salt
2 cups whole milk
1 cup half-and-half
1 Tbsp scotch – optional (see above)
Salted Whipped Cream ingredients:
1/2 cup whipping cream
A generous pinch of kosher salt
First, make the pudding. It needs time to chill in your refrigerator prior to serving it, so start it at least three or four hours in advance.
I start by preparing my ingredients. Place the egg yolks in a medium bowl. Use a fork to whisk them together and set the bowl aside for later. You’ll need a one-cup scoop later, so set the scoop near the egg yolks so you’ll have it handy.
Measure out your butter. Go ahead and cut it into tablespoons. Set the butter aside. Keep your bottle of vanilla (and the scotch, if you’re going to use it) nearby because you’ll need to add it when you add the butter.
You’ll need six small dishes for your pudding. Locate them and set them nearby.
In a medium saucepan, off of the heat, stir together the cornstarch, sugar, and salt. The mixture should look very sandy.
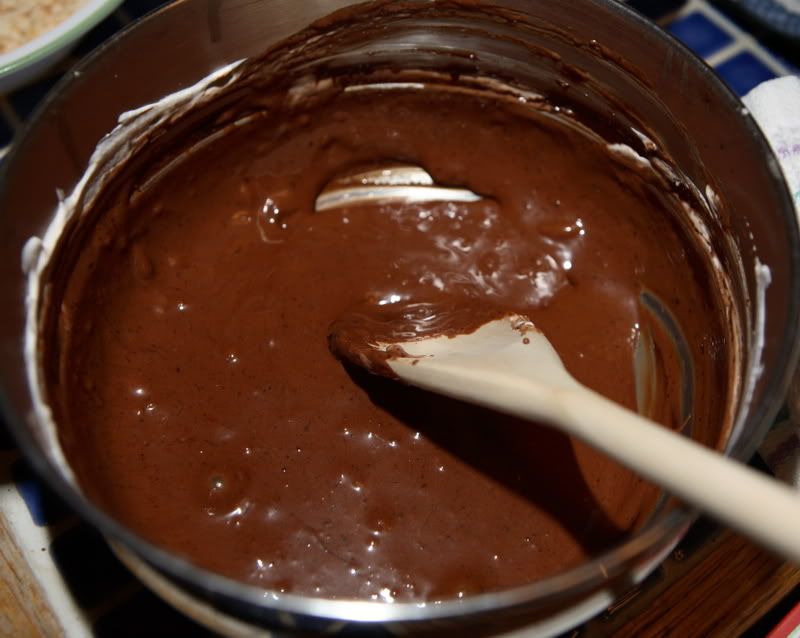
Gradually whisk in the milk and the half-and-half. Bring the mixture to a boil over medium-high heat, whisking constantly. (As you’re whisking, the consistency will change from a liquid to a thick pudding.) Once the mixture begins to bubble, remove it from the heat.
Using the one-cup scoop you set aside earlier, ladle out approximately one cup of the milk/sugar mixture into the whisked egg yolks. Vigorously whisk the egg yolk mixture to combine everything, then transfer the egg yolk mixture back to the remaining milk/sugar mixture in the saucepan. Keep whisking everything until it is combined.
(If you don’t whisk constantly, your eggs can cook improperly and leave chunks in your pudding. If this should happen, don’t get too upset, you can pass the pudding through a sieve later. The pudding won’t have the exact same texture, but it’ll still be very edible. But try to keep whisking constantly to avoid the chunks!)
Return the pudding to medium heat - keep whisking - until the mixture comes back to a boil. Continue to boil, whisking constantly, for one minute. Immediately remove the pan from the heat and whisk in the butter pieces until they are completely melted. Whisk in the vanilla and the scotch, if you’re using it. If you need to strain your pudding, do so now.
Pour the pudding into your serving dishes. Cover the dishes with plastic wrap, pressing the wrap directly onto the surface of the pudding, and refrigerate it for several hours, until it is well-chilled.
Just prior to serving the pudding, make the salted whipped cream:
Place the whipping cream and the salt in a medium bowl. Whip on high speed until soft peaks form. Spoon or pipe the whipped cream onto your pudding.
Thursday, June 25, 2009
Chocolate Cream Pie
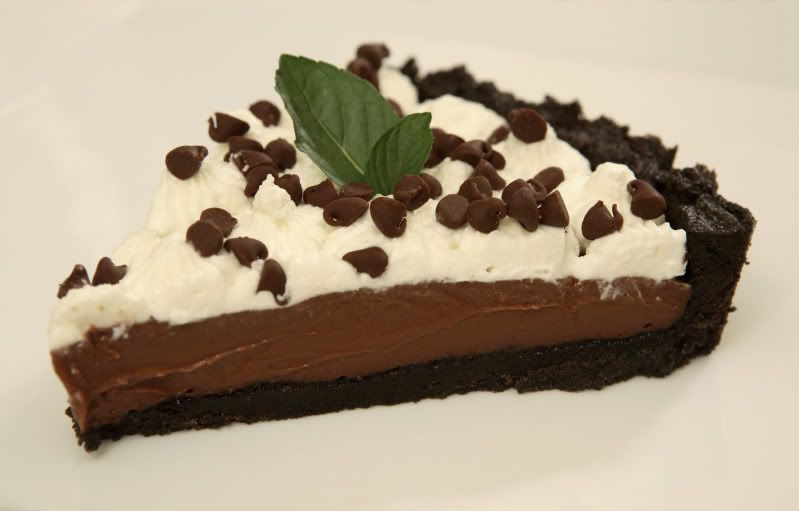
Here’s an easy pudding pie recipe you can make next time you have company over. It looks good without being overly pretentious, tastes delicious, and most of the prep can be done earlier in the day. (Actually, the pie requires time to chill, so you will NEED to make it ahead of time.) I’ve made this twice recently for dinner parties, and both times it was really well received.
This recipe largely comes from Diner Desserts, by Tish Boyle, a cookbook I’ve found is one of my favorites despite its somewhat narrow genre of recipes.
For easy serving and pretty presentation, I make this in a 9” fluted tart pan with a removable bottom. (The idea of a pan with a removable bottom is one of the best ideas ever!) It’s so much easier to get the individual slices out of the pie.
Chocolate Cream Pie
Makes 1 9" pie
Make the crust first, it needs to cool slightly.
Crust
16 ounces chocolate/cream sandwich cookies, like Oreos or a similar knock-off
8 Tbsp butter, melted
Preheat your oven to 350 degrees. Lightly grease a 9” tart pan with a removable bottom (a 9” pie pan will work if you don’t have a tart pan). Pam spray works well.
The easiest way to make the crust is to use a food processor to crush the cookies and mix in the melted butter. If you don’t have a food processor, you can smash the cookies sealed in a thick plastic zip-lock bag with a rolling pin – it will take longer and the results won’t be as even, but it will work.
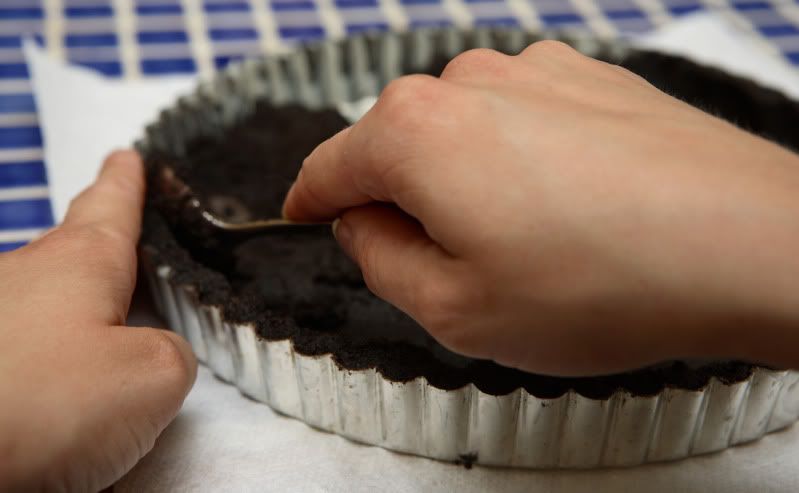
Place the cookies in the work bowl of a food processor, pulse repeatedly to crush the cookies. With the processor running, drizzle the melted butter through the feed tube; process to incorporate. Scrape the crumbs out of the bowl into the prepared tart/pie pan. Use your fingers and a spoon to shape the crust up the sides of the pan; flatten the center part evenly into the pan.
Bake the crust for 8 minutes, until it has set. Let the crust cool on a wire rack. (Use caution when moving the pan around so you don’t inadvertently push up on the removable bottom and break the crust.)
Pudding
3 Tbsp cornstarch
1 Tbsp cocoa powder
1/4 tsp salt
1 cup half-and-half
1 1/4 cups whole milk
1 cup granulated sugar
4 ounces unsweetened chocolate, like 99% cacao
2 Tbsp unsalted butter
1 tsp vanilla extract
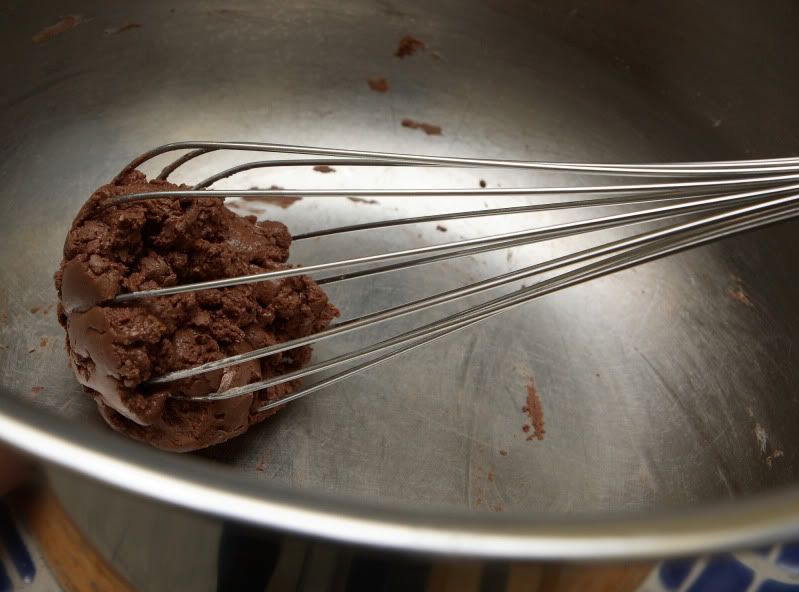
In a medium bowl, whisk together the cornstarch, cocoa powder, and salt. Whisk in about 2 tablespoons of the half-and-half until it is a smooth paste. If it lumps up in the whisk, that’s fine, just shake it all out.
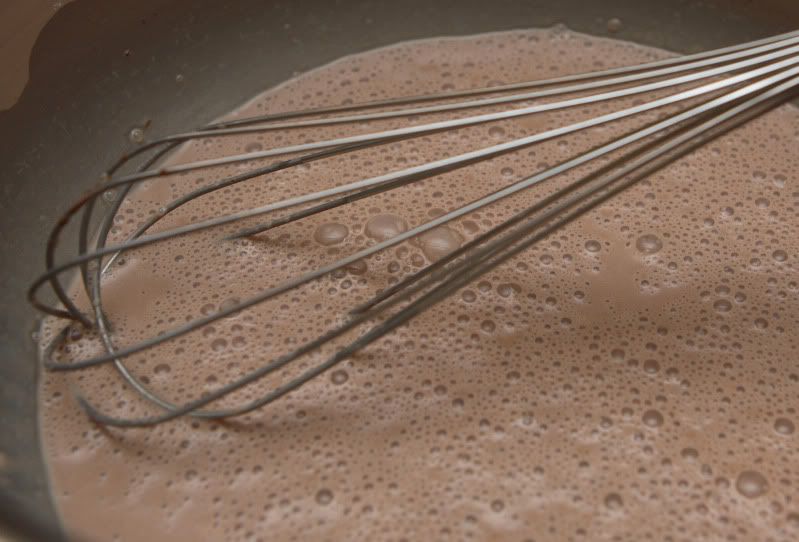
Whisk in the remaining half-and-half; keep whisking until the mixture looks kind of like chocolate milk. Set the bowl aside.
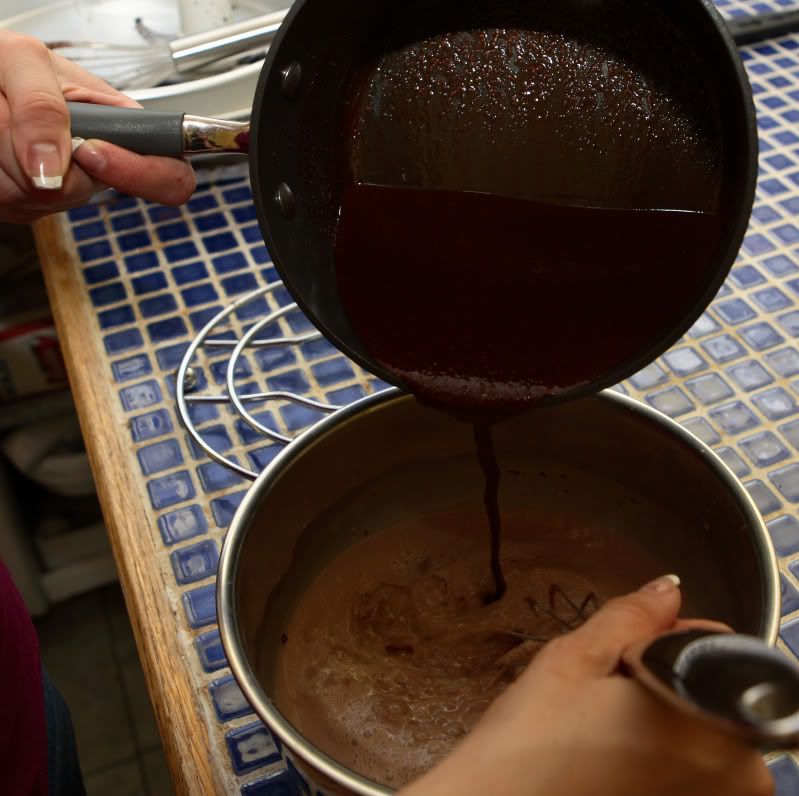
In a medium saucepan, combine the milk, sugar, and chocolate. Place over medium heat and cook, stirring constantly with a whisk, until the chocolate has completely melted. Remove the pan from the heat and whisk about a 1/2 cup of the hot chocolate mixture into the half-and-half mixture.
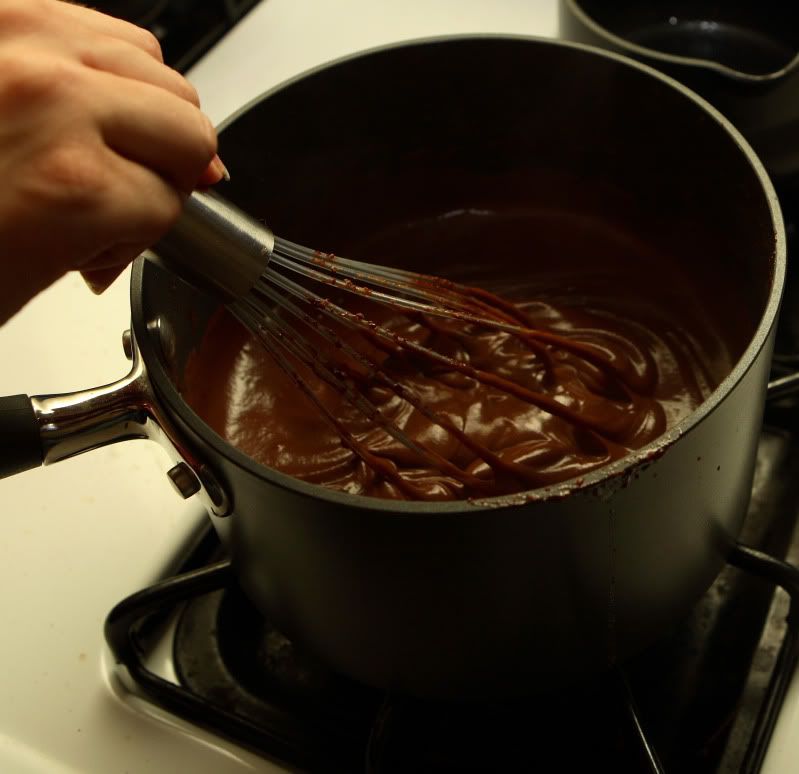
Whisk this mixture into the remaining chocolate mixture in the saucepan. Return the pan to the heat an cook over medium high heat, whisking constantly. When the mixture begins to bubble, continue to cook, whisking constantly, for one minute.
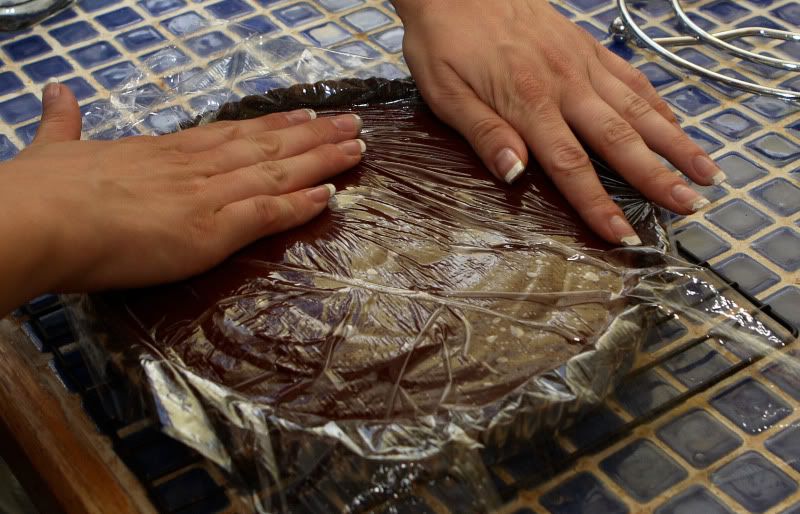
Remove the pan from the heat and whisk in the butter and then the vanilla. Scrape the pudding into the cooled tart shell. Cover the pie with plastic wrap, pressing it directly onto the surface of the pudding, and refrigerate the pie until thoroughly chilled, at least four hours.
Whipped Cream Topping
I usually wait until just before serving the pie to make the whipped cream topping. Then the cream is at it's maximum volume at serving time - looks the prettiest!
2 cups heavy cream
2 Tbsp granulated sugar
1 tsp vanilla extract
Mini chocolate chips, for garnish
Using an electric mixer, beat the cream and sugar on medium-high speed until soft peaks form. Beat in the vanilla.
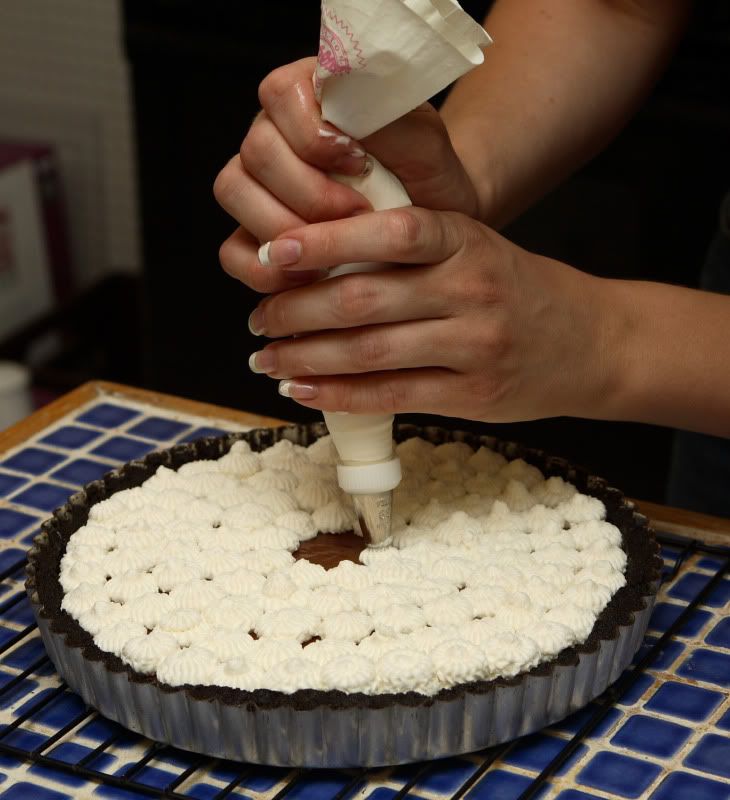
There’s several options to apply the cream to the pie. You can simply scoop it on, using a rubber spatula to create swirly billows of whipped cream. Or, you can pipe it on with a pastry bag. In my photos I used a Wilton #364 tip fitted onto a pastry bag and made little stars over the top of the pie.
More recently, I purchased a Wilton #2110 (1M) tip (which takes the large size coupler) and piped big stars on the top of the pie. I preferred the appearance of the larger #2110 (1M), but didn’t have a chance to take any photos...so I guess you’ll have to take my word on it... At any rate, either will work, just get the whipped cream on the pie.
Once you’ve topped the pie with the whipped cream, garnish it with mini-sized chocolate chips.
Saturday, April 11, 2009
Warm Chocolate Pudding "Cakes"
Finally, this post represents the last dish served at the dinner party I had last year! And of course I saved the best for last - the chocolate dessert! I served moist, chocolatey, cakey puddings, baked in single-serving ramekins, each topped with a scoop of premium-quality ice cream...yum.
The results of this recipe will be completely different depending on how long you allow the batter to bake. A shorter baking time results in a liquidy chocolatey pudding. A longer baking time results in a moist, somewhat cakey pudding resting over a liquidy chocolate pudding. Both variations must be served warm out of the oven. Both are delicious, but when I'm serving them for a dinner party, I usually bake them longer for a texture more people seem to be familiar with.
It's one of my favorite desserts, in part because it's chocolate, but also because it's easy, relatively inexpensive, and doesn't take a million ingredients. I also like it because portion control is easy, since it is baked in individual serving dishes.
Warm Chocolate Pudding "Cakes"
Serves 6
Butter or shortening, for greasing the ramekins
1/3 cup sugar, plus a little extra for the baking dishes
4 ounces semisweet chocolate (I usually use Scharffen-Berger 62% Cacao chocolate, but their 70% is also good in this recipe)
4 eggs, separated
a pinch of salt
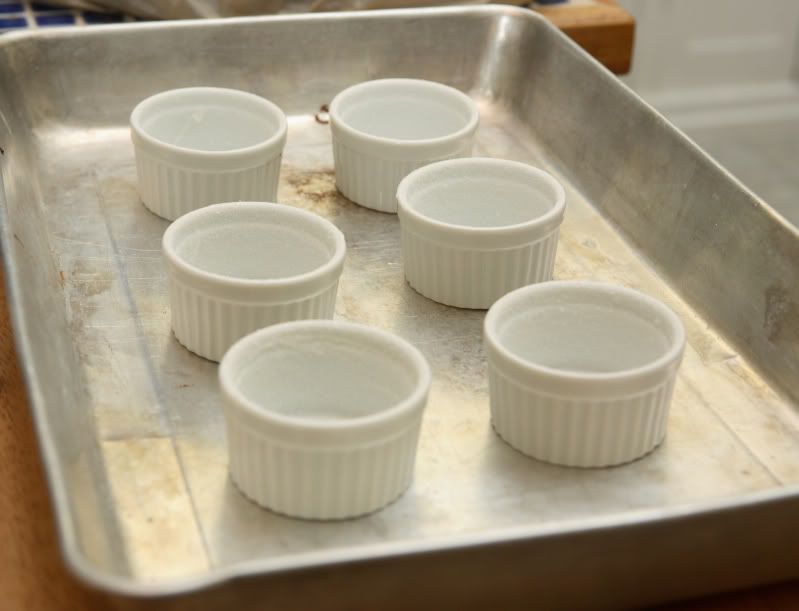
Preheat oven to 350 degrees. Grease six 4-ounce ramekins; coat with sugar, tapping out the excess. Place ramekins in a larger roasting pan, as shown below.

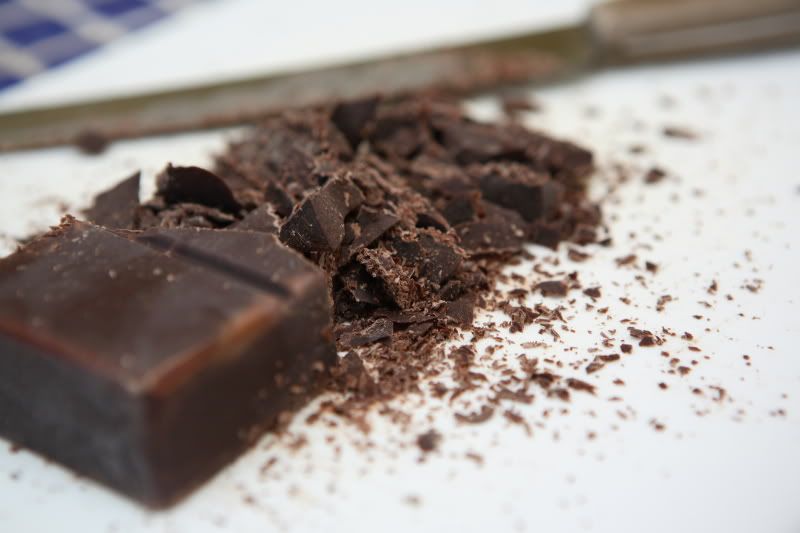
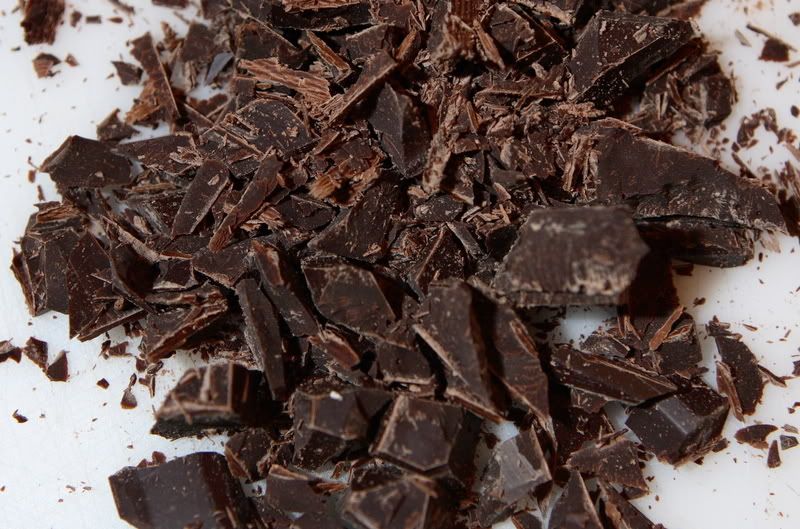
Roughly chop the chocolate.

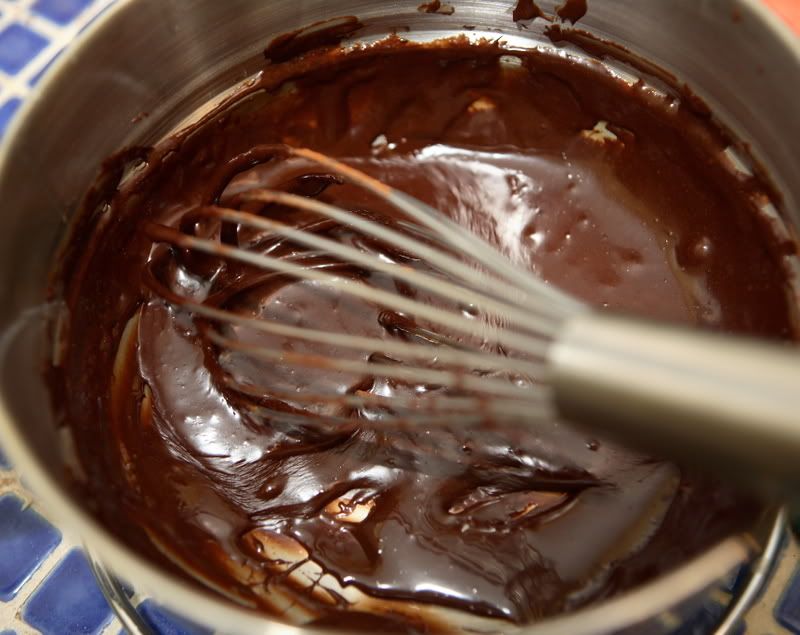
Place chocolate in the top of a double boiler; melt over simmering water.

Once you're done melting the chocolate, keep the water on the burner, as you'll need boiling water later. Actually, you might need to add more water to the pot to boil because you'll need enough to be able to eventually pour boiling water into the roasting pan containing the ramekins, enough to where the water level comes about an inch up the side of the dishes.
Set the melted chocolate aside to cool slightly. Meanwhile, in a medium bowl, whisk 1/3 cup of sugar and the egg yolks together until incorporated. Whisk the melted chocolate into the egg yolk mixture.

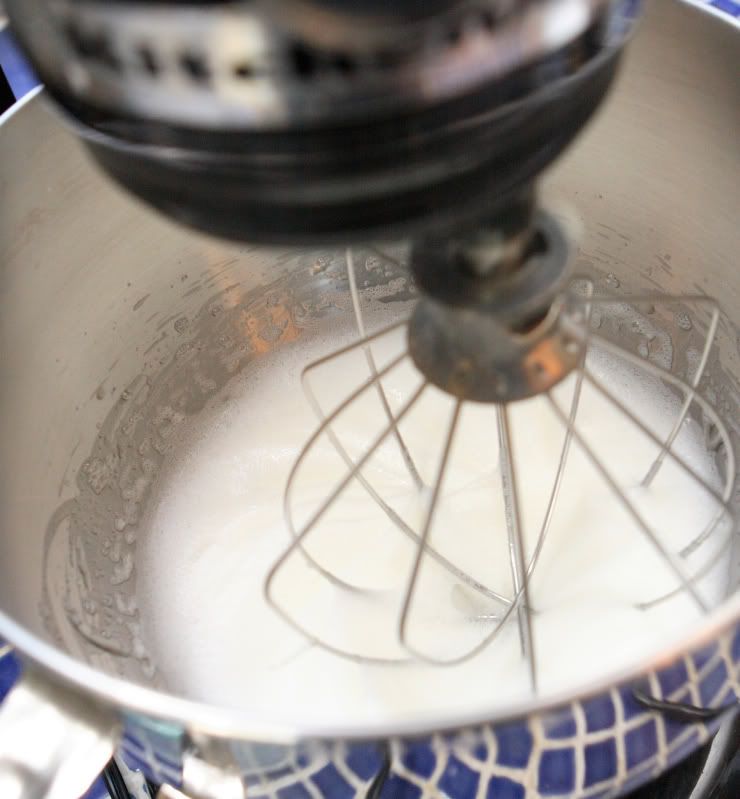
In a large clean bowl, beat the egg whites and salt on high speed until soft peaks form.

Using a rubber spatula, fold in one third of the egg white mixture into the chocolate mixture.

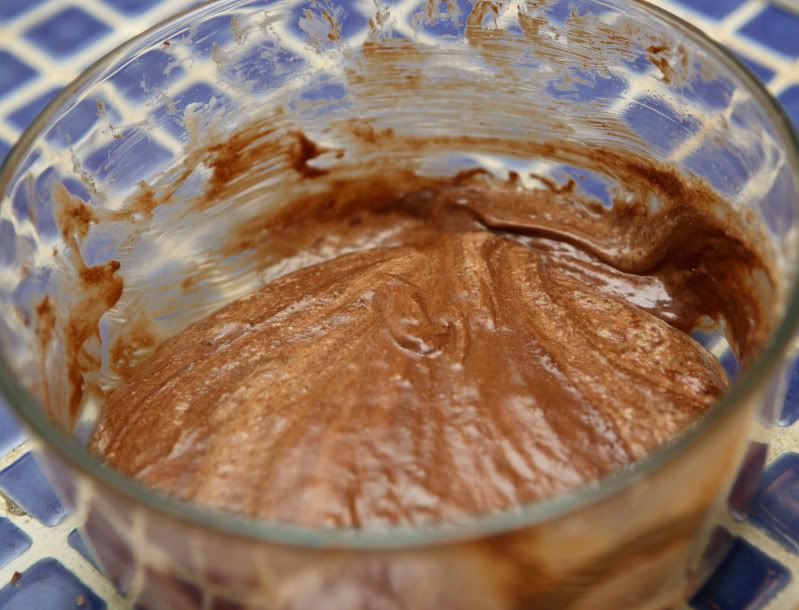
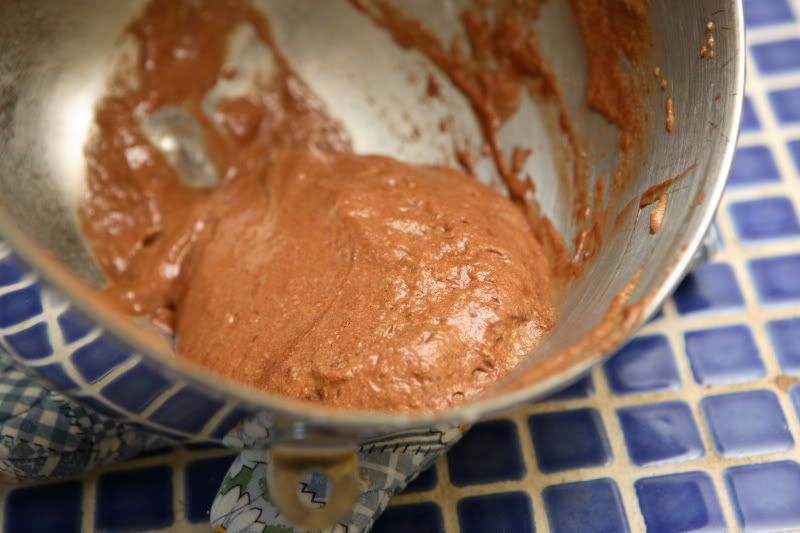
Gently fold the remaining egg whites into the chocolate mixture, taking care not to deflate the egg whites. The result should be a pillowy batter. Do not overmix.

Spoon the batter into each ramekin, filling 2/3 of the way full. Return ramekins to the larger roasting pan; pour the boiling water into the roasting pan, enough to come up the side of the ramekins by about an inch. Bake at 350 degrees F for 15-25 minutes.
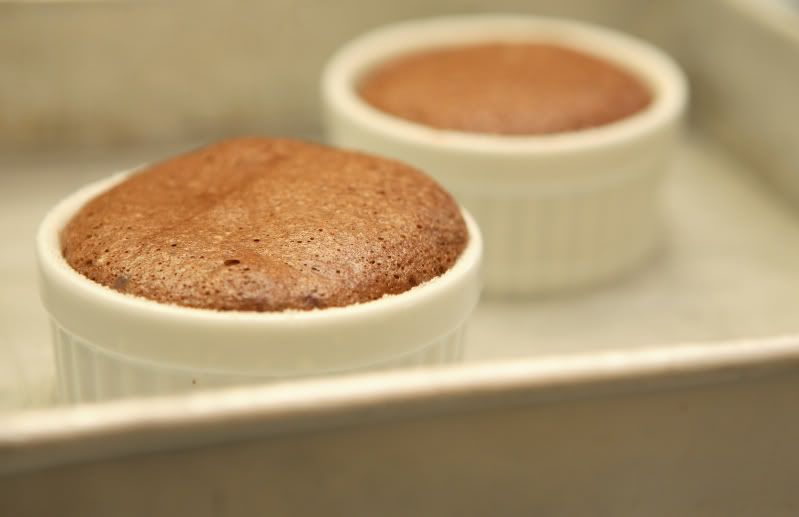
After 15 minutes, the puddings will have puffed up and will barely be set. (The centers will still be jiggly.) If you take them out now, they'll be very moist but very delicious.

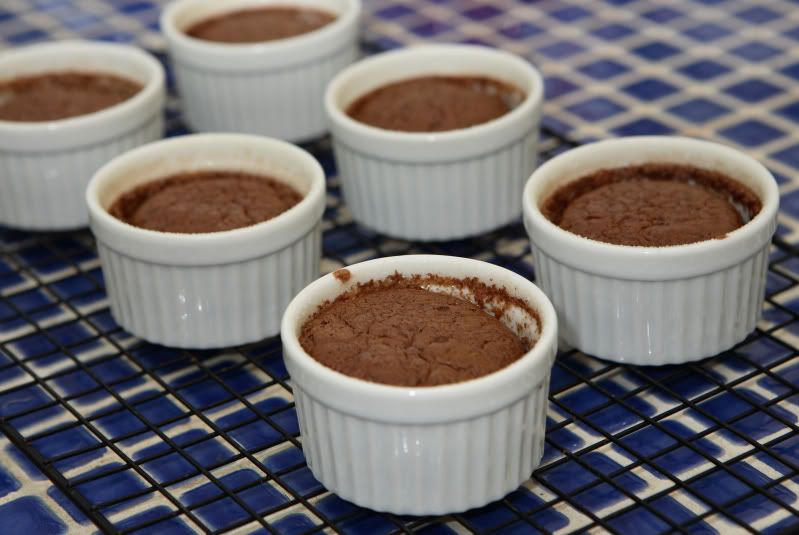
...Or, you can bake the puddings for 20-25 minutes, resulting in a somewhat cakier texture. (They will begin to pull away from the sides of the ramekins.)

The longer you bake the dessert, the cakier it will be...don't overbake it or they won't be moist anymore!
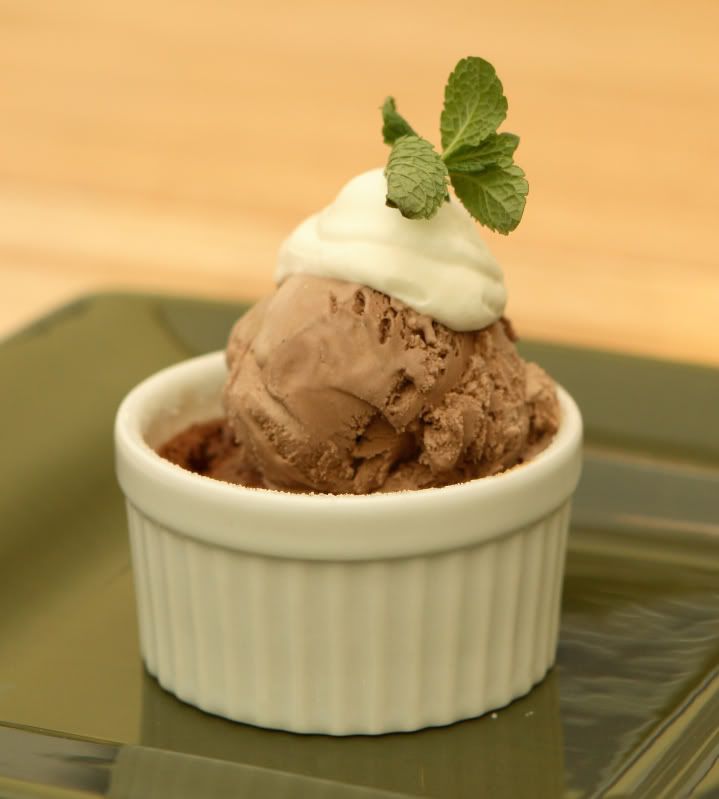
Do not turn the cakes out of the ramekins for serving. Serve them while they're still warm! Top each with a scoop of ice cream; add a whipping cream and mint garnish to dress it up!
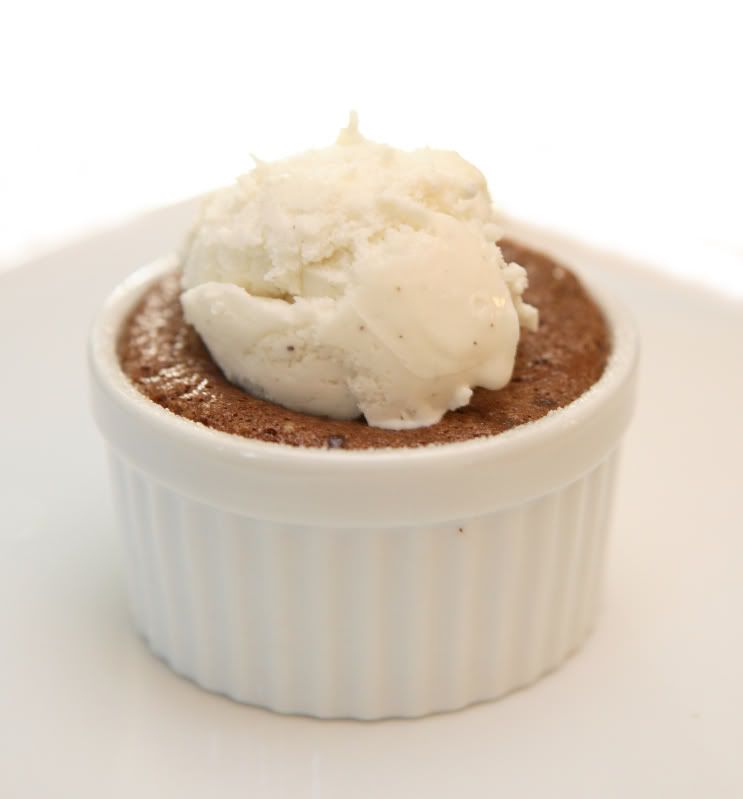
Here's the more moist version, which I baked just today, topped with vanilla ice cream:

...and the somewhat cakier version, topped with chocolate ice cream and a garnish, which I served at the dinner party:

(That was a busy evening! Most of the dessert preparation pictures were not shot during that dinner party! However, somehow I had the presence of mind to snap a picture of my dessert before I took a bite of my dessert that night...my guests probably thought I was a little nutty...)
The results of this recipe will be completely different depending on how long you allow the batter to bake. A shorter baking time results in a liquidy chocolatey pudding. A longer baking time results in a moist, somewhat cakey pudding resting over a liquidy chocolate pudding. Both variations must be served warm out of the oven. Both are delicious, but when I'm serving them for a dinner party, I usually bake them longer for a texture more people seem to be familiar with.
It's one of my favorite desserts, in part because it's chocolate, but also because it's easy, relatively inexpensive, and doesn't take a million ingredients. I also like it because portion control is easy, since it is baked in individual serving dishes.
Warm Chocolate Pudding "Cakes"
Serves 6
Butter or shortening, for greasing the ramekins
1/3 cup sugar, plus a little extra for the baking dishes
4 ounces semisweet chocolate (I usually use Scharffen-Berger 62% Cacao chocolate, but their 70% is also good in this recipe)
4 eggs, separated
a pinch of salt
Preheat oven to 350 degrees. Grease six 4-ounce ramekins; coat with sugar, tapping out the excess. Place ramekins in a larger roasting pan, as shown below.
Roughly chop the chocolate.
Place chocolate in the top of a double boiler; melt over simmering water.
Once you're done melting the chocolate, keep the water on the burner, as you'll need boiling water later. Actually, you might need to add more water to the pot to boil because you'll need enough to be able to eventually pour boiling water into the roasting pan containing the ramekins, enough to where the water level comes about an inch up the side of the dishes.
Set the melted chocolate aside to cool slightly. Meanwhile, in a medium bowl, whisk 1/3 cup of sugar and the egg yolks together until incorporated. Whisk the melted chocolate into the egg yolk mixture.
In a large clean bowl, beat the egg whites and salt on high speed until soft peaks form.
Using a rubber spatula, fold in one third of the egg white mixture into the chocolate mixture.
Gently fold the remaining egg whites into the chocolate mixture, taking care not to deflate the egg whites. The result should be a pillowy batter. Do not overmix.
Spoon the batter into each ramekin, filling 2/3 of the way full. Return ramekins to the larger roasting pan; pour the boiling water into the roasting pan, enough to come up the side of the ramekins by about an inch. Bake at 350 degrees F for 15-25 minutes.
After 15 minutes, the puddings will have puffed up and will barely be set. (The centers will still be jiggly.) If you take them out now, they'll be very moist but very delicious.
...Or, you can bake the puddings for 20-25 minutes, resulting in a somewhat cakier texture. (They will begin to pull away from the sides of the ramekins.)
The longer you bake the dessert, the cakier it will be...don't overbake it or they won't be moist anymore!
Do not turn the cakes out of the ramekins for serving. Serve them while they're still warm! Top each with a scoop of ice cream; add a whipping cream and mint garnish to dress it up!
Here's the more moist version, which I baked just today, topped with vanilla ice cream:
...and the somewhat cakier version, topped with chocolate ice cream and a garnish, which I served at the dinner party:
(That was a busy evening! Most of the dessert preparation pictures were not shot during that dinner party! However, somehow I had the presence of mind to snap a picture of my dessert before I took a bite of my dessert that night...my guests probably thought I was a little nutty...)
Saturday, February 16, 2008
Valentine's Dinner: Bittersweet Chocolate Mousse
This year we celebrated Valentine’s Day early. Our favorite restaurant books up months in advance for the holiday, and we could only get a reservation for the Friday prior to what is definitely one of the busiest weekends of their year. That was okay – we prefer to go on a day where they are not so busy – a day when we don’t feel guilty for relaxing over a bottle of wine because there is no massive line of patrons piling up towards the door. We enjoyed our slow-paced, relaxing evening so much that we agreed to try to celebrate Valentine’s Day a week early every year from now on.
It was also nice because I had the best of both worlds: I got to relax and eat out at my favorite restaurant, but also got to have fun making a nicer-than-average-but-no-overkill-required-since-we-already-had-the-real-deal dinner on the day of the actual Valentines Day holiday.

I wasn’t sure what to make for dessert until I stumbled across a recipe on the Everyday Food website. Although I love mousse, I rarely make it for some reason, so I thought it would be a nice change from what I might normally make. The recipe below reflects my changes from the original recipe.
The original recipe says it serves four. I disagree: Yes, it could be divided into four servings, but they would be so small that they would be difficult to attractively plate and present if you were planning on serving the dessert to guests. It is, however, perfect to make into two somewhat larger servings and share one of these larger servings with your significant other, saving the second portion for later. (But, it generally wouldn’t be appropriate to serve a single dessert to two random guests and demand that they share it between themselves.)
Bittersweet Chocolate Mousse
Yield: 2 large servings
2 ounces bittersweet chocolate, plus a small additional amount to be used as garnish
4 large egg yolks
¼ cup sugar
A pinch of salt
2 Tbsp unsweetened cocoa powder
1 cup heavy whipping cream (3/4 cup will be used in the recipe; ¼ cup will be used as a garnish)
Finely chop the bittersweet chocolate – for best results, pieces should be pea-sized or smaller. (I used Scharffen Berger 70% Cacao Bittersweet chocolate.) Set chopped chocolate aside.

In the top of a double boiler or in a heat-safe mixing bowl set above (but not in) gently-simmering water, whisk the egg yolks, sugar, and salt until the sugar has dissolved. The mixture will thicken ever so slightly.
Remove the bowl from the heat and whisk in the chopped chocolate and the cocoa powder. (To keep the flavors similar, I used the same brand of cocoa, Scharffen Berger Natural Unsweetened Cocoa Powder.) The mixture will be thick. Allow this mixture to cool to room temperature. As it cools it will become even more thick and sticky – give it a stir every few minutes to keep it loose.

Once the chocolate mixture has cooled, in a separate bowl, beat only ¾ cup of the heavy whipping cream until soft peaks form (reserve the last ¼ cup of unwhipped cream for the garnish, which won’t be used until just before the dessert is served). Whisk half of the whipped cream into the chocolate mixture, then use a rubber spatula or flat spoon to fold in the remaining half of the whipped cream.

Divide the mixture between your serving dishes. Refrigerate for at least two hours and up to one day.
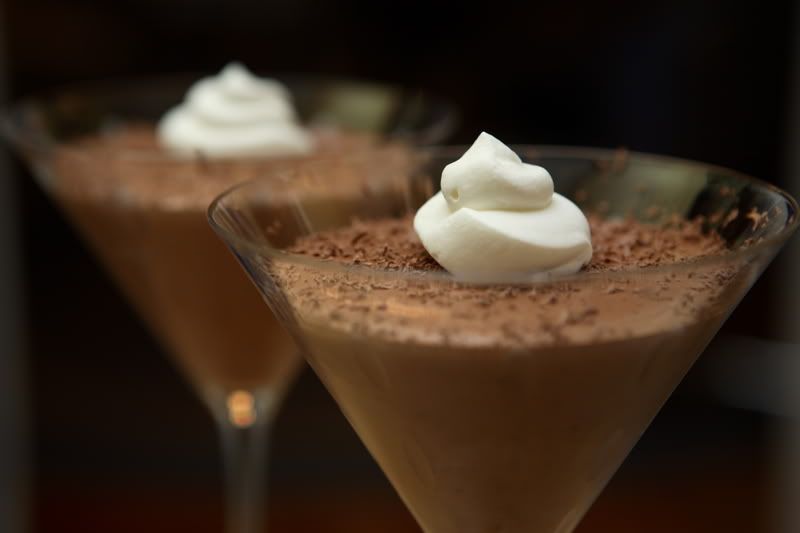
Immediately before serving, grate a small amount of bittersweet chocolate over the mousse as a garnish.
In a small bowl, whip the remaining ¼ cup of whipping cream until stiff peaks form. Place the whipped cream into a small plastic baggie, pushing it into one corner of the bag. Snip a small triangle off of the corner of the bag. Use the baggie as a piping bag to decorate the top of the dessert.

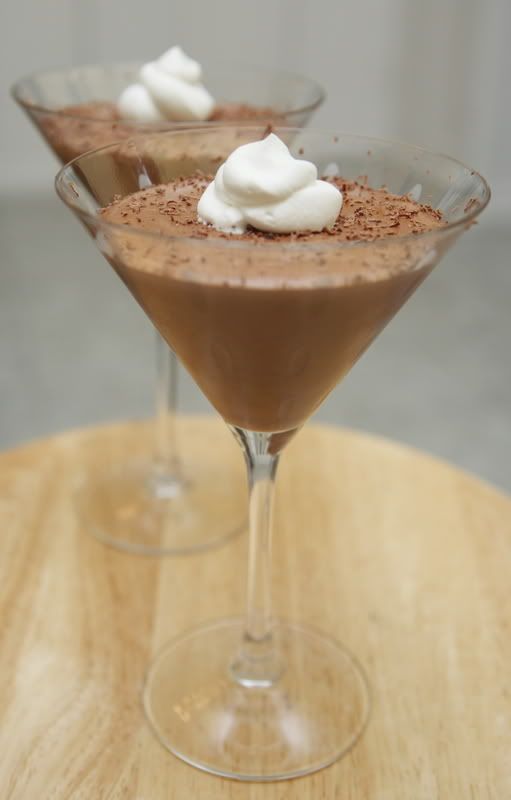
I love using my martini glasses as dessert cups!
The dessert was delicious, but I prefer my chocolate desserts slightly less sweet. It would be great to serve to someone who enjoys desserts but isn’t necessarily a chocoholic. Will I make it again? Probably, but next time I plan to try to modify the recipe to yield more mousse with less sugar. I’ll let you know how it works out...
It was also nice because I had the best of both worlds: I got to relax and eat out at my favorite restaurant, but also got to have fun making a nicer-than-average-but-no-overkill-required-since-we-already-had-the-real-deal dinner on the day of the actual Valentines Day holiday.
I wasn’t sure what to make for dessert until I stumbled across a recipe on the Everyday Food website. Although I love mousse, I rarely make it for some reason, so I thought it would be a nice change from what I might normally make. The recipe below reflects my changes from the original recipe.
The original recipe says it serves four. I disagree: Yes, it could be divided into four servings, but they would be so small that they would be difficult to attractively plate and present if you were planning on serving the dessert to guests. It is, however, perfect to make into two somewhat larger servings and share one of these larger servings with your significant other, saving the second portion for later. (But, it generally wouldn’t be appropriate to serve a single dessert to two random guests and demand that they share it between themselves.)
Bittersweet Chocolate Mousse
Yield: 2 large servings
2 ounces bittersweet chocolate, plus a small additional amount to be used as garnish
4 large egg yolks
¼ cup sugar
A pinch of salt
2 Tbsp unsweetened cocoa powder
1 cup heavy whipping cream (3/4 cup will be used in the recipe; ¼ cup will be used as a garnish)
Finely chop the bittersweet chocolate – for best results, pieces should be pea-sized or smaller. (I used Scharffen Berger 70% Cacao Bittersweet chocolate.) Set chopped chocolate aside.
In the top of a double boiler or in a heat-safe mixing bowl set above (but not in) gently-simmering water, whisk the egg yolks, sugar, and salt until the sugar has dissolved. The mixture will thicken ever so slightly.
Remove the bowl from the heat and whisk in the chopped chocolate and the cocoa powder. (To keep the flavors similar, I used the same brand of cocoa, Scharffen Berger Natural Unsweetened Cocoa Powder.) The mixture will be thick. Allow this mixture to cool to room temperature. As it cools it will become even more thick and sticky – give it a stir every few minutes to keep it loose.
Once the chocolate mixture has cooled, in a separate bowl, beat only ¾ cup of the heavy whipping cream until soft peaks form (reserve the last ¼ cup of unwhipped cream for the garnish, which won’t be used until just before the dessert is served). Whisk half of the whipped cream into the chocolate mixture, then use a rubber spatula or flat spoon to fold in the remaining half of the whipped cream.
Divide the mixture between your serving dishes. Refrigerate for at least two hours and up to one day.
Immediately before serving, grate a small amount of bittersweet chocolate over the mousse as a garnish.
In a small bowl, whip the remaining ¼ cup of whipping cream until stiff peaks form. Place the whipped cream into a small plastic baggie, pushing it into one corner of the bag. Snip a small triangle off of the corner of the bag. Use the baggie as a piping bag to decorate the top of the dessert.
I love using my martini glasses as dessert cups!
The dessert was delicious, but I prefer my chocolate desserts slightly less sweet. It would be great to serve to someone who enjoys desserts but isn’t necessarily a chocoholic. Will I make it again? Probably, but next time I plan to try to modify the recipe to yield more mousse with less sugar. I’ll let you know how it works out...
Subscribe to:
Posts (Atom)