Showing posts with label main dish. Show all posts

Monday, December 27, 2010

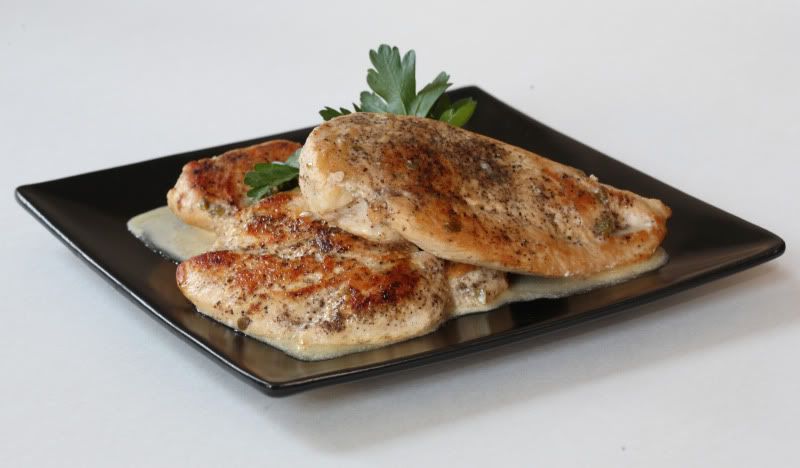
Chicken Picatta


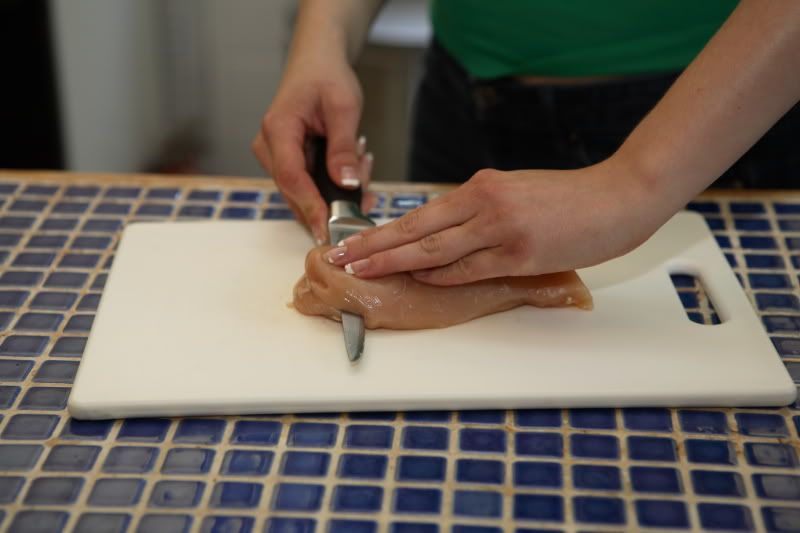
Want to know a secret I use to help with portion control?  This particular recipe involves chicken, but my little secret also works well with pork chops or even steaks.  And although I have mentioned it before on this blog, I only devoted a few sentences to it, so it is worth mentioning again.    Whenever possible, I slice my chicken breasts in half horizontally, like this:


The end result:  Two roughly equal-sized pieces of meat.  One serving of meat has become two.  Yes, they are thinner servings, but because the cut still looks (from the top) like it’s the same sized piece of meat, your brain is fooled into thinking you’re eating the same quantity of meat even though you’ve reduced the size by 50%.  Sometimes, if I’m feeling particularly hungry and one cutlet just isn’t going to be enough, I’ll make both halves and have “seconds” (which still really isn’t overeating).  Or, I’ll just add some pasta or a salad to the menu to help fill me up.  Slicing the meat in half is also a great way to stretch your food dollar – you’ll get twice as many servings out of one package of chicken breasts.

This recipe is another super easy one to make.  It is delicious served with a bit of buttered noodles, something that is a rather neutral (but still delicious) side dish.  (The acidity in a tomato sauce would compete with the lemons, and a cream sauce would be too heavy and would mask the bright flavor of the Piccata sauce.  The buttery noodles complement rather than compete with the lemon-caper flavor.)

You can substitute veal for the chicken, if you like.  A veal cutlet might take slightly less time to cook than a chicken cutlet (and neither option takes particularly long to cook because both are very thin) so be prepared to pull it out of the pan pretty quickly.  There are no other changes to the recipe ingredients or preparation, so its easy to make the substitution.

When choosing a wine to use for this dish, pick something you’d drink (NOT a grocery store “cooking wine”).  Choose something dry, and not particularly sweet, because the sweet flavor will be further concentrated during the cooking process.  I usually use pinot grigio because that’s usually what I keep in the house, but you could also use a sauvignon blanc or any other dry white wine.  Plan to serve the remainder of the bottle with dinner, then you’re not opening a huge bottle of wine for one small recipe quantity.

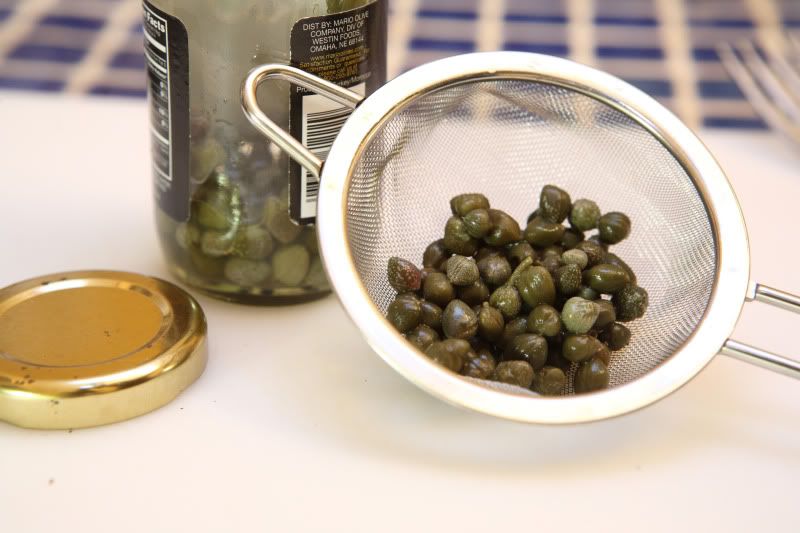
The recipe has one ingredient in it that you may or may not be familiar with:  capers.  My grocery store usually stocks these in the same aisle as the pickles, olives, mustard, and other condiments.  Capers look like this:


…and you should not omit them from this dish.  I know they seem unusual if you’ve never had them, but give them a shot because they are necessary to produce the proper flavor for the sauce (otherwise its not “piccata,” its just a lemon and butter sauce).  Capers will keep in your refrigerator for a very long time, so don’t worry about them going bad before you can use them up.  Before you add them to the dish, capers should be rinsed under cool water because they are packed in a salty brine.  I put the necessary quantity in a little sieve and run them under the tap for a few seconds.

Chicken Piccata
Serves 4

salt & pepper
4 thin, boneless, skinless chicken breast cutlets (cut from two breast halves, see the photo above)
2 Tbsp olive oil
2 Tbsp capers, rinsed & drained
1-1/2 cups dry white wine
juice of two smallish lemons
2 Tbsp butter
1/4 cup unwhipped heavy cream (not coffee creamer), or you can use half-and-half if you're out

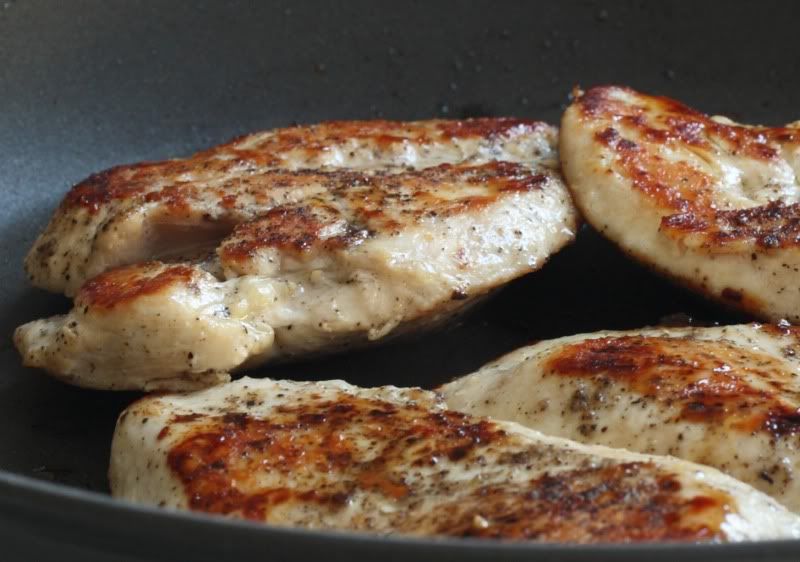
Sprinkle salt and pepper over the surface of the chicken cutlets.  In a deep skillet, over medium-high heat, sauté the cutlets in the olive oil, turning once, until they are lightly browned on both sides and the chicken is just barely cooked through.  (Don’t overcook the chicken - err on the side of slightly less done because later we’ll return the chicken to the pan to reheat it.)  Remove the chicken and set it aside.  Reduce the heat under the pan to medium.


(Anyone who says you cannot brown in a nonstick pan hasn't tried these nonstick pans.  They're awesome.  Love my Anolon Advanced cookware.)

While the chicken is cooking, place your capers in a small sieve and rinse them under cool running water.  Drain them, then give them a rough chop.  Set the chopped capers aside for later.

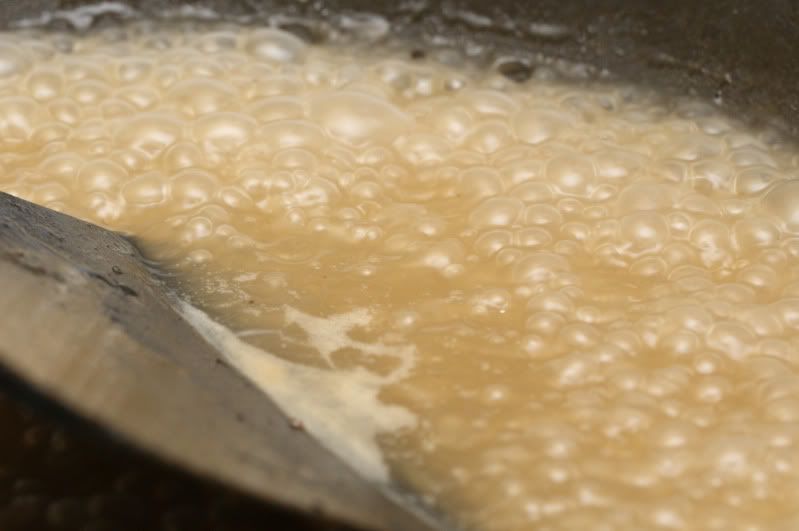
Add the wine and lemon juice to the same skillet, stirring to scrape up any browned bits.  It will probably be bubbly and noisy when you add the liquid – keep stirring the pan!  Cook the liquid for several minutes over medium heat until it has reduced by about half.  


Reduce the heat to low.  Add the butter, rinsed capers, and the cream or half-and-half. Stir to incorporate the ingredients and melt the butter. Once the dairy products have been added to the pan, take care to avoid allowing it to boil (you may need to reduce the heat further).

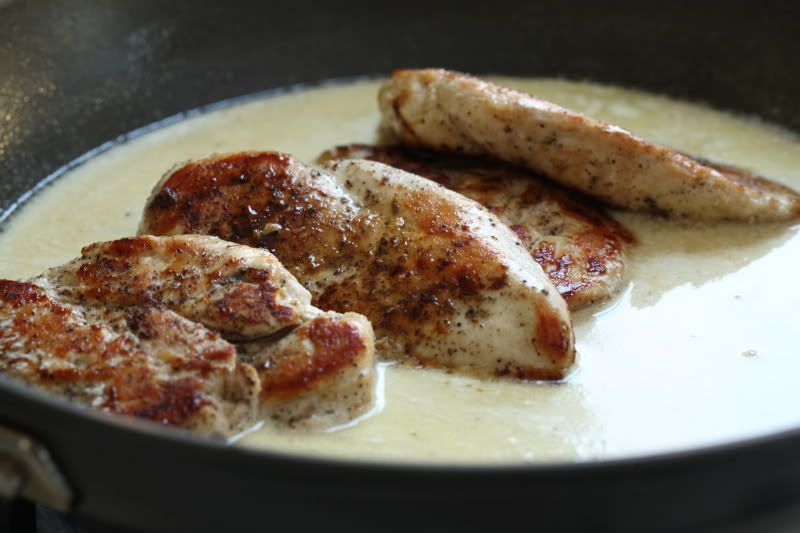
Return the cooked chicken to the pan and heat it through, just long enough to bring the chicken back up to the proper serving temperature.


Sunday, March 14, 2010

Homemade Barbeque Sauce

In anticipation of better weather (and in protest of our current not-winter-anymore-but-not-quite-spring-either weather), I've started grilling outdoors.  We have a nice covered porch which makes it easy to use the grill even if it's raining.  Barbequed chicken is pretty easy to make outdoors because it doesn't require much babysitting.  The chicken is brushed with sauce and is placed on the grill.  After a few minutes, it is flipped once, brushed with more sauce, but is otherwise left alone while it cooks.  Pretty simple.

Homemade barbeque sauce is really easy to make. Onions are browned in butter (olive oil can be substituted for a somewhat healthier sauce…but the butter tastes better), then everything else is added and simmered over medium heat. There’s not much to it.


One thing that's great about this sauce: you can make it ahead and freeze it. You can also make it in larger quantities.

Homemade Barbeque Sauce (for chicken)
Makes about 3 cups of sauce

1 small onion, finely chopped (a mini food processor works well!)
2 Tbsp unsalted butter
1/4 cup molasses
1/2 cup freshly-squeezed lemon juice (2 large lemons yielded the proper amount of juice)
1/2 cup dry red wine (I used a Malbec on this particular occasion, but I usually make it with Cabernet Sauvignon or Shiraz)
Several shakes (to taste) of Tabasco or similar hot sauce
1/4 cup ketchup
1/4 cup spicy mustard
2 Tbsp Worcestershire sauce
2 tbsp brown sugar
3 large cloves garlic, minced
1 tsp cumin
1/2 tsp black pepper
1/4 tsp ground cloves
1/2 tsp ancho chili powder (another type will also suffice if you don’t have ancho)
1 cup water

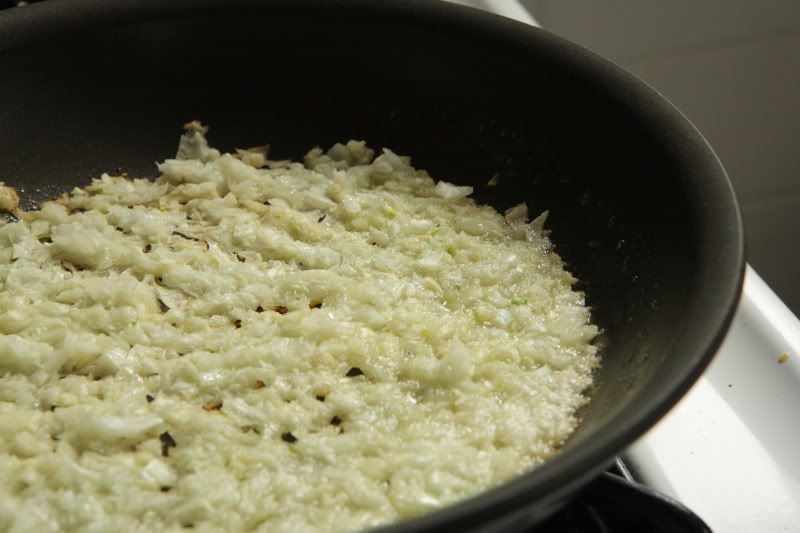
Place the chopped onions and the butter in a medium skillet. Spread out the onions so they cover the bottom of the pan. Turn the heat to medium-low and allow the onions to brown slowly. The moisture will begin to cook out of the pan and the onions will begin to brown at the edges. Avoid stirring the pan until this starts to happen. The pan looks like this when it’s time to stir (see the browned edges?):


Stir the onions and allow them to continue to brown slightly longer, so they are evenly browned. Transfer the browned onions to a medium saucepan and add the remaining ingredients.

Simmer the sauce over medium heat, stirring often, to reduce the sauce by approximately one third.

I usually serve this sauce with grilled chicken. I pour a small amount of the sauce over the chicken pieces as a marinade. The remaining sauce is saved to mop the chicken as it is grilling. (Remember, should any of the reserved basting sauce come into contact with raw meat, be sure to return the sauce to a boil before using it to baste cooked chicken!)


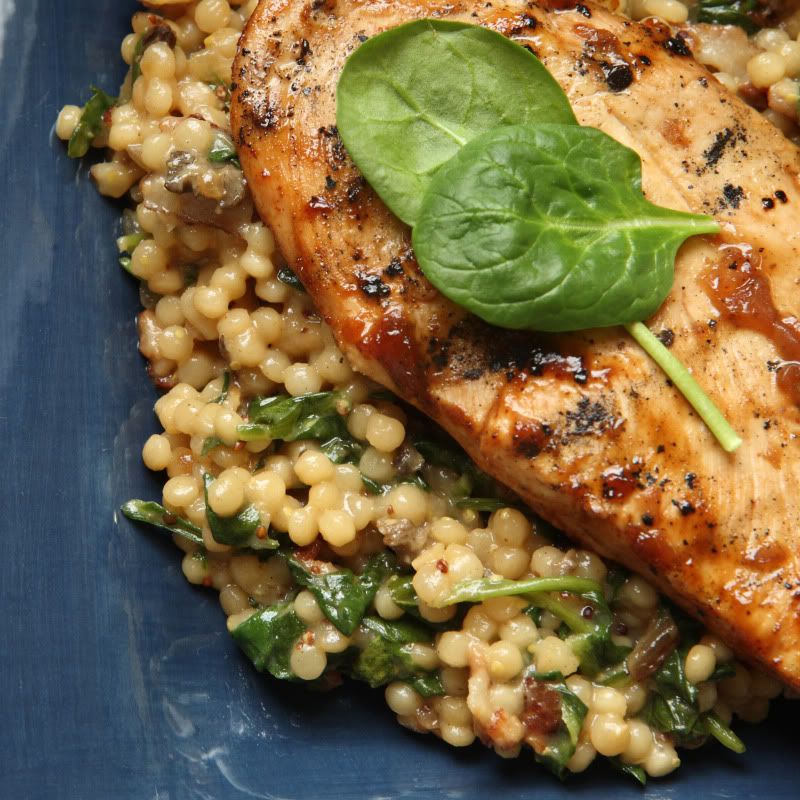
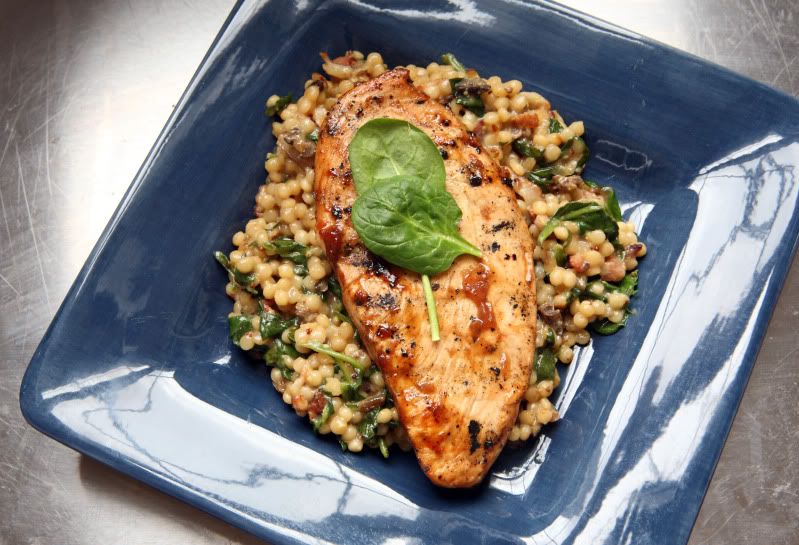
The chicken in these pictures is served with my Bacon and Spinach Couscous. It’s really yummy – give it a try.

Printable PDF file (with pictures)
Printable PDF file (text only)

Wednesday, February 24, 2010

Lemon-Sage Cornish Game Hens with Porcini Tomato Sauce


There are several good reasons you should try this chicken recipe. For one, its pretty easy to make, considering it involves whole chickens. (When I first started learning to cook, whole birds seemed kind of intimidating to me…but the truth is, whole birds sound a whole lot more complicated than they actually are. And this particular recipe is fairly easy.)

The second reason you should make this recipe is that it tastes quite good. The chicken is baked at a high temperature, so the skin becomes nice and crispy while the chicken stays juicy and tasty. Lemons are stuffed in the chicken – they give a bright but subtle counterpoint to the umami flavor present in the mushroom tomato sauce.

This recipe is made with Cornish game hens (sometimes known as "rock" hens...they're basically just smaller-sized whole chickens). In my household, one large Cornish game hen will serve two people…but we’re used to moderately-sized portions. If you have big eaters, or if you want to have leftovers, you might want to allow one small hen per person.

Lemon-Sage Cornish Game Hens with Porcini Tomato Sauce
Serves up to 4

Chicken Ingredients:
Two to four 1-1/4 to 1-1/2 pound Cornish game hens (see the note above)
For each hen, you'll need...
1 medium lemon
2 large fresh sage sprigs (left whole), plus 1 Tbsp chopped fresh sage
1 Tbsp olive oil
salt and pepper

Sauce Ingredients (makes enough for four servings)
2 Tbsp olive oil
3/4 cup hot water
1/2 ounce dried porcini mushrooms
2 large cloves garlic, finely chopped
one 14.5-ounce can diced tomatoes, with juices

First, prepare the chicken:

Preheat the oven to 450 degrees Fahrenheit. You’ll need a roasting pan large enough to hold the birds.

Remove the giblets. (They’re usually contained in a little plastic baggie stuck inside the chicken cavity, but sometimes they’re just loose inside the bird.) They can be discarded or saved for another use. Rinse the chicken (inside and out). Pick off any stray feathers or any giant clumps of fat. Pat the chicken dry with paper towels.

Cut each lemon in half. Save half of each lemon (we’ll squeeze it on the meat later). Cut the remaining lemon halves into rough wedges. Stuff the lemon wedges and the two large sage sprigs inside the cavity of each bird. Put the stuffed birds in your roasting pan. I like to roast them breast-side-down, because the juices from the bird will help keep the meat moist and flavorful.

Drizzle one tablespoon of olive oil over each bird. Squeeze the juice from the remaining lemon halves over each bird. Sprinkle each bird with a generous pinch of salt and several generous turns of freshly-ground black pepper. Scatter 1 tablespoon of chopped sage over each bird.


Roast the birds at 450 degrees F until they are cooked through and the juices run clear when thickest part of thigh is pierced. (It should take approximately 45-50 minutes.) Transfer the birds to a platter (or a cutting surface if you want to cut them in half – use heavy-duty kitchen scissors to snip them in half); tent them with foil to keep them warm. Reserve the pan drippings.

While birds are roasting, start the sauce...and...

...I highly recommend that you serve this with creamy polenta…that's what the chicken is served with in the photo at the top of this post.  Follow your polenta package directions to make a creamy polenta. If you decide to make polenta, you’ll probably want to start it now, as it probably takes awhile to make…

Combine 3/4 cup of hot tap water and the porcini mushrooms in a small bowl. Let them stand until the mushrooms soften, about 30 minutes. Remove the mushrooms from the soaking liquid, reserving the soaking liquid. Roughly chop the mushrooms; set the mushrooms and the soaking liquid aside.

Heat 2 tablespoons of olive oil in a large saucepan over medium heat. Add 1 tablespoon of chopped fresh sage and the garlic; sauté them until they are fragrant, about one minute. Add the tomatoes, the chopped mushrooms, and the mushroom soaking liquid. Bring the sauce to a simmer – it can simmer on low heat until the birds are done roasting.

Once birds are done roasting, pour the pan drippings into a small measuring cup. Skim the fat off of the top, then stir the remaining drippings into the tomato mixture. Simmer the tomato mixture two minutes to blend the flavors. Serve the chicken with the sauce.

Sunday, January 31, 2010

Chicken Strips with Honey Mustard Dipping Sauce


It’s always more fun to eat food when you can dip it into a sauce or condiment. I guess that’s why hand-held, dip-able things like chicken nuggets are always on children’s menus at fast food restaurants. (If its fun to eat, kids will ask for it, right? Sales!)

Of course, they’re on the grown-up McMenu too, because you definitely don’t have to be a kid to enjoy using your hands to eat food. Since I do not usually include foods with the prefix “Mc” in my meal plan (but still like eating chicken strips), I just periodically make them at home.

Although my chicken strips are not quite as speedy as running through a drive-thru, they’re not too difficult to make and they taste much better. Plus, you know exactly what you’re putting into your homemade chicken strips. They’re much lower in sodium and they’re not deep fried, so they’re better for you.

Look for panko in the Asian foods aisle of your grocery store. If you cannot find it, you can substitute regular unseasoned bread crumbs, but you’ll have the best, crispiest texture with panko.

If you’re looking for something to serve at a Super Bowl party next weekend, give these chicken strips a try! The honey mustard sauce tastes good with other things, too – I accidentally discovered asparagus spears are delicious when dipped in the sauce.

First make the dipping sauce:

Honey Mustard Dipping Sauce
Makes about 3/4 cup

1/4 cup light mayonnaise
2 Tbsp honey
1/3 cup Dijon mustard
A pinch of kosher salt
1/4 tsp garlic hot sauce, or to taste

Mix all of the ingredients. Taste the sauce and adjust the spicy/sweet/tangy ingredients as necessary. Refrigerate the sauce until serving time.

Then make the chicken:

Homemade Chicken Strips
Serves 4 as an appetizer (add a few side dishes to serve it as an entrée)

2 chicken breast halves
1 cup all-purpose flour
A pinch of salt
A pinch of pepper
2 eggs
2 Tbsp water
Approximately 2 cups panko crumbs
Olive oil, for panfrying

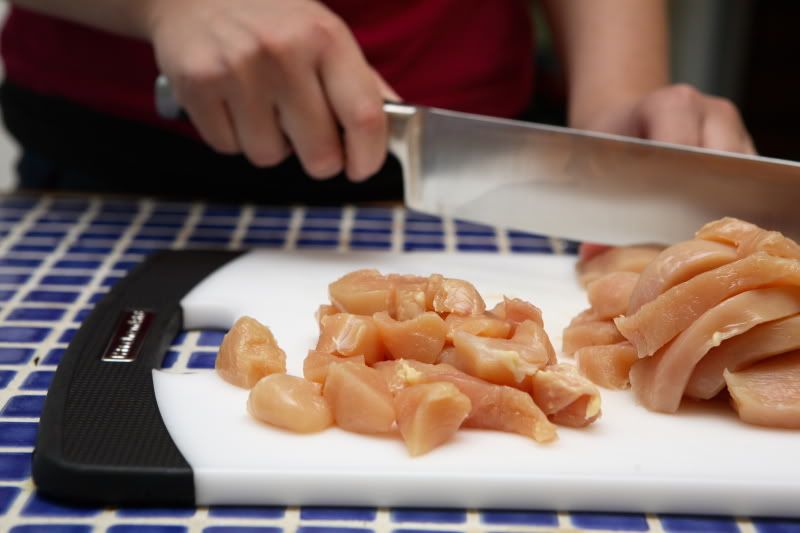
Slice the chicken breasts in half horizontally into two flat, thin pieces.


Then cut the chicken into “fingers.”

You will need three small bowls (cereal bowls, pie pans, small mixing bowls, whatever…all work well). In one bowl, place the flour, salt, and pepper. Stir it with a fork to combine the ingredients. In the second bowl, whisk together the eggs and water.

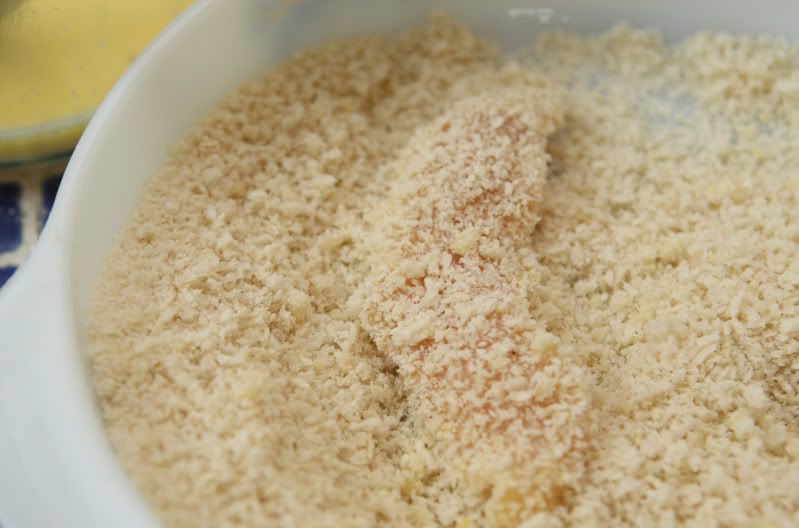
In the third bowl, place the panko. Since panko is kind of expensive, you might want to start with a smaller quantity and add more to the bowl only as you need it. I start with one cup and add a little more as I work, for a total usage of approximately two cups.

Bread the chicken:

When I bread meat, I usually use tongs. It is kind of messy. If you get flour and eggs on your hands, you’ll have a gluey mess that is difficult to wash off. Tongs are much easier to clean – if they get too gluey, just use a utensil to scrape the yuck off.

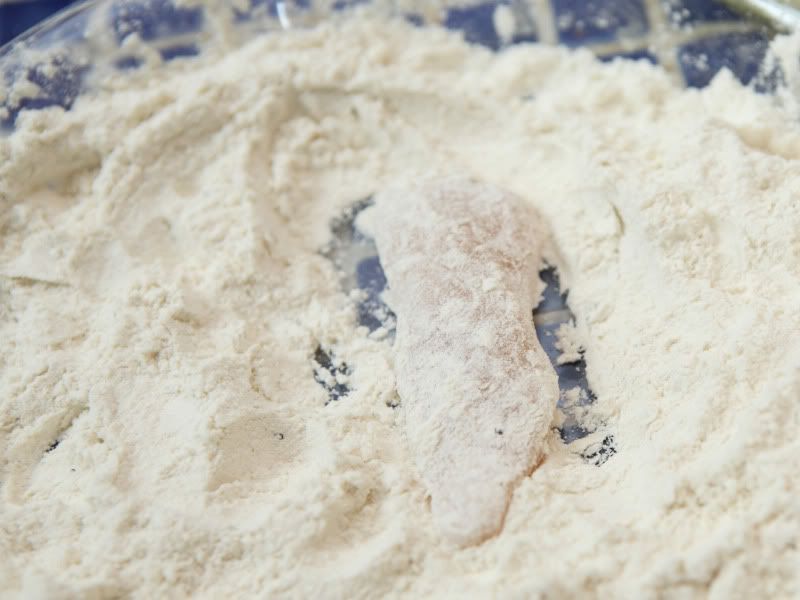
Each piece of chicken should be dipped first into the flour…


…then into the egg wash, and then into the panko.


Be sure you have coated all parts of the chicken each time you dip – that’s especially important with the egg and the panko. Use the flat part of the tongs to pat the panko crumbs firmly onto the chicken pieces.

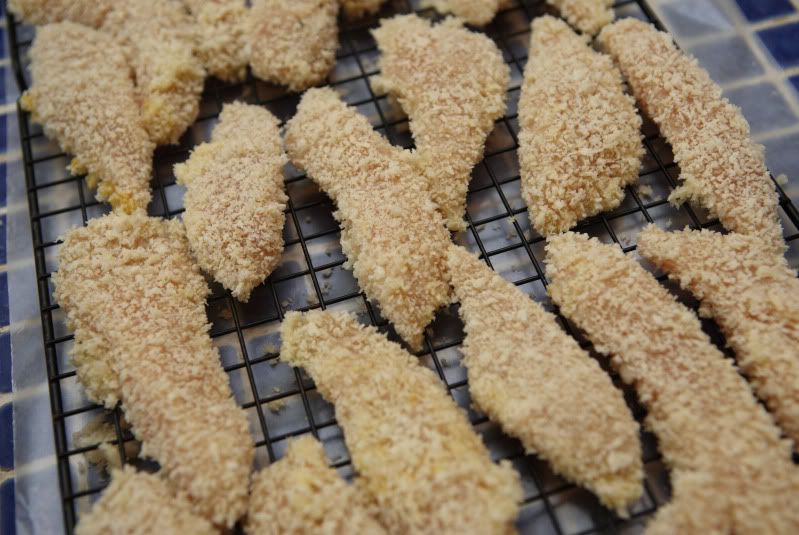
I transfer the breaded chicken to a rack set over a piece of waxed paper (to catch the crumbs) until its time to start cooking.


Once you’ve breaded a fair amount of chicken, you can start to cook it while you continue to bread the remaining meat.

To cook the chicken:

In a large nonstick skillet, heat a few teaspoons of olive oil over medium-high heat. Lay in several strips of chicken, enough to cover the bottom of the pan – but don’t let the chicken pieces touch each other. Cook the chicken for several minutes on each side until the breading is golden brown and the chicken is cooked through. Continue with the remaining chicken (you will probably need to add additional oil as you work). I drain my chicken pieces on paper towels after they’re cooked.

Serve the chicken with honey mustard sauce. Yum!

Saturday, January 30, 2010

Grilled Pork Tenderloin with Pineapple Ginger Sauce, served with Grilled Pineapple


Have you ever had grilled pineapple? If you haven't had it, try it!  It will totally change your opinion of pineapple. The heat causes the sugars to caramelize slightly, resulting in a deeper flavor, and the grill marks look pretty against the yellow fruit.

Not only does pineapple taste great grilled, but it also makes a great marinade ingredient due to a certain naturally-occurring enzyme. The recipe written here is a fruity pineapple marinade, spiked with ginger and a little garlic. It pairs really well with pork tenderloin, and works great on the grill.

If you’ve never bought or cut up a whole pineapple before, don’t worry, I have provided you with instructions! Give it a try!

How to choose a pineapple at the grocery store:

Pineapples don’t continue to ripen after they’ve been picked, so you’ll want to choose the ripest pineapple available from your grocer. Unless you live in or near Florida and have other locally-grown options available to you, you’re probably buying a pineapple imported from Hawaii. (I guess that statement is only true if you live in the United States…I’m not sure what the pineapple availability is elsewhere.)

Since Hawaiian pineapples are the ripest when they have a bright golden color, pick the pineapple that has the most gold on its skin (but not a mottled brown color, because too much brown = rotten!). Some green skin coloration is ok, but the greener the skin is, the less ripe the pineapple was when it was picked.

The spiky leaves should be stiff and green (again, not brown). Grab the base of the bunch of leaves – it should wiggle slightly…not too much wiggle, but not totally stiff either. One more thing to check: the pineapple was once attached to its plant on the underside of the fruit. Turn the fruit over and look to be sure the place where it was attached to the plant hasn’t turned moldy.

Now that you have your pineapple, you're ready to start making...

Grilled Pork Tenderloin with Pineapple Ginger Sauce, served with Grilled Pineapple
Serves 4

1 fresh pineapple
1/3 cup hoisin sauce
4 tsp peeled, grated fresh ginger
1 large clove of garlic, minced
1 tsp Dijon mustard
1-1/2 pounds pork tenderloin, trimmed of any fat
1 tsp soy sauce
2/3 cup chicken stock

First, cut up the pineapple:

Chop off and discard the leafy crown. A lot of people cut off the bottom of the pineapple at this point, but I usually leave it on because its roughness provides more stability on your cutting board (cut pineapple is slippery!). If its really uneven, though, you might prefer to cut it off. Cut off and discard all of the skin from the sides of the pineapple. If you missed any “eyes” or seeds, cut them out too.


If you haven’t yet, slice off and discard the bottom of the pineapple. With the pineapple standing on its end, cut straight down just next to the core.


Set aside the coreless piece. Mirror the exact same cut on the other side of the core so you have two large coreless pieces and one rectangular piece which still contains the core. Cut off the pineapple on either side of the core. The core is too tough for me to want to eat, so I usually just discard it (although I do know a guy who puts lots of salt on it and eats it anyway…).


You should be left with two smaller pieces of pineapple and two larger slabs of pineapple. Cut the larger slabs of pineapple into 1/2-inch slices. Set these aside – they’ll be grilled later.


The two smaller pieces of pineapple can be cut into chunks – place them in a small food processor. Process the pineapple to make chunky juice. Transfer approximately half of it to a small saucepan and reserve it for later – this will become a sauce to be served with the meat. The rest will be used to create a marinade.

Then, marinate your meat:

The remaining processed pineapple can be transferred to a gallon-sized food storage bag (or whatever vessel you’re going to use to marinate your meat). Add 3 Tbsp hoisin sauce, 2 tsp grated fresh ginger, the minced garlic, the mustard, and the trimmed pork tenderloin. Seal the bag and smash it around a bit to incorporate the ingredients and coat the pork. Let the pork sit a minimum of 15 minutes. (Obviously longer is fine, you can even put this together in the morning before you go to work.)

Then make the sauce:

Near the end of the marinating time, prepare the sauce: In the small saucepan with the reserved processed pineapple, combine 2 Tbsp hoisin sauce, 2 tsp grated fresh ginger, the soy sauce, and the chicken stock. Set the sauce aside until its time to grill the meat.

About grilling big pieces of meat:

When I’m grilling a piece of meat this big, I do several things. One is that I use medium indirect heat. I have a three-burner gas grill. I turn the two outer burners up to medium or medium-high, and the middle burner on low. The pork is placed over the middle low-heat burner.

I also use a heat-safe thermometer. They’re not too expensive to buy from the kitchen section of your grocery store. You just put it in the meat and leave it there during the entire cooking time. The thermometer beeps when it reaches the proper temperature. Easy, and totally worth the nominal cost. Go buy one while your meat’s marinating. (Just remember, use a hot pad to remove it when you’re done with it…it’s hot. Yes, that’s personal experience talking. Doh!)

Grill the pork tenderloin over medium indirect heat, with the grill covered, turning it once, until it reaches 155 degrees internally. The exact time varies (there’s a lot of variables), but count on around 20 minutes.


While the meat is grilling:

While the meat is cooking, bring the sauce to a simmer over medium heat, then turn it to low heat until serving time. The sauce will thicken as it bubbles – if necessary, add another splash of chicken stock if the pan gets too dry. I pour a few tablespoons of the sauce over the meat at the halfway point of the grilling time – just after turning it over. (Careful, don’t contaminate the sauce with raw meat…and if you do, bring it back up to a boil before serving it.)


Half-way through the pork's cooking time, add the reserved pineapple slices to the warmer part of the grill. Cook them over medium direct heat, turning them once, until the pineapple is soft and warm, with nice grill marks on each side. Each side should take just a few minutes at the most. When they’re done, you can move them to a cooler spot on the grill, or transfer them to a plate and cover them with foil to keep them warm.


When the meat has reached 155 degrees internally, remove it from the heat and cover it with aluminum foil. Let it rest for about five minutes before slicing it (the temperature will rise to 160 as it rests).

To serve, thinly slice the pork into medallions. Serve it alongside the grilled pineapple slices, topped with the sauce. I like to serve this meal with rice…it’s a great way to soak up the sauce!

Monday, January 11, 2010

Tortellini in Cream Sauce


One of St. Louis’ great neighborhoods is called The Hill – it’s kind of a little Italy. Nestled between the cute little homes are lots of Italian restaurants, several great Italian grocery stores, bakeries, and even an Italian deli. One of St. Louis’ favorite restaurants, Cunetto House of Pasta, is on The Hill.  Amongst many other delicious entrees, they have an outstanding tortellini and cream sauce dish: tortellini, mushrooms, peas, and prosciutto enveloped in a velvety cream, butter, and parmesan sauce. It is quite good. If I lived closer, I’d eat supper there all the time.

Since it is at least a 45 minute drive to get to The Hill, I have my own version of tortellini and cream sauce that I can make at home. It is surprisingly quick and easy – so easy it can easily be made on a weeknight. My version isn’t an exact copy of their dish, but it tastes good enough that the difference doesn’t matter to me. It is not exactly health food, but it is One Good Cream Sauce, worth ignoring the calories and eating it every once in awhile.  To help with portion control, the recipe I’ve posted here makes enough for a smallish main dish.

There are several keys to success with this recipe: One – have everything ready to go before you start to make the sauce. (You can prepare everything while your pasta water is coming to a boil.) You don’t want to be scrambling to grate cheese while your butter overheats. Two – don’t omit the nutmeg – its just a pinch – and please use freshly grated nutmeg!  Three – when you select your cheese, please don't use the powdery stuff in the green container.  This is a dish where real Parmigiano Reggiano makes a difference.

Tortellini in Cream Sauce
Serves 4 as a smallish main course

1 cup freshly grated Parmigiano Reggiano cheese (I use the medium sized holes on my box grater)
2 ounces prosciutto
3 Tbsp unsalted butter
1-1/4 cups heavy cream (unwhipped heavy whipping cream, not coffee creamer)
freshly grated nutmeg
freshly ground black pepper
4 cups frozen packaged fully-cooked tortellini
1-1/2 cups frozen peas


Fill a large saucepan or small stockpot with water, bring it to a boil. (This will be your pasta water.) While the water is coming to a boil, prep the rest of your ingredients:

Grate the Parmigiano Reggiano cheese, set it aside. Finely chop the prosciutto, set it aside. Locate your butter, measure the cream, and get the nutmeg and pepper out so you’re ready to go.


Once your pasta water is boiling, stir in the frozen tortellini. Watch the pot closely; as soon as the tortellini begin to boil (and it wont take long – just a couple of minutes), add the frozen peas.

Again, watch the pot closely; as soon as the pasta mixture begins to boil, remove it from the heat, drain it, and set it aside.

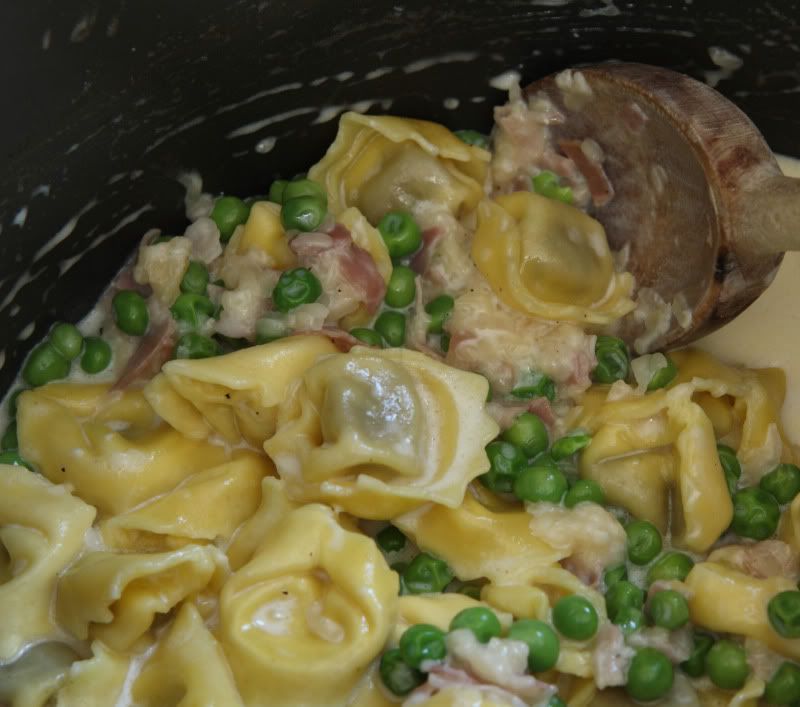
Add the butter to the empty pot – melt it over medium heat. Add the nutmeg and the black pepper; stir the butter mixture a few times until the spices have heated and are aromatic. Stir in the prosciutto; heat it through. Stir in the cream and heat it through, stirring constantly. Add the grated cheese, then return the cooked pasta to the pot. Gently stir the pasta to melt the cheese and coat the pasta evenly. Serve hot. The longer the sauce sits, the thicker the sauce will get.


A note for vegetarians: The sauce is nearly vegetarian – except the prosciutto. If you omit the meat, you might want to add a little bit of salt to the sauce. (The prosciutto is very salty; you’ll need to make up for its absence.)

A note for those who don’t want to use cream: You can cut back on the fat slightly by substituting half-and-half for the heavy cream. The sauce won’t be quite as thick and will not taste quite as good, but you might feel its worth the reduction in calories and fat.

Tuesday, September 29, 2009

Creamy Homemade Stovetop Macaroni & Cheese


One of my favorite comfort foods of all time is macaroni and cheese. When I was younger, still in high school or college, and didn't yet have any culinary skill to speak of, I only made generic “imitation blue box” macaroni (“generic” due to funding limitations and a general distaste for the Kraft company, and “blue box” due to a lack of culinary skill). Now-a-days, I usually make my mac & cheese homemade, but occasionally I’ll bust out a blue box (I like Annie's brand) if I’m having a particularly bad day and just need a quick, inexpensive, and fast meal. I like it served alongside barbecued sausage. I know Mom, it’s not exactly a healthy meal, so I don’t eat it very often!

I do love macaroni and cheese. I get excited when I see it on the menu at sandwich shops, but most of the time it’s a let-down once I’ve tasted it:  it’s usually not all that great. It always seems to be too runny, too gritty, or the cheese sauce tastes too much like the flour used to thicken it. I want a silky, smooth textured sauce over perfectly al dente macaroni – pasta that hasn’t been cooking all afternoon in a giant sheet pan. The sauce shouldn’t be too thick, and nor should the pasta be swimming in it – there should be just enough sauce to coat the pasta.

So, like I said, I’m often disappointed.

I found this recipe in “The Best American Classics,” which is a Cooks Illustrated cookbook. I have a couple of their cookbooks, and while I don’t always agree with what their opinion of “best” may be (“best” is so subjective!), I do agree with them in this case…well, mostly. I’ve written my changes into the version you’ll find here.

This recipe is made on the stovetop. It’s almost as simple as blue-box macaroni (it does require a bit more stirring), yet it tastes so much better. There’s no long baking time involved, so like the boxed variety, you can make it on the spur of the moment. It makes more than a family-sized blue box, so I always have leftovers to take to work.

Speaking of leftovers, the best way to reheat any kind of macaroni and cheese is in a saucepan over medium-low heat, with a splash of milk or other dairy added to help recreate the sauce. I usually don’t put that much effort into reheating lunch at work, so I just stick it in the microwave and eat it even though the texture of the sauce has changed slightly. (It still has great flavor, though!)

The original recipe is written to include a toasted bread crumb topping, but I never bother with it. I like mine topped with chopped tomatoes instead.  Not only is it better for you, but the sweet juicy tomatoes are a nice counterpart to the salty, cheesy pasta.

Creamy Homemade Stovetop Macaroni and Cheese
Serves 6-8, unless you are a big macaroni eater, in which case it might yield closer to 4 servings.

1 can evaporated milk
2 large eggs
1/4 tsp hot pepper sauce (like Tabasco sauce)
2 tsp salt
1/4 tsp ground black pepper
1/4 tsp dry mustard
1/2 pound macaroni
4 Tbsp unsalted butter
12 ounces sharp cheddar (I used Tilamook Vintage White Extra Sharp Cheddar)
1 cup chopped tomato (either 1 cup of sliced "baby" tomatoes, or 1 chopped "regular" tomato should be about the right amount)

In a two-cup liquid measure, use a fork to whisk together 1 cup of evaporated milk, the eggs, hot pepper sauce, 1 tsp of salt, and the dry mustard. Set it aside.

Meanwhile, cook the pasta according to package directions. Use a large pot, and if you have a nonstick one, use it. (Tip: select a pot that’s slightly larger than what I used in these pictures, because I thought the pot was too small once I got to the last few steps. Oops!). Cook the macaroni only until barely al dente.

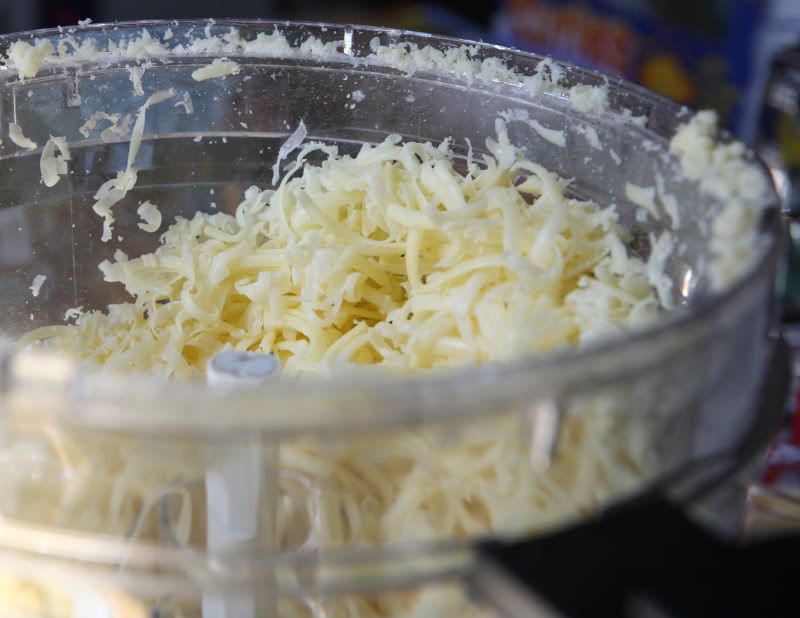
While the pasta is cooking, grate the cheese. For this much cheese, I use the shredding (grating) disc in my food processor.


Once the pasta has cooked, drain it and return it to the pot. Add the butter and stir over medium heat until it has melted.

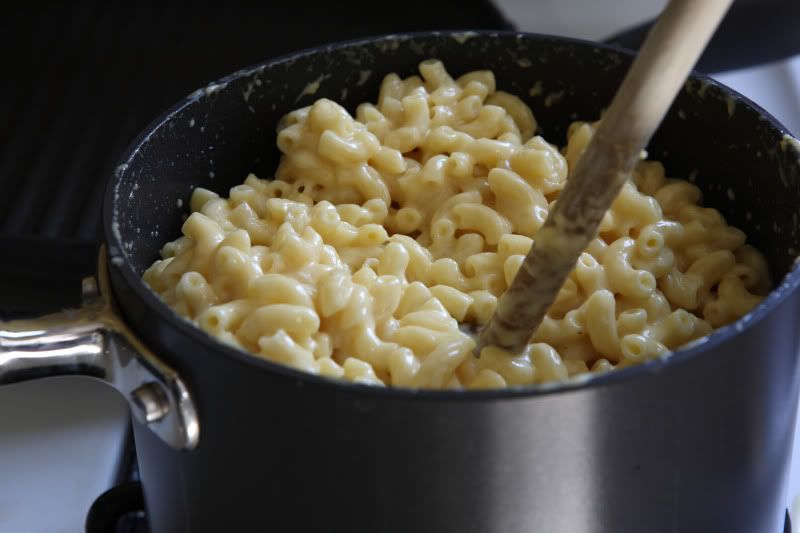
Pour the egg mixture over the buttered noodles. Sprinkle about half of the cheese over the pasta. Stir constantly over medium-low heat until the sauce thickens and the mixture is hot and creamy, about five minutes. Yes, it’s a lot of stirring, but you’ve got to do it in order to properly cook the eggs.  Don’t let the mixture boil; if the pan starts sizzling when you’re stirring, it’s too hot.  (Remember, medium-low heat!)  In general, if it seems runny, you haven’t cooked/stirred it long enough. Keep the heat on medium-low and keep stirring, and it should end up just fine.

As you near the end of the five-minute stirring time, add the rest of the cheese and the remaining evaporated milk. Stir it just long enough to incorporate everything and melt the cheese. Taste it, and sprinkle the remaining teaspoon of salt over the pasta (or salt to taste, because cheeses vary in saltiness).  Stir to incorporate the salt, then taste it again just to be sure things aren't too salty.


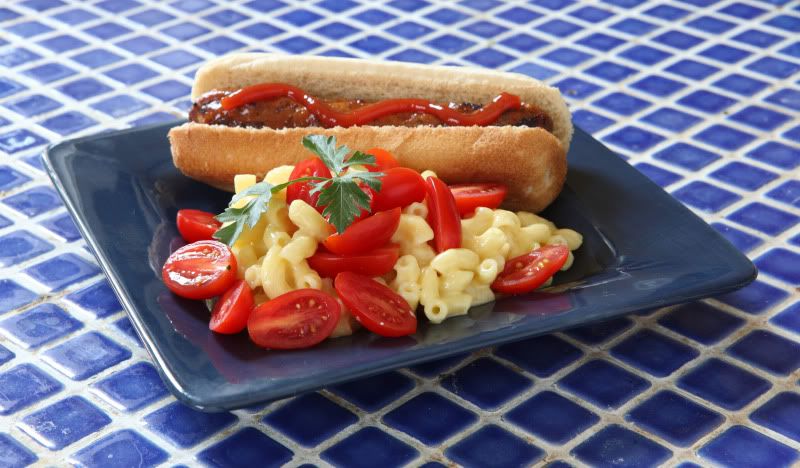
Serve immediately, topped with a handful of chopped tomatoes.

I mentioned earlier that I liked mine served with sausage… I love bratwurst, but it’s sooo unhealthy that I rarely serve them. I have found an alternative that I’ve been enjoying lately: chicken sausage!

Costco carries an andouille chicken sausage (sorry, the exact brand is not listed online, but it probably doesn’t matter because the available brands and flavors vary by location anyway. Over the years, I’ve tried several different brands of chicken sausage from both Midwestern American and Western Canadian Costcos, and I liked both of the varieties available from both regions, so maybe your nearest Costco has a brand you’d like).

I also found a different chicken sausage at my local grocery store: Al Fresco brand Sweet Apple Chicken Sausage (it has Maple Syrup in it – yum!). They have several other interesting-sounding flavors, which I haven’t yet tried. It’s more expensive than buying in bulk at Costco, but truthfully, I think it tastes better. (Maybe I just liked it because of the maple syrup. Me?!?!)

By the way, the sausage in the picture at the beginning of this post is the Costco andouille sausage.

Oh, and if you want to slightly lower the carbs in the dish (it is pasta, after all!), you could omit the bun, slice up the grilled sausage, and serve it mixed into the macaroni.

Wednesday, August 19, 2009

Pasta with Sausage, Spinach, and White Beans


Do you pack a lunch to take to work or school each day? I go through stages: for awhile I'll be really good about packing my PB&J and applesauce, but after awhile I get kind of tired of the same old same old and end up eating takeout. I do better when I have leftovers packed up from the previous night's dinner.

So, when I plan what I'm going to eat for dinner, I try to choose something that I know will leave enough leftovers for me to take to lunch the next day (or two).

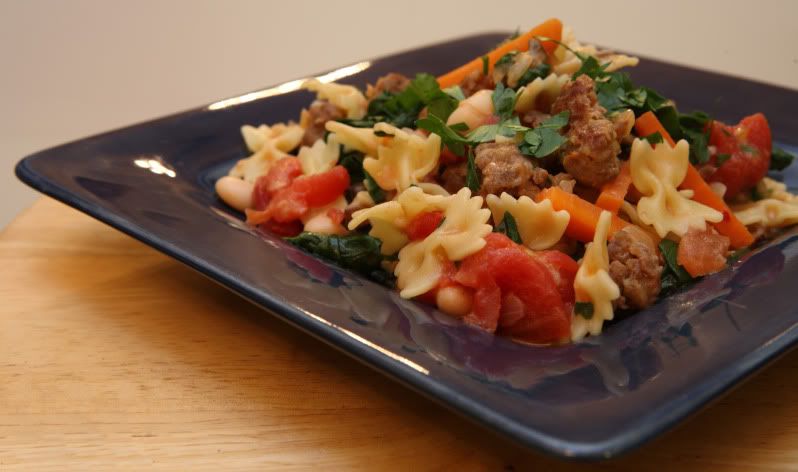
For my family of three, this recipe fits the bill.

This meal serves about six people, depending on how big your servings are. That's way more than what I need to feed the three mouths I currently have in my house, but that just means I have plenty of leftovers to eat throughout the rest of the week. We just packaged up leftovers from tonight's dinner and have enough for at least four lunches! It reheats pretty well in the microwave or on the stovetop, and I can't wait for lunch tomorrow!

And if you don't need quite that much food all at once, the recipe can easily be halved, or simply reduced slightly.

I like this meal because it's easy enough to make on a weeknight and it tastes great due to the spicy Italian sausage - buy a type that is labeled "hot" for the best flavor!

You'll need a large, deep skillet to make this dish.

Pasta with Sausage, Spinach, and White Beans
Serves about 6

3 links hot Italian sausage, casing removed
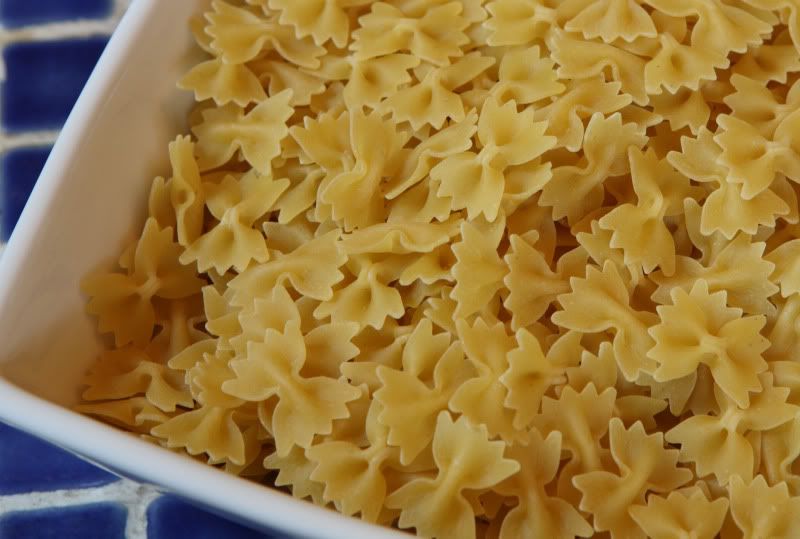
8 ounces bow-tie pasta (the pictures show mini farfalle)
5 tomatoes (you could substitute one 14.5-ounce can of diced tomatoes if your fresh tomato availability is nil)
1 medium onion, chopped (I give it a whir in the mini food processor)
2 carrots, peeled and chopped (I make little carrot sticks about the length of the pasta - you could use an equal amount of baby carrots sliced into sticks)
4 ounces portabella mushrooms, chopped
1/2 cup chicken stock
2 Tbsp heavy cream (approximately...I just eyeball it)
6 ounces fresh baby spinach, roughly chopped if the pieces are particularly large
1/4 cup chopped fresh parsley
One 14.5-ounce can Great Northern white beans, rinsed and drained

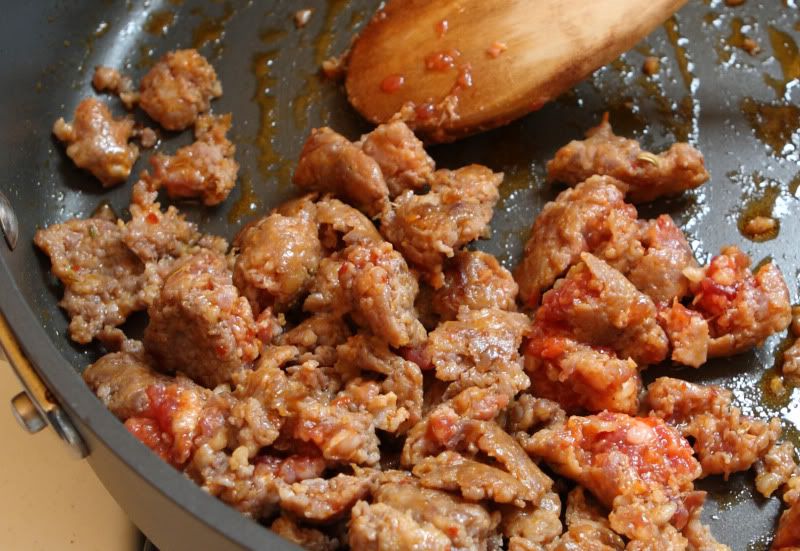
In a deep, large skillet, over medium heat, fry sausage, stirring and breaking it up as it cooks. When the sausage is mostly-cooked, but is still slightly pink on the inside, remove it from the pan to a plate lined with a paper towel, leaving the fat in the pan - set the pan aside. This picture shows the sausage at the proper level of doneness: mostly browned on the outside but still pink on the interior. (No worries, we’ll finish cooking the sausage later.)


Bring a separate large pot of water to a boil. Add the pasta and cook according to the package directions. Drain and set aside.


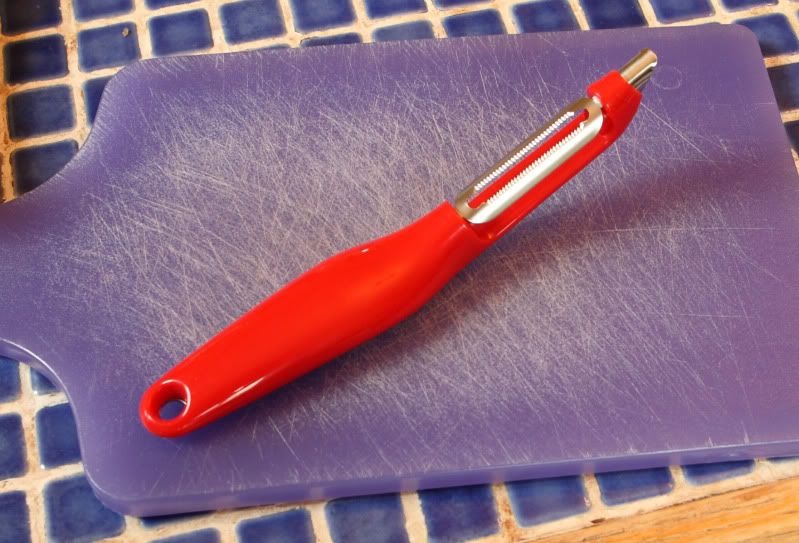
Meanwhile, if you like (and I highly recommend it), peel the tomatoes. If you don’t have one yet, I suggest you invest in one of these gadgets:


…a soft-skin serrated peeler! Besides being good at peeling tomatoes, they do an excellent job of peeling kiwis, peaches, and the skin off your fingers (so be careful!). They’re dishwasher safe, and happen to be ergonomic: they are pretty comfortable to use if you have a big peeling task ahead of you. Buy one, and while you’re at it, buy one of their standard peelers too. Your hands will thank you next time you peel a potato.

If you don’t have a nifty soft-skin peeler, you’ll need to peel the tomatoes using the boiling water method: Cut a shallow X into the bottom of each tomato. Plunge them first in boiling water for about ten or fifteen seconds, then rinse them under cold water to stop any cooking. The skins should come off more easily than they would otherwise (start peeling from the X). (A soft-skin peeler is much easier – no boiling water to deal with and one less pot to wash!)

(If its wintertime and your supermarket has terrible tomatoes, go ahead and use canned diced tomatoes.  No peeling or chopping necessary...)

Once you’ve peeled the tomatoes, roughly chop them and divide them into two approximately equal portions. Set both portions aside.

Add the onions to the leftover fat in the large skillet you used for the sausage. Cook on medium-high heat until onions just begin to soften. Stir in the carrots, mushrooms, and half of the chopped tomatoes and cook a few minutes longer until carrots are crisp-tender.

Stir in the chicken stock, reserved sausage, and the spinach, and allow the mixture to simmer for a few minutes to reduce the liquid slightly.  If you have a lid for your skillet, cover it for a minute to help cook the spinach more evenly.  No lid?  Don't worry, just stir it frequently until the spinach is all evenly wilted.

Add the cream, chopped parsley, and reserved cooked pasta. Stir to incorporate the ingredients. Once the sausage has cooked through, gently fold in the beans and the remaining tomatoes. Heat through, then serve immediately.

Sunday, July 19, 2009

Tilapia and Green Beans, with Home-Dried Powders - the July Daring Cooks Challenge


This month’s Daring Cooks recipe was pretty unusual – at least, compared to what I usually cook for my family. The July challenge recipe was hosted by Sketchy, of Sketchy’s Kitchen. He chose a skate recipe from the Alinea Cookbook, which is to be served with “powdered traditional flavors” – more on exactly what that means in a minute.

First, the original recipe called for skate, a creature similar in appearance to a stingray. Many Daring Cooks chose to substitute other types of seafood because skate is on the “avoid” list. (According to the Monterey Bay Aquarium and other similar websites, skates have been overfished, and most are caught by a method that results in high levels of accidental catch of other fish. The fishing method also results in substantial damage to the seafloor.)

So, I substituted US farmed Tilapia for the skate, and thought the results were delicious. I suggest you do the same! (Please check out the rest of the list and try to make good seafood choices when you prepare seafood in the future!)

Besides the controversial main ingredient, the recipe brings up another interesting topic. For one, it touches on molecular gastronomy, a modern method of cooking that I have not, until now, had a chance to experience. This version of MG involves home-drying an assortment of foods to be pulverized into flavorful powders. Thus, the flavors of the dish are intense and very concentrated. The powders are served alongside the main course – seafood poached in a velvety butter sauce – and the fish is dipped into the assortment of powders as it is eaten. The result is really a taste explosion in your mouth – it’s delicious. Definitely something I’m not used to eating, though!

The recipe does require some special equipment. Best results will be achieved if you own a dehydrator. Some Daring Cooks were able to duplicate the results in a microwave. It’s also possible to use an oven set on a very low temperature – but it takes a very long time. You’ll also need some way to grind the dehydrated foods. Many people used coffee grinders or a mortar and pestle. I used a food processor and sifted the powders through a fine mesh strainer.

I wasn’t certain if I was going to be able to complete this month’s challenge. For one, I don’t own a dehydrator or a microwave. Nor do I have a coffee grinder or a mortar and pestle. And, it’s been 90+ degrees nearly every day lately, so I wasn’t too excited about running my oven all day to complete the challenge. To top it all off, I have had a problem with my back lately, so I have been moving around more slowly than usual.

However, my mother owns an awesome dehydrator and I was able to talk her into shipping some dehydrated food to me. (Thanks, Mom!) In addition to her contributions, I dried some of the thinnest of the required ingredients in my oven, purchased some already-dried items from the grocery store, and pulled a few spices out of my pantry to come up with the rest of the ingredients. Sorry, with this bad back, that was the best I could do!

I’m glad I did what I could to put together the challenge. Like I said, the food was so flavorful and delicious. Definitely different, and definitely outside of my usual comfort zone of cooking – but that’s why I joined the Daring Kitchen. If you’ve got a dehydrator and haven’t tried a recipe like this yet, give it a shot. It’s really not too difficult at all.

The version I’m posting here reflects the changes I made to the original recipe. There were a few ingredients I was unable to source, so I left them out of this post. Check out Sketchy’s blog if you want to see how the challenge recipe was originally written for us. His blog also includes instructions for using a microwave or an oven to dry the powders.

Tilapia and Green Beans, with Home-Dried Powders
Serves 4

1 red onion, trimmed and thinly sliced
30 grams capers (in brine, not oil-packed)
1 cup fresh Italian parsley (left intact)
1/4 cup fresh cilantro (left intact)
1 ounce dried lemon peel (I used the brand Melissa’s, which is sweetened)
3 Tbsp dried instant milk powder
1 Tbsp brown sugar
1 lb butter (4 sticks)
300 grams fresh green beans
Salt, to taste
4 tilapia fillets
2 bananas (neither overripe nor underripe)
Juice of 1 lemon

Optional
Pink peppercorns
Ground white pepper
Sweet Hungarian paprika
Any other ground flavoring you have or want to make that you think will match the flavors of the dish

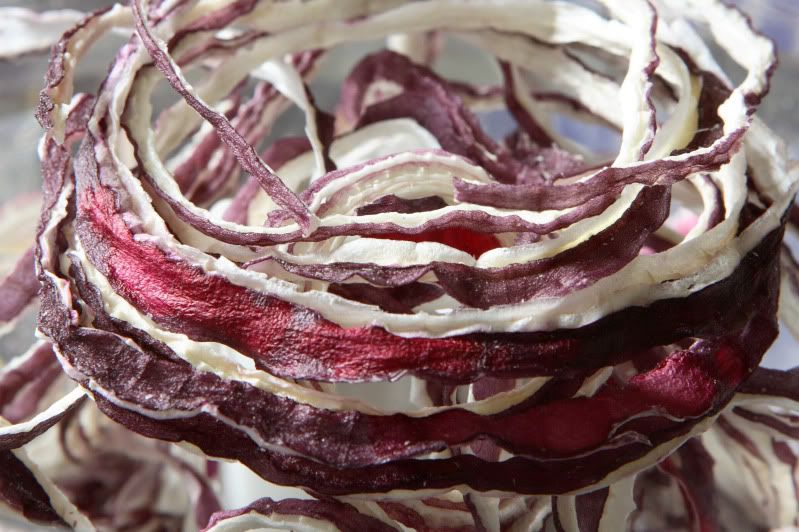
First, the onions and capers need to be dehydrated and ground. Special thanks to my Mom, who dried these for me using her dehydrator. See Sketchy’s blog if you want to try a different dehydration method.

Dry the red onion slices in a dehydrator at 135 degrees until they are brittle, about twelve hours.


Use a food processor, mortar and pestle, or coffee grinder to grind the brittle onions. Pass the ground onions through a fine strainer and store the powder in an airtight container.

Rinse the capers under water. Use a towel to remove as much water as possible. Dry the capers at 135 degrees until dry, about 12 hours. Use a clean grinding implement to grind the capers. Pass them through a fine strainer and store the powder in an airtight container.

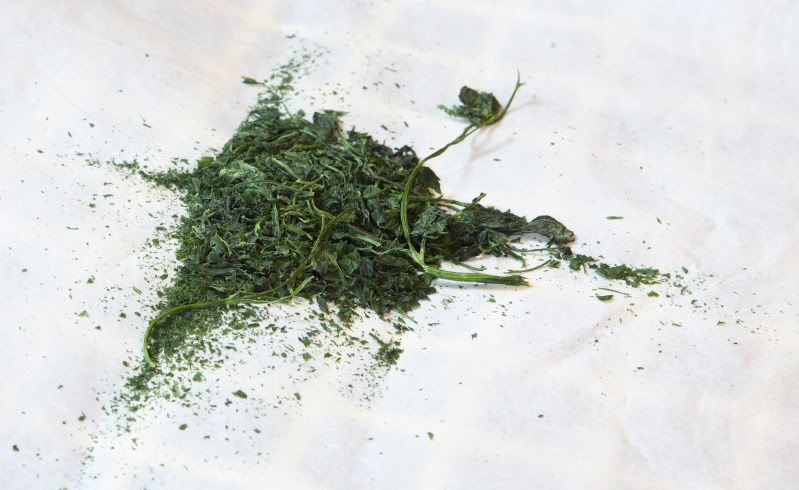
The parsley and cilantro also need to be dried, but they don’t take nearly as long. I used my oven to dry these. You can use a dehydrator if you’ve got one.
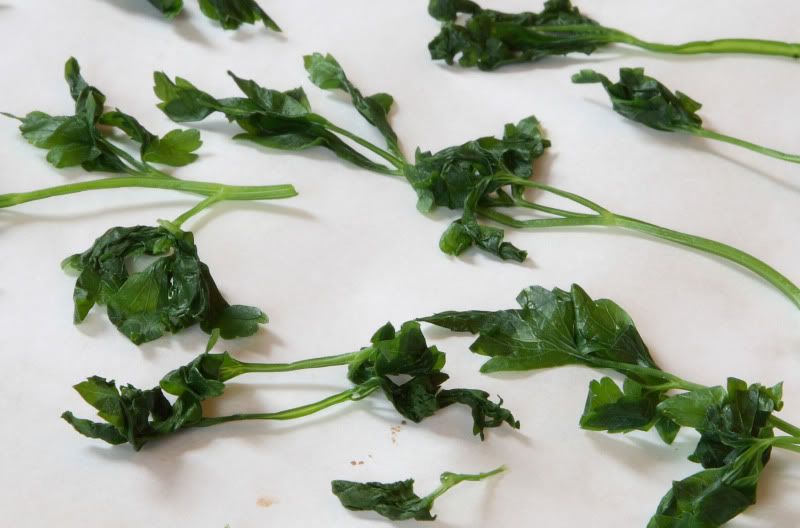
Preheat the oven to the lowest setting possible (mine only goes down to 200 degrees, so that’s what I used). Cover a cookie sheet with a piece of parchment paper. Bring some water to a boil in a small saucepan. Blanch the cilantro and parsley in the boiling water for one second, then transfer them to ice water to stop the cooking process. (You don’t have to keep the two herbs from mixing.) Pat the herbs dry with paper towels. Lay the cooled cilantro and parsley out on the parchment paper as flat as possible. Don’t let the leaves touch one another, or they won’t dry properly.


Dry the herbs in the oven, turning them over once, until they are brittle. At 200 degrees, I left them in for 15 minutes on each side. Nearly all of the pieces were sufficiently dried, except for the thickest stems and a few clumps of leaves I missed. I just crunched them up a little bit, picked out the couple of pieces that weren’t brittle enough, and ground the rest up. Use a clean grinding implement to grind up the cilantro and parsley (again, you can mix it together, no need to keep it separate).


Pass the ground herbs through a fine strainer and store the powder in an airtight container.


In a clean bowl of a food processor, grind the lemon peel until it is as small as possible. (It won’t pulverize like the other dried things will, but it’ll do. It will bring an interesting variation in texture to the final dish.) Store it in an airtight container.

In a small skillet, toast the dried milk powder over medium heat, stirring occasionally. (Be cautious not to burn it!) Turn it out into a small bowl and allow it to come to room temperature. Mix the brown sugar into the cooled milk powder. Store it in an airtight container.

The recipe may be made ahead to this point.

Before we start cooking fish and green beans, we’ll first make a beurre monte, a buttery liquid we’ll use for poaching. Heat 60 grams of water in a large saucepan to a boil. Meanwhile, cut the butter into rough cubes (approximately 1 Tbsp each). Once the water has reached a boil, turn the heat down to low. Stir in one cube of butter at a time, waiting to add the next cube until the last one has melted. Keep this liquid heated, but do not allow it to exceed 195 degrees F.

Now we’ll divide up the beurre monte. Three-fourths of the finished beurre monte will stay in the large saucepan over low heat. One fourth of the finished beurre monte should be transferred to a medium saucepan over low heat. After you've divided it up, add water to the each beurre monte to double it’s volume – this doesn’t have to be exact and can be “eyeballed” up the side of the pan. Or, if you’re more comfortable doing so, you can pour each portion of butter sauce into a liquid measuring cup and add an equivalent amount of water. Again, keep the liquids heated, but not above 195 degrees.

Decorate your serving plates:
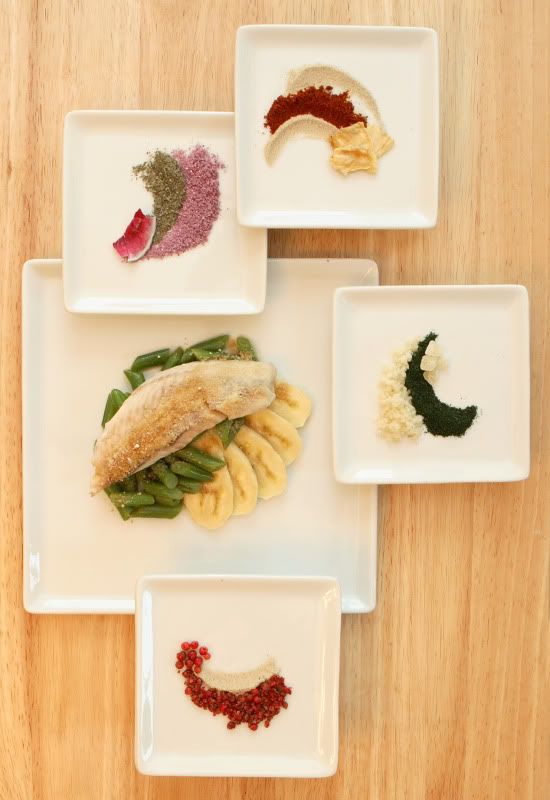
The powders are to be plated alongside the fish, swirled in a decorative fashion. Since my back was causing problems and I wasn’t physically up for a lengthy trial-and-error process, I plated the powders on several smaller plates. (Much easier, because if you screw it up, you’re not out a whole plate of multiple powders.) You can check out other Daring Cooks' photos for more plating ideas.

I plated crushed pink peppercorns and ground white pepper (both storebought), garnished with whole pink peppercorns


the ground red onion and capers, garnished with a chip of dried red onion,


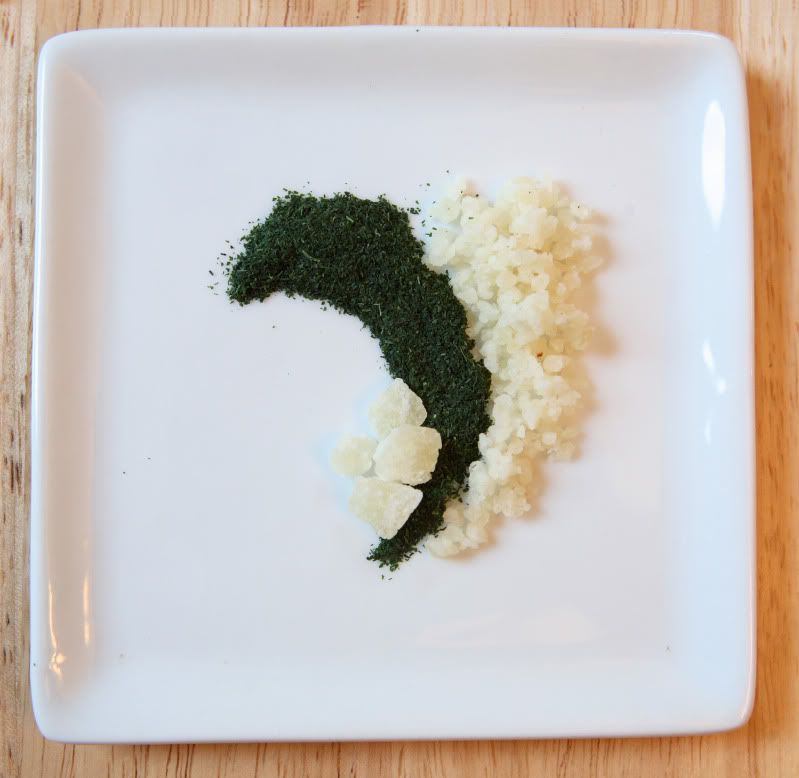
ground white pepper and sweet Hungarian paprika (also storebought), garnished with several chips of dried pineapple (another dried item my mom shipped - and they were delicious, but wouldn’t pulverize well enough to use in this recipe),


and the powdered parsley/cilantro and the sweetened lemon peel, garnished with a few of the larger, unground pieces of peel,


It is much easier to decorate the empty plates now, rather than waiting until after the fish is cooked. Otherwise the fish will get cold while you fumble with the various powders. Just be sure you leave room for the fish later!

We’re ready to start cooking:
Cut the green beans diagonally into bite-sized pieces. Add them to the smaller portion of beurre monte. Turn the heat to medium and poach the beans until they are done to your liking. Taste the beans and season them with salt.

While the beans are poaching, turn the heat of the larger saucepan up to medium. Add the tilapia fillets (you might need to do this in batches) and poach, turning once, until the fish turns white and easily flakes apart. (That should only take a few minutes on each side.) Be careful to avoid overhandling the fish, or it might fall apart. After you’ve removed the cooked fish, season it with salt.

Meanwhile, thinly slice two bananas diagonally. Squeeze the lemon juice over them to prevent browning. Fan several banana slices on each serving plate. Top the bananas with the drained green beans. Top the beans with a fish fillet. Sprinkle the milk powder/brown sugar mixture on top of the fish.


Serve the fish piping hot. Encourage your eaters to dip the fish in the various powders, experimenting with different flavor combinations. My favorite was definitely the capers and the red onions!
Saturday, July 4, 2009

Strawberry Pecan Pork


I have recently rediscovered pecans. I didn’t think I cared for them much (pecan pie still doesn’t do anything for me), but after eating them on top of a strawberry poppyseed salad at a certain lunchtime restaurant here in town, I have been enjoying their nutty, crunchy taste.

This recipe not only makes use of pecans, but it also makes use of some of the two giant trays of strawberries I bought at the store today. (We’ll be having strawberries in *everything* until I get those things cut up and frozen…)

This recipe involves coating pork chops in ground pecans. I use three small cereal bowls to hold the flour, egg, and pecans. If your cereal bowls are too deep, it might be easier for you to use pie tins. You could also use large zip lock bags – that has worked well for me in the past, particularly when I’ve made pecan-encrusted pork for large groups.

Strawberry Pecan Pork
Serves 4
2 cups pecans, chopped
3 cups strawberries, hulls removed
1 Tbsp brown sugar
2 Tbsp balsamic vinegar
Approximately 1-1/2 cups all-purpose flour
Pinch of salt
1 egg
4 thin-cut boneless pork chops
1 to 2 Tbsp olive oil

In a small skillet, lightly toast the pecans over medium heat until they become fragrant and just barely begin to brown. Reserve a few tablespoons of the nuts to use as a garnish. Turn the rest of the toasted nuts out into the small work bowl of a food processor; reserve the small skillet. Process the nuts until finely ground – but not so much that they turn into nut butter.


While the nuts are toasting, slice the strawberries into chunks. Place the sliced strawberries in the empty small skillet. Add the brown sugar and balsamic vinegar. Don't start cooking the strawberries yet - just set the skillet aside until you’re ready to start the cooking process.

You will need three small cereal bowls or similar vessels. Place the flour and a pinch of salt in one bowl. In the second small bowl, lightly beat the egg and 2 Tbsp of water. Place the ground pecans in the third small bowl. Place a wire rack (like what you’d use to cool cookies) over a large plate – this will be the holding spot for the encrusted pork.

Use a pair of tongs to dip a pork chop into the flour mixture. Turn it, patting flour onto it to be sure it is evenly coated. Shake off any excess flour and transfer the meat to the egg mixture. Use the tongs to push the pork into the egg mixture, covering the entire piece. Allow any excess egg mixture to run off, then transfer the pork into the pecans. Gently pat the pecans onto the surface of the pork, coating the surface evenly. Transfer the encrusted pork to the wire rack. Repeat with the remaining pieces of pork. (Use tongs or something similar - try not to use your fingers – you’ll be picking gluey pecan bits out of your fingernails for hours.)

In a large skillet, heat the olive oil over medium-high heat. Add the pork, cooking it in batches if necessary. Handle the pork as infrequently as possible, or you’ll risk damaging the pecan coating. Panfry over medium high heat until the pork is cooked through, turning it only once. The cooking time will vary depending on the thickness of the meat, but you can expect 3 to 5 minutes per side.

After you flip the pork and begin to cook it on it’s second side, place the skillet with the strawberries over medium heat. Give them a stir every so often. They should soften up and begin to release their juices – it will just take a few minutes. Once they begin to soften, turn the heat down to low.

After the pork has finished cooking, transfer it to a serving plate, reserving the large skillet. If it’s cool in your kitchen, you might want to tent the pork with foil to keep it warm. Turn the heat off of both pans.

Transfer the strawberry mixture to the still-hot large skillet, reserving the small skillet. The liquid in the strawberries will start to deglaze the pan. (It will bubble up, so use caution!) Add a quick splash of water – maybe 1/4 cup at the most – just enough to keep the strawberry mixture from totally boiling down and burning. Stir the strawberries, scraping the bottom of the pan to deglaze any browned bits. (This all just takes a few seconds.) Once the browned bits are incorporated into the strawberry sauce, transfer the strawberries and sauce back into the small pan where it is cooler – again, this will keep the strawberries from burning.

Serve the pork topped with the strawberries and sauce. Garnish with the reserved nuts. I served it alongside some asparagus, too, because that’s one of my favorite veggies!
Friday, July 3, 2009

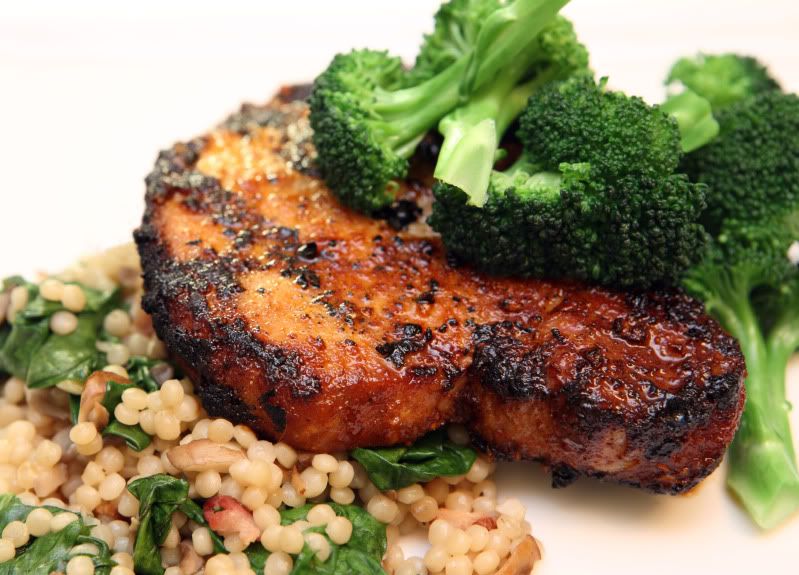
Grilled Pork Chops with Paprika Rub


This spice rub is so easy to make and it tastes great. The prep is quick, but it does need time to sit in the refrigerator to let the meat take on the flavors. I usually make it in my mini food processor so I don't have to cut up the garlic - especially if I'm multiplying this recipe to feed a lot of people.

A lot of my weeknight meals are inspired by recipes in Everyday Food magazine…this is modified from their July/August 2009 issue.

Grilled Pork Chops with Paprika Rub
Serves 4

4 cloves garlic
3 Tbsp vegetable oil
2 Tbsp brown sugar
2 tsp coarse salt
2 tsp sweet Hungarian paprika
½ tsp hot Hungarian paprika (cayenne pepper will work if you don’t have hot paprika)
½ tsp ground black pepper
4 bone-in pork chops

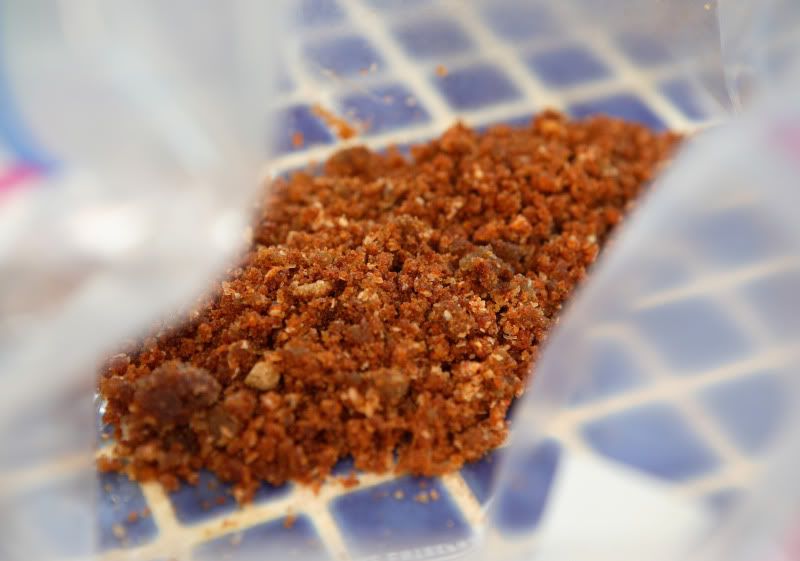
Place all of the ingredients except the pork in a small food processor bowl. Process until the garlic is finely chopped and the ingredients are all incorporated. Scrape the mixture into a gallon-sized thick plastic bag.


Add pork chops to the bag. Seal the bag up, squeezing out any excess air, and gently knead the bag to coat the meat with the spice rub. Refrigerate at least one hour, up to overnight.

Grill over medium-high heat until pork is cooked through. Cooking times will vary depending on the thickness of your pork, but you’re probably looking at 3 to 5 minutes per side. Pork is considered “medium” when the center is at 160 degrees F – don’t overcook it or it’ll be dry and tough.

If you’re not into pork, try this on beef. This past Father’s Day, I served this spice rub on ribeye steaks and it was a hit. I’m sure it’d be good on chicken too.

If you’re looking for something to take along on a camping trip, toss this together in a thick baggie and freeze it before you leave home. Stick the baggie in a watertight container and let it sit in the ice in your cooler, thawing little by little over the course of your camping trip until it’s soft enough to successfully grill over your campfire. It’ll be delicious, I guarantee!
Sunday, June 7, 2009

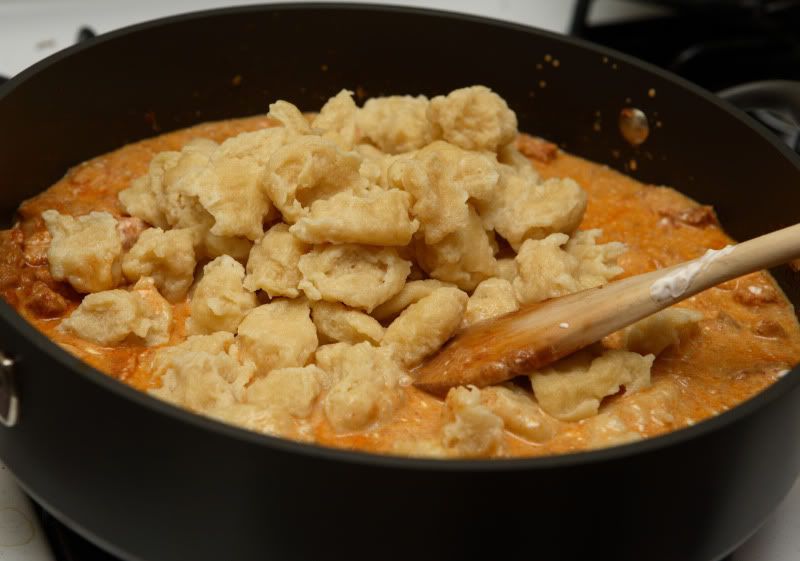
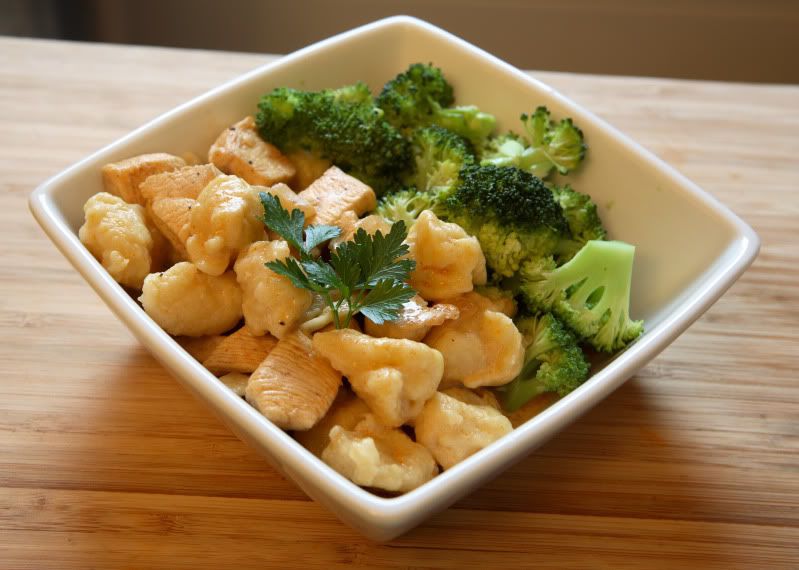
Paprikás Csirke, with Galuska (Hungarian Chicken and Dumplings)

Chicken and dumplings are perfect together. They fall under the category of “comfort food” for many people – myself included. There’s a million variations. Maybe you remember a layer of flavorful herb biscuit dumplings floating on a sea of thick chicken soup, or a large tangy buttermilk biscuit dumpling served alongside slow-cooked braised chicken. Or maybe you like tender strips of chicken nestled in thick, ribbon-cut noodle-style dumplings, or maybe you enjoy Italian gnocchi and chicken enveloped in a spicy marinara sauce.

Here is yet another variation I enjoy: chicken in a paprika sauce, enriched with tangy sour cream – Hungarian comfort food.

I taught my sister-in-law how to make this recipe, so we work on it together. She is in charge of the chicken and its sauce, and I am in charge of making the galuska. To increase our speed and efficiency, she also fishes the cooked galuska out of the water for me. We can throw this meal together in no time when the two of us work on it collectively. This is a really easy meal to make, but there’s a lot going on at once, so it is definitely easier when you’ve got a helper around. I like to serve this with broccoli, which nicely soaks up the paprika-flavored sauce. (Everything’s better with paprika!)

Paprikás Csirke (Chicken Paprika), with Galuska (dumplings)
Serves 4

4 boneless, skinless chicken breast halves or chicken thighs
1 Tbsp vegetable oil
1 onion, peeled & chopped
1 tsp salt
1 Tbsp sweet Hungarian paprika (or more, to taste)
1 tsp hot Hungarian paprika
1 to 1-1/2 cups chicken stock
3/4 cup fat-free sour cream

Wash chicken and pat dry. Trim any fat away as necessary, and set the chicken aside. I usually use breasts, and usually cut them into bite-sized pieces to shorten the cooking time.


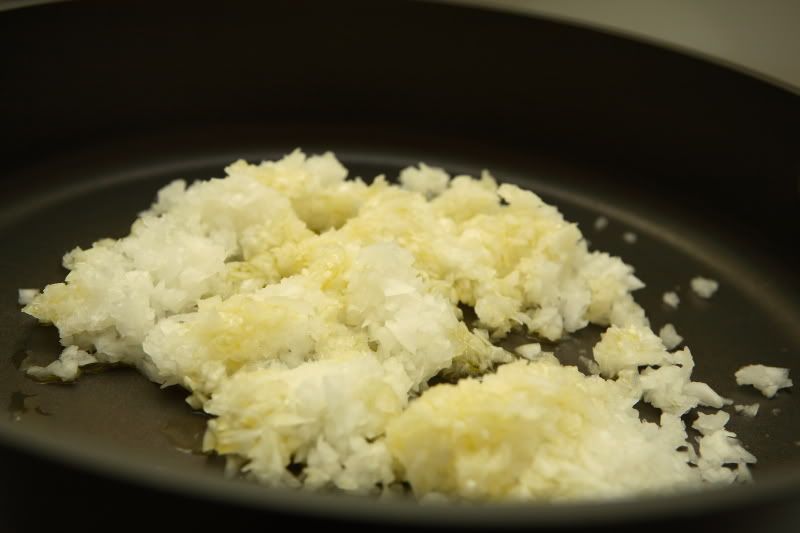
In a large, deep skillet with a lid, heat vegetable oil, uncovered over medium-high heat. Add chopped onion and cook uncovered until onions are translucent and cooked through.


Meanwhile, begin the Galuska recipe by heating a pot of water to a boil and mixing the dough:


Galuska (Dumplings)
1 Tbsp butter, softened
1 egg
1 cup milk
1 tsp salt
2 cups flour
Water, for boiling Galuska

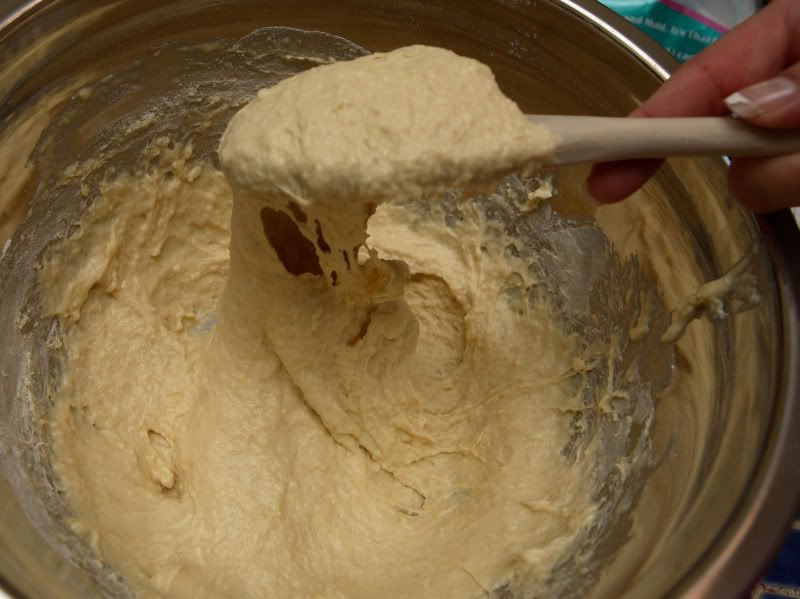
In a medium mixing bowl, beat butter, egg, milk, salt, and 1-1/2 cups flour until smooth. Add additional flour, 1/4 cup at a time, until the mixture is the consistency of sticky cookie dough. If dough gets too stiff, add a little more milk. The dough should be sticky, but not so moist as to be liquidy. It should hold its shape when spooned.


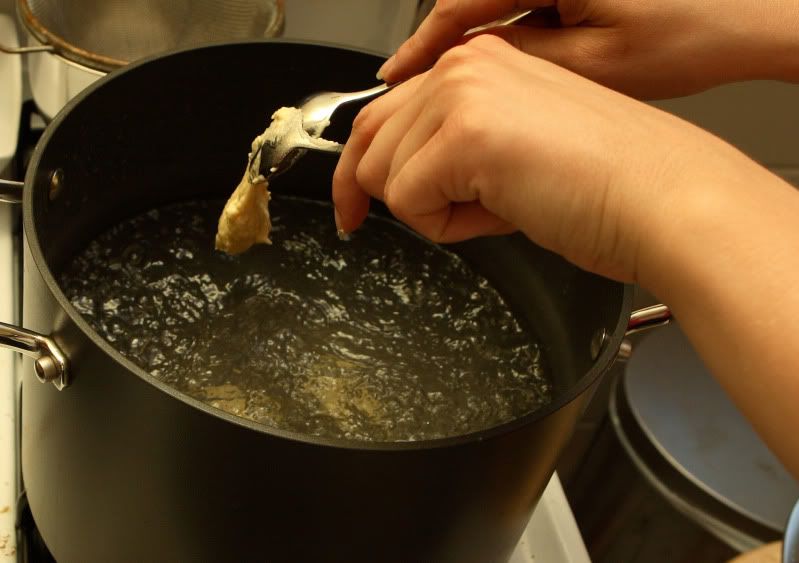
In a large saucepan or small stockpot, bring water to a boil. Using a small teaspoon, scoop up a small amount of dough, approximately 1/2 to 1 teaspoon; use a second spoon to shape the dough into a somewhat spherical shape, and scrape the dough off into the boiling water. Add several more pieces of dough, stirring frequently to keep dough from sticking.


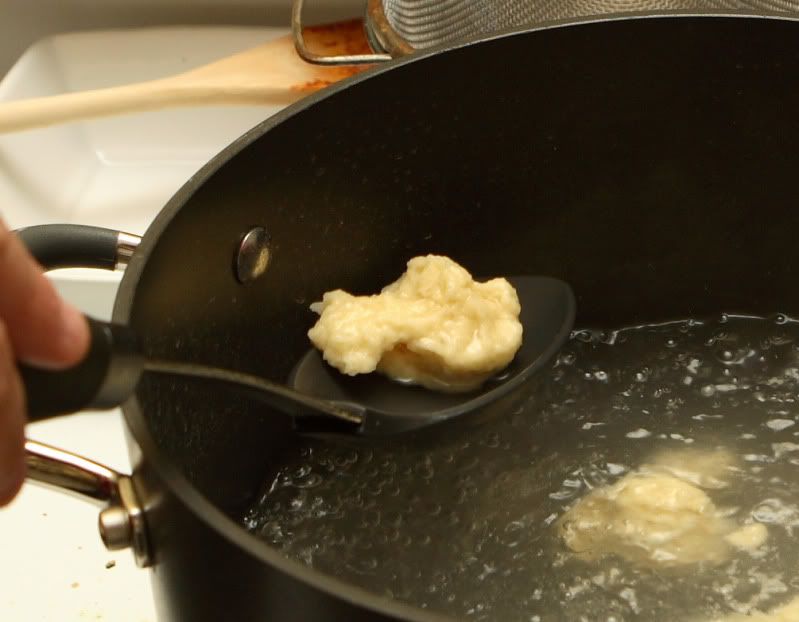
Boil the Galuska until they rise to the surface – 2 to 3 minutes each. Use a slotted spoon to scoop the floating dumplings out; drain them in a colander and set them aside. As you remove cooked pieces, continue to add dough to the boiling water until all of the dough is used up.


While the dumplings are cooking, continue to prepare the chicken:

If using chicken thighs or similarly thick pieces of meat, sprinkle the onion mixture with salt and both paprikas; add 1 cup of chicken stock to moisten pan. Stir the onion mixture, then add the chicken pieces, reduce the heat to medium, cover the pan, and allow it to simmer while you continue preparation of Galuska. Turn the chicken as necessary during preparation to ensure meat is evenly cooked. Keep an eye on the sauce in the pan, and as the pan begins to dry up, add 1/4 cup of chicken stock at a time to remoisten and deglaze pan. Skip to the final step below...

If using smaller pieces of chicken, sprinkle the onion mixture with salt and both paprikas; add 1/4 cup of chicken stock to moisten pan. Stir the onion mixture, reduce the heat to medium, and allow the sauce to simmer while you continue preparation of Galuska. Once liquid is reduced and the pan begins to dry up, add the chicken pieces and 1/2 cup of chicken stock. Allow the chicken to cook, turning as necessary to ensure chicken is evenly cooked. Keep an eye on the sauce in the pan, and as the pan begins to dry up again, add 1/4 cup of chicken stock at a time to remoisten and deglaze pan. If chicken pieces complete their cooking process before you are finished with the Galuska, turn heat down to low to keep warm and slow the cooking process. Continue with final step below...

Final Step: Once Galuska are prepared and cooked, add the sour cream to the chicken/onion mixture. Stir well to incorporate; heat on medium-low heat only until sour cream is heated through. Do not allow sauce to boil excessively. Fold cooked and drained Galuska into sauce; stir to coat all pieces with sauce. Taste and add additional paprika as necessary.