Showing posts with label vegetarian. Show all posts

Monday, October 10, 2011

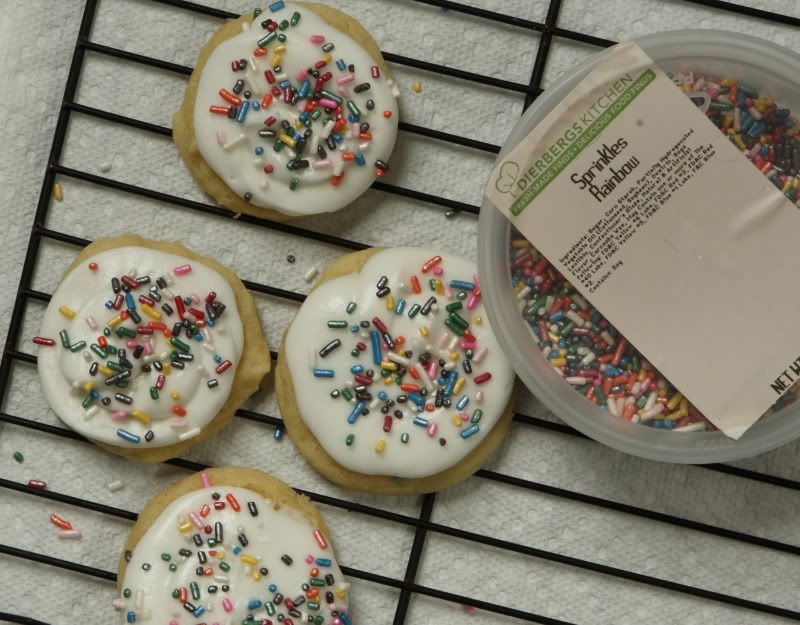
Simple Vanilla Drop Sugar Cookies (or Whoopee Pies?!)


Although I love the simple vanilla flavor of sugar cookies, I hardly ever make them.  I think its because they’re a little pesky to make – they usually require lots of refrigeration time.  The dough must be rolled out on the countertop, and regular readers of this blog will recall from photographs that my kitchen countertop is tiled – its not the usual smooth Formica or granite or whatever surface it is that most people have in their kitchen.  The textured tile countertop makes it basically impossible to roll out cookies.  (Don't ever put a tile countertop in your kitchen.)

If I want to make cut-out sugar cookies, I have to haul the dough and cutters and cookie sheets over to a family member’s house, invade their kitchen, and make them there.  Consequently, I usually only bother with sugar cookies once or twice a year, generally only around a holiday, and make cut-out shapes of Christmas trees and angels or Easter bunnies and tulips over at my Dad’s house with my sisters.

To satisfy my sugar cookie fix during the rest of the year, I’m always looking for a good soft drop sugar cookie recipe.  This one works pretty well – no refrigeration required, and the fact that I don’t have a smooth countertop is irrelevant.  The mixing process is easy enough your kids can put the recipe together.  Unlike most sugar cookie recipes, you don’t need to plan to make the cookies four hours ahead to allow ample time for refrigeration.  The cookies are simply dropped onto the cookie sheet with a cookie scoop.  The addition of sour cream gives the cookies great flavor, and keeps them ultra soft, as long as they don’t get excessively overbaked.  They taste good either frosted or unfrosted.

My mom found the first version of this recipe’s ingredient list and baking times somewhere, it apparently came from compilation cookbook put together by Beta Sigma Phi, “The Millennium Cookbook.”  She might have made a few modifications on her end (the recipe was originally supposed to be a roll-out sugar cookie recipe, but my mom found it to be way too soft to easily roll out).  We thought it might make a good drop cookie recipe, and thus I began experimentation in my kitchen.

Turns out, the resulting unbaked “dough” IS really soft – its really more like a thick cake batter than it is like any other cookie dough I’ve ever made.
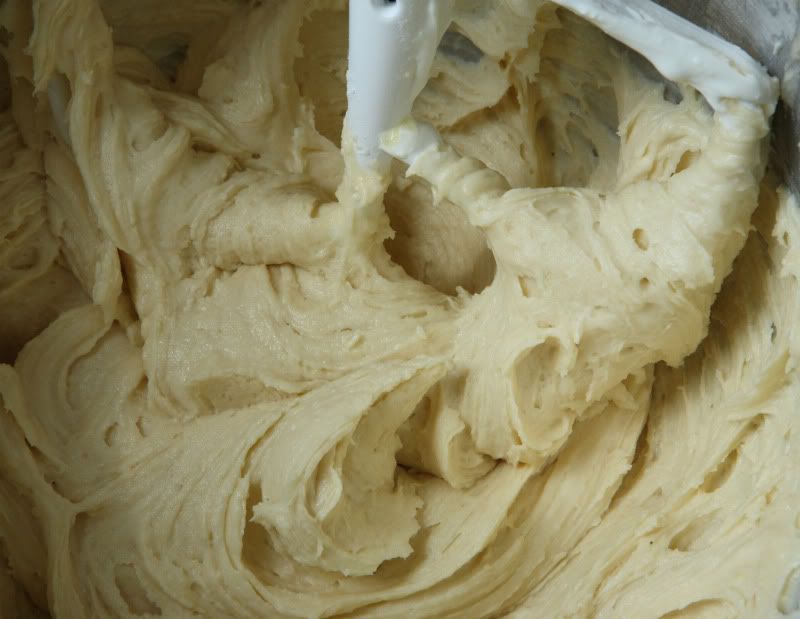


I have no idea how anyone could possibly roll the dough out without making a huge mess - multiple cups of flour would need to be dusted onto the countertop during the rolling process, and the cookies wouldn’t be nearly as tender with the addition of all that extra flour.  The original recipe concept seemed so difficult and inconsistent – the drop cookie method as I’ve written it below is definitely the way to go.

During experimentation, I discovered these cookies work pretty well as the cake portion of a whoopee pie.  Since the cookies are vanilla and are not strongly flavored, they pair well with a tangy lemon curd filling.  I’ve included an easy-to-make lemon curd filling recipe below the cookie recipe in case you want to try that out.  It uses good-quality store-bought lemon curd, and therefore is way less complicated to make than it would be if you were to make the lemon curd yourself.

Soft Vanilla “Drop” Sugar Cookies
Makes about 4 dozen cookies, depending on how big your cookie scoop is

1 cup butter
1-1/2 cups sugar
2 tsp vanilla
3 eggs
Finely grated zest from one small lemon
4 cups flour
1/2 tsp salt
2 tsp baking powder
1 tsp baking soda
One 8-oz. container sour cream (3/4 cup)

Preheat your oven to 350 degrees F.

Using a mixer, cream together the butter and sugar.  Add the vanilla, eggs, and lemon zest; mix until well-combined.

While the mixer is running, in a separate medium bowl, blend together the flour, salt, baking powder, and baking soda.

Mix half of the flour mixture into the butter mixture until batter is well-combined.  Then mix in half of the sour cream until the batter is uniform.  Add the remaining flour mixture, and once it has been mixed in thoroughly, add the remaining sour cream, and mix until the batter is combined.

Cover your cookie sheets with aluminum foil.  Use a cookie scoop to drop heaping tablespoons of batter onto the sheet, spacing them several inches apart as they will spread slightly.  (My cookie scoop dropped .75 ounces of dough with each scoop.)
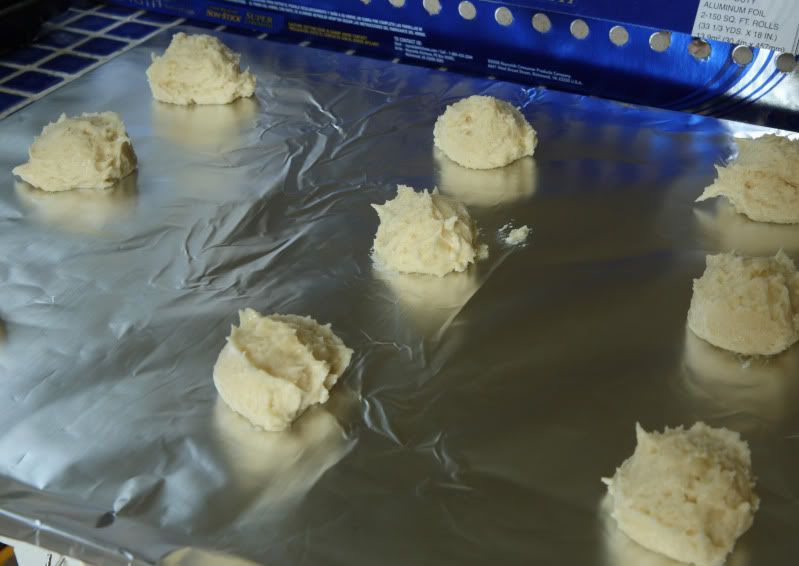


Bake the cookies at 350 for 11-13 minutes.  The cookies will look pillowy and should only be barely browned.


Let the baked cookies rest on the warm cookie sheet for 5 minutes before transferring the sheet of foil to a wire cooling rack.  The cookies will be too soft to remove from the foil at this time, but will firm up as they continue to cool.  Once the cookies have cooled completely, remove them from the foil.  They may need to continue to sit on the racks a bit longer until they are firm enough to move to storage containers.

The cooled cookies can be frosted, filled-and-sandwiched into whoopee pies, or just enjoyed plain.


Easy Lemon Curd Filling
in case you want to make whoopee pies out of the cookies

2 cups unwhipped heavy whipping cream
2 Tbsp sugar
1 cup prepared lemon curd, I used storebought Dickinson's brand

In a medium bowl, whip the cream and sugar on high speed until soft peaks form.  Set aside.

Put the lemon curd in a small bowl (I like to use a 2-cup glass measuring cup).  Spoon in about 1/2 cup of the whipped cream.
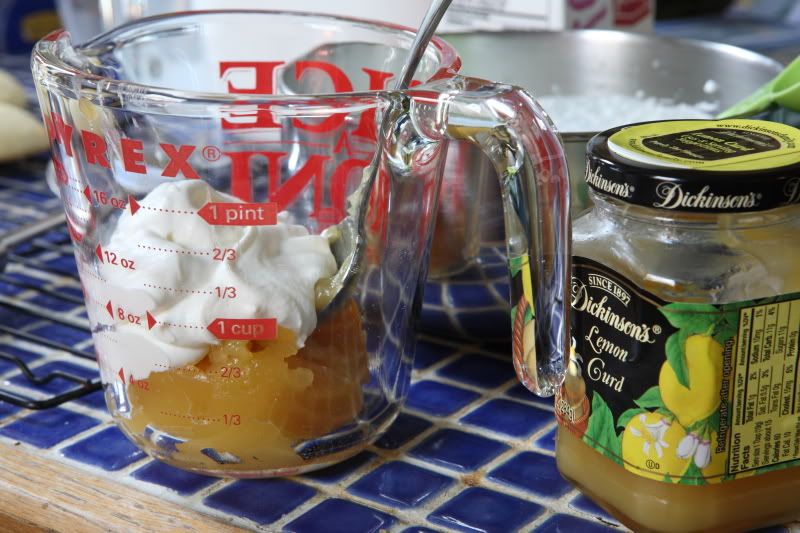


Stir vigorously to incorporate the lemon curd into the cream.  It may not be entirely lump-free but stir it until it is mostly smooth.
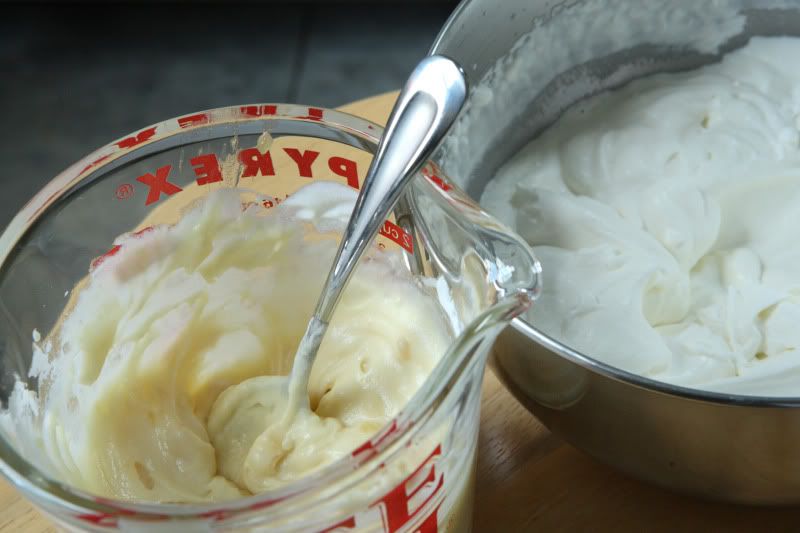


Transfer the lemon mixture into the bowl containing the remaining whipped cream.  Use a spatula to gently fold the lemon mixture into the cream.  Don’t overmix it, just fold it until the color is uniformly lemon yellow.
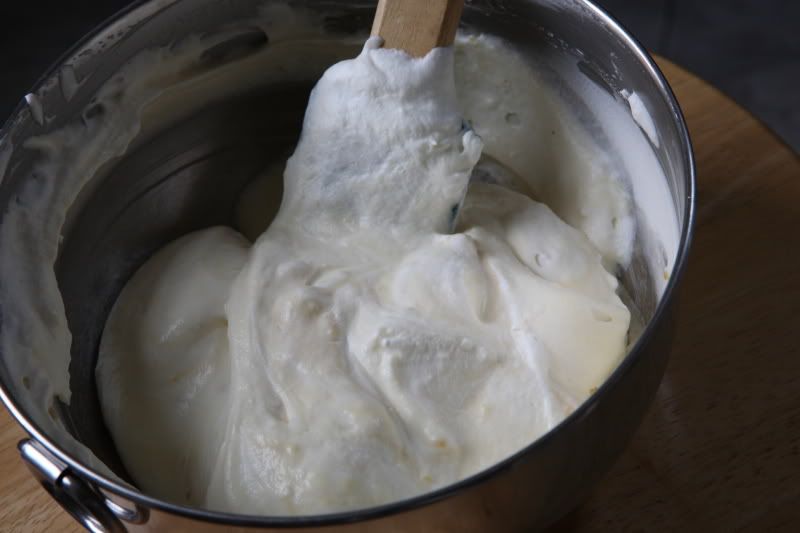


Pair up your cookies - match them up so you have similarly-shaped pairs, so your finished product looks better.

Dollop the lemon cream mixture onto one of each of the cookie pairs, then sandwich them together.

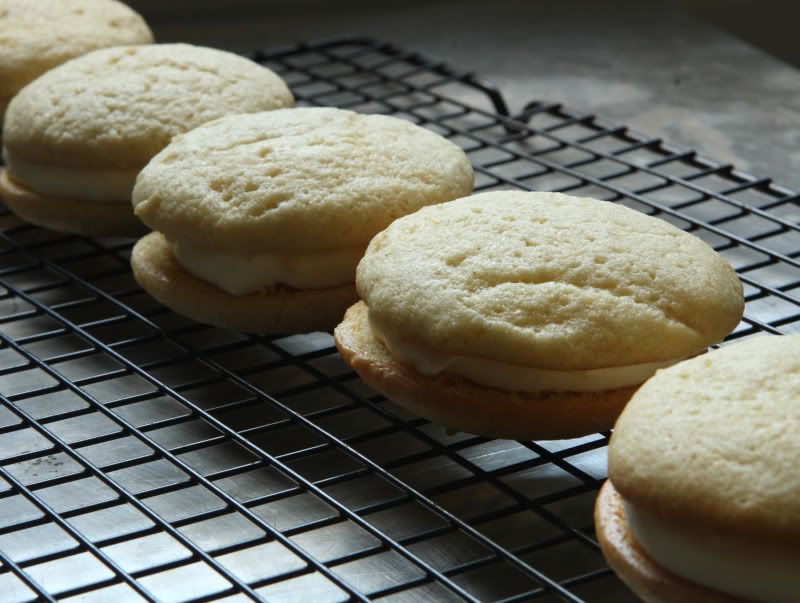


Since this filling recipe contains cream, you’ll need to refrigerate the cookies if you aren’t planning to serve them right away.  The cream is quite soft at room temperature, but is more firm at refrigerator temperature, and is quite delicious served either way.  I think I preferred the refrigerator temperature personally, but that’s just me.  They will last about a week in the fridge (if you haven’t eaten them all first!).

Printable PDF File (with pictures)
Printable PDF File (text only)

Tuesday, May 24, 2011

Buttered Pasta


I have a weakness for uniquely-shaped pasta. I could buy a box or bag of pasta every time I go to the grocery store. I have an entire cabinet devoted to pasta storage, and even though I already have every shape imaginable, I can’t resist picking more up any time I see something that looks interesting.

To feed my pasta-buying addiction, I visit “The Hill” neighborhood here in St. Louis, the old Italian neighborhood with lots of wonderful restaurants and several fun little grocery stores where good-quality tomatoes, olive oil, wine, and balsamic vinegar are the norm. The pasta selection is outstanding, of course, and you can get a lot of neat shapes I’ve never seen anywhere else, all imported directly from Italy.

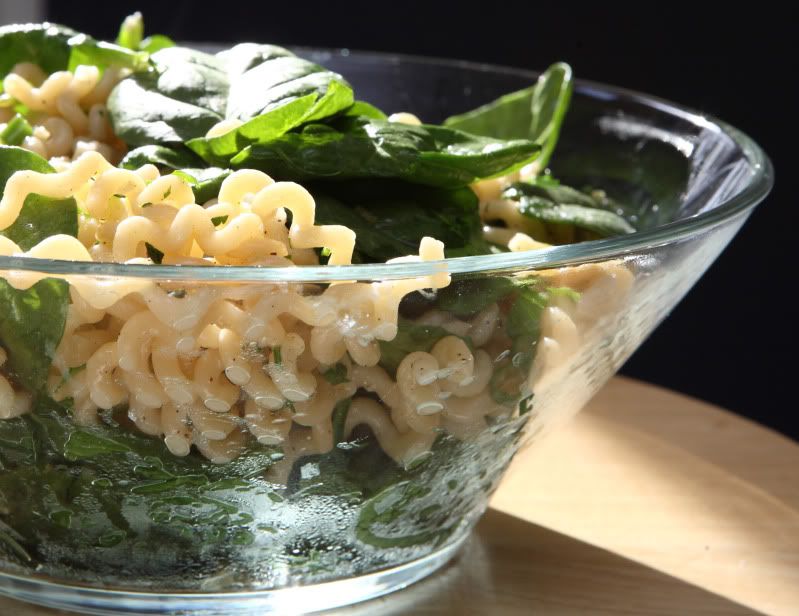
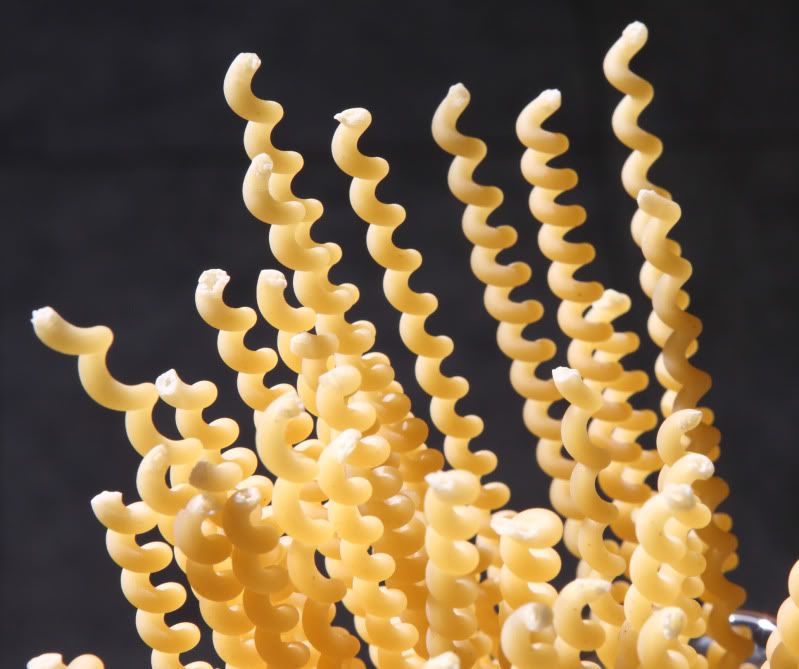
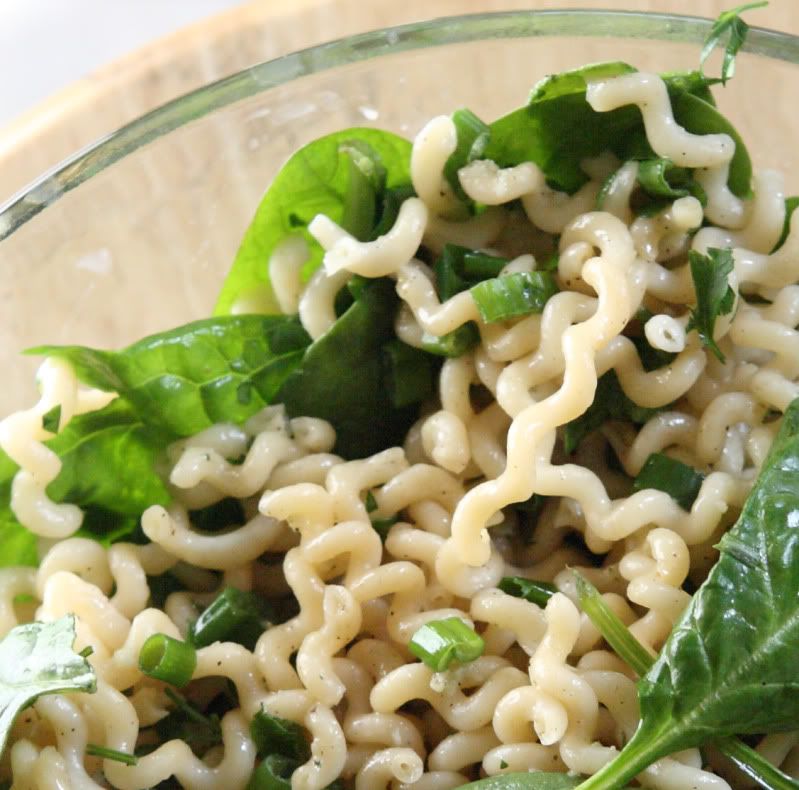
I made this pasta dish with the last half of a bag of fusilli col buco, which is a long, hollow, corkscrew-shaped pasta. It’s thick and chewy and works great in a dish like this, with simple accompaniments, where the pasta really stars. Bucatini (the straight version of what I used) would work great: it has the same chewy texture but is a little harder to eat gracefully because it is just a little too thick to swirl around your fork. If you cannot find either specialty pasta, you can use fettuccini or linguine – something thick and chewy, not thin.


Although these subtly flavored, buttery noodles are a great side dish to go with any Italian entrée, they are the perfect accompaniment to something delicately-flavored like Chicken Piccata, because the noodles and their sauce will not overpower the Piccata sauce. They’re fast and easy to make, and don’t require a lot of expensive ingredients. There’s just a touch of garlic in them, but it, and the butter, salt, and pepper is all secondary to the pasta.

If you have any leftover noodles, take them to work for lunch – they reheat well in the microwave.

Buttered Pasta
Serves 4 as a side dish (smaller portions)

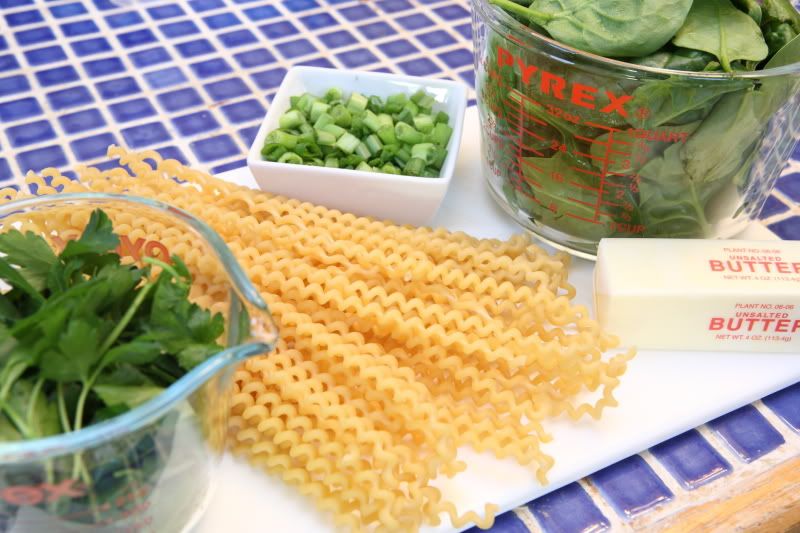
8 oz pasta
5 oz fresh spinach (least expensive if you buy it from the loose spinach bin, not the prebagged/prewashed kind)
1 loosely-packed cup Italian parsley
4 Tbsp butter
Salt and freshly-ground black pepper
Freshly grated nutmeg
2 cloves garlic, finely chopped
1/3 cup snipped green onions


In a large pot (one that has a lid), cook the pasta, uncovered, according to the package directions. Do not overcook the pasta!

Wash and dry the spinach. If the spinach leaves are particularly large, you may wish to roughly chop the spinach. Set it aside.

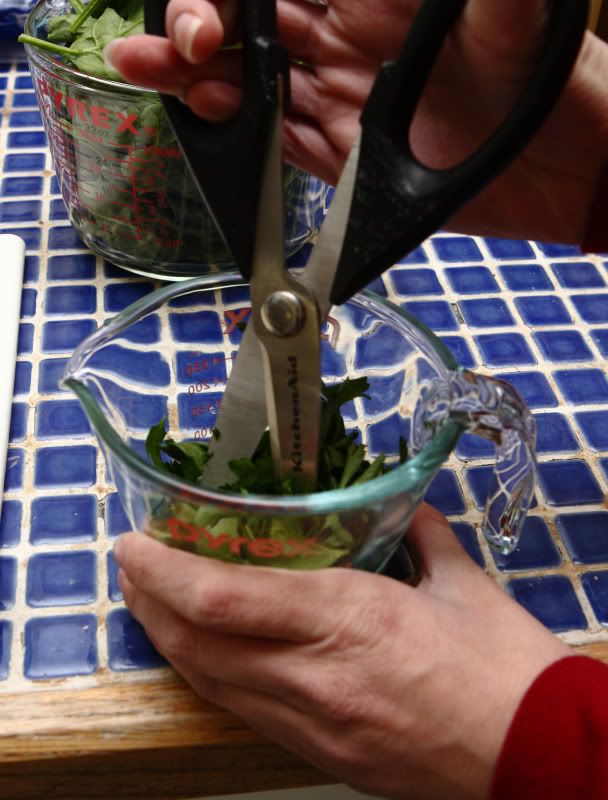
Chop the parsley – I find the easiest way to do this is to just stick my scissors into the measuring cup and snip away until its all uniformly chopped.


Once the pasta has cooked, drain it and set it aside. In the empty pasta pot, melt the butter over medium heat. Add a pinch of salt, a generous quantity of freshly-ground black pepper, and some freshly grated nutmeg (I usually do equal quantities of black pepper and nutmeg).

Turn the heat to medium-low. Return the pasta to the pot; add the green onions, spinach, and parsley, and stir to incorporate everything. Taste the pasta and adjust the seasonings…you may need more salt. Cover the pot (still on medium-low heat), and wait several minutes until the spinach has wilted slightly, stirring the pasta once or twice to give it all a chance to cook.


Thursday, January 6, 2011

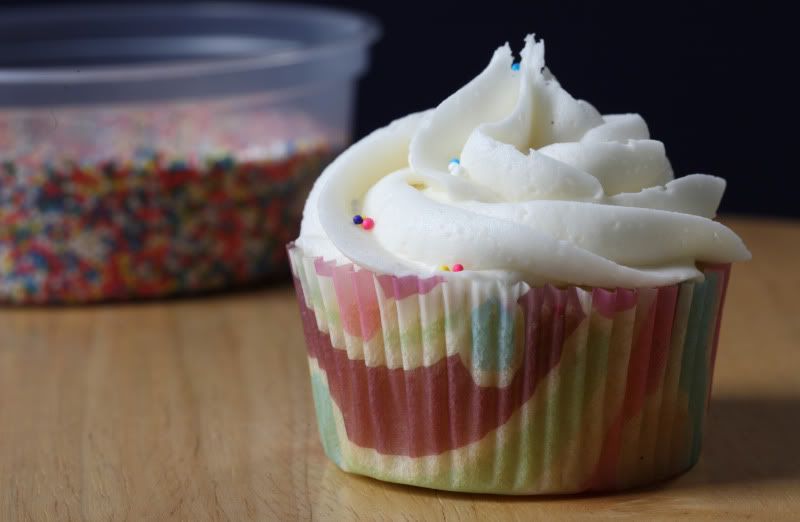
Vanilla Buttermilk Cupcakes with Vanilla American Buttercream Frosting


The day after New Year’s Eve is a great day for a lazy day – most people probably need a little bit of recovery time after their New Year’s Eve festivities, so no one really expects anything other than just that.  Assuming you’re not working, you can sleep in, be unmotivated to accomplish much of anything, lounge around the house, take a nap, watch TV, and think of nothing of any importance.

So, being as the day I baked this recipe did happen to be the day after New Year’s Eve, and being as I had it off from work, I took full advantage of the opportunity for a lazy day, and slept most of the morning, surfed the internet, spent the day in my PJ’s, and just plain took the day off.  The most complicated thing I thought of was whether or not I should take a nap (I initially decided against it since I slept in that morning and didn’t want to screw up my sleeping schedule for later that night, but then decided I was tired and a nap was definitely in order.).  I also thought about what I might want to make for the blog next.

I initially thought of cookies, but I guessed that most people are rather cookied-out now that we’re at the close of the holiday season.  (Posting any kind of cookie in January seems a little unfashionably late.)  Then my mind moved to cupcakes.  I haven’t made cupcakes in a long time – not since the last time I made my knockoff Hostess cream-filled cupcakes.  Those are delicious, but I decided they were too much work for my low brainpower day…however something a little less difficult would be perfect – like a classic vanilla cupcake with a swirly crown of frosting.

These cupcakes are super easy to make, so they are perfect if you’re having a lazy day like I was, or if your kids want to bake and you want to give them a recipe that is simple and uncomplicated.  The recipe is no more difficult to make than a batch of cookies (they actually kind of taste like sugar cookies in cupcake form), and it is made with things I almost always have in my fridge and pantry.  The recipe does call for both cake flour and all-purpose flour, and you should definitely use both as the recipe is written or you’ll end up with a cake that is too dry and dense.  The only ingredient that might be slightly more unique is buttermilk.  I always keep a container of dry powdered buttermilk in my fridge for recipes such as this (it takes a very long time for it to go bad, so I recommend you do the same even if you hardly ever use it).  If you don’t have that in your fridge, the chances are better that you might have some milk in there, and hopefully you have some vinegar somewhere around your house, so you can do the old fake buttermilk (vinegar-in-milk) trick in lieu of actual buttermilk.  (I’ve included the directions for this substitution in the recipe ingredients list.)

Note that one reason the recipe is so simple is because there are no egg whites to whip.  The lack of whipped egg whites means the cakes aren’t going to be as light and airy and perfect in texture as a cake with whipped whites included.  Sometimes I'm willing to sacrifice a bit of texture in favor of simplicity…sometimes I'm not.  If you’re just looking for a quick and easy cupcake recipe and don’t require perfection in the sponge cake world, these cupcakes will definitely fit the bill.  What I'm hinting at is, while these cupcakes aren't bad, nor are they going to be the cornerstone recipe of the next cupcake boutique shop.  But they are nice, easy-to-make, simple, unassuming cupcakes.

This recipe originally came from Martha Stewart’s Cupcakes cookbook.  While the cupcake recipe was pretty good given the limitations I’ve described above, I wasn’t satisfied with the quality of the frosting recipe that accompanied the cupcakes in the cookbook.  It didn’t make enough frosting, was excessively dense, buttery and greasy, and just wasn’t very good.  The frosting was so bad that I tossed it and made something different - much better tasting.  You should make the frosting I’ve posted below, or whatever your favorite buttercream frosting happens to be, instead of the frosting recipe written in the cookbook.

Vanilla Buttermilk Cupcakes
Makes about 42 standard-sized cupcakes, more or less, depending on how full you fill the tins.  The original recipe claimed a yield of 36 cupcakes, but I got 48 out of the batch...

3 cups cake flour
1-1/2 cups all-purpose flour
3/4 tsp baking soda
2-1/4 tsp baking powder
1-1/2 tsp coarse salt
1 cup plus 2 Tbsp unsalted butter (that’s 2-1/4 sticks), room temperature
2-1/4 cups sugar
5 whole eggs, plus 3 egg yolks
2 cups buttermilk (or use dry buttermilk according to the package instructions, or substitute fake buttermilk:  place 2 Tbsp vinegar in a 2-cup liquid measure.  Add milk to fill up the measure to 2 cups)
2 tsp vanilla extract
frosting and sprinkles, to decorate

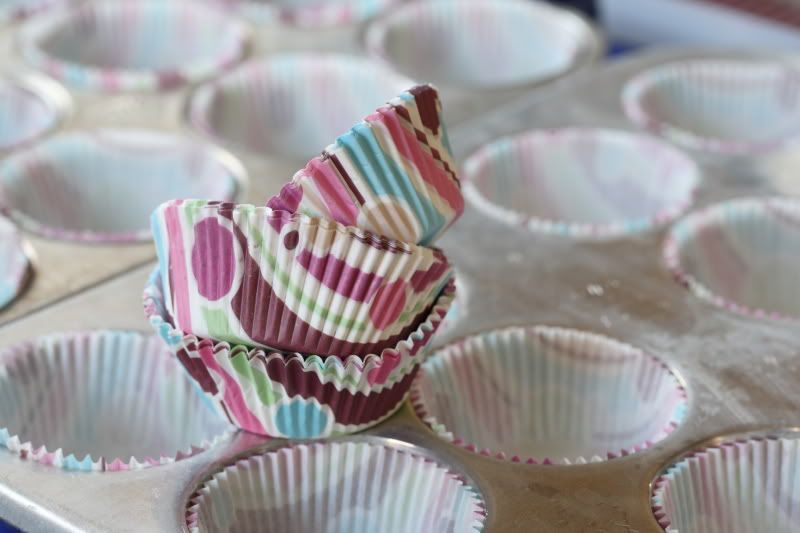
Preheat oven to 350 degrees F.  Line standard muffin tins with liners.  (I got these neat Wilton cupcake liners for 99 cents from Hobby Lobby!)


In a medium bowl, whisk together both flours, the baking soda, baking powder, and the salt.  Set the bowl aside.

With an electric mixer on medium-high speed, cream the butter and sugar until pale and fluffy.  Add the eggs one at a time (both the whole eggs and the egg yolks), beating until they are completely incorporated between each addition.  You may need to scrape down the sides of the bowl a few times as you work.

Add the flour mixture in three batches, alternating with two additions of buttermilk, and beating until combined after each.


Beat in the vanilla.

The finished batter is thinner than the above photo (it shows the batter mid-way through the mixing process).  Divide the batter between the cupcake liners, filling each 2/3 to 3/4 full.


Bake about 18-20 minutes, or until a cake tester inserted in the center comes out clean.  Turn the cupcakes out onto racks and cool completely before frosting.  The cupcakes will taste best when they’re served the same day they are baked.


(Oops, one cupcake liner was kind of bent in!  You know what that means?  Taste test cupcake!!) 

Vanilla “American” Buttercream Frosting
Makes 6 cups, which is about 58 ounces of frosting.  And there's a reason I gave you the yield of the frosting in ounces:

If you intend to frost your cupcakes with “cupcake shop”-style swirly tops (using a piping bag and a Wilton #2110 (1M) tip), this makes just enough to top 42 cupcakes assuming you use no more than 1.4 oz of frosting per cupcake.

If you intend to frost your cupcakes using the “smear with a knife” method, you can probably just make a half batch of this recipe, because my experience is that you’ll use much less frosting per cupcake (usually about half, so no more than .7 oz of frosting per cupcake), and therefore won’t need as much frosting to get the job done.  If you anticipate you’ll have a heavy hand with the frosting, you might want to make 2/3 or 3/4 of a batch of frosting.

3/4 cup unsalted butter, room temperature
6 Tbsp shortening
2 tsp vanilla
1/2 tsp salt
12 cups powdered sugar (about 3.2 pounds)
3/4 cup milk

Beat the butter, shortening, vanilla, and salt on medium-high speed until everything is well incorporated.  Meanwhile, I suggest that you measure the powdered sugar into a new, separate mixing bowl. (Doing so means you wont have to keep track of how many cups of sugar have been added to the frosting as you’re making it.)  Similarly, its easier to make the frosting if you have the milk measured into a liquid measuring cup with a spout.

After the butter has been fully mixed, the powdered sugar and milk should be added to the butter mixture a little bit at a time, alternating between the two.  I turn the mixer to low (or powdered sugar will be everywhere!) and use the pouring shield to drop in 1 cup of sugar.  I wait until the sugar has been incorporated into the butter mixture, then add a splash of milk, about 1 tablespoon for each addition.  Once the milk has been incorporated, I add another cup of sugar, wait for it to mix in, then add another tablespoon of milk, and so forth, until all of the sugar and milk has been added to the frosting.  It takes time to make the frosting, but you’ll have smooth, airy, lump-free frosting when you make it this way.

After the ingredients are all mixed in, beat the frosting on high speed until it is creamy and smooth.  It should be spreadable and pipeable, but you may need to adjust the consistency with a small addition of powdered sugar (sift it over the surface, then mix it in) or an additional drop or two of milk.


Wednesday, April 21, 2010

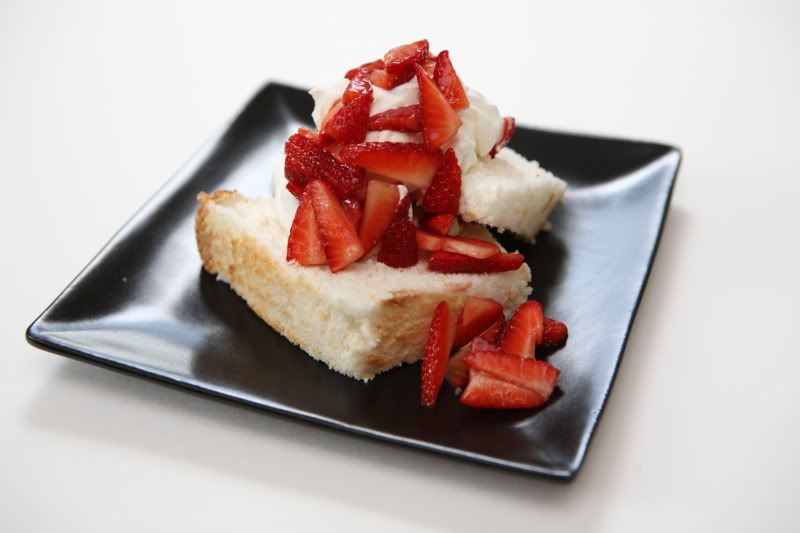
Strawberry Shortcake (with Angel Food Cake)

Strawberry shortcake is sort of the epitome of summertime desserts. The sweet-but-slightly-tart berries, swirls of whipped cream, and yummy shortcake make for one delicious dessert. (And it has fruit in it, so it’s good for you, right?)

There are several schools of thought on the proper base for strawberry shortcake. Some people like it served with sweetened biscuits. Some like it with sponge cake. Some like it with pound cake. Those are all good, but my favorite way to serve strawberry shortcake is with angel food cake.


This particular angel food cake recipe comes from Betty Crocker, circa the 1960’s. Yeah, the cookbook is a little outdated, but this recipe is a keeper...unlike some of the other ones in the book. There are a bunch of angel food cake variations on the same page, and they all require gelatin and something called “dessert topping mix” Fortunately this recipe steers clear of all of that. It is a standard angel food cake recipe, tried-and-true, and I’ve made this exact cake for many birthdays, a few graduation parties, and on many, many other occasions over the years.

If you don’t have an angel food cake pan and are planning to buy one, you should select your pan carefully.

  • An angel food cake pan should NOT be nonstick. (Angel food cake keeps itself risen by climbing up and sticking to the sides of the pan, and a nonstick pan prevents this from happening. The cake won’t have the proper height and the texture will suffer if the pan is nonstick.)
  • For almost all of my baking, I prefer light-colored pans because it keeps the food from over-browning. Angel food cake is no exception: try to find a light-colored pan.
  • The pan doesn’t need to be insulated or have any other fancy technology.
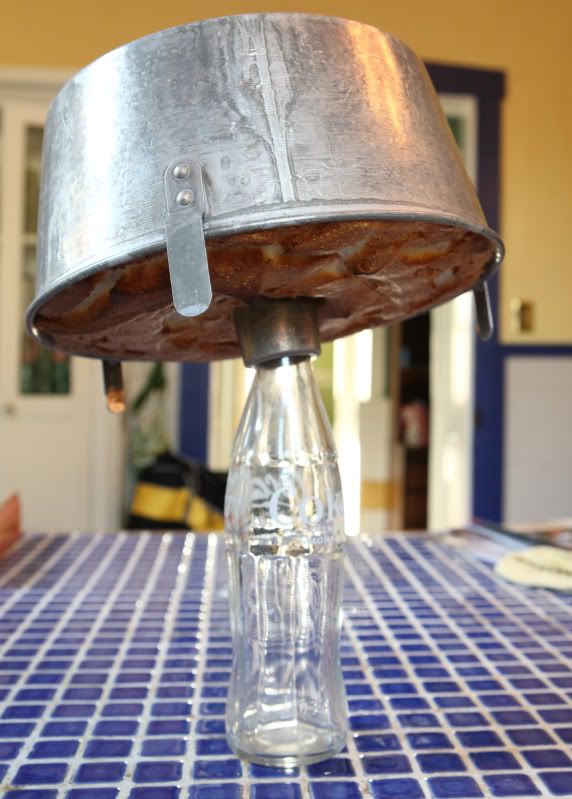
  • It does, however, need to have a way to stand upside down during the cooling process. My angel food cake pan has a tall central tube and little aluminum feet sticking off the top of the pan, which hold the cake off the countertop when the pan is inverted. This will cool the cake properly, but for even better air circulation, I stick a coke bottle in the central tube and turn the pan over balanced on the bottle (you’ll see pictures below). So, you’ll need either a pan that has feet, or you’ll need to come up with a way to invert it without smashing the cake. A wine bottle works too.
  • The best pans are two-part pans. Angel food cake needs to be cut out of its pan, and its basically impossible to do that with a one-piece pan. (That’s why they started making the one-piece pans nonstick, but we already went over why nonstick is a bad idea…) The one-piece pans work well for other things (pound cake!) but not well for angel food cake.
It’s really hard to find a good angel food cake pan at the kitchen store. Most properly-shaped pans are nonstick or made of dark-colored aluminum, neither of which I want. Last time I needed another angel food cake pan (before the days of the internet), I hit up the garage sales until I found an old one for a buck. The pan can be dinged up slightly and it won’t hurt anything. It’s not supposed to be a water-tight pan (properly-made angel food cake batter isn’t runny and shouldn’t leak through the pan), so don’t worry if the bottom doesn’t fit absolutely flat into the sides of the pan. Now that we are in the days of internet shopping, you can buy a new one from Amazon that meets all the specifications I’ve mentioned and it should work just as well as all of my Garage Sale Specials have worked for me.

Angel Food Cake
Makes one cake 10” in diameter and 4” tall

1 cup cake flour
3/4 cup plus 2 Tbsp granulated sugar
12 egg whites (about 1-1/2 cups)
1-1/2 tsp cream of tartar
1/4 tsp salt
3/4 cup granulated sugar
1-1/2 tsp vanilla
1 tsp almond extract

Preheat your oven to 375 degrees F.

In a medium mixing bowl, whisk together the flour and 3/4 cup plus 2 Tbsp granulated sugar. Set the mixture aside.

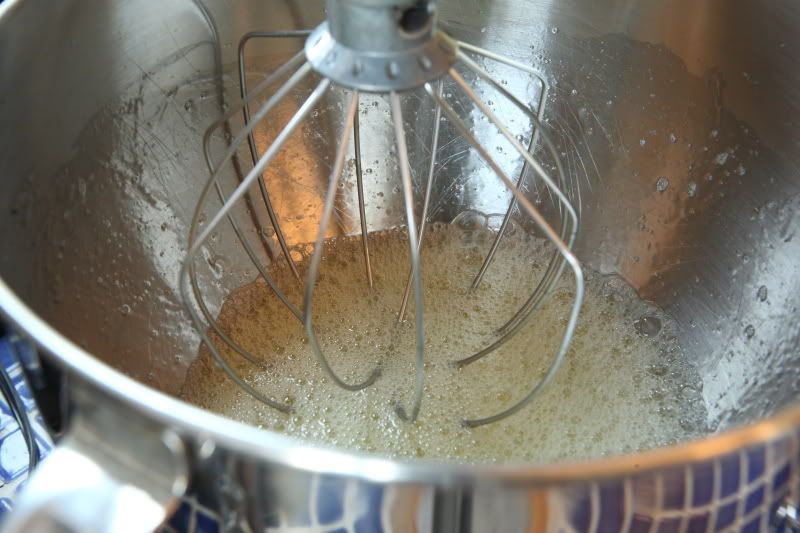
In a large mixer bowl, use the wire whip attachment to beat together the egg whites, cream of tartar, and salt until foamy.


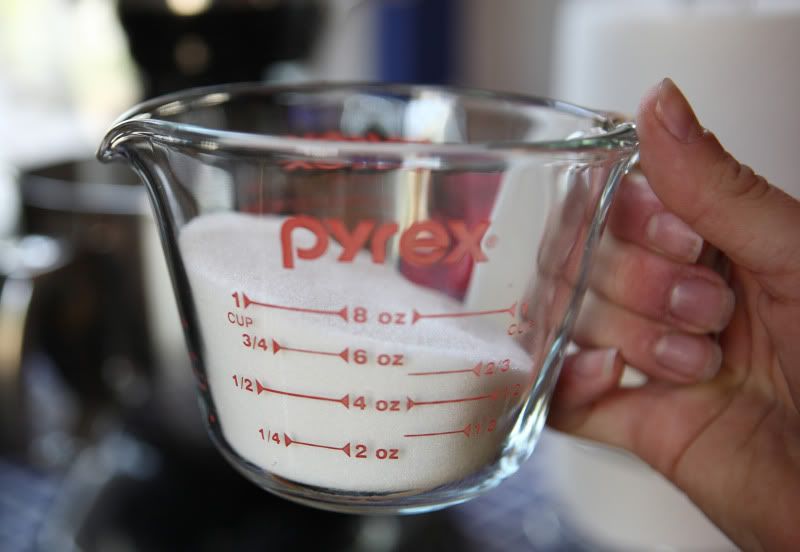
While this is happening, measure 3/4 cup granulated sugar into a spouted cup similar to this one:


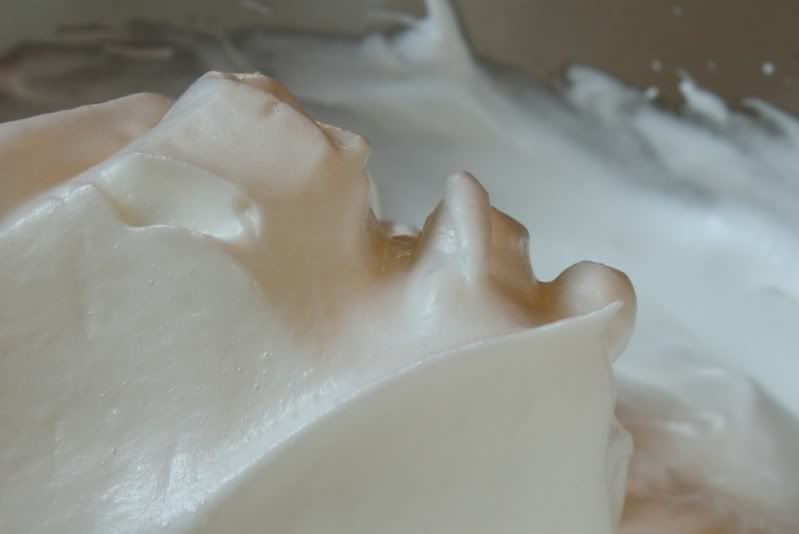
With the mixer on the highest speed, slowly shake in a very small stream of granulated sugar into the egg white mixture. Continue to add the sugar very slowly as the mixer is whipping the whites. Do not dump in large quantities of sugar at once. As the whites whip up, they will increase in volume. The goal is to shake all of the sugar into the egg whites in about the same amount of time it takes for the whites to be beaten to the “stiff peak” stage. You’ll know the whites are “stiff peaks” when you lift the beater out of the bowl and the whites hold shape and don’t slump back down into the mixture. But, use caution to avoid over whipping the whites – they’ll become chunky and that’s not what we’re looking for either.

Properly whipped egg whites are smooth and stand up like this:


Once you’ve finished beating the egg whites, take the bowl off of the mixer. The rest of the steps must be mixed by hand or you’ll deflate the batter. I like to use a large flat rubber spatula, but before I owned that particular piece of kitchen equipment, I used to use a flat wooden spoon with nearly-as-good results. Whatever you use, you’ll need to have something with a fairly long handle because in case you haven't noticed, there’s a lot of volume in that bowl now.

Add the vanilla and almond extracts. Use your rubber spatula or flat spoon to gently fold them into the egg whites. Don’t stir the batter or you’ll deflate it. Fold it. (I wish I had a video camera – I’d demonstrate it…sorry.) To fold, cut the spatula down the center of the egg whites, then run it along the bottom of the bowl, up the side, and down into the center again. Rotate the bowl and repeat the motion.

Sprinkle approximately 1/4 of the flour mixture over the surface of the flour. Fold it gently into the egg white mixture just until the flour mixture disappears into the batter. Add another fourth of the flour mixture and repeat the folding-and-adding process until you’ve folded all of the flour mixture into the egg whites.

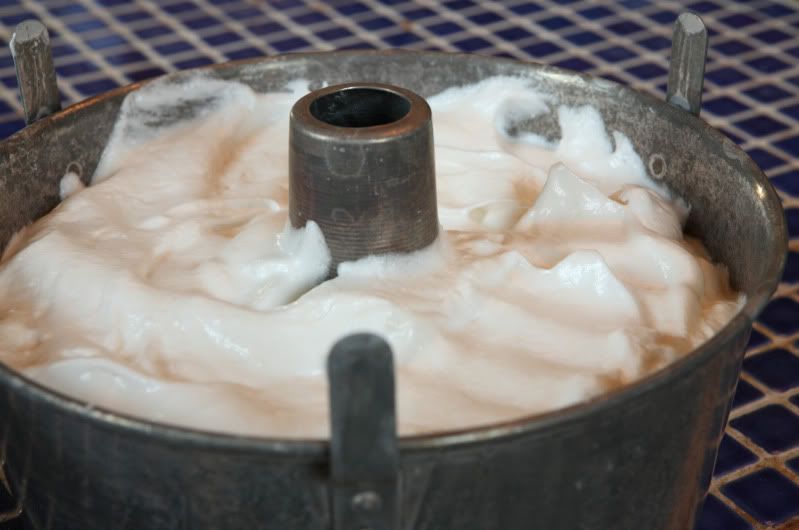
Spoon the batter into an ungreased angel food cake pan, 10” x 4.” Tap your rubber spatula straight down through the batter to help remove any air bubbles from the cake.


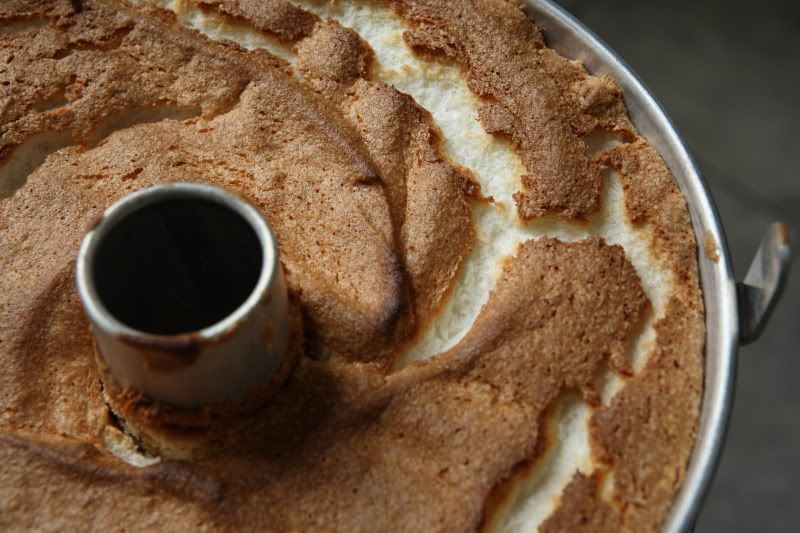
Bake the cake approximately 30-35 minutes. How can you tell when angel food cake is done baking? The top should be lightly browned. “Betty" tells you it should “spring back when touched lightly with a finger,” whatever that means. Here’s how I tell: as the cake bakes, the top surface cracks, exposing lighter-colored cake interior. When that lighter colored section of the cake is dry and no longer sticky, the cake is properly baked. I use the point of a knife or my fingernail to scrape just a tiny bit of crumb out of one of the lighter areas and see if it is still moist and sticky or if it is dry. If it’s still sticky, give it another 3 to 5 minutes in the oven. The top will be nicely browned and any peaked areas will be an even deeper, nearly-toasty brown.


As soon as the cake comes out of the oven, the pan must be inverted or the cake will sink. As I mentioned above, I use the coke bottle cooling method, but if your pan has feet, you can simply turn it upside down. The cake must be entirely cooled before it is removed from the pan. If you come back to your cake in fifteen minutes and find it has fallen out all over the countertop, you under baked it and didn’t give it enough time in the oven. Take notes for next time and try again. I promise, if it’s completely baked, and if you used the proper pan, it won’t fall out despite the fact that it's sitting upside down.


A side story… Once, earlier in my baking days, I decided I wanted to make lots of angel food cake for a party. I baked a whole bunch of these cakes in sort of an assembly line, one cake after another. I was running out of countertop space in my kitchen and had nowhere to cool the cakes. So I looked around my small apartment for somewhere else to balance my coke-bottle-cake-pan setup for an hour or so, and saw the flat surface of my bedroom dresser. Unfortunately I was in such a rush to get these cakes baked, I slightly under baked the cake – but I was new enough to baking that I didn’t realize it at the time. After I thought the cake had a sufficient amount of time to cool, I went back to my bedroom to bring it back to the kitchen…and found cake EVERYWHERE. (Since it was under baked, it fell out of the pan.) What a mess! Cake all over the top-of-the-dresser knick-knacks! Cake all over my clothes! Cake on the carpet! Cake all over the cat (who was very interested in it). And because it was under baked, it was sticky and sugary and very messy to clean up - and the last thing I wanted to do while running around making last-minute preparations for a party. Lesson learned:  be sure the cake is completely baked. Don’t get in a hurry to get it out of the oven!

While the cake is cooling, you can prepare the strawberries for the shortcake:

Macerated Strawberries

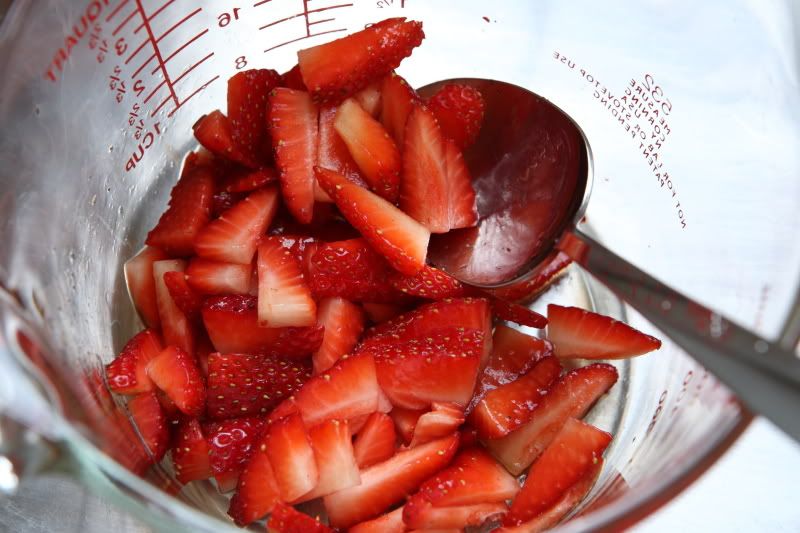
16 ounces strawberries, tops discarded, fruit sliced
2 to 3 Tbsp of granulated sugar
1 to 2 tsp best-quality balsamic vinegar

The measurements above are somewhat approximate because the amount of sugar necessary will depend on how sweet your strawberries are. I recommend mixing the smaller quantity of sugar and vinegar in with the berries first. Let it all sit for about 20 minutes, then taste it and adjust the flavoring as necessary. (You can always add more sugar and vinegar, but you cannot take it out!) I like them on the tart side, but you might like them sweeter than even what I’ve written above.


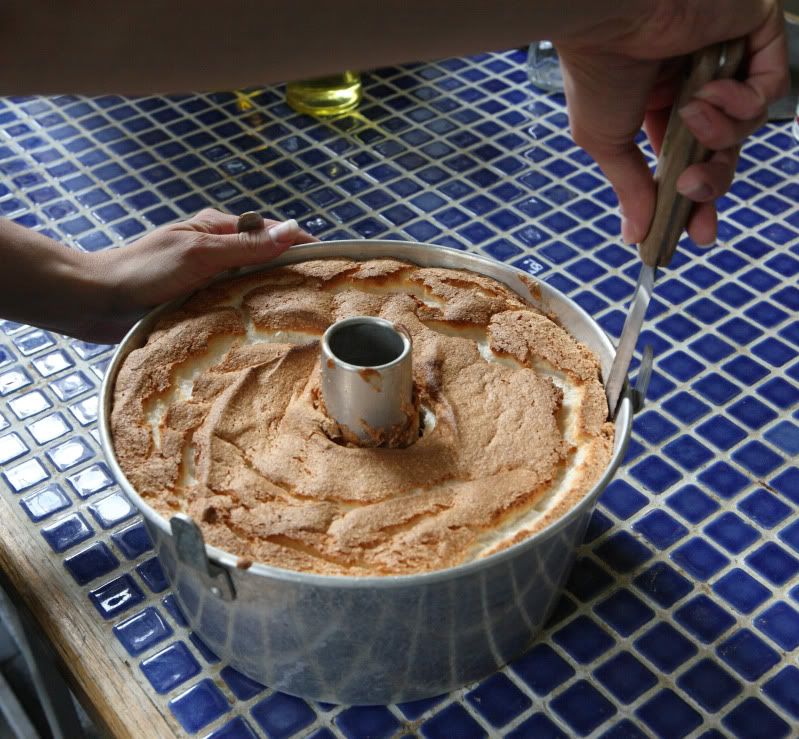
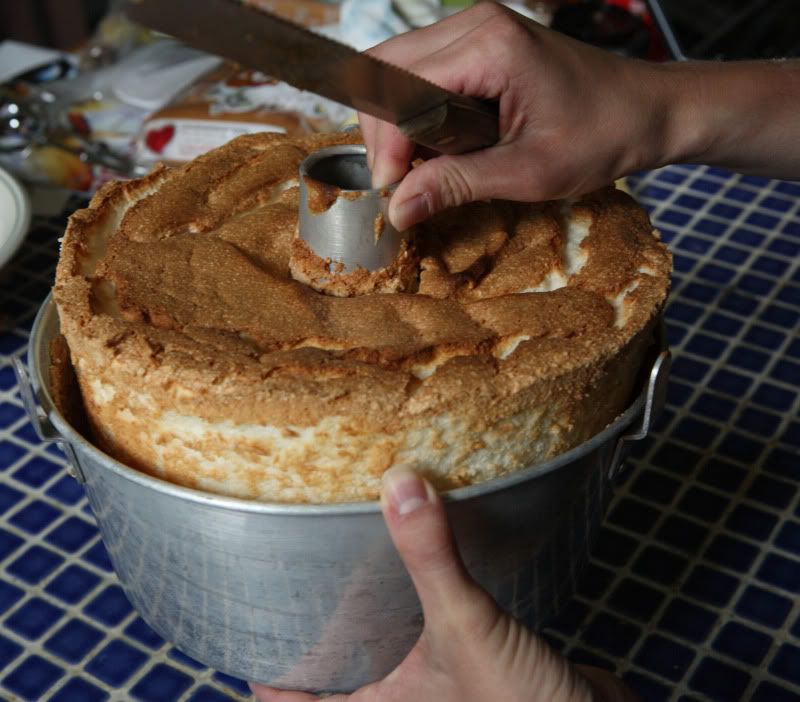
After the cake has cooled completely, the cake will need to be cut out of the pan. You’ll need a long serrated knife. First, holding the knife vertically, cut around the outside edge of the cake.  Use a sawing motion with the knife.  Then cut around the center tube in the pan. If you miss a spot, the cake will rip when you try to remove the pan, so be sure you are thorough in your cutting.


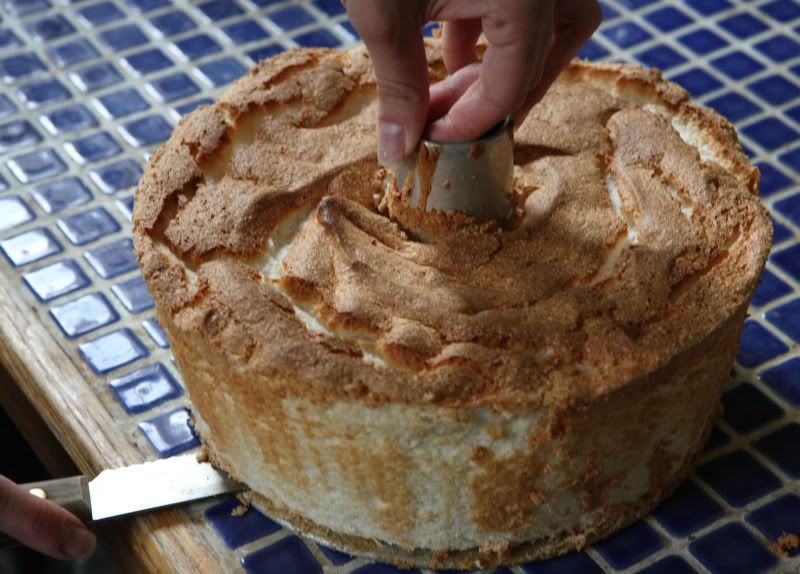
As long as you haven’t missed any spots, if you lift up on the center tube, you should be able to ease the side of the pan away from the cake.


Hold the cake pan by the center tube. Place the knife horizontally and cut between the bottom of the cake and the base of the pan. Rotate the pan as you work so you get all areas of the pan. Double check to be sure your center tube is thoroughly cut free.


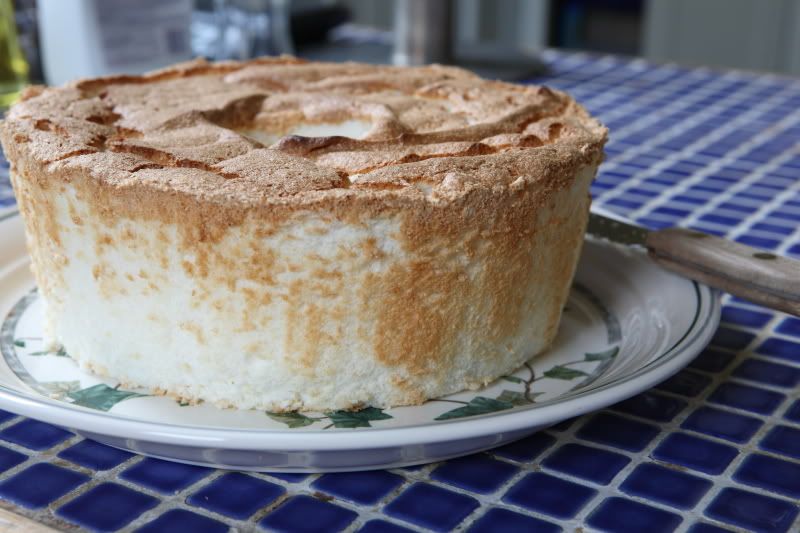
Once everything has been cut away from the pan, invert the cake onto a plate or a wire rack – the center piece should come right out.


(I turned mine out onto a rack, then flipped it over onto a plate because I thought the crackly top was prettier than the squared off bottom was.)


Immediately prior to serving, whip the cream

1 cup heavy whipping cream, more or less
1 Tbsp granulated sugar

Place the cream and sugar in a small bowl - one large enough to accommodate a hand mixer. Use a hand mixer to beat the cream on high speed until soft peaks form.

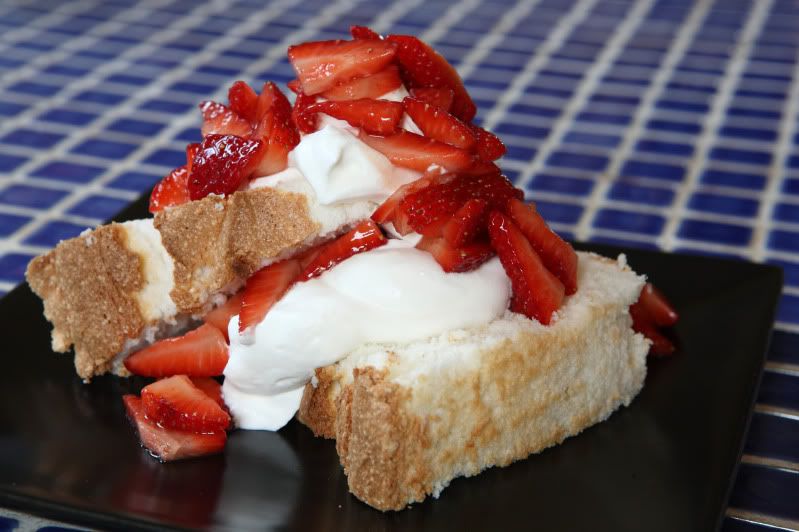
Assemble the strawberry shortcake from the angel food cake, berries, and whipping cream. Yum!


A note:  Angel food cake tastes best when it's served the same day it's baked.  If you must store it for another day, loosely cover it or put it under a cake dome.  Since the cake is mostly sugar and egg whites, it breaks down quickly if it gets moist, so it won't last too long, especially in a humid environment.  It doesn't last too long in my household anyway because it tastes pretty good...

Printable PDF file (with pictures)
Printable PDF file (recipe text only)

Sunday, February 28, 2010

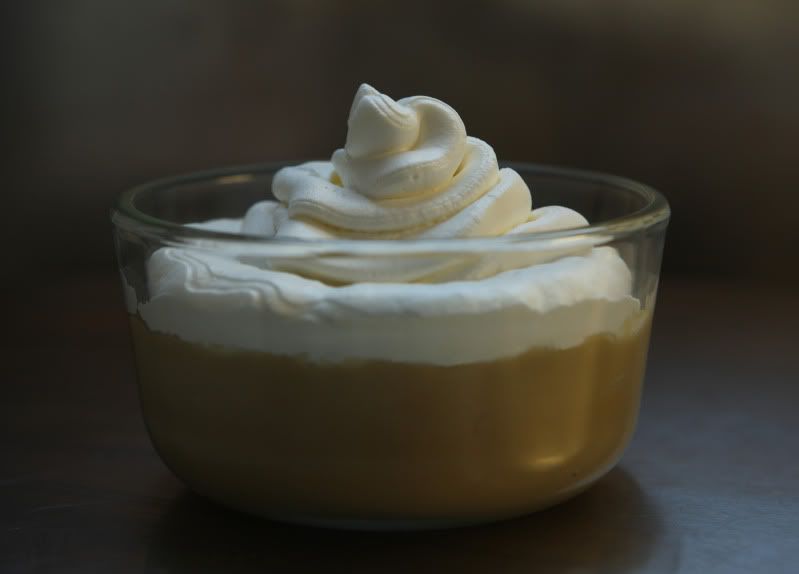
Butterscotch Pudding with Salted Whipped Cream


I’ve been on a butterscotch kick lately. It all started with the brown butter blondies I made awhile back – their butter-and-brown sugar flavor profile has had me thinking about butterscotch desserts ever since. A few weeks later, I made a butterscotch sauce to top some ice cream sundaes I served when we had family over to visit. Then I experimented with butterscotch pudding on Super Bowl Sunday, but felt the recipe wasn’t quite there yet, so it didn’t get blogged.

After I had a butterscotch sundae at Ted Drewes last night, I felt sufficiently inspired to try out another butterscotch pudding recipe. I found a different recipe from one of my favorite dessert cookbooks (one you’ve seen before), Diner Desserts, by Tish Boyle. Like every other recipe I’ve made out of that cookbook, it didn’t disappoint me.

Despite the inclusion of the word “scotch” in the name “butterscotch,” there actually isn’t supposed to be any scotch in traditionally-made butterscotch. (If you want, you can add a tablespoon of scotch and make less-traditional butterscotch pudding, but for the most authentic pudding, it should be left out.)

“Real” butterscotch flavor is created by butter and brown sugar. Therefore, any butterscotch-flavored dessert is necessarily going to be rather sweet. To counter all that sugar, the pudding tastes great with a little bit of extra salt. I suggest topping the pudding with salted whipped cream.  You could skip the whipped cream and sprinkle a pinch of sea salt directly on top of each of your puddings just before serving them.

When I’m making pudding, I like to set out all of my ingredients in advance. Making pudding isn’t too difficult, but it requires that you whisk the mixture almost constantly, so you can’t take time to set the whisk down and fuss over the next ingredient.

Butterscotch Pudding with Salted Whipped Cream
6 servings

Pudding ingredients:
3 large egg yolks
3 Tbsp unsalted butter, cut into tablespoons
2 tsp vanilla extract
1/3 cup cornstarch
1 cup packed dark brown sugar
1/2 tsp salt
2 cups whole milk
1 cup half-and-half
1 Tbsp scotch – optional (see above)

Salted Whipped Cream ingredients:
1/2 cup whipping cream
A generous pinch of kosher salt

First, make the pudding. It needs time to chill in your refrigerator prior to serving it, so start it at least three or four hours in advance.

I start by preparing my ingredients. Place the egg yolks in a medium bowl. Use a fork to whisk them together and set the bowl aside for later. You’ll need a one-cup scoop later, so set the scoop near the egg yolks so you’ll have it handy.

Measure out your butter. Go ahead and cut it into tablespoons. Set the butter aside. Keep your bottle of vanilla (and the scotch, if you’re going to use it) nearby because you’ll need to add it when you add the butter.

You’ll need six small dishes for your pudding. Locate them and set them nearby.


In a medium saucepan, off of the heat, stir together the cornstarch, sugar, and salt. The mixture should look very sandy.


Gradually whisk in the milk and the half-and-half. Bring the mixture to a boil over medium-high heat, whisking constantly. (As you’re whisking, the consistency will change from a liquid to a thick pudding.) Once the mixture begins to bubble, remove it from the heat.

Using the one-cup scoop you set aside earlier, ladle out approximately one cup of the milk/sugar mixture into the whisked egg yolks. Vigorously whisk the egg yolk mixture to combine everything, then transfer the egg yolk mixture back to the remaining milk/sugar mixture in the saucepan. Keep whisking everything until it is combined.

(If you don’t whisk constantly, your eggs can cook improperly and leave chunks in your pudding. If this should happen, don’t get too upset, you can pass the pudding through a sieve later. The pudding won’t have the exact same texture, but it’ll still be very edible. But try to keep whisking constantly to avoid the chunks!)

Return the pudding to medium heat - keep whisking - until the mixture comes back to a boil. Continue to boil, whisking constantly, for one minute. Immediately remove the pan from the heat and whisk in the butter pieces until they are completely melted. Whisk in the vanilla and the scotch, if you’re using it.  If you need to strain your pudding, do so now.

Pour the pudding into your serving dishes. Cover the dishes with plastic wrap, pressing the wrap directly onto the surface of the pudding, and refrigerate it for several hours, until it is well-chilled.

Just prior to serving the pudding, make the salted whipped cream:

Place the whipping cream and the salt in a medium bowl. Whip on high speed until soft peaks form. Spoon or pipe the whipped cream onto your pudding.


Monday, February 15, 2010

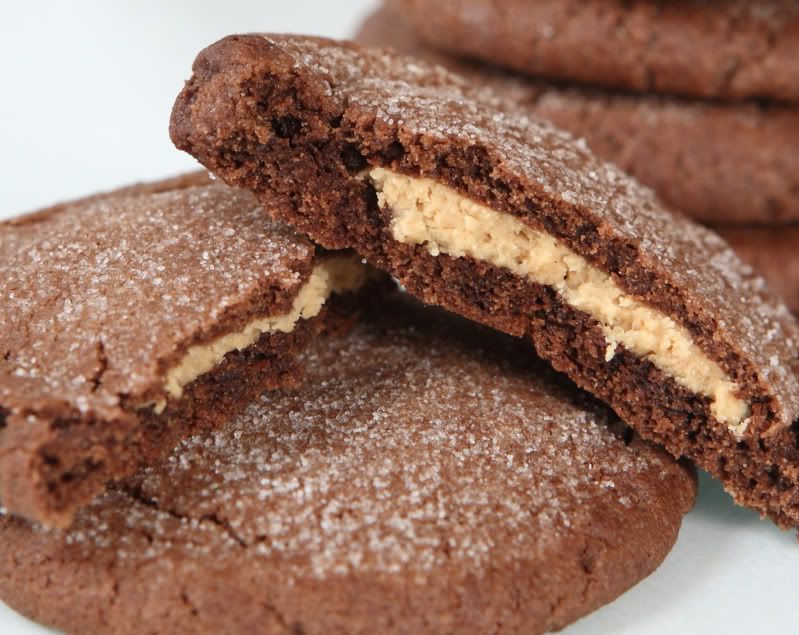
Chocolate Peanut Butter Cookies


I love reading the newspaper. There’s something satisfying about paging through the inky newsprint, sipping on a cup of hot cocoa, catching up on the latest national news, soaking up the details in the local stories, and comparing the weather forecast to reality. I always save the best for last: the comics (Calvin and Hobbes, I miss you!). The same section has the Sudoku puzzle…I love solving those. There’s a certain comforting feeling about tangible print media that cannot be recreated by online news sources.

My absolute favorite section is, of course, the food and cooking section (too bad it only comes once a week!). I love reading about local restaurants, getting ideas for recipes, and looking through the grocery advertisements. I’ve always been a recipe clipper – you’ll never know when you find a recipe that’s a keeper!

This recipe is one of those clipped-out-of-a-newspaper keepers. It was printed when I was ten years old (there are expired coupons for Chex cereal on the back of it!). My mom had this recipe clipping taped to the inside back cover of one of our favorite cookie cookbooks.

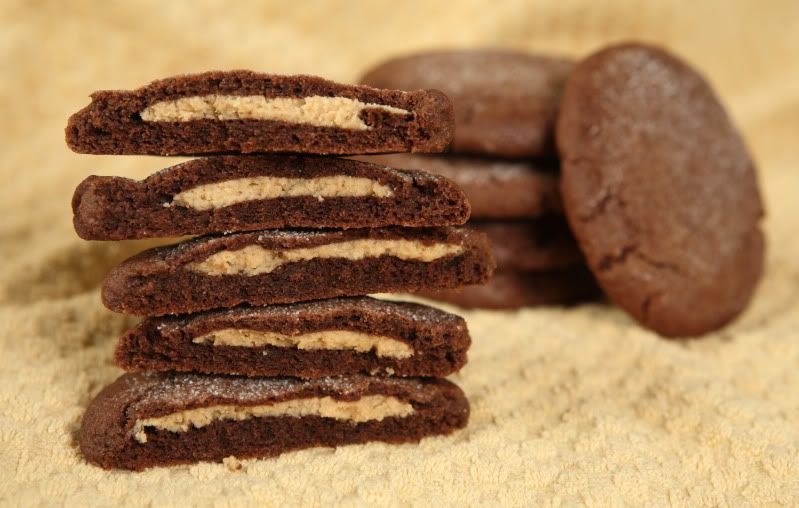
I remember wanting to make the cookies often as a child, partially because I have always loved the combination of chocolate and peanut butter, and partially because the cookies in the accompanying picture had these cute little green and white Christmas trees piped on them – they looked fun to eat. The name they gave the cookies was “Magic Peanut Butter Middles,” a name I always thought fell short (the “Magic” part seemed cool to a ten-year-old, but “Middles”?? Really??  Ok, I guess the name I came up with isn't much better...) Despite the writers’ (and my) halfhearted attempt at a creative title, the cookies were always a hit with me and my sister. Biting into what looks like just a plain old chocolate cookie and finding a delicious, creamy peanut butter filling is fun when you’re ten! (It’s still fun now!)

The recipe is very hands-on, so it’s a little messy, but the method is easy enough that my sister and I made them together when we were young.  You might enjoy making these with your kids.

Be sure you use “kid's” peanut butter, not the all-natural kind that you have to stir up before using. (The Jif/Skippy/Peter Pan/whatever kinds contain solid fats, and the cookie recipe presumably was written and tested with that fat composition in mind because it specifically recommends Skippy brand original creamy peanut butter.) Or, try the natural kind and report back on how it turns out…I have never tried using natural peanut butter in this particular recipe, but I have tried Jif brand original creamy peanut butter, and I can say that it works well.


Chocolate Peanut Butter Cookies
Makes 18 cookies

First, start the cookie dough:

Cookie Dough Ingredients
1-1/2 cups all-purpose flour
1/2 cup unsweetened cocoa
1/2 tsp baking soda
1/2 cup sugar
1/2 cup packed brown sugar
1/2 cup butter
1/4 cup “kid's” peanut butter (not the “natural” kind)
1 tsp vanilla
1 egg

Preheat your oven to 375 degrees F.

In a small bowl, whisk together the flour, cocoa, and baking soda - blend it well. Set it aside.

In a large bowl (I use my stand mixer, but always did this with a wooden spoon when I was a kid), beat together the sugar, brown sugar, butter, and 1/4 cup peanut butter until it is light and fluffy and well-combined. Add the vanilla and egg; beat well.

While the stand mixer is combining the above ingredients, I start mixing together the filling:

Filling Ingredients
1/2 cup “kid's” peanut butter (not the “natural” kind)
1/2 cup powdered sugar

In a medium bowl, combine the 1/2 cup peanut butter and the powdered sugar. It starts out with a rough texture…


…but will come together if you just keep stirring.


Roll the filling into 18 one-inch balls. (Yes, there’s more than 18 here…I made a bigger batch.) Set them aside.


(When I was a kid, I just used my hands, but now that I have better kitchen tools, I use a mini ice cream scoop like this one…


…so much easier! Less mess! It’s exactly one inch in diameter, so it’s the perfect size.)

Back to finishing the cookie dough:

Stir the cocoa mixture into the large bowl containing the creamed butter/sugar mixture until the ingredients are all blended together.

Now start shaping the cookies:

Take a heaping tablespoon-or-so of dough (about the size of a ping pong ball)…


…and use your fingertips to sort of flatten it into a little cupped circle of dough. Put one of the peanut butter balls in the center…


Shape the chocolate dough around the peanut butter to entirely encase it. Roll it around in your hands to make a smooth ball. Place the shaped dough about 2 inches apart on a cookie sheet (the original recipe calls for an ungreased sheet, but I always use parchment paper on my sheets for easier cleanup).


Use the bottom of a drinking glass dipped in granulated sugar to flatten the cookie balls to approximately 1/4-inch thick. (Don’t be too skimpy with the sugar or it’ll all disappear into the cookies as they’re baking.)


Bake at 375 degrees F for 7 to 9 minutes, or until the cookies are barely set and slightly cracked. They should still be soft – do not overbake them or they will be dry.


Leave the baked cookies on the warm cookie sheet for only a few minutes, just until they are firm enough to transfer to wire racks for cooling.

These cookies are soft inside, but have a nice exterior texture due to the sugar on top. With all the peanut butter in these cookies, you’ll definitely need to enjoy these with a tall glass of cold milk! Yum!