Showing posts with label chicken. Show all posts

Monday, December 27, 2010

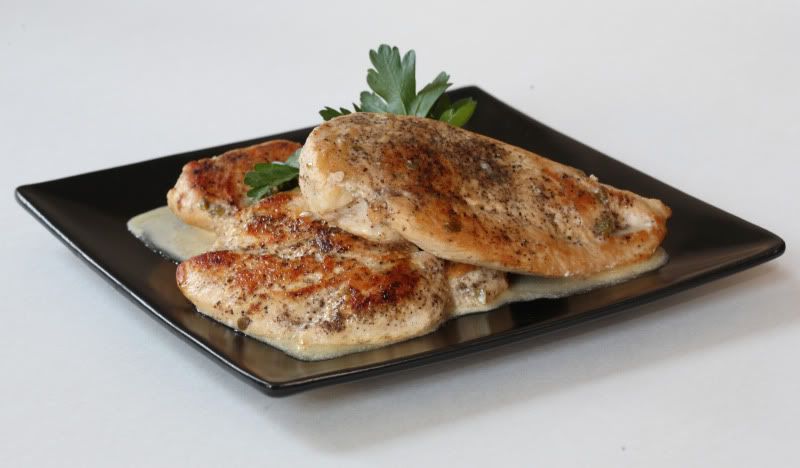
Chicken Picatta


Want to know a secret I use to help with portion control?  This particular recipe involves chicken, but my little secret also works well with pork chops or even steaks.  And although I have mentioned it before on this blog, I only devoted a few sentences to it, so it is worth mentioning again.    Whenever possible, I slice my chicken breasts in half horizontally, like this:
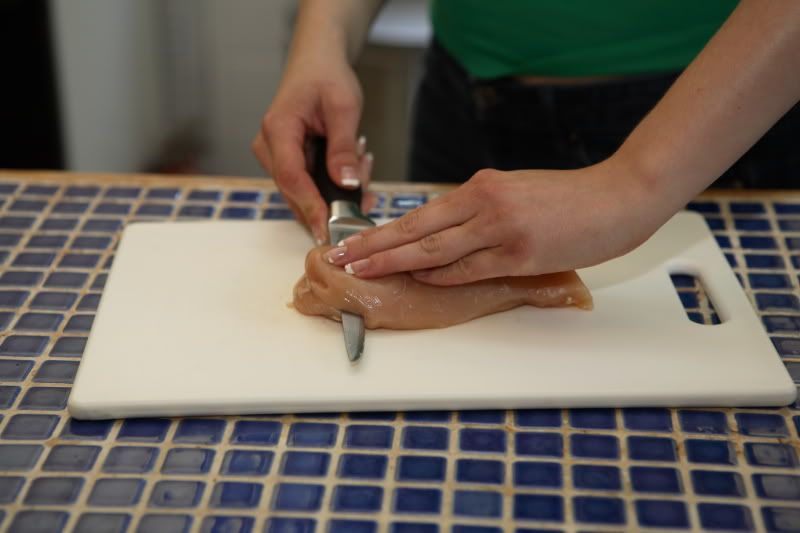


The end result:  Two roughly equal-sized pieces of meat.  One serving of meat has become two.  Yes, they are thinner servings, but because the cut still looks (from the top) like it’s the same sized piece of meat, your brain is fooled into thinking you’re eating the same quantity of meat even though you’ve reduced the size by 50%.  Sometimes, if I’m feeling particularly hungry and one cutlet just isn’t going to be enough, I’ll make both halves and have “seconds” (which still really isn’t overeating).  Or, I’ll just add some pasta or a salad to the menu to help fill me up.  Slicing the meat in half is also a great way to stretch your food dollar – you’ll get twice as many servings out of one package of chicken breasts.

This recipe is another super easy one to make.  It is delicious served with a bit of buttered noodles, something that is a rather neutral (but still delicious) side dish.  (The acidity in a tomato sauce would compete with the lemons, and a cream sauce would be too heavy and would mask the bright flavor of the Piccata sauce.  The buttery noodles complement rather than compete with the lemon-caper flavor.)

You can substitute veal for the chicken, if you like.  A veal cutlet might take slightly less time to cook than a chicken cutlet (and neither option takes particularly long to cook because both are very thin) so be prepared to pull it out of the pan pretty quickly.  There are no other changes to the recipe ingredients or preparation, so its easy to make the substitution.

When choosing a wine to use for this dish, pick something you’d drink (NOT a grocery store “cooking wine”).  Choose something dry, and not particularly sweet, because the sweet flavor will be further concentrated during the cooking process.  I usually use pinot grigio because that’s usually what I keep in the house, but you could also use a sauvignon blanc or any other dry white wine.  Plan to serve the remainder of the bottle with dinner, then you’re not opening a huge bottle of wine for one small recipe quantity.

The recipe has one ingredient in it that you may or may not be familiar with:  capers.  My grocery store usually stocks these in the same aisle as the pickles, olives, mustard, and other condiments.  Capers look like this:
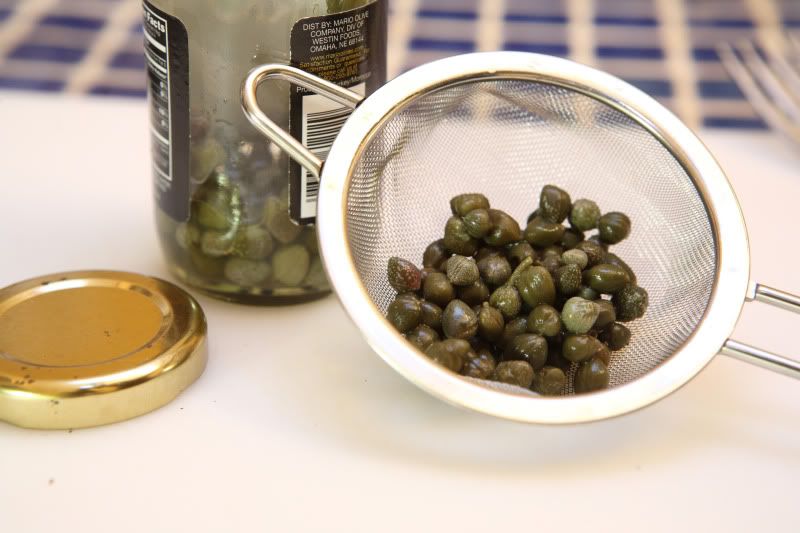

…and you should not omit them from this dish.  I know they seem unusual if you’ve never had them, but give them a shot because they are necessary to produce the proper flavor for the sauce (otherwise its not “piccata,” its just a lemon and butter sauce).  Capers will keep in your refrigerator for a very long time, so don’t worry about them going bad before you can use them up.  Before you add them to the dish, capers should be rinsed under cool water because they are packed in a salty brine.  I put the necessary quantity in a little sieve and run them under the tap for a few seconds.

Chicken Piccata
Serves 4

salt & pepper
4 thin, boneless, skinless chicken breast cutlets (cut from two breast halves, see the photo above)
2 Tbsp olive oil
2 Tbsp capers, rinsed & drained
1-1/2 cups dry white wine
juice of two smallish lemons
2 Tbsp butter
1/4 cup unwhipped heavy cream (not coffee creamer), or you can use half-and-half if you're out

Sprinkle salt and pepper over the surface of the chicken cutlets.  In a deep skillet, over medium-high heat, sauté the cutlets in the olive oil, turning once, until they are lightly browned on both sides and the chicken is just barely cooked through.  (Don’t overcook the chicken - err on the side of slightly less done because later we’ll return the chicken to the pan to reheat it.)  Remove the chicken and set it aside.  Reduce the heat under the pan to medium.
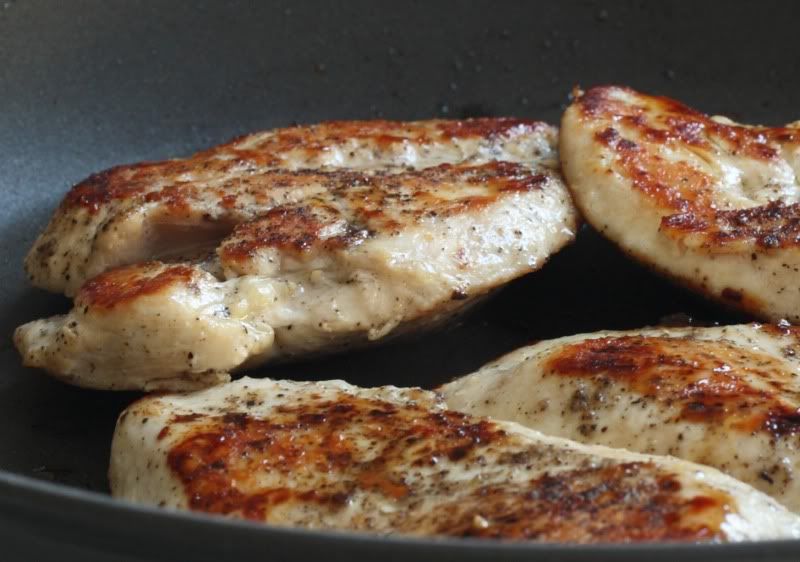


(Anyone who says you cannot brown in a nonstick pan hasn't tried these nonstick pans.  They're awesome.  Love my Anolon Advanced cookware.)

While the chicken is cooking, place your capers in a small sieve and rinse them under cool running water.  Drain them, then give them a rough chop.  Set the chopped capers aside for later.

Add the wine and lemon juice to the same skillet, stirring to scrape up any browned bits.  It will probably be bubbly and noisy when you add the liquid – keep stirring the pan!  Cook the liquid for several minutes over medium heat until it has reduced by about half.  
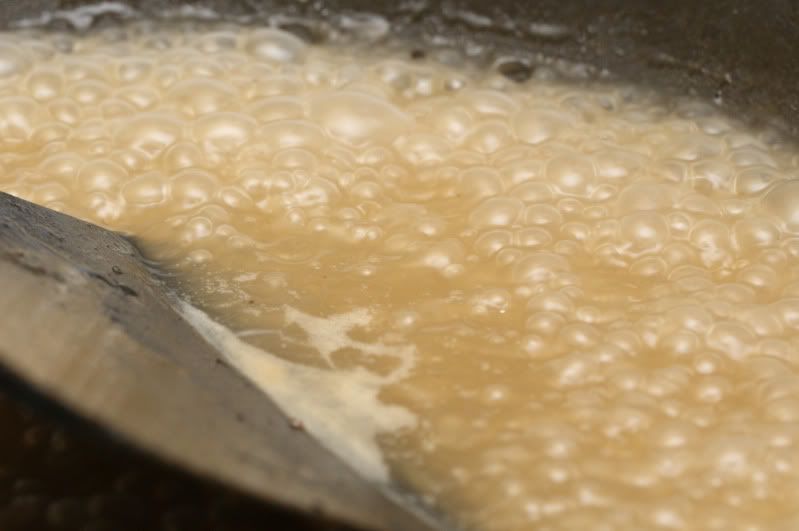


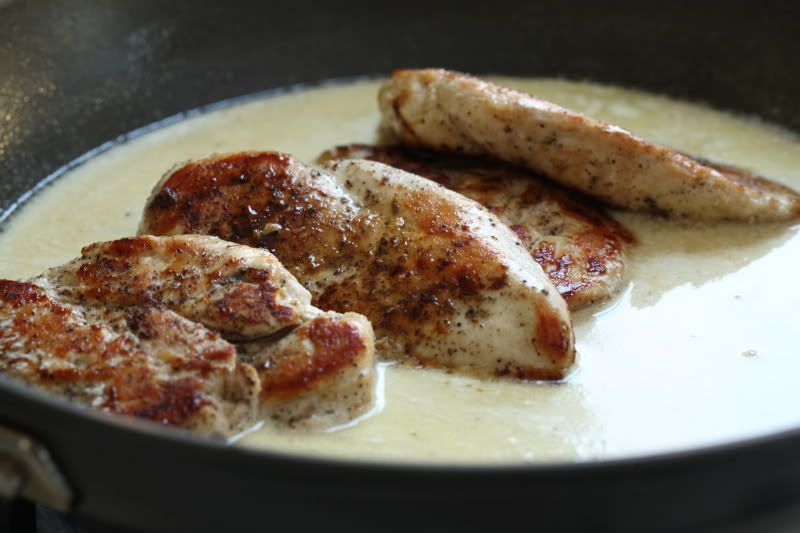
Reduce the heat to low.  Add the butter, rinsed capers, and the cream or half-and-half. Stir to incorporate the ingredients and melt the butter. Once the dairy products have been added to the pan, take care to avoid allowing it to boil (you may need to reduce the heat further).

Return the cooked chicken to the pan and heat it through, just long enough to bring the chicken back up to the proper serving temperature.

Sunday, March 14, 2010

Homemade Barbeque Sauce

In anticipation of better weather (and in protest of our current not-winter-anymore-but-not-quite-spring-either weather), I've started grilling outdoors.  We have a nice covered porch which makes it easy to use the grill even if it's raining.  Barbequed chicken is pretty easy to make outdoors because it doesn't require much babysitting.  The chicken is brushed with sauce and is placed on the grill.  After a few minutes, it is flipped once, brushed with more sauce, but is otherwise left alone while it cooks.  Pretty simple.

Homemade barbeque sauce is really easy to make. Onions are browned in butter (olive oil can be substituted for a somewhat healthier sauce…but the butter tastes better), then everything else is added and simmered over medium heat. There’s not much to it.


One thing that's great about this sauce: you can make it ahead and freeze it. You can also make it in larger quantities.

Homemade Barbeque Sauce (for chicken)
Makes about 3 cups of sauce

1 small onion, finely chopped (a mini food processor works well!)
2 Tbsp unsalted butter
1/4 cup molasses
1/2 cup freshly-squeezed lemon juice (2 large lemons yielded the proper amount of juice)
1/2 cup dry red wine (I used a Malbec on this particular occasion, but I usually make it with Cabernet Sauvignon or Shiraz)
Several shakes (to taste) of Tabasco or similar hot sauce
1/4 cup ketchup
1/4 cup spicy mustard
2 Tbsp Worcestershire sauce
2 tbsp brown sugar
3 large cloves garlic, minced
1 tsp cumin
1/2 tsp black pepper
1/4 tsp ground cloves
1/2 tsp ancho chili powder (another type will also suffice if you don’t have ancho)
1 cup water

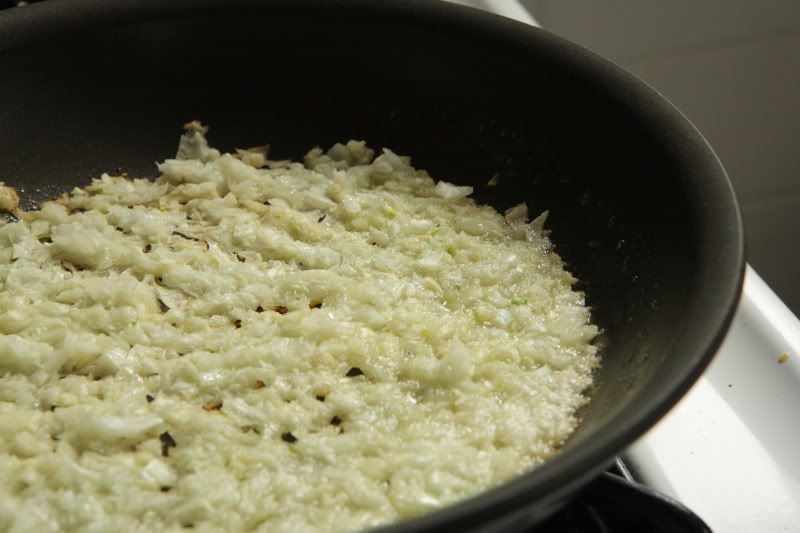
Place the chopped onions and the butter in a medium skillet. Spread out the onions so they cover the bottom of the pan. Turn the heat to medium-low and allow the onions to brown slowly. The moisture will begin to cook out of the pan and the onions will begin to brown at the edges. Avoid stirring the pan until this starts to happen. The pan looks like this when it’s time to stir (see the browned edges?):


Stir the onions and allow them to continue to brown slightly longer, so they are evenly browned. Transfer the browned onions to a medium saucepan and add the remaining ingredients.

Simmer the sauce over medium heat, stirring often, to reduce the sauce by approximately one third.

I usually serve this sauce with grilled chicken. I pour a small amount of the sauce over the chicken pieces as a marinade. The remaining sauce is saved to mop the chicken as it is grilling. (Remember, should any of the reserved basting sauce come into contact with raw meat, be sure to return the sauce to a boil before using it to baste cooked chicken!)


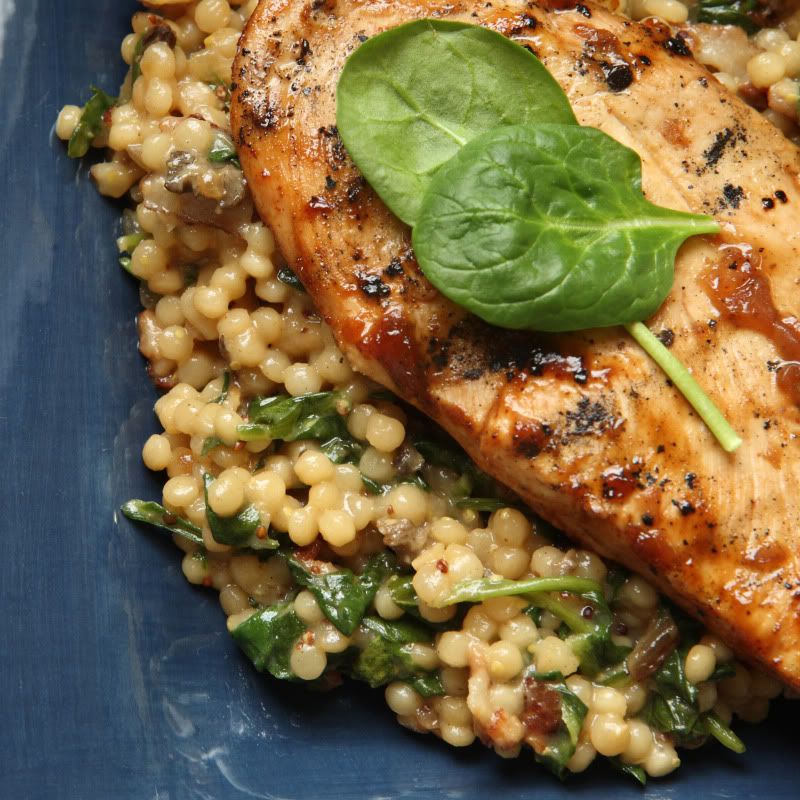
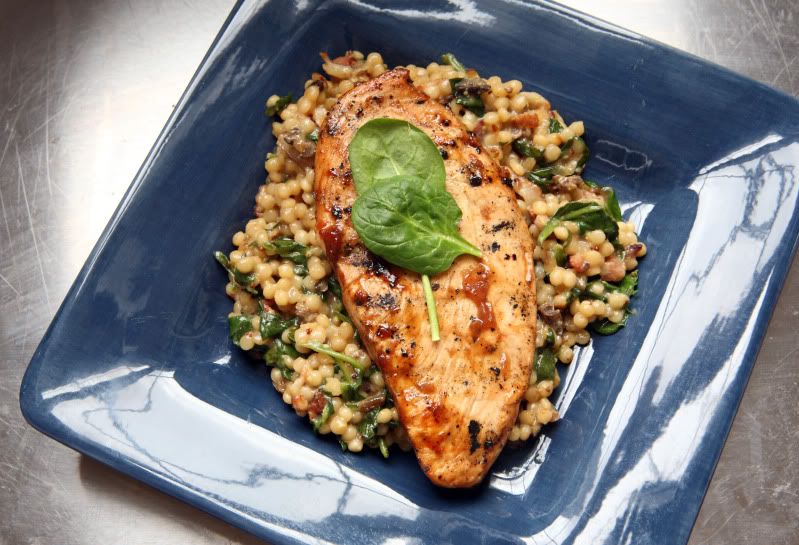
The chicken in these pictures is served with my Bacon and Spinach Couscous. It’s really yummy – give it a try.

Printable PDF file (with pictures)
Printable PDF file (text only)

Wednesday, February 24, 2010

Lemon-Sage Cornish Game Hens with Porcini Tomato Sauce


There are several good reasons you should try this chicken recipe. For one, its pretty easy to make, considering it involves whole chickens. (When I first started learning to cook, whole birds seemed kind of intimidating to me…but the truth is, whole birds sound a whole lot more complicated than they actually are. And this particular recipe is fairly easy.)

The second reason you should make this recipe is that it tastes quite good. The chicken is baked at a high temperature, so the skin becomes nice and crispy while the chicken stays juicy and tasty. Lemons are stuffed in the chicken – they give a bright but subtle counterpoint to the umami flavor present in the mushroom tomato sauce.

This recipe is made with Cornish game hens (sometimes known as "rock" hens...they're basically just smaller-sized whole chickens). In my household, one large Cornish game hen will serve two people…but we’re used to moderately-sized portions. If you have big eaters, or if you want to have leftovers, you might want to allow one small hen per person.

Lemon-Sage Cornish Game Hens with Porcini Tomato Sauce
Serves up to 4

Chicken Ingredients:
Two to four 1-1/4 to 1-1/2 pound Cornish game hens (see the note above)
For each hen, you'll need...
1 medium lemon
2 large fresh sage sprigs (left whole), plus 1 Tbsp chopped fresh sage
1 Tbsp olive oil
salt and pepper

Sauce Ingredients (makes enough for four servings)
2 Tbsp olive oil
3/4 cup hot water
1/2 ounce dried porcini mushrooms
2 large cloves garlic, finely chopped
one 14.5-ounce can diced tomatoes, with juices

First, prepare the chicken:

Preheat the oven to 450 degrees Fahrenheit. You’ll need a roasting pan large enough to hold the birds.

Remove the giblets. (They’re usually contained in a little plastic baggie stuck inside the chicken cavity, but sometimes they’re just loose inside the bird.) They can be discarded or saved for another use. Rinse the chicken (inside and out). Pick off any stray feathers or any giant clumps of fat. Pat the chicken dry with paper towels.

Cut each lemon in half. Save half of each lemon (we’ll squeeze it on the meat later). Cut the remaining lemon halves into rough wedges. Stuff the lemon wedges and the two large sage sprigs inside the cavity of each bird. Put the stuffed birds in your roasting pan. I like to roast them breast-side-down, because the juices from the bird will help keep the meat moist and flavorful.

Drizzle one tablespoon of olive oil over each bird. Squeeze the juice from the remaining lemon halves over each bird. Sprinkle each bird with a generous pinch of salt and several generous turns of freshly-ground black pepper. Scatter 1 tablespoon of chopped sage over each bird.


Roast the birds at 450 degrees F until they are cooked through and the juices run clear when thickest part of thigh is pierced. (It should take approximately 45-50 minutes.) Transfer the birds to a platter (or a cutting surface if you want to cut them in half – use heavy-duty kitchen scissors to snip them in half); tent them with foil to keep them warm. Reserve the pan drippings.

While birds are roasting, start the sauce...and...

...I highly recommend that you serve this with creamy polenta…that's what the chicken is served with in the photo at the top of this post.  Follow your polenta package directions to make a creamy polenta. If you decide to make polenta, you’ll probably want to start it now, as it probably takes awhile to make…

Combine 3/4 cup of hot tap water and the porcini mushrooms in a small bowl. Let them stand until the mushrooms soften, about 30 minutes. Remove the mushrooms from the soaking liquid, reserving the soaking liquid. Roughly chop the mushrooms; set the mushrooms and the soaking liquid aside.

Heat 2 tablespoons of olive oil in a large saucepan over medium heat. Add 1 tablespoon of chopped fresh sage and the garlic; sauté them until they are fragrant, about one minute. Add the tomatoes, the chopped mushrooms, and the mushroom soaking liquid. Bring the sauce to a simmer – it can simmer on low heat until the birds are done roasting.

Once birds are done roasting, pour the pan drippings into a small measuring cup. Skim the fat off of the top, then stir the remaining drippings into the tomato mixture. Simmer the tomato mixture two minutes to blend the flavors. Serve the chicken with the sauce.
Sunday, January 31, 2010

Chicken Strips with Honey Mustard Dipping Sauce


It’s always more fun to eat food when you can dip it into a sauce or condiment. I guess that’s why hand-held, dip-able things like chicken nuggets are always on children’s menus at fast food restaurants. (If its fun to eat, kids will ask for it, right? Sales!)

Of course, they’re on the grown-up McMenu too, because you definitely don’t have to be a kid to enjoy using your hands to eat food. Since I do not usually include foods with the prefix “Mc” in my meal plan (but still like eating chicken strips), I just periodically make them at home.

Although my chicken strips are not quite as speedy as running through a drive-thru, they’re not too difficult to make and they taste much better. Plus, you know exactly what you’re putting into your homemade chicken strips. They’re much lower in sodium and they’re not deep fried, so they’re better for you.

Look for panko in the Asian foods aisle of your grocery store. If you cannot find it, you can substitute regular unseasoned bread crumbs, but you’ll have the best, crispiest texture with panko.

If you’re looking for something to serve at a Super Bowl party next weekend, give these chicken strips a try! The honey mustard sauce tastes good with other things, too – I accidentally discovered asparagus spears are delicious when dipped in the sauce.

First make the dipping sauce:

Honey Mustard Dipping Sauce
Makes about 3/4 cup

1/4 cup light mayonnaise
2 Tbsp honey
1/3 cup Dijon mustard
A pinch of kosher salt
1/4 tsp garlic hot sauce, or to taste

Mix all of the ingredients. Taste the sauce and adjust the spicy/sweet/tangy ingredients as necessary. Refrigerate the sauce until serving time.

Then make the chicken:

Homemade Chicken Strips
Serves 4 as an appetizer (add a few side dishes to serve it as an entrée)

2 chicken breast halves
1 cup all-purpose flour
A pinch of salt
A pinch of pepper
2 eggs
2 Tbsp water
Approximately 2 cups panko crumbs
Olive oil, for panfrying

Slice the chicken breasts in half horizontally into two flat, thin pieces.


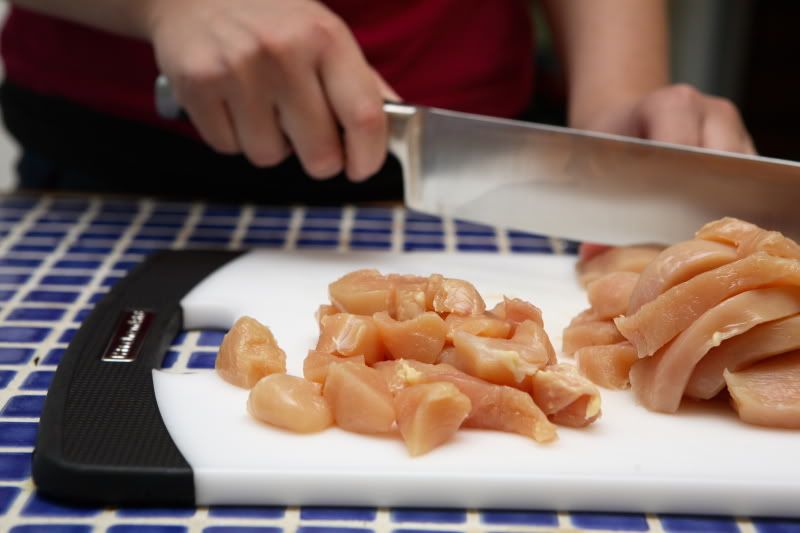
Then cut the chicken into “fingers.”

You will need three small bowls (cereal bowls, pie pans, small mixing bowls, whatever…all work well). In one bowl, place the flour, salt, and pepper. Stir it with a fork to combine the ingredients. In the second bowl, whisk together the eggs and water.

In the third bowl, place the panko. Since panko is kind of expensive, you might want to start with a smaller quantity and add more to the bowl only as you need it. I start with one cup and add a little more as I work, for a total usage of approximately two cups.

Bread the chicken:

When I bread meat, I usually use tongs. It is kind of messy. If you get flour and eggs on your hands, you’ll have a gluey mess that is difficult to wash off. Tongs are much easier to clean – if they get too gluey, just use a utensil to scrape the yuck off.

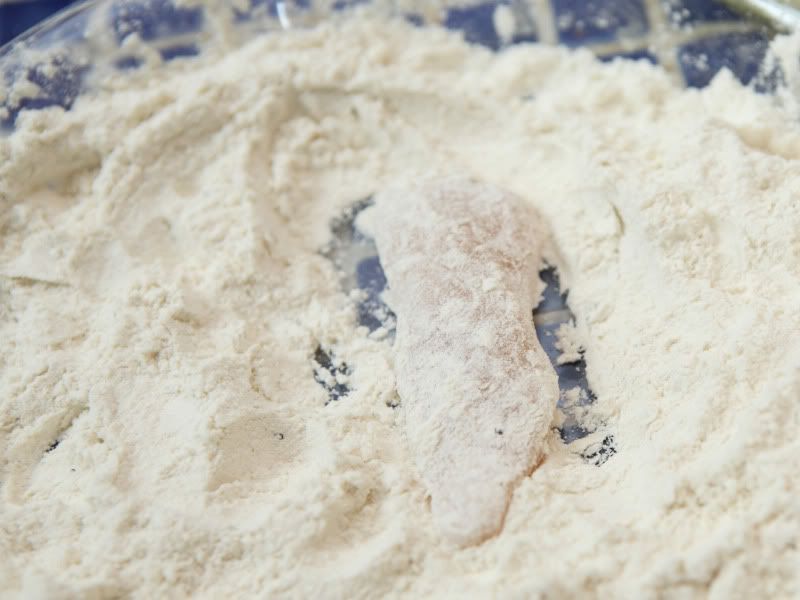
Each piece of chicken should be dipped first into the flour…


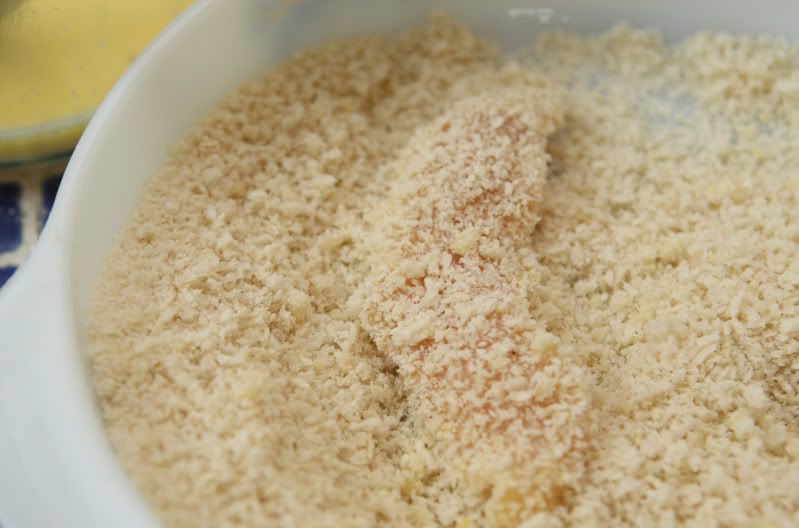
…then into the egg wash, and then into the panko.


Be sure you have coated all parts of the chicken each time you dip – that’s especially important with the egg and the panko. Use the flat part of the tongs to pat the panko crumbs firmly onto the chicken pieces.

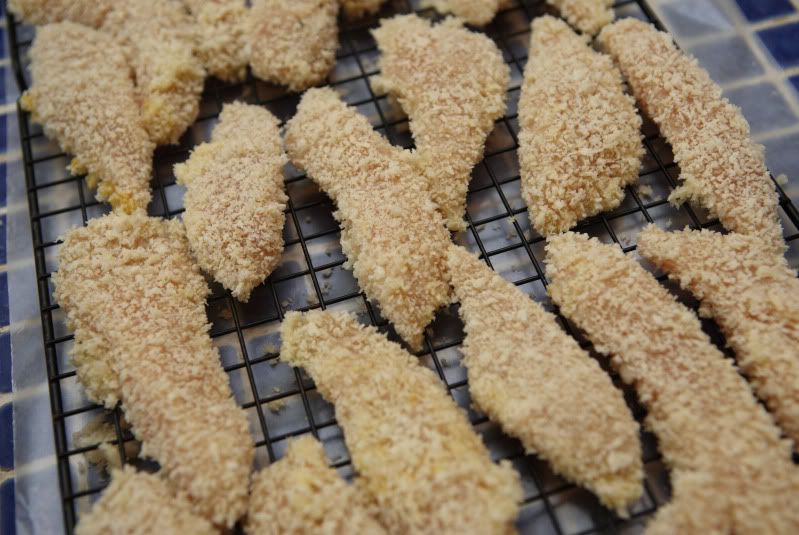
I transfer the breaded chicken to a rack set over a piece of waxed paper (to catch the crumbs) until its time to start cooking.


Once you’ve breaded a fair amount of chicken, you can start to cook it while you continue to bread the remaining meat.

To cook the chicken:

In a large nonstick skillet, heat a few teaspoons of olive oil over medium-high heat. Lay in several strips of chicken, enough to cover the bottom of the pan – but don’t let the chicken pieces touch each other. Cook the chicken for several minutes on each side until the breading is golden brown and the chicken is cooked through. Continue with the remaining chicken (you will probably need to add additional oil as you work). I drain my chicken pieces on paper towels after they’re cooked.

Serve the chicken with honey mustard sauce. Yum!

Friday, July 3, 2009

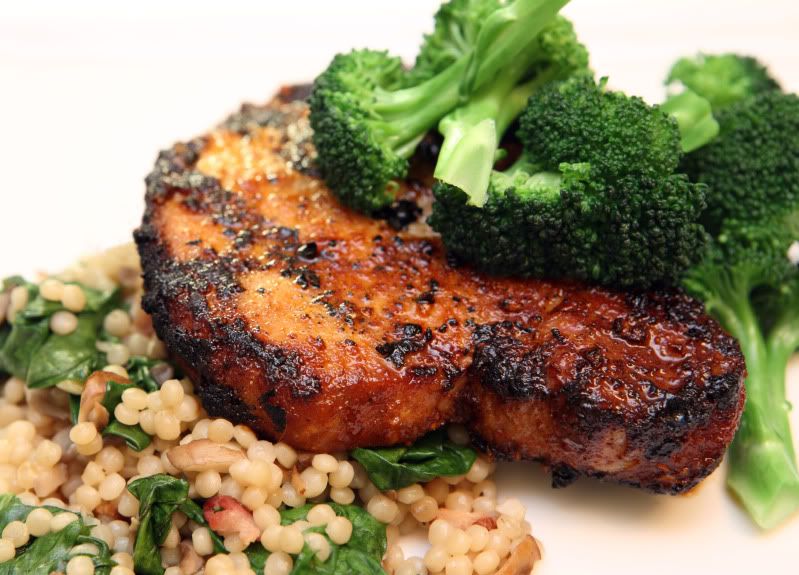
Grilled Pork Chops with Paprika Rub


This spice rub is so easy to make and it tastes great. The prep is quick, but it does need time to sit in the refrigerator to let the meat take on the flavors. I usually make it in my mini food processor so I don't have to cut up the garlic - especially if I'm multiplying this recipe to feed a lot of people.

A lot of my weeknight meals are inspired by recipes in Everyday Food magazine…this is modified from their July/August 2009 issue.

Grilled Pork Chops with Paprika Rub
Serves 4

4 cloves garlic
3 Tbsp vegetable oil
2 Tbsp brown sugar
2 tsp coarse salt
2 tsp sweet Hungarian paprika
½ tsp hot Hungarian paprika (cayenne pepper will work if you don’t have hot paprika)
½ tsp ground black pepper
4 bone-in pork chops

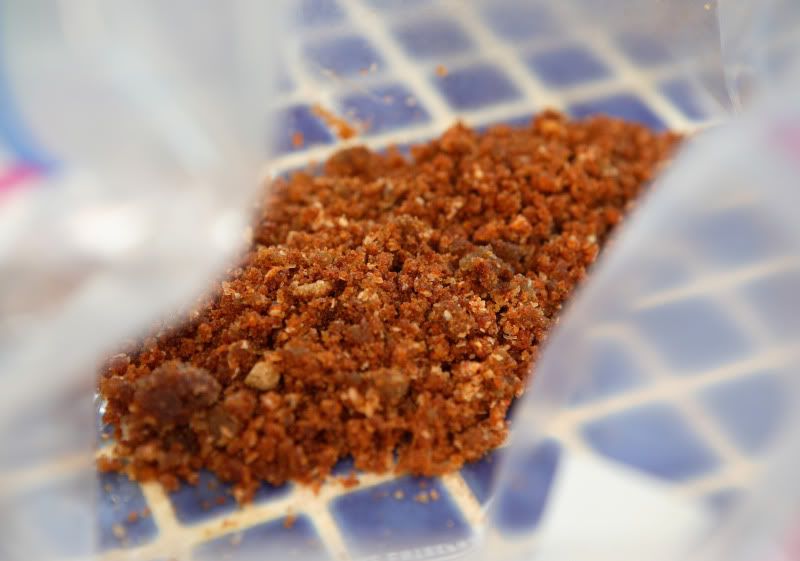
Place all of the ingredients except the pork in a small food processor bowl. Process until the garlic is finely chopped and the ingredients are all incorporated. Scrape the mixture into a gallon-sized thick plastic bag.


Add pork chops to the bag. Seal the bag up, squeezing out any excess air, and gently knead the bag to coat the meat with the spice rub. Refrigerate at least one hour, up to overnight.

Grill over medium-high heat until pork is cooked through. Cooking times will vary depending on the thickness of your pork, but you’re probably looking at 3 to 5 minutes per side. Pork is considered “medium” when the center is at 160 degrees F – don’t overcook it or it’ll be dry and tough.

If you’re not into pork, try this on beef. This past Father’s Day, I served this spice rub on ribeye steaks and it was a hit. I’m sure it’d be good on chicken too.

If you’re looking for something to take along on a camping trip, toss this together in a thick baggie and freeze it before you leave home. Stick the baggie in a watertight container and let it sit in the ice in your cooler, thawing little by little over the course of your camping trip until it’s soft enough to successfully grill over your campfire. It’ll be delicious, I guarantee!

Sunday, June 7, 2009

Paprikás Csirke, with Galuska (Hungarian Chicken and Dumplings)

Chicken and dumplings are perfect together. They fall under the category of “comfort food” for many people – myself included. There’s a million variations. Maybe you remember a layer of flavorful herb biscuit dumplings floating on a sea of thick chicken soup, or a large tangy buttermilk biscuit dumpling served alongside slow-cooked braised chicken. Or maybe you like tender strips of chicken nestled in thick, ribbon-cut noodle-style dumplings, or maybe you enjoy Italian gnocchi and chicken enveloped in a spicy marinara sauce.

Here is yet another variation I enjoy: chicken in a paprika sauce, enriched with tangy sour cream – Hungarian comfort food.

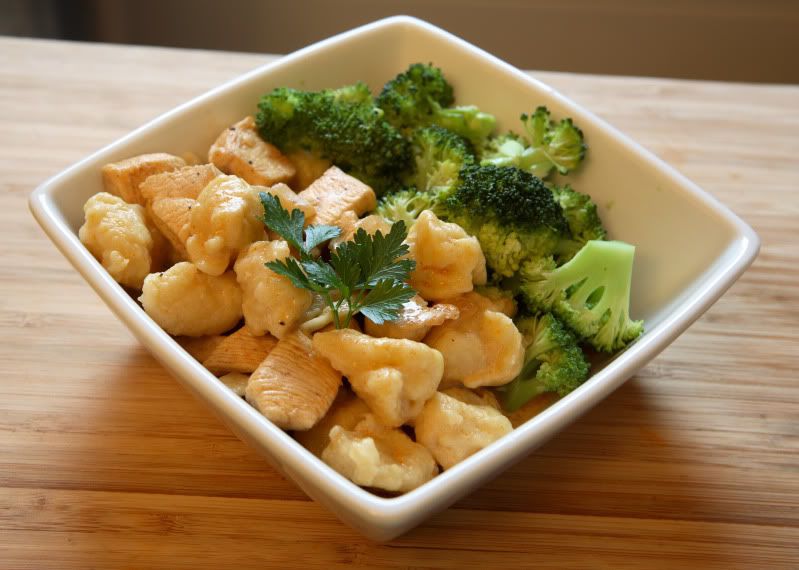
I taught my sister-in-law how to make this recipe, so we work on it together. She is in charge of the chicken and its sauce, and I am in charge of making the galuska. To increase our speed and efficiency, she also fishes the cooked galuska out of the water for me. We can throw this meal together in no time when the two of us work on it collectively. This is a really easy meal to make, but there’s a lot going on at once, so it is definitely easier when you’ve got a helper around. I like to serve this with broccoli, which nicely soaks up the paprika-flavored sauce. (Everything’s better with paprika!)

Paprikás Csirke (Chicken Paprika), with Galuska (dumplings)
Serves 4

4 boneless, skinless chicken breast halves or chicken thighs
1 Tbsp vegetable oil
1 onion, peeled & chopped
1 tsp salt
1 Tbsp sweet Hungarian paprika (or more, to taste)
1 tsp hot Hungarian paprika
1 to 1-1/2 cups chicken stock
3/4 cup fat-free sour cream

Wash chicken and pat dry. Trim any fat away as necessary, and set the chicken aside. I usually use breasts, and usually cut them into bite-sized pieces to shorten the cooking time.


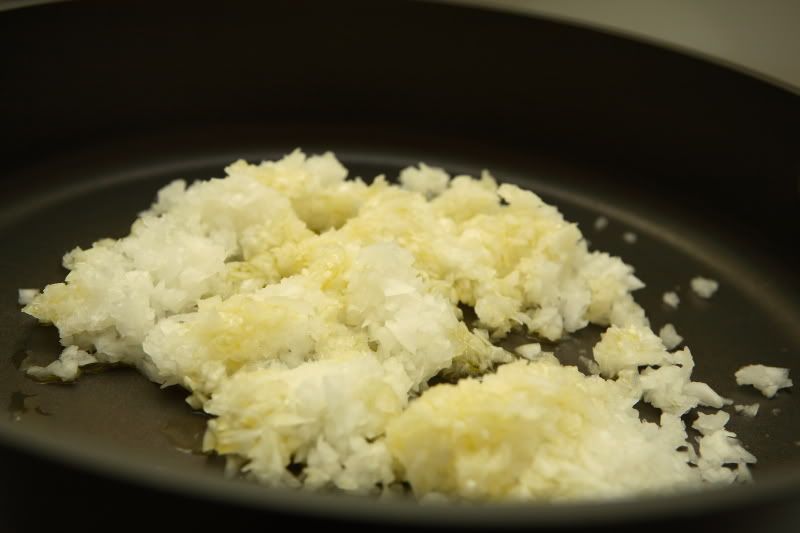
In a large, deep skillet with a lid, heat vegetable oil, uncovered over medium-high heat. Add chopped onion and cook uncovered until onions are translucent and cooked through.


Meanwhile, begin the Galuska recipe by heating a pot of water to a boil and mixing the dough:


Galuska (Dumplings)
1 Tbsp butter, softened
1 egg
1 cup milk
1 tsp salt
2 cups flour
Water, for boiling Galuska

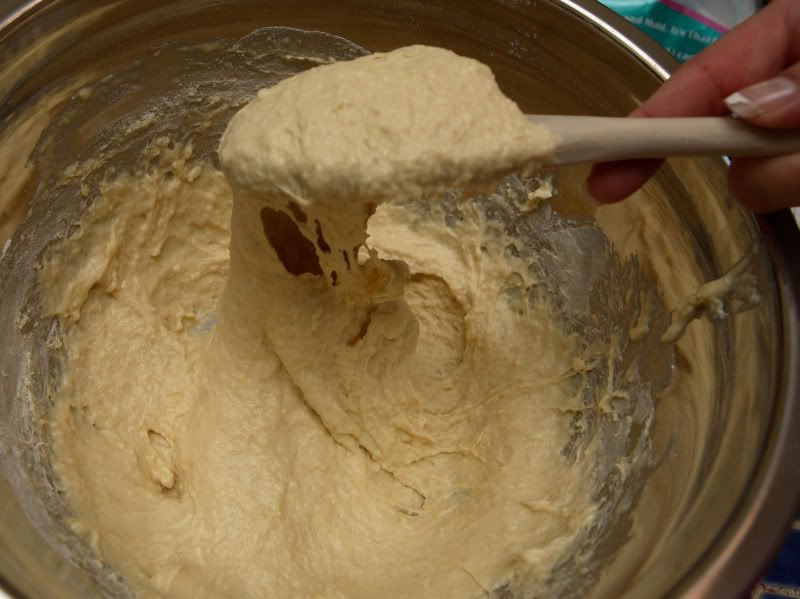
In a medium mixing bowl, beat butter, egg, milk, salt, and 1-1/2 cups flour until smooth. Add additional flour, 1/4 cup at a time, until the mixture is the consistency of sticky cookie dough. If dough gets too stiff, add a little more milk. The dough should be sticky, but not so moist as to be liquidy. It should hold its shape when spooned.


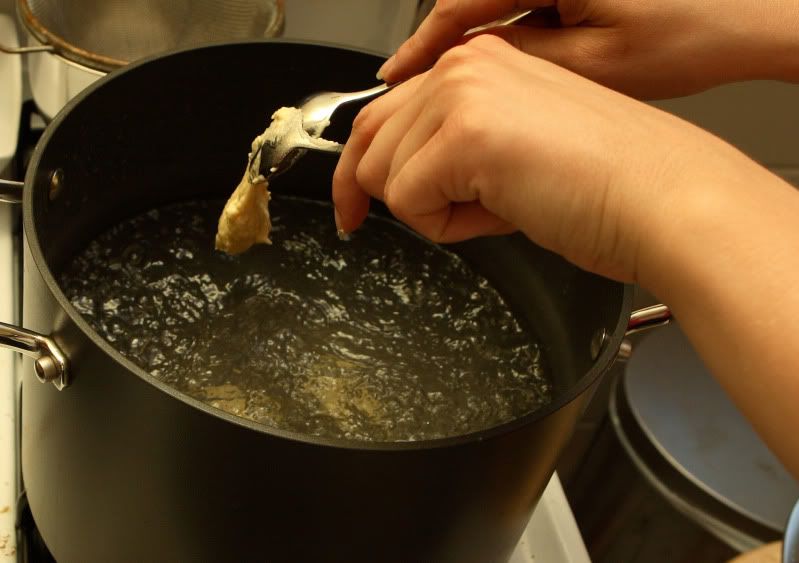
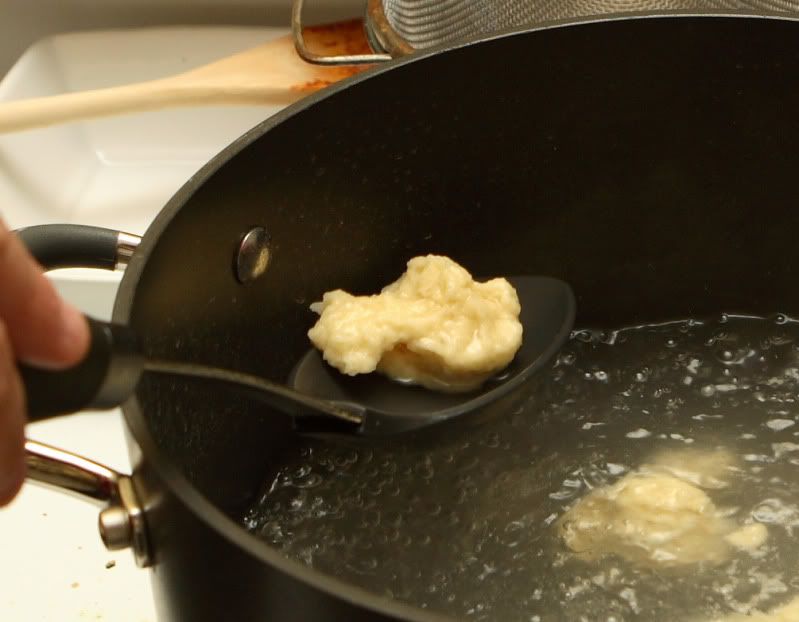
In a large saucepan or small stockpot, bring water to a boil. Using a small teaspoon, scoop up a small amount of dough, approximately 1/2 to 1 teaspoon; use a second spoon to shape the dough into a somewhat spherical shape, and scrape the dough off into the boiling water. Add several more pieces of dough, stirring frequently to keep dough from sticking.


Boil the Galuska until they rise to the surface – 2 to 3 minutes each. Use a slotted spoon to scoop the floating dumplings out; drain them in a colander and set them aside. As you remove cooked pieces, continue to add dough to the boiling water until all of the dough is used up.


While the dumplings are cooking, continue to prepare the chicken:

If using chicken thighs or similarly thick pieces of meat, sprinkle the onion mixture with salt and both paprikas; add 1 cup of chicken stock to moisten pan. Stir the onion mixture, then add the chicken pieces, reduce the heat to medium, cover the pan, and allow it to simmer while you continue preparation of Galuska. Turn the chicken as necessary during preparation to ensure meat is evenly cooked. Keep an eye on the sauce in the pan, and as the pan begins to dry up, add 1/4 cup of chicken stock at a time to remoisten and deglaze pan. Skip to the final step below...

If using smaller pieces of chicken, sprinkle the onion mixture with salt and both paprikas; add 1/4 cup of chicken stock to moisten pan. Stir the onion mixture, reduce the heat to medium, and allow the sauce to simmer while you continue preparation of Galuska. Once liquid is reduced and the pan begins to dry up, add the chicken pieces and 1/2 cup of chicken stock. Allow the chicken to cook, turning as necessary to ensure chicken is evenly cooked. Keep an eye on the sauce in the pan, and as the pan begins to dry up again, add 1/4 cup of chicken stock at a time to remoisten and deglaze pan. If chicken pieces complete their cooking process before you are finished with the Galuska, turn heat down to low to keep warm and slow the cooking process. Continue with final step below...

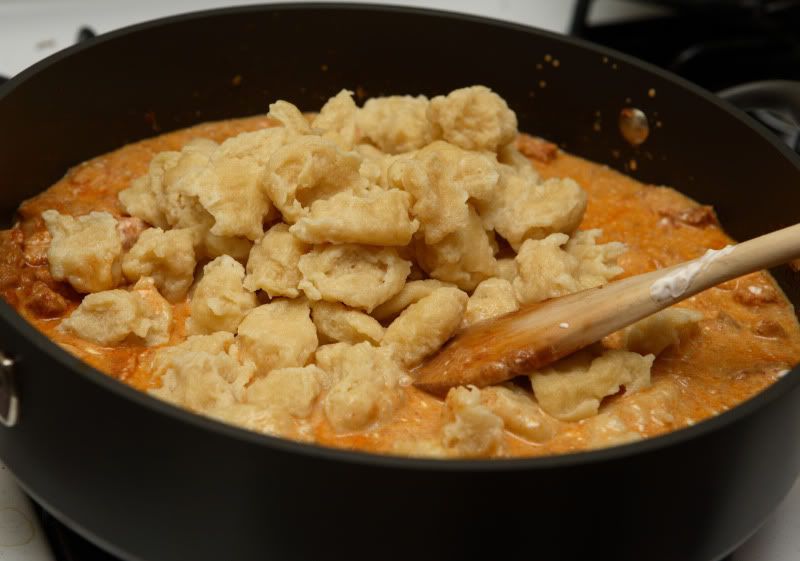
Final Step: Once Galuska are prepared and cooked, add the sour cream to the chicken/onion mixture. Stir well to incorporate; heat on medium-low heat only until sour cream is heated through. Do not allow sauce to boil excessively. Fold cooked and drained Galuska into sauce; stir to coat all pieces with sauce. Taste and add additional paprika as necessary.


Sunday, May 17, 2009

"Pineapple Mint" Chicken

A friend of mine was surfing the internet recently and found this recipe for Mojito Chicken, by Guy Fieri of Food Network fame. We agreed the recipe needed a few changes (Baking marinated chicken? Obviously it should be GRILLED!) but we both thought the basic idea sounded good. My friend apparently went home and made the recipe for his family, although I’m not sure what kind of changes he made to it. He did mention he cut back on the amount of mint suggested in Guy’s original recipe, and I know he grilled the chicken.

I studied the original recipe further, read the accompanying reviews, and came to the conclusion that the recipe was probably too salty, too minty for my taste, and was a lot more elaborate than necessary.

I made one other conclusion: regular grocery store mint just wasn’t going to cut it. I never much cared for the strong mint flavor of the stuff the grocer carries, anyway.

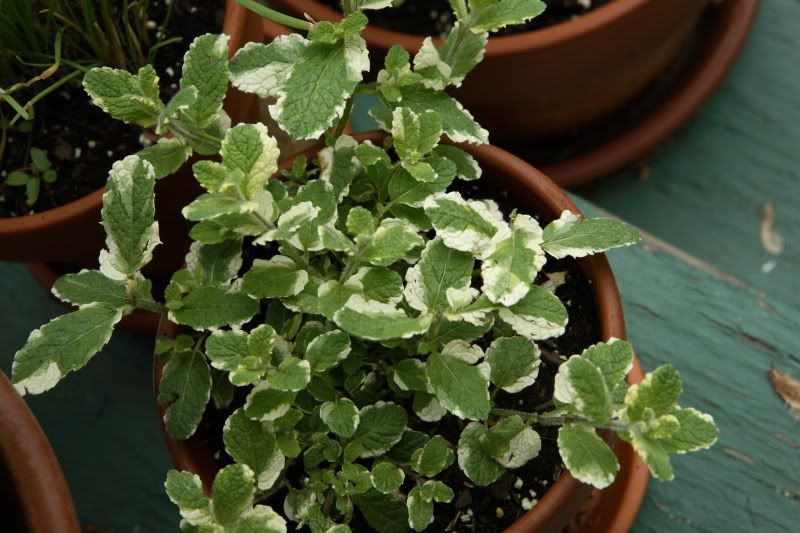
The last time I was at the greenhouse/nursery, I saw some interesting varieties of herbs, including a variety of mint called “Pineapple Mint.” It’s beautiful, as far as herbs go, and has fuzzy stems, with ivory and green leaves. True to its name, its leaves have the unmistakable aroma of freshly-cut pineapple. I initially passed on the plant because I was already over budget as it was. But when I saw this recipe and thought of the possibilities presented by Mojito Chicken, I immediately knew I’d have to go back and buy the Pineapple Mint plant for the sole purpose of trying it with this recipe.


$3.50 well spent. Delicious. Not overwhelmingly minty, just right.

I’d totally recommend picking up some of this plant if you ever see it around!

So, I ended up modifying quite a bit of the original recipe – same basic flavors, but different quantities and different method. It’s a lot easier now – mix up some ingredients and wait for the marinade to do its magic. There's no pineapple in the recipe because there wasn't any in Guy Fieri's original recipe, so the recipe title is only a reference to the variety of mint I used.

Usually when I’m grilling chicken breast halves, I slice them horizontally into two flat, thin pieces. They cook more evenly (no dried out, overcooked edges or undercooked centers!). If you have a long, thin, sharp boning knife, give it a try. (Carefully! Don’t cut yourself!) You can use a chef’s knife too, but a boning knife is easier because there's less knife surface area to stick to the meat. This also helps with portion control...it looks like you're eating a full half of a breast, but you're not.


“Pineapple Mint” Chicken
Serves 4-6

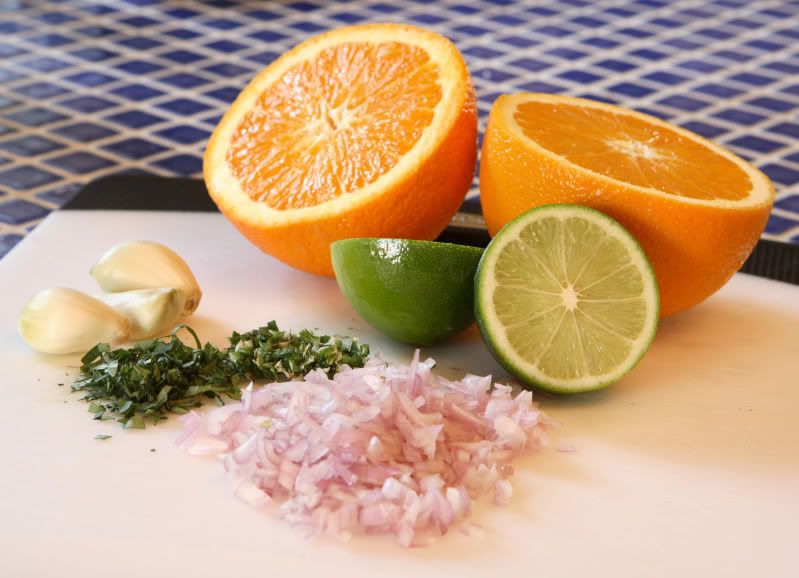
2 to 4 halves chicken breast
3 large cloves garlic, pressed or finely chopped
1 large shallot, finely chopped
1/4 tsp cumin
1 Tbsp fresh oregano, finely snipped
1/2 tsp kosher salt
1 tsp freshly ground black pepper
1 tsp paprika
1 Tbsp fresh Pineapple Mint, or another mint variety
2 oranges, juiced
1 lime, juiced
1/4 cup rum (If you’re anti-rum, you could sub it out for chicken stock, but the taste won’t be the same.)
1/4 cup olive oil

Place the chicken pieces in a dish or heavy plastic bag – something you can use to hold them while they marinate.


In a medium bowl, mix together remaining ingredients. Pour over chicken. Allow chicken to marinate at least two hours, up to eight hours.

Grill chicken over medium-high heat only until chicken is no longer pink. Turn once. While chicken is grilling, bring the leftover marinade to a boil (kill the germs!). Spoon boiled marinade over chicken as it is grilling.

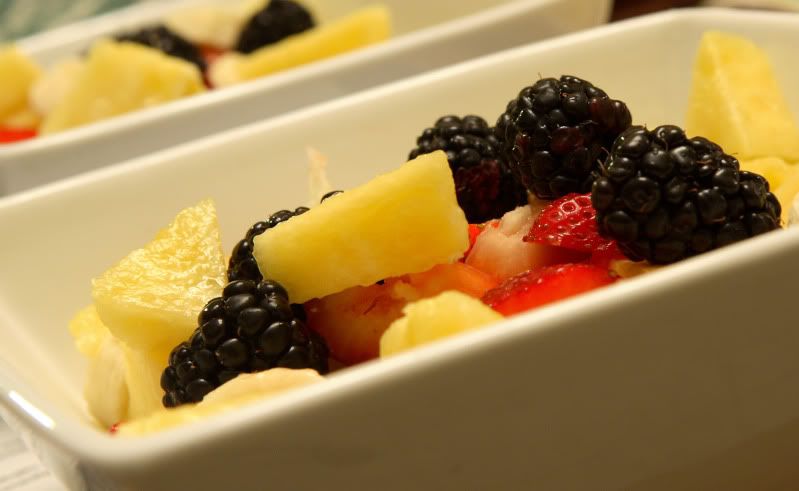
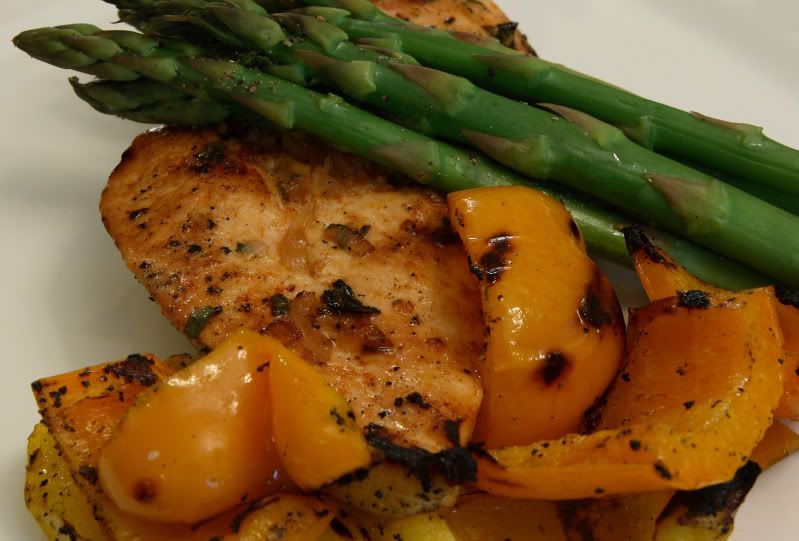
I served this with a fruit salad (pineapple, strawberries, blackberries, and bananas!) and grilled asparagus and bell peppers. Simple and delicious!


Tuesday, March 4, 2008

Moroccan Braised Chicken


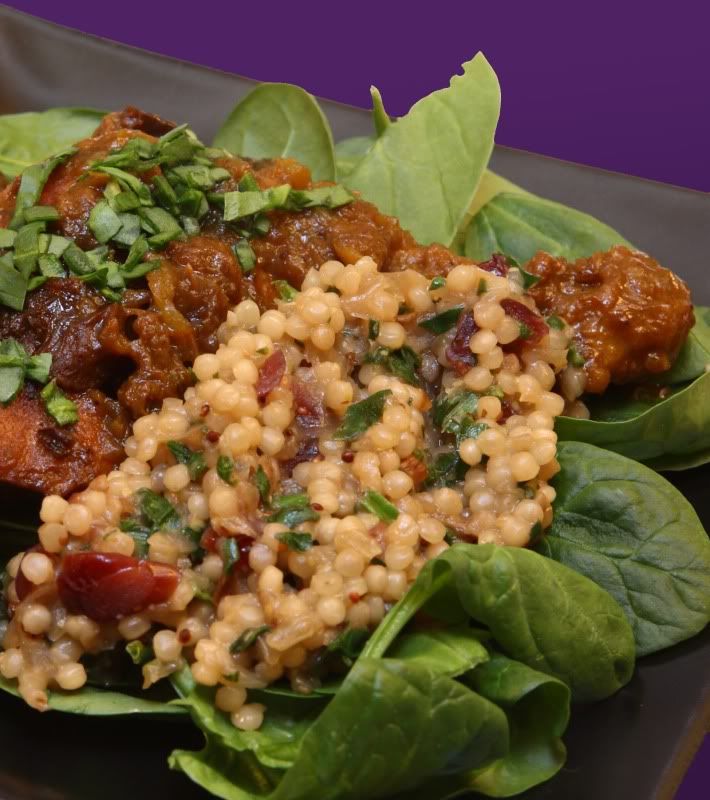
A week or so ago, we invited some family over for dinner and to check out the house we recently bought. While my hubby gave them a tour of the house, I cooked up Moroccan Braised Chicken, Roasted Root Vegetables, Cranberry-Spinach Couscous, and Warm Chocolate Pudding "Cakes" with ice cream. Everything seemed to be a hit – there were no leftovers!

The Moroccan Braised Chicken recipe originally came from the October 2006 issue of Everyday Food magazine. The recipe is so good, it’s the reason I bought a subscription. It’s also extremely simple and easy to do for a crowd, since most of the cooking time is hands-off and you can prep most of it easily. Since I usually make this for guests, I have rewritten it to show the method I use when serving company. This recipe can easily be doubled, tripled, quadrupled, etc. – I have made it for as many as 70 people - simple, if you have big enough stockpots!

There are two key ingredients that I have found make more of a difference than I initially realized: the dried plums and the chicken stock. If you can find the cherry-essence plums (I use Sunsweet brand), the cherry flavor adds another subtle, delicious dimension to the recipe. (Of course, if you happen to have a plum tree and dry your own plums like my mom does, use those instead.) And, the chicken stock is integral to the flavor of the dish. If you have homemade stock, use it. If you must use store-bought stock, use only the best low-sodium variety you can find.

Moroccan Braised Chicken
Serves 6

6 whole chicken legs, drumsticks and thighs attached, skin removed
Coarse salt, ground black pepper, and paprika, for seasoning
1 generous tsp turmeric
1 generous tsp ground ginger
½ generous tsp ground cinnamon
1 ½ cups dried plums, finely chopped
1 large onion, chopped
Olive oil, for panfrying
2 cups best-quality chicken stock

If you’re making this for guests, I strongly suggest prepping everything in advance. I chop everything up, measure out the spices, and put the ingredients in individual containers so all I have to do at the last minute is dump things into the pot. Even if I’m not making this for a crowd, the mise en place helps things go more smoothly in preparing a weeknight dinner. So, with that in mind…

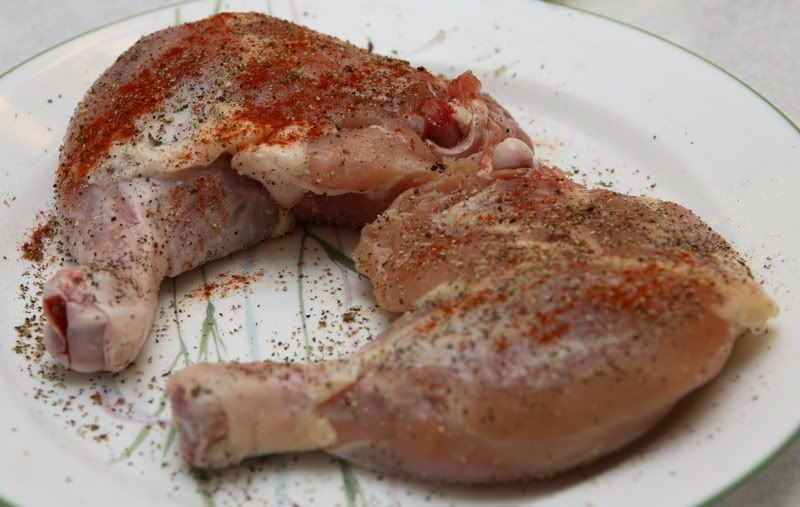
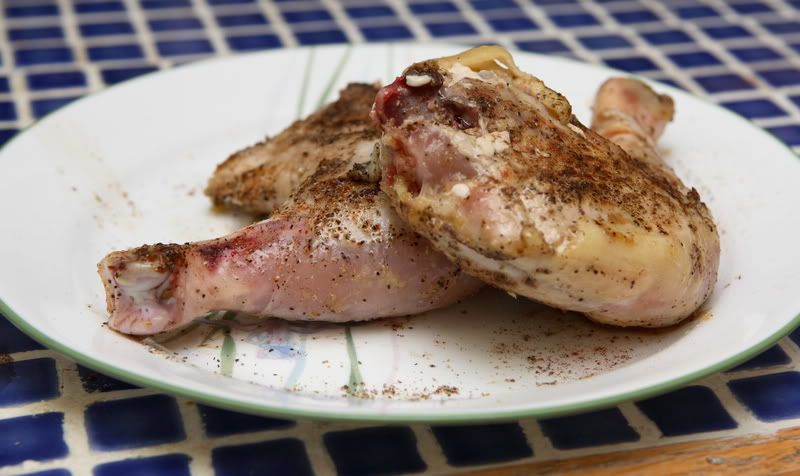
Season the chicken generously on both sides with salt, pepper, and paprika. Set the pieces aside.


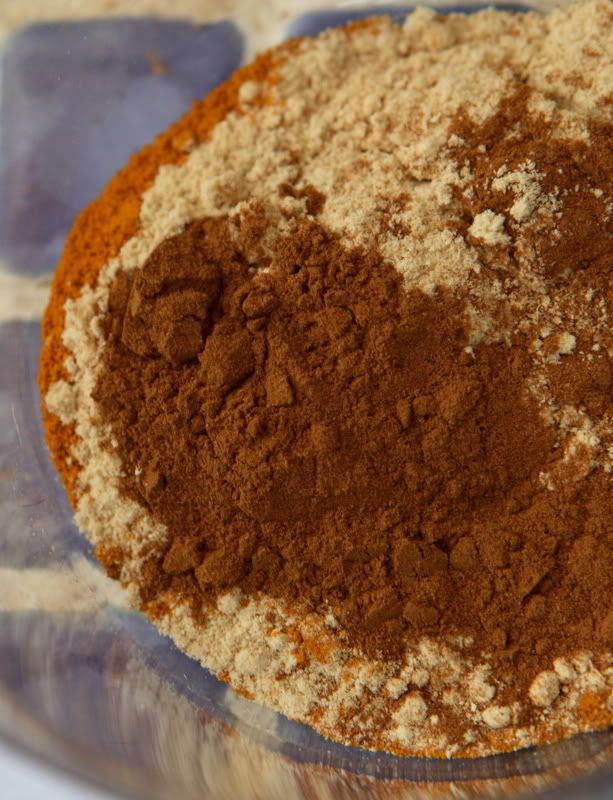
If you’re making this for a crowd, go ahead and measure out the turmeric, ginger, and cinnamon; set it all aside.


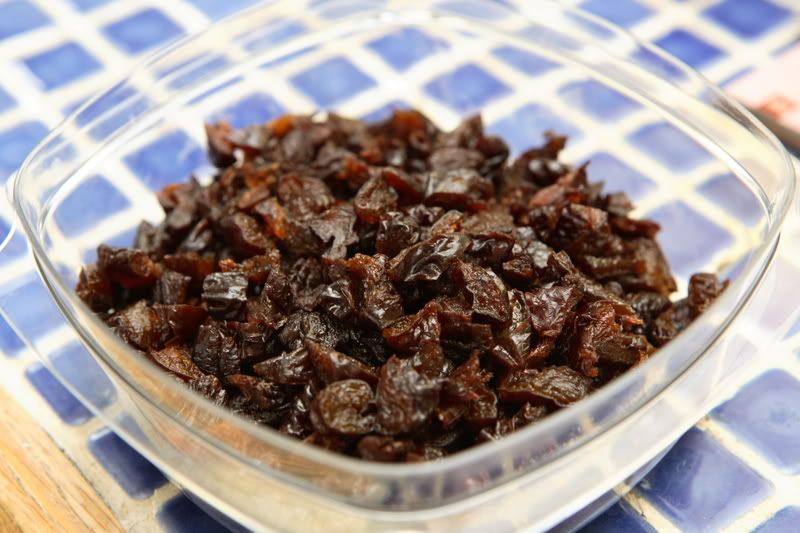
Chop the dried plums; set them aside.


You’ll need a large, 5-quart heavy pot with a lid. Chop the onion; place it in the pot with a few tablespoons of olive oil. Cook it over medium heat, uncovered, stirring often, until nicely browned. Remove it from the pot and set it aside.

In the same empty pot, add several chicken pieces, along with some additional olive oil and cook, uncovered, over medium-high heat, turning once, until browned. Transfer browned chicken to a plate; repeat with the remaining uncooked chicken, adding additional oil as necessary.


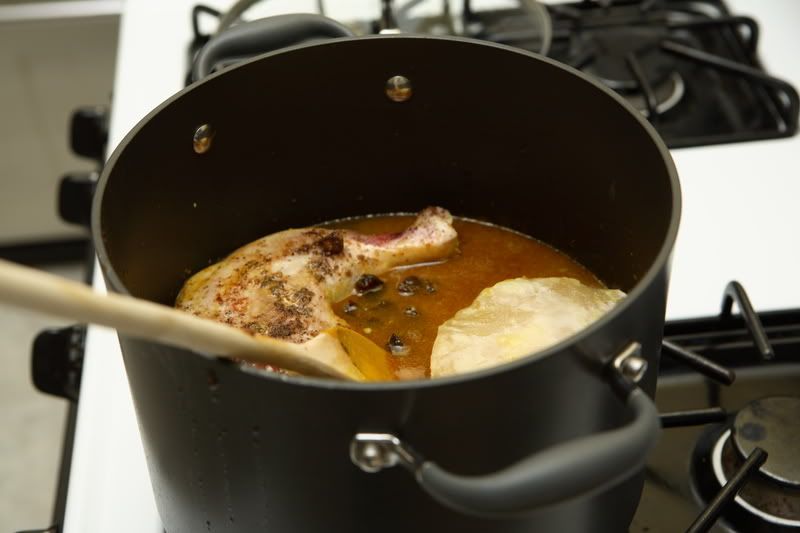
Once all of the chicken pieces are browned, remove them from the pan and return the browned onion mixture to the pot – the heat should still be at medium-high. Add the turmeric, ginger, and cinnamon, and give everything a stir. Add the chicken stock, stirring to scrape up any browned bits on the bottom of the pot. Add the chopped plums, then return the browned chicken to the pot.


What's that large yellow item in the pot next to the chicken? It's a block of frozen homemade chicken stock!


Bring the pot to a boil, then reduce the heat to a simmer. Cover the pot, leaving the lid ajar slightly so steam can escape. The chicken needs to be simmering for 45 minutes total, but give it a stir every 15 minutes. It’s unlikely the pan will go dry, but if it does, add additional stock as necessary.

The chicken will be very tender. It will have a deep golden color due to the spices. Although this isn't a curry dish, it looks similar to one (the spice turmeric provides the golden color of curry; you'll remember that turmeric is also used in this recipe). Truthfully, this is one dish that tastes better than it looks! Give it a try! It is outstanding!

To serve, plate the chicken and pour a small amount of the sauce from the pot on top of it. I always serve additional sauce so my guests can add more as they desire.
Sunday, February 24, 2008

Fettuccine with Spinach Pesto


This is one of my favorite recipes to make on a Monday night – the busiest night of my week, since I have a class to attend that night. I don’t have much time to make dinner that night, so we often have this since it is so quick to prepare!

I love this dish – it’s so bright, flavorful, and easy!

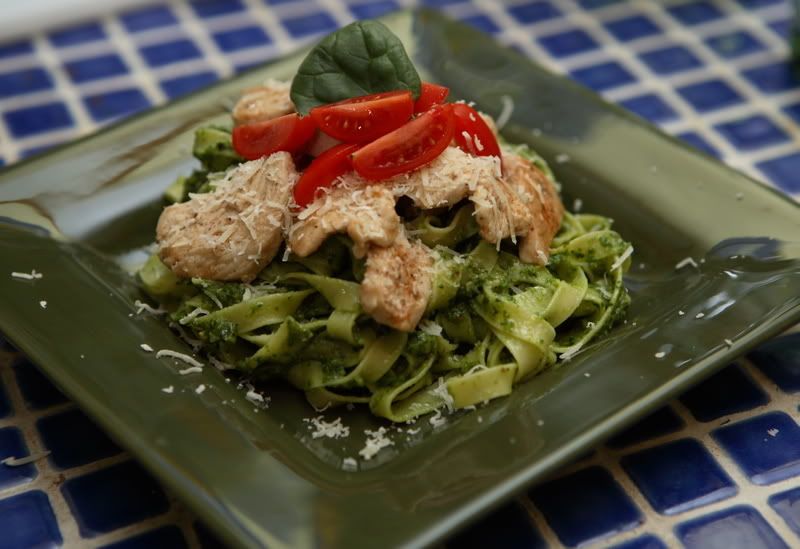
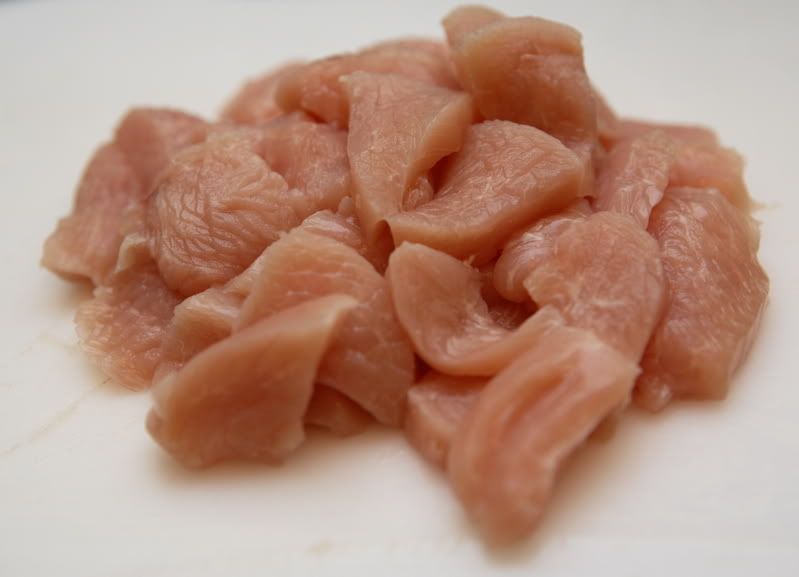
In the version shown below, I used turkey breast tenderloin, but I usually just make it with chicken breast. Either choice is delicious.

The original recipe came from the March 2007 issue of Everyday Food magazine. I make this recipe so often that I don’t even look at the original version anymore, so the recipe I’ve posted here reflects any changes I have made.
Fettuccine with Spinach Pesto
Serves 4

12 ounces fettuccine
2 boneless, skinless chicken breast halves, or an equivalent amount of turkey breast
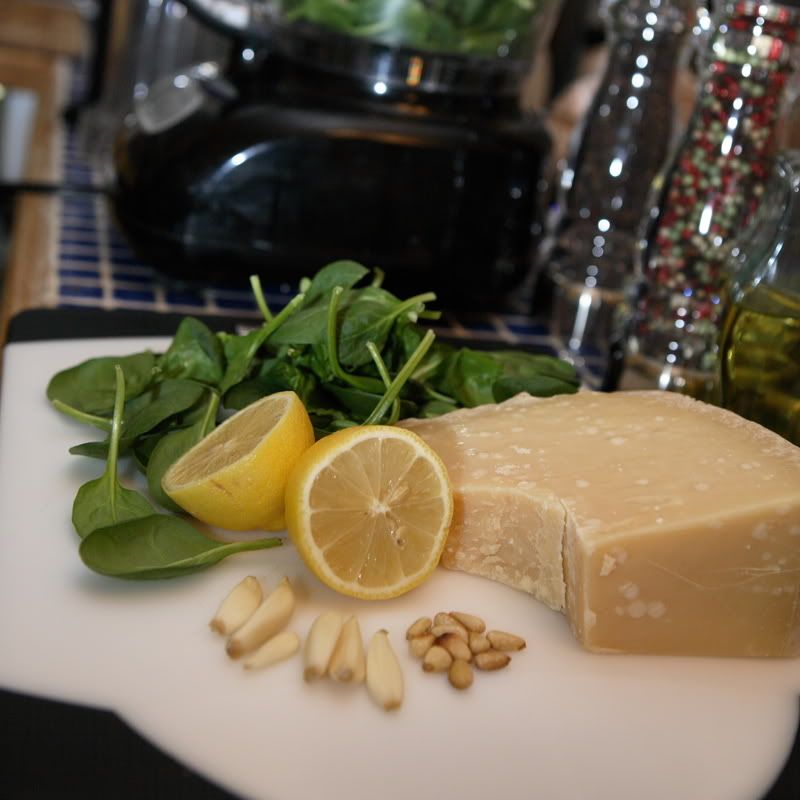
¼ cup pine nuts
10 ounces fresh baby spinach
3 ounces Parmigiano-Reggiano cheese, cut into chunks, plus a small additional amount for garnish
3 cloves garlic
Zest and juice from one lemon

Cook pasta according to package directions.


Meanwhile, chop poultry into bite-sized pieces.


Sprinkle poultry with salt and pepper. In a large skillet, cook the meat over medium-high heat until it is barely done


In a small skillet, toast the pine nuts over medium heat, stirring them constantly and watching them carefully to ensure they do not burn. Once they turn golden brown and start to smell toasted, remove them from the pan; set them aside to cool. Reserve 1 tablespoon for garnish.

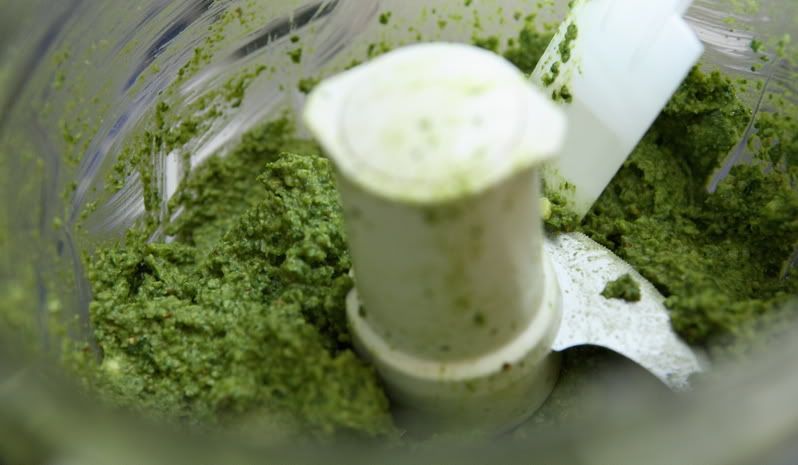
In the bowl of a large food processor, place the spinach, parmesan, 3 tablespoons toasted pine nuts, garlic, lemon zest, olive oil, and lemon juice. Process until everything is finely chopped, scraping the bowl as needed to ensure everything is evenly chopped.


While pasta is draining, place processed spinach mixture in the empty pasta pot over medium heat. Stirring constantly, cook mixture for 1 or 2 minutes, until the sauce is heated through. Add the drained, cooked pasta; stir to coat evenly. Garnish with the remaining tablespoon of pine nuts and parmesan cheese.

I also chopped up some cherry tomatoes and used them alongside a spinach leaf for garnish.

Tuesday, February 19, 2008

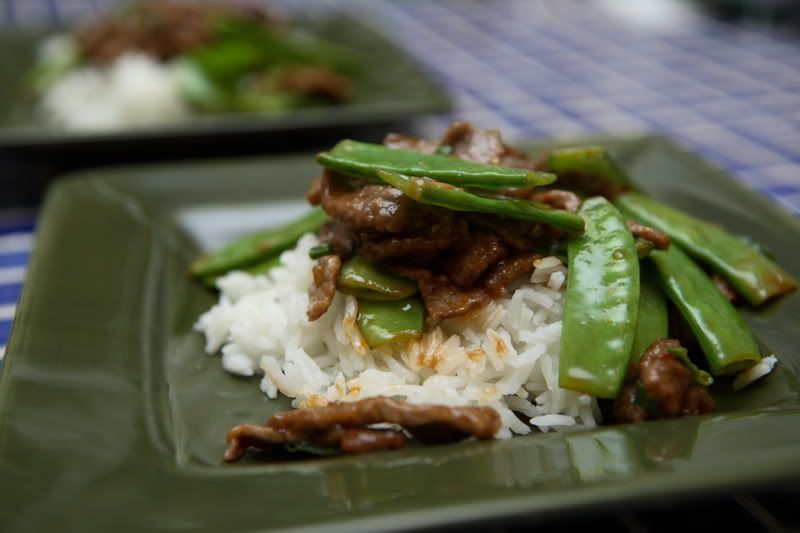
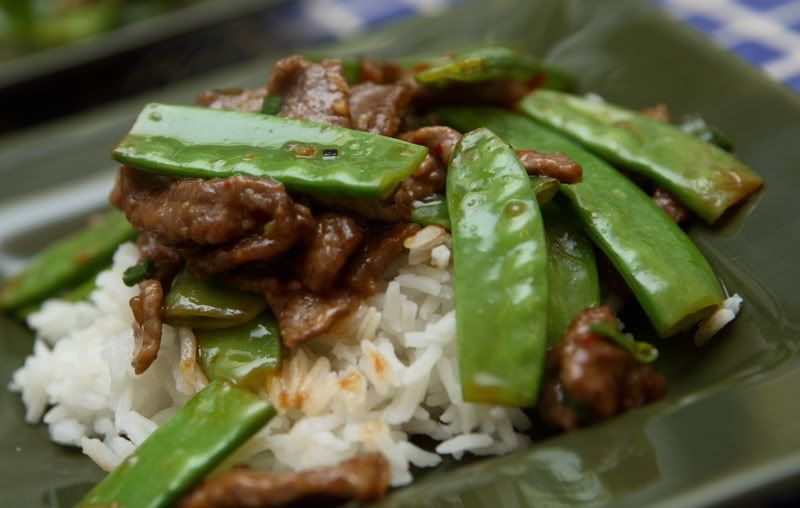
Ginger Beef Stir-Fry with Snow Peas and Jasmine Rice

Here’s a quick and easy weeknight dinner idea. The recipe is very flexible: you could easily substitute your favorite quick-cooking vegetable for the snow peas (try broccoli, carrots, or sugar snap peas). If you don’t happen to have any beef on hand, you could use poultry, pork, or a firm tofu in its place. The scallions add a nice flavor and are easier to prepare than onions – no tears! If you have any sesame oil on hand, drizzle a very small amount on top of your plated meals right before serving.


Ginger Beef Stir-Fry with Snow Peas and Jasmine Rice
Serves 4

1 cup jasmine rice (or any Asian rice)
Water, for cooking the rice (refer to the rice package directions for the quantity)
1 lb sirloin steak
1 Tbsp cornstarch
Ground black pepper
2 Tbsp low-sodium soy sauce, divided
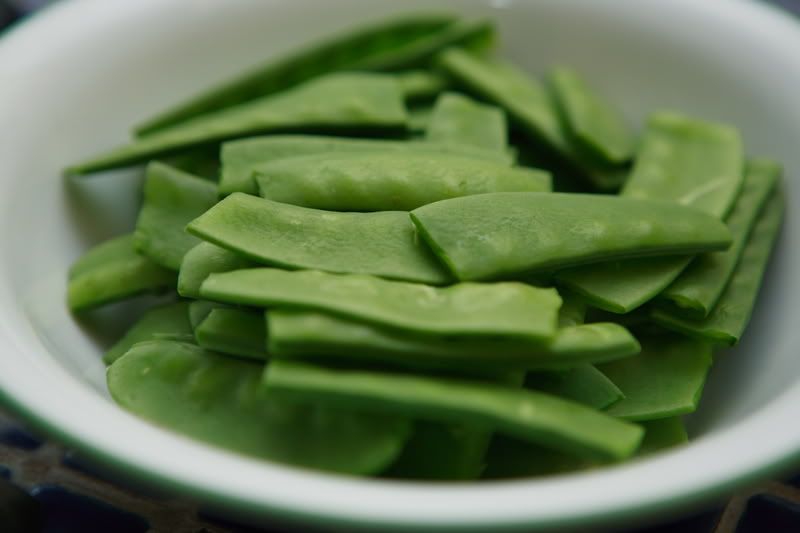
12 ounces snow peas, trimmed as necessary
Vegetable oil, preferably peanut oil, for stir-frying
1 clove garlic (or to taste)
1 Tbsp fresh ginger, peeled and finely chopped
5 scallions
1 Tbsp chili garlic sauce, such as Lee Kum Kee brand (or use your favorite Asian hot sauce, to taste)
Juice of one lime
1 Tbsp brown sugar


Start to cook the rice according to the directions on its package.

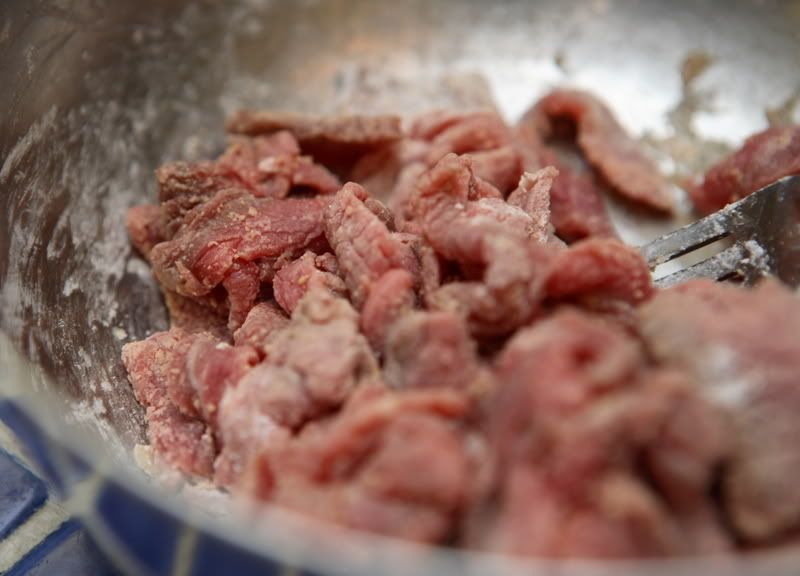
Meanwhile, slice the steak as thinly as possible into bite-sized pieces. Toss the pieces in the cornstarch, pepper, and 1 tablespoon of the soy sauce. Set aside.


Finely chop the garlic; set it aside. Peel and finely chop the ginger; set it aside. Trim the snow peas; set them aside.


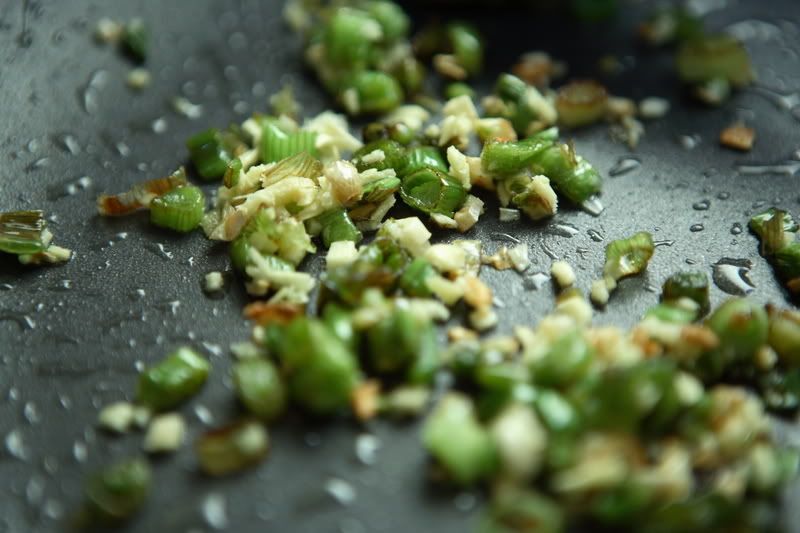
Finely chop the scallions, separating the green “tops” from the lighter green and white “bottoms."

Heat the vegetable oil in a large frying pan or wok over medium-high heat; add the chopped garlic and the chopped scallion “bottoms” (set the “tops” aside, they will be added later).


Stir-fry the garlic/scallion mixture for a minute or two, then add the trimmed snow peas. Stir-fry the snow peas until they turn bright green, then transfer the snow pea mixture to a bowl, emptying the frying pan.

Heat a small additional amount of vegetable oil to the pan, then add the sliced steak and the chopped ginger to the pan. Stir-fry the meat until it is barely browned – it will just take 1 or 2 minutes. Return the snow pea mixture to the pan; add the chili garlic sauce, lime juice, brown sugar, remaining 1 tablespoon of soy sauce, and scallion “tops.” Stir to incorporate and heat all of the ingredients. Serve piping hot with rice.

Saturday, February 16, 2008

Valentine's Dinner: Veal Marsala


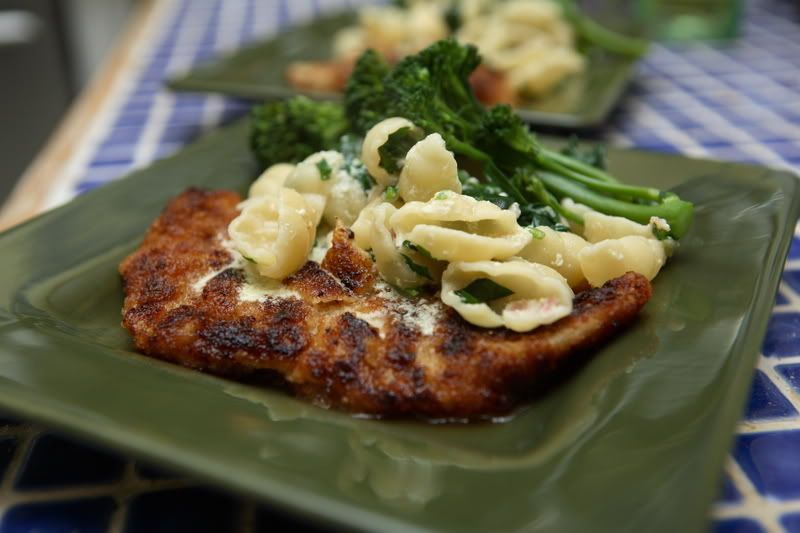
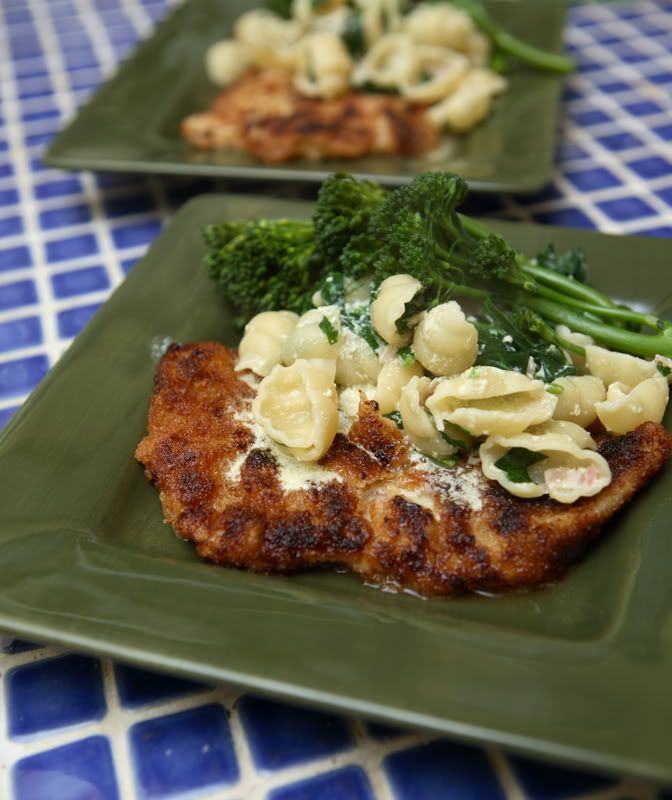
To go along with our Valentine's Day Bittersweet Chocolate Mousse, we had a variation of Veal Marsala, served alongside some broccolini and a quick pasta with a sauce inspired by the classic Italian carbonara sauce. I didn’t use a recipe for the pasta sauce, since it was thrown together at the last minute with a few ingredients I had on hand: “hmmmm what could I put on this pasta?”

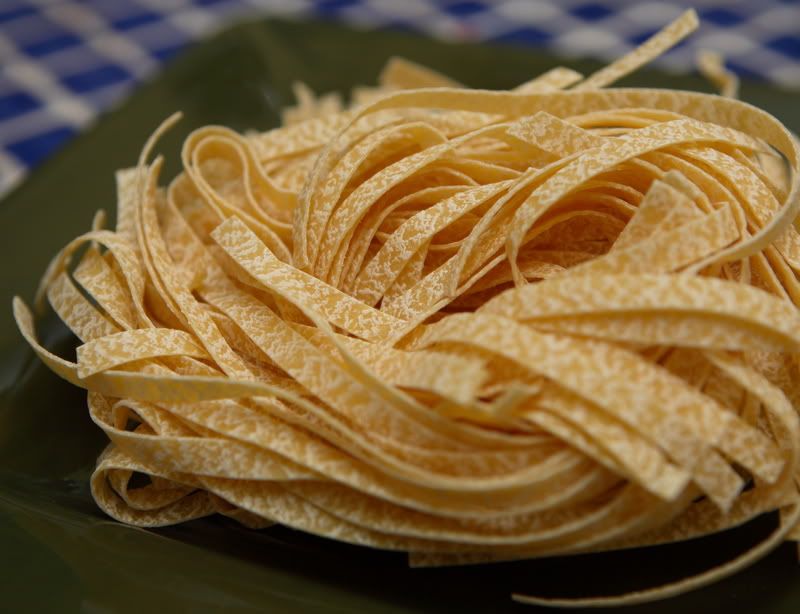
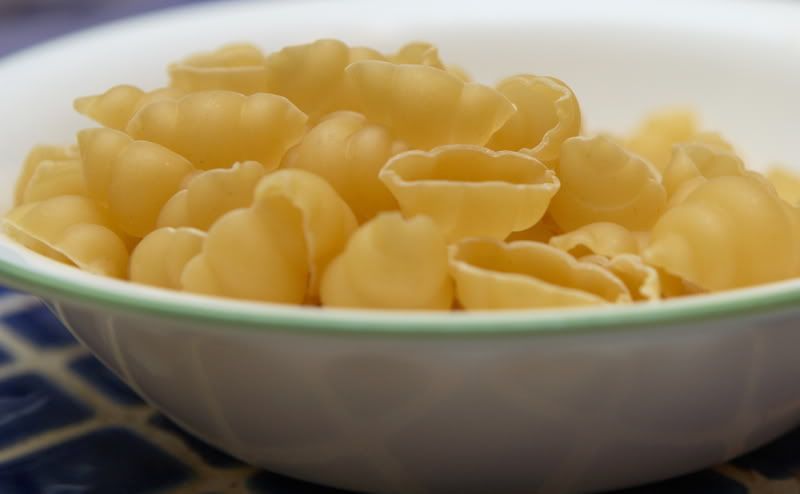
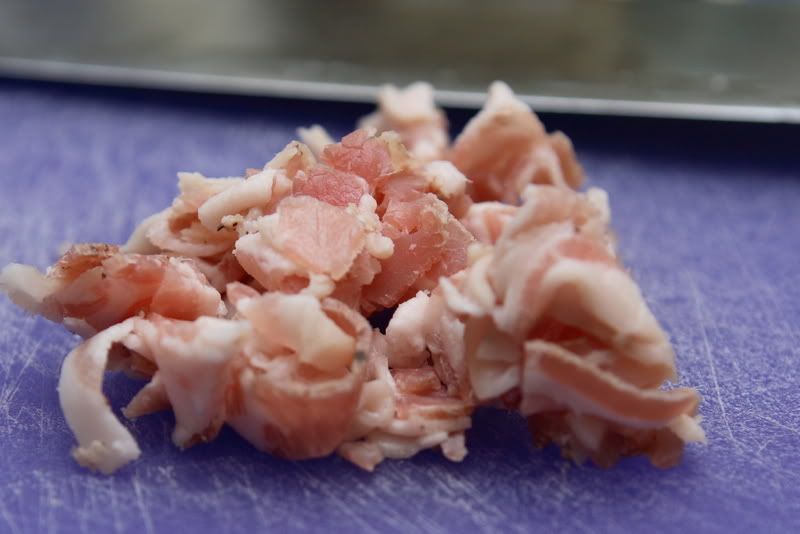
Carbonara pasta is basically pasta with a creamy sauce containing copious amounts of cheese (typically Parmesan Reggio), eggs, and Italian ham. It’s a very luscious, delicious, rich dish – but since my meal wasn’t focusing on the pasta, and since Carbonara isn't exactly health food, I felt it was acceptable to scale it back in fat content (I used homemade chicken stock in lieu of some of the dairy, and used a smaller quantity of half-and-half instead of the full quantity of cream.). Yeah, it wasn’t quite as rich and delicious as normal, but nor was it quite as sinful either. It was still a very tasty side dish for our meal. I snapped a couple of pictures of the uncooked pasta and the pancetta to pique your interest:


The Marsala recipe came from Make It Italian, by Nancy Verde Barr. It could easily be made with chicken or turkey cutlets pounded thin. The recipe below reflects my changes from the original recipe.

Veal Marsala
Serves 4

About 1 pound veal scaloppine, pounded to ¼-inch thick, cut into manageable sizes
1 cup flour
Salt and pepper
1 egg, lightly beaten with a few tablespoons of water
1 ½ cups fresh bread crumbs
Several tablespoons of olive oil, for pan-frying
2/3 cup dry Marsala wine
2 Tbsp unsalted butter

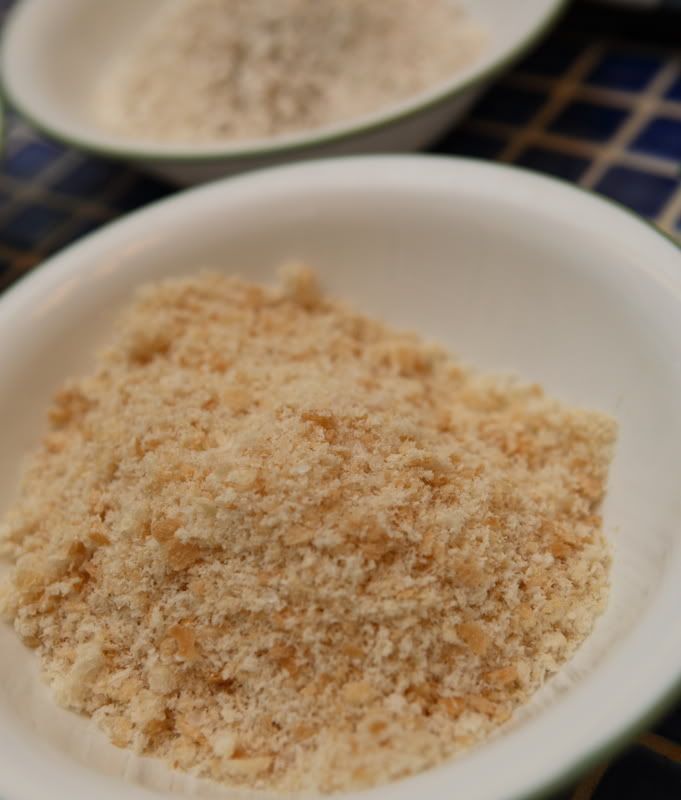
Thoroughly dry the veal with paper towels. In a small bowl, season the flour generously with salt and pepper. Prepare a little assembly line: one bowl of the seasoned flour, one bowl of the beaten egg mixture, and one bowl of bread crumbs.


Dip the veal into the flour, being careful to coat the piece entirely. Pat the meat to remove any excess flour, then dip it into the egg mixture, coating the piece entirely. Allow the excess egg to drip off of the meat, then transfer the veal to the bread crumbs, using your fingers to pat the crumbs onto the meat.

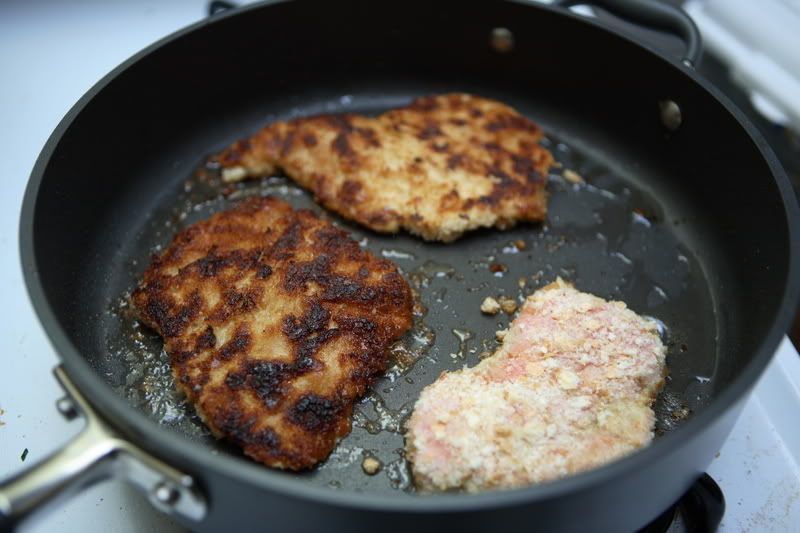
Heat the olive oil in a large frying pan over medium-high heat. Add the coated meat pieces and cook until barely they are nicely browned, but barely done. (Depending on the thickness of your meat, it might be as little as 1-2 minutes on each side.) Be cautious as you are turning the pieces, as the coating is delicate and may start to fall off. Remove the meat from the pan; set aside.


Add the Marsala and butter to the pan, stirring to scrape up any browned bits. Allow it to boil aggressively for a few minutes. Return the meat to the pan, warming it through. Serve immediately.