Showing posts with label The Daring Kitchen. Show all posts

Sunday, September 20, 2009

Mini Dobos Tortes - the August Daring Baker's Challenge


The August 2009 Daring Bakers' challenge was hosted by Angela of A Spoonful of Sugar and Lorraine of Not Quite Nigella. They chose the spectacular Dobos Torte based on a recipe from Rick Rodgers' cookbook Kaffeehaus: Exquisite Desserts from the Classic Caffés of Vienna, Budapest, and Prague.

I know, I know, it’s not August anymore. It’s actually past time to do the September challenge already. Obviously I am really late this month! Between school, work, life, family, and the million-and-two other activities that seem to take up my week…you know how it is.

One thing about this torte: it’s not incredibly difficult to make, but it takes a fair amount of time to complete the entire process. (Don’t start this on a Sunday night if you’ve got to get up early for work on Monday morning!) Fortunately, the recipe can be broken down into several individual components, which makes things easier to manage. I made the individual cake layers one day and finished the rest of the cake components and assembly the next day.

The torte recipe was originally written to make one five-layer 9” cake. I like making individually-sized desserts, so I scaled the cake down and made several mini Dobos Tortes. And, I felt the layers would be more visually appealing if they were thinner, so I made twice as many layers that were half as thick. (Those decisions were a large part of what made the cakes so labor-intensive…it would have gone a lot faster if I would have only had to frost and stack five layers instead of 30.)

Before you get started, you’ll need a few specific pieces of equipment. You’ll need some cookie sheets that are decent enough quality that they won’t warp when they heat up – mine are the thicker insulated type, and they worked perfectly. Also, I’d highly recommend that you use two offset spatulas: one large one for spreading the cake batter, and one small one for frosting the miniature cakes. (I don’t own a small offset spatula, so I used a small butter knife serving utensil from my silverware…it worked, but a small offset spatula would have worked even better.) Also, stock up on parchment paper…you’ll need quite a bit of it…and you might want to have some less expensive waxed paper on hand for some of the steps that don’t involve baking. You will also need a circular cookie cutter. I used a 3-1/16” cutter; whatever size you select will be the size of the diameter of the finished cakes. And, while we’re on the topic of equipment, if you have a double boiler, get it out. If not, don’t run out and buy one just for this purpose - you can improvise with a bowl set over a pan of simmering water.

Mini Dobos Tortes
Makes 3 or 4 cakes, depending on how tall you want to stack them

Make the sponge cake layers first, as they need to be cooled prior to assembly. If necessary, they can also be stored the longest out of any of the components – just stack the cakes up between sheets of waxed paper and store them in an airtight container.

6 large eggs, separated, at room temperature
1-1/3 cups (162g) confectioner's (icing) sugar, divided
1 teaspoon (5ml) vanilla extract
1 cup plus 2 tablespoons (112g) sifted cake flour
A pinch of salt

Position a rack at the top of your oven; preheat the oven to 400 degrees F.

In a large mixing bowl, using clean beaters, (use your stand mixer and the wire whip if you have one) beat the egg whites until soft peaks form. Gradually beat in 2/3 cup (81g) of confectioner's sugar until the whites form stiff, shiny peaks.


While the egg whites are whipping, begin the next step: In a separate large bowl, whisk together the egg yolks, 2/3 cup (81g) of the confectioner's sugar, and the vanilla. Whisk until the mixture is thick and pale yellow.

Using a large rubber spatula, stir about 1/4 of the beaten whites into the egg yolk mixture. Then, gently fold in the remainder of the beaten egg whites, leaving a few wisps of white visible.


Scatter the pinch of salt evenly over the surface of the egg mixture. Then, sift half the flour over the egg mixture. Gently fold it in; repeat with the remaining flour. (The only sifter I own qualifies as a decorative antique, so I just use my fine mesh sieve to shake the flour over the cake batter.)


Line a cookie sheet with a large piece of parchment paper. Using an offset spatula, spread about 200g of batter over the surface of the parchment paper into a big rectangle. (If you don’t have a scale to weigh the batter, don’t worry, just start with about 1 cup of batter and work up. Actually, I didn’t bother weighing the batter every time; I only weighed it so I could give you an idea of the approximate amount of batter you should use.) Spread the batter out into a large rectangle, approximately 12x15 inches. The length and width of the rectangle is not as important as the thickness of the batter: the batter should be spread out to somewhere between 1/8” and 3/16” thick (1/4” is thicker than I wanted my cakes to be). Try to make it as uniform in thickness and as smooth as possible. But, caution: if you can see the parchment paper through the batter, it’s too thin.


Bake the cake on the top rack until the top of the cake is lightly browned and the cake springs back when you touch it, 4 to 6 minutes. I found the baking time really varied depending on whether or not my gas oven happened to be actively working to heat the oven during the time the cake was inside…there’s a pretty good variation in temperature there that’s not normally noticeable over a 20 or 30 minute bake time. In short, keep an eye on the cakes – they’re so thin that they can overbake in a matter of a minute.


Once the cake has baked, slide the parchment and cake together off the cookie sheet. Let it sit flat on a heatproof countertop for a minute until the cake has cooled slightly: it should still be warm, but it should have cooled enough that you can handle it. (Don’t let it cool too long, or the cake will become too crisp and will break during the next step.) Rest a piece of parchment paper on top of the cake and flip the entire cake over, upside down. Peel the parchment paper off of the underside of the cake. Replace the same parchment paper back on the cake, then flip it all back over. Remove and save the top parchment paper – if it’s not too dirty you can reuse it. (These steps of flipping and peeling paper off will greatly aid in removing the cake during the next step.)

Use a round 3” cookie cutter to cut circles out of the baked cake. I pushed the cutter into the cake, pulled the cake circle and cutter away from the cake as one unit (with the cake still stuck inside the cutter, I mean).


Then I pushed the blade of a flat spatula against the outside of the circular cookie cutter, which trimmed the ragged edges off of the cake.


Once I pushed the circle out of the cookie cutter, I had perfect little cake circles. The cake would gum up the cookie cutter after 3 or 4 cuts, so I just used my fingernail to scrape the cake residue off of the blade.


I got 35 circles out of the entire recipe. While I was cutting out cake circles, I stacked up some of the scraps to gauge their thickness, and decided I wanted my cakes to be 10 layers thick. So my yield is three 10-layer cakes, with a few extra circles to account for breakage during assembly. You could also make four 8-layer cakes.

Set the cut circles out on a cooling rack. Don’t let the edges touch or they’ll stick together. You’ll notice that the one side of the cake is stickier than the other side – don’t let the cakes rest on their sticky side.


The cakes can be made ahead up to this point. Once the cakes have cooled completely, you can stack the cakes between layers of parchment paper. Store in an airtight container or wrap the stacks well. If you’re only storing the cakes overnight, they can be left at room temperature. If you refrigerate the cakes, let them come to room temperature before you attempt to unwrap them.

The next step is the chocolate buttercream. Although it can be stored at room temperature overnight, I made mine the same day I served it.

Chocolate Buttercream

4 large eggs, at room temperature
1 cup (200g) caster (ultrafine or superfine white) sugar
4oz (110g) 70% cacao dark chocolate, finely chopped
2 sticks plus 2 tablespoons (250g) unsalted butter, at room temperature.

First, prepare a double-boiler: fill the bottom half of a double boiler about 1/3 of the way with water and bring it to a boil. Once it begins to boil, back the heat down so it is at a simmer.

Meanwhile, off the heat, in the top half of the double boiler, whisk together the eggs and sugar until they pale and thicken. Once the water is at a simmer, fit the top half of the pan onto the bottom half and continue whisking the egg mixture over the heat another 2 to 3 minutes. Whisk constantly. The mixture will continue to thicken and will become somewhat foamy. Whisk in the finely chopped chocolate and cook, stirring, for another 2 to 3 minutes more.

Scrape the chocolate mixture into a mixing bowl and leave to cool to room temperature. (If you have a stand mixer, use its bowl!)

Once the chocolate mixture has completely cooled to room temperature, beat in the softened butter on high speed, one a small piece (about 2 tablespoons/30g) at a time. For best results, use a stand mixer or an electric hand mixer. Once the butter has been completely added, continue beating the mixture until you end up with a thick, velvety chocolate buttercream. (There is a period in the mixing process where it looks very soupy and nothing like buttercream. Keep beating, it will come together eventually. Don’t give up.)

The next step is to begin assembling the Dobos tortes.

If you haven’t already done so, count your cake layers and decide how many cakes you’ll make. Choose several of the least wrinkled, most evenly baked, best-looking cake layers from the selection of mini cakes you baked earlier. These layers will be the topmost layer on your finished tortes, so you’ll need one layer per finished cake. You might want to grab an extra one or two to account for potential breakage. Set the good cake layers aside from the others; save them for later.

I assembled my cakes directly on their serving plates. To keep the plates clean, I cut up little strips of waxed paper and put them under the edges of the cake. Once they were entirely iced, I pulled the strips out. Voila, clean plates. I recommend you do that.

Place a small dab of frosting on the center of your serving plate. Top with one cake layer – press it flat to create a good foundation for your cake. Thinly ice the top of the layer, then top with another layer and repeat the icing/stacking process until all of the layers are iced and stacked except for the top cake layers you set aside earlier (leave those off for now, they will be added later). As you’re working, take care to build the cake up as evenly as possible to avoid a “leaning tower of Dobos.” If your tortes start to lean, toothpicks inserted vertically might help. Keep your icing thin and your “tower” will probably be just fine.


Once the layers are stacked (except for those reserved layers), frost the top and sides of the torte. Set the frosted tortes aside.


The last step is the decorative sugar toppings. It is best to make sugar topping and any other decorations as close as possible to serving time. They should be made the same day they will be served and should be kept in a cool, DRY place (not a refrigerator – it’s too moist). If you absolutely must store the sugar decorations, store them in an airtight container with a packet of desiccant enclosed. Don’t place sugar decorations directly on top of the cake until immediately prior to serving, or moisture from the cake and frosting will harm the sugar.

If you’ve never worked with sugar, you might be surprised to learn that working with sugar is actually very easy. It is kind of messy, so use waxed paper or newspaper to keep it from getting all over your countertop. I encourage you to try it out…the candied hazelnuts are much easier than you might think, and are very impressive-looking. They taste pretty good too.

Candied Hazelnuts and Cake Tops

The reserved unfrosted, unstacked mini Dobos torte cake layers
6-8 whole hazelnuts (or, whatever the quantity you need to top your cakes, plus a few extras to account for breakage), for the candied hazelnuts
6-8 additional hazelnuts, to be chopped for the side of the cakes
1 cup sugar
12 tablespoons (180 ml) water

First, the setup for the candied cake tops: Use newspaper or waxed paper to cover your countertops. Over a piece of waxed paper, place a wire cooling rack. Place the unfrosted, unstacked cake layers on the cooling rack. Set them out so they don’t touch each other, and leave a decently sized gap between them. For best results, use a cooling rack with larger gaps.

Toast all of the hazelnuts in a dry skillet over medium heat until they barely begin to change color. Don’t let them burn. Turn them out onto a paper towel; let them cool slightly until you can handle them. Divide them back into two portions: those to be candied and those to be chopped.


We’ll get set up to candy the hazelnuts next. You’ll need to devise a way to suspend the hazelnuts. I suggest you come up with something similar to what I did: I used an open cabinet which hangs overtop my countertop. I stuck a skewer into each hazelnut and weighed the skewer down with small but heavy plates. I covered my countertop with waxed paper. Get everything ready to go.


Gently insert a skewer partway into each hazelnut. Don’t insert it too far, or you’ll break the hazelnut into pieces. (That’s why you have a few extra to account for breakage. If you break one, swap it out with one from the reserved pile of nuts to be chopped for the sides of the cakes.)

Next, make the candy syrup. Once your syrup has cooked, you’ll need to move quickly so go ahead and read ahead in the recipe before you begin…so you know what’s coming…

Stir the sugar and water together in a small saucepan – nonstick will give you the easiest cleanup later. Bring to a boil over a medium heat, stirring to dissolve the sugar. Once the sugar has dissolved into a smooth syrup, turn the heat up to high and boil without stirring, swirling the pan by the handle occasionally and washing down any sugar crystals on the sides of the pan with a wet brush until the syrup has turned into an amber-colored caramel. (We’re boiling until we reach approximately 340 degrees F. Caution: Your thermometer must be clean and dry every time you insert it in the sugar syrup. Another caution: Although it takes awhile to cook from the first step to the perfect stage of golden, it will change from a beautiful caramel color to burnt in a matter of seconds, so don’t let your guard down - stay on top of it!)

Once the syrup has turned to caramel, immediately pour a thin layer over the top of each cake. Work quickly – the longer the syrup is in the pan, the more it will continue to cook due to residual heat. Also, try to conserve the syrup as you pour – you will still need to use part of it to dip the hazelnuts. Depending on how good you are at metering out the syrup, it might just be easiest to plan on making two batches of syrup. Another tip: try to avoid overpouring because an excessive amount of syrup will “glue” the cakes to the cooling rack (that’s why you have extra cakes – in case some break as you attempt to remove them from the rack.) Don’t try to remove the cakes just yet because you need to dip the hazelnuts while the syrup is still hot...

After you’ve poured the syrup over the cakes, immediately begin dipping the skewered hazelnuts. Gently dip each one into the pan, then suspend it so the excess syrup drips off of it in a long string.


Some of it will break off and collect on the waxed paper. You can gather this excess up into a loose “birds nest” and save it to use as a cake decoration, too.


Note: Avoid getting any moisture in the syrup or it will seize up into a gritty unattractive mess. If that happens, or if you run out of syrup, you’ll need to caramelize more sugar…

The candied nuts and cake pieces need time to cool to firm up. Meanwhile, chop the reserved, uncandied hazelnuts. Gently press the chopped nuts onto the sides of the frosted cakes.

The sugar syrup on both the cake tops and the hazelnuts should harden up fairly quickly. (If they don’t firm up into brittle sugar pieces, you didn’t cook the sugar syrup long enough.) Once they are completely firm, you can gently handle them. Try to avoid touching them any more than necessary because you could leave fingerprints or moisture marks on the sugar. Use scissors to trim the hazelnut “drips” to your preferred length – you can leave them long and dramatic or you can trim them to several inches if you prefer. Gently twist the skewers out of the hazelnuts. Remove the candied cake pieces from the cooling rack – you might need to turn the rack upside down and pop the pieces off from the underside if the sugar was poured on too thickly.

Immediately prior to serving, top the Dobos tortes with a piece of candied cake. Garnish with the candied hazelnuts. Serve immediately.

Monday, August 3, 2009

Homemade Marshmallow - Part of the July Daring Baker's Challenge

The July Daring Bakers' challenge was hosted by Nicole at Sweet Tooth. She chose Chocolate Covered Marshmallow Cookies and Milan Cookies from pastry chef Gale Gand of Food Network.com.


I have been struggling with how to write this post. I don’t like to sugarcoat my writing to give a false impression of glowing success in the kitchen, but nor do I want to be a total downer when something didn’t turn out quite right.

To be totally frank, I thought the recipes weren’t written very well. Definitely great ideas, but it’s obvious that the Food Network didn’t take enough time to test and rewrite either of these recipes. I was hoping I’d have time to test and retest to give you a better recipe, but with that backache problem I had earlier in the month, I just ran out of time. (I actually made the cookies before my back acted up, but once the back went out, that was it for the month. I barely got through the Daring Cook's challenge, and as you can see by the lack of other posts, I wasn’t able to make much of anything else either. Although my back has mostly healed by now, I’m late on this post because I’ve been out of town for a week.)

I’m not entirely ruling out “baker’s error” on my part...but I see that a number of other Daring Bakers had similar results, so I’m less likely to think the problems I identified were due to our Bakers’ own mistakes. I was also very cautious to follow the recipes exactly (especially once I identified several red flags). But, maybe they didn't turn out because of something I did - there were a number of other Daring Bakers who were happy with their results.

--------------------


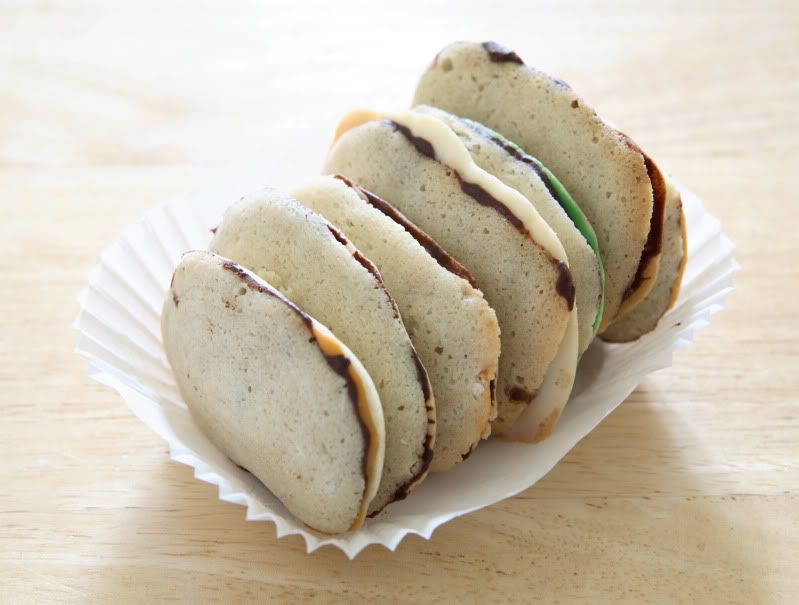
The Milan cookies were two thin cookies sandwiched together by a ganache filling, mimicking the appearance of the Pepperidge Farm Milano cookies. I was really excited to make these cookies, as the Pepperidge Farm version (specifically the mint flavor) are one of my favorite types of store-bought cookies. I love their crisp, buttery texture, and couldn’t wait to try them at home.

Unfortunately, the Food Network version didn’t taste anywhere close to the Pepperidge Farm version. Nor did they taste better (I don’t mind improving on something already delicious, but these cookies didn’t fit the bill). They were chewy and gummy regardless of their baking time (no, they weren’t underdone, I tried quite a few trays with a wide variety of baking times). The recipe called for an insane amount of lemon and vanilla extract (2 Tbsp each – that’s 1/4 cup total!), thus the dough reeked of cheap alcohol and didn’t taste any better. The baked, unassembled cookie reminded me more of a poorly-executed tuile cookie than the Milano cookies I’ve bought from the grocery store. The recipe’s suggested yield was inaccurate and the cookie size recommended in the original recipe was not authentic.

So, I am not including the recipe here because I don’t post things on this blog that I’m not reasonably confident about. (My rule of thumb is, if I wouldn’t serve it to houseguests, I’m not posting it on here. And if I can’t give a friend the link to the recipe and expect her to be able to recreate it herself, it’s not going on the blog.) You can click on over to the host’s blog or over to Food Network if you are dying to try the cookies out...

I will give you a photo – they looked good enough, they just didn’t taste good.


I did make multiple flavors of filling - shown from left to right are white chocolate/butterscotch, chocolate/orange zest, plain chocolate, chocolate/white chocolate, chocolate/mint, and a few duplicates: another straight chocolate, and another chocolate/butterscotch. The filling tasted good – it was simply basic chocolate ganache variations.

--------------------


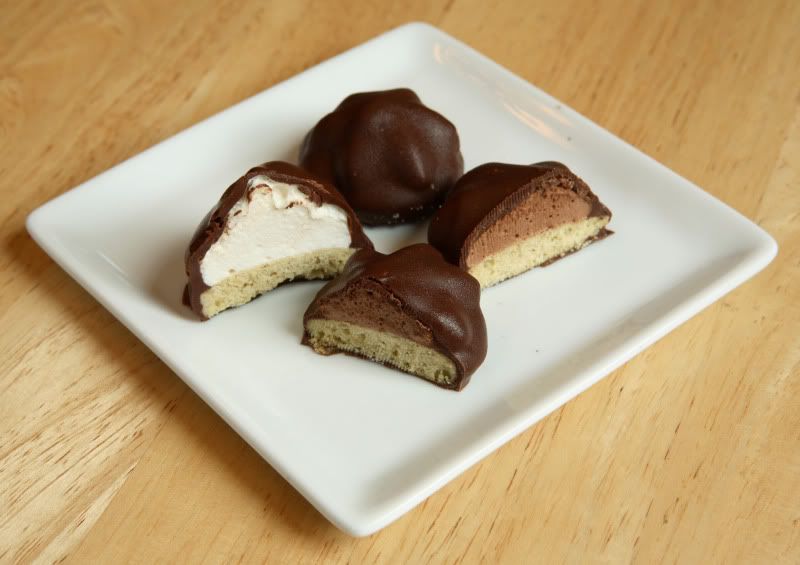
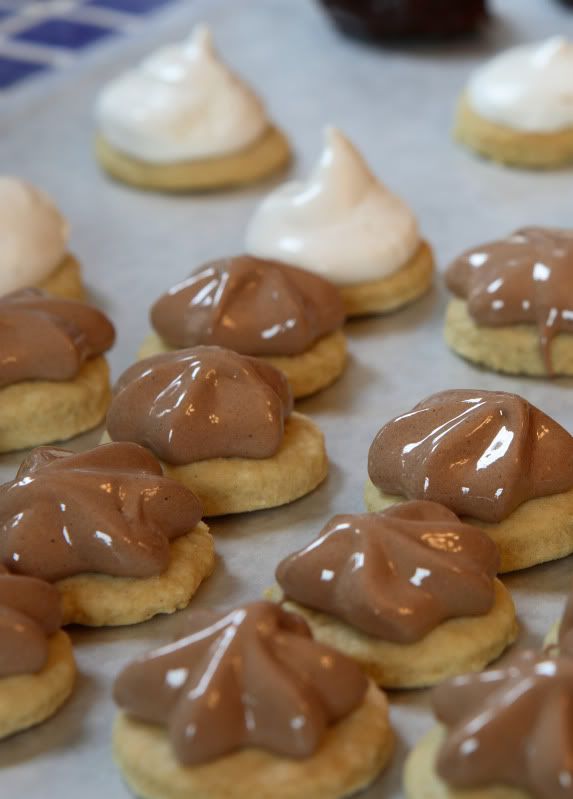
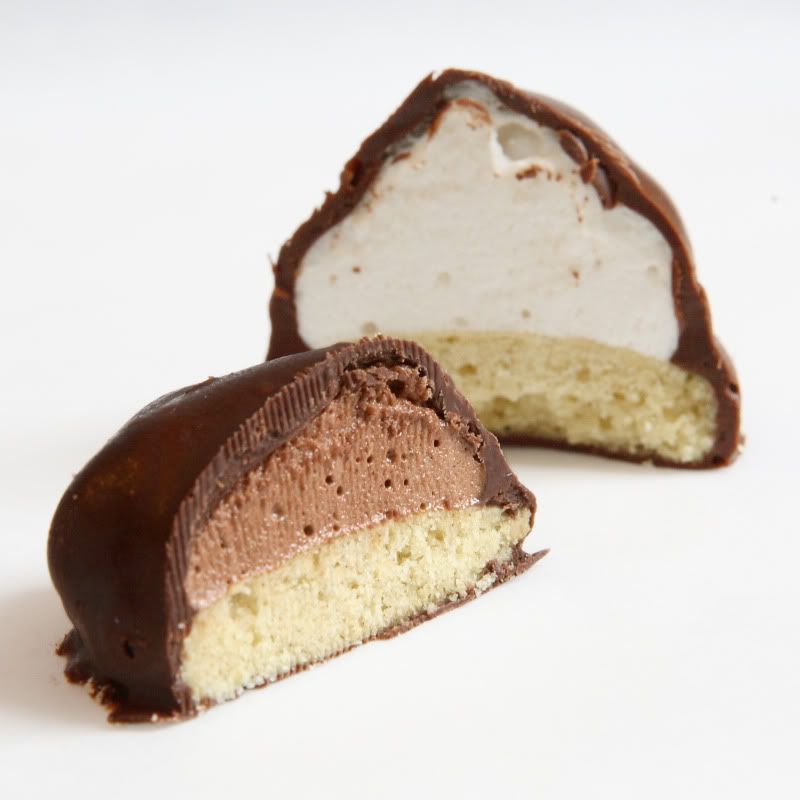
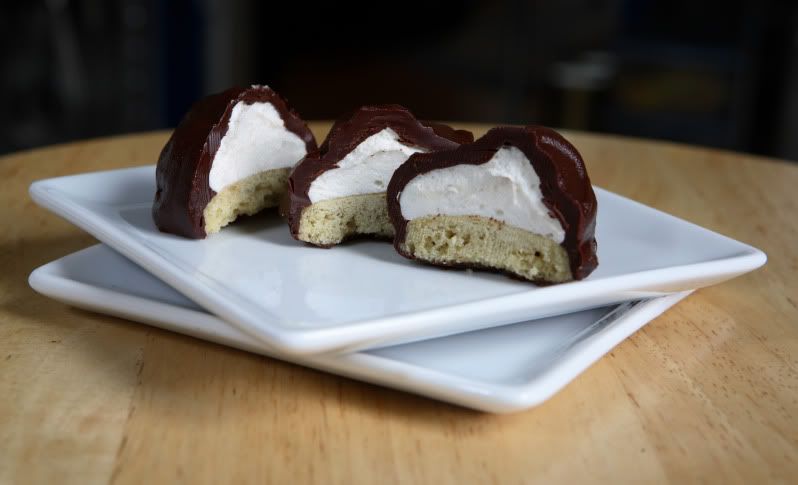
The marshmallow cookies were composed of three parts: a cookie base, which was topped with a homemade marshmallow “kiss,” all of which was dipped in a chocolate coating. My opinion of this recipe is varied: The “base” component of the cookie was dry and tasteless, and the recipe yielded twelve dozen cookies even though it indicated a yield of only two dozen. The marshmallow topping yielded enough to make four dozen cookies (that’s still twice as much as the suggested yield, but definitely not nearly enough to cover all of the cookies). And the chocolate coating yielded exactly the amount suggested in the original recipe: two dozen cookies. However, it was sticky and wet at room temperature, and bloomed as it sat to dry. Even after I popped the cookies in the refrigerator to set the chocolate up firm, the chocolate still did not have an appealing texture or appearance, and it melted once it was returned to room temperature. Tempering the chocolate would have solved these problems – and as I made a second batch of chocolate coating, that’s exactly what I did, with much better results.

Despite all the issues these cookie recipes presented, the marshmallow component was absolutely delicious, and it was a fun challenge - I’m glad I tried it, as I rarely make candy. I won’t give you the recipe for the entire completed cookie on this blog, but I will give you the marshmallow recipe, and you should make the marshmallow soon! Use it to top your favorite crispy sugar cookie recipe, or try a homemade graham cracker cookie, or a crunchy chocolate cookie, anything. Then dip it all in tempered chocolate, and you’ll have a delicious final product that’s similar to the intent of the original recipe. Or use the marshmallow to make homemade s’mores – toast them over your charcoal or gas grill if you don’t have plans to be near an open fire. You can pipe marshmallow “kisses” directly onto a piece of parchment paper dusted liberally with cornstarch.

I wouldn’t recommend that you double the marshmallow recipe because there’s a small window of time where it’s firm enough to not be overly runny, but soft enough to pipe into your desired shape. If you make too much marshmallow up at once, you won’t be able to pipe them all out before things set up and become too firm.

Another recommendation: I made my first batch of marshmallow with a stand mixer with the wire whip attachment. The second batch was made with a hand mixer with the standard beater attachment. Both worked well enough, but the best results were obtained with the stand mixer/wire whip setup - so if it’s available to you, use it!

Homemade Marshmallow
Makes enough to top four dozen 1.5” cookies
1/4 cup water
1/4 cup light corn syrup
3/4 cup (168.76 grams/5.95oz) sugar
1 tablespoon powdered gelatin
2 tablespoons cold water
2 egg whites, room temperature
1/4 teaspoon pure vanilla extract
3 Tbsp cocoa powder (optional)

In a medium non-stick saucepan, combine the water, corn syrup and sugar. Bring it to a boil until it reaches the “soft-ball” stage, or 235 degrees on a candy thermometer.

Meanwhile, in a small bowl, sprinkle the gelatin over the cold water and let it dissolve. It will turn into a glob of gelatin – if there is still dry gelatin, give it a quick stir to ensure all of it has a chance to dissolve.

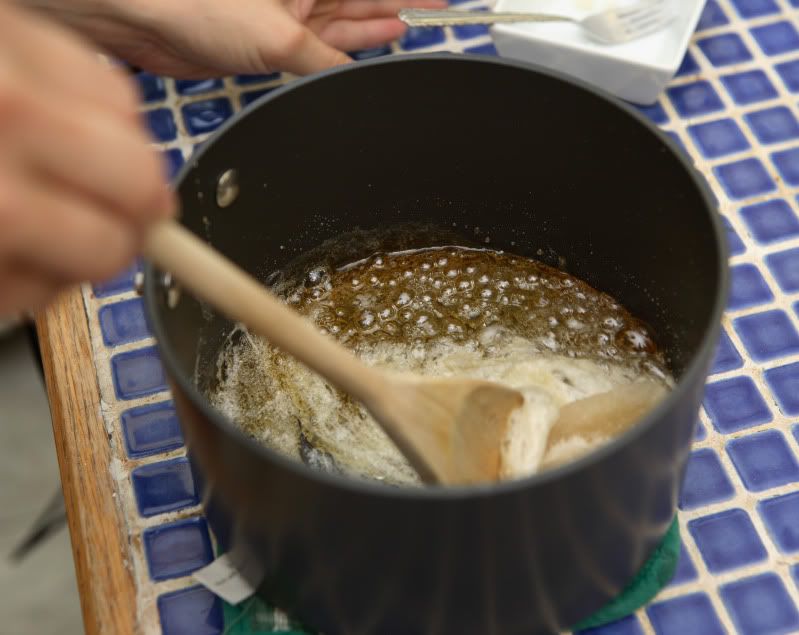
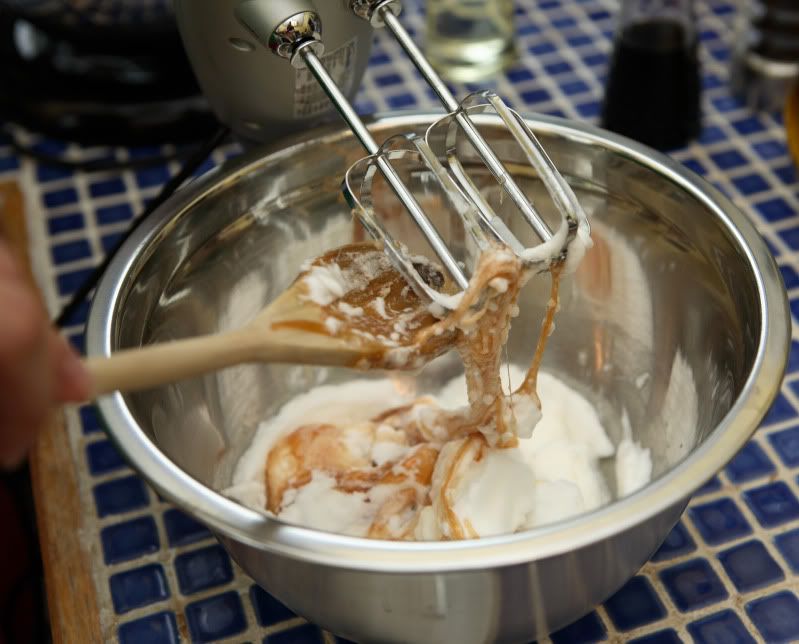
Once the syrup is at the “soft-ball” stage, remove the pan from the heat, add the gelatin, and mix. The pan will sizzle and bubble and glop up a bit, not too dissimilar from how it does when you make homemade caramel. Keep stirring and it will all smooth out. Note that in this picture, which was from my second batch of marshmallow, I ended up cooking the syrup a too long. (Sigh…distractions!) So it’s a little more golden than your results should be. It didn’t end up being a problem – the marshmallows still tasted great. And I was planning on making chocolate marshmallows for my second batch anyway, so the golden color didn’t matter once the cocoa was added.


In a large mixing bowl, whip the whites until soft peaks form. If in doubt, whip slightly more rather than slightly less – but don’t whip it so long that your whites are at a stiff-peak stage just yet.

With the mixer off, scrape the still-warm syrup into the whites.


Add the vanilla. If you want to make chocolate marshmallows, flip the mixer back on high for a few seconds to begin to incorporate the liquid, then turn it back off and sift 3 Tbsp cocoa powder over the whites. Next, whether you’re making plain marshmallows or chocolate ones, continue to whip the marshmallow mixture on high speed until it is stiff.

Transfer the marshmallow mixture to a large pastry bag fitted with a wide tip – a large star Wilton #2110 (1M) makes a pretty shape. A large plain circle will work too. Don’t overfill the bag. I twist the top of the bag tightly closed and rest the pastry bag upside-down on itself in a tall liquid measuring cup so it won’t leak out of the top or bottom. Let the marshmallow mixture cool until it sets up enough to maintain an attractive shape during piping.

The marshmallow stuff sets up pretty quickly. Work fast because once it gets too firm you won’t be able to scrape it up or pipe it out nymore. But you can’t use it immediately – it does need to cool slightly or it will be too runny to hold shape. Pipe it onto cookies or graham crackers, or whatever your desired use is. Let the piped marshmallow dry until it is firm to the touch before you try to do anything else with it.


The syrup is difficult to clean up. Use dishwasher-safe implements and a non-stick pan. My non-stick pans won’t go in my dishwasher, so here’s how I clean them out: Fill the dirty pan about half-way with water. Put it on high heat and use a wooden spoon or other no-scratch utensil to scrape the sides and bottom of the pan as it heats up. As the pan gets warm, the sugar will dissolve into the water and rinse away. It might take a couple of tries to get the pan entirely sugar-free. The pan can then be washed by your usual method.
If you’re going to use a chocolate coating, I highly recommend that you take the time to temper the chocolate. It’s one of those things that sounds complicated, but is really super easy as long as you have a thermometer.

Tempered chocolate has a prettier appearance and won’t “bloom” (the lighter brown spotty swirls you sometimes see on chocolate). If you want some advice and background information on tempering chocolate, read Michael Chu’s article, Tempering Chocolate. I always use the Seed Method, which he describes at the point where the pictures begin. Remember, different types of chocolate temper at different temperatures, so be sure to adjust accordingly (broad suggestions on temperature ranges are included further down his article).

For what could potentially produce the best results, check out your chocolate manufacturer’s website, there’s a good chance they will list the exact temperature that should be used when tempering their brand of chocolate. In my case, since Scharffen Berger chocolate is what’s most readily available where I live, I have always referred to their website for tempering instructions when working with their brand of chocolate. However, they apparently changed their website recently – actually, it was three days ago, as of the time of this writing. Their new site doesn’t list tempering instructions, but their old site (which may or may not work by the time you read this) recommended the following instructions:

To temper chocolate, first chop up the chocolate you want to temper. Save a few chunks for later in the process. Then, melt all but the few chunks of chocolate over a double boiler to 110 degrees. By melting chocolate to 110 degrees F, you dissolve all crystals and start from scratch.

Take the chocolate off the heat. Add the chunks of chocolate you held back and, stirring, let it cool to about 80 degrees F.

Reheat the chocolate using a flash method over the hot water in the double boiler. Heat it 3 to 5 seconds at a time, take it off the heat, put it back on, rather than just sitting the bowl back on top of the hot water, until the mixture reaches 91 degrees F.


(During that last reheat step, I stir the chocolate five strokes while it's over the heat, then five strokes off the heat (then repeat). I think it's easiest when I get into that 1-2-3-4-5, 1-2-3-4-5 rhythm.)

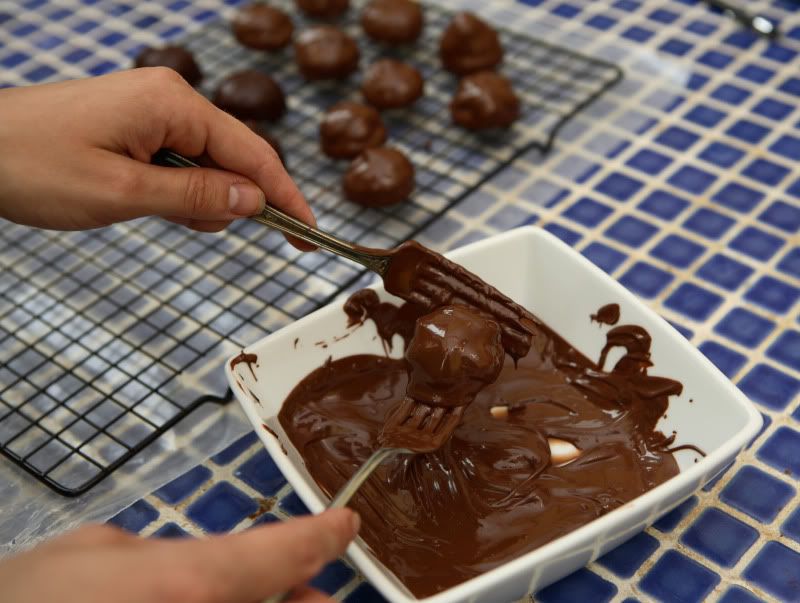
I find it easiest to coat the cookies using two forks. I put the coated cookies on a wire rack to allow any excess coating to drip off, then transfer them to parchment or waxed paper until they can completely firm up.


Although the cookies were dry tasting, they were cute!


The cookies below were made according to the original recipe, with untempered dark chocolate.

Sunday, July 19, 2009

Tilapia and Green Beans, with Home-Dried Powders - the July Daring Cooks Challenge


This month’s Daring Cooks recipe was pretty unusual – at least, compared to what I usually cook for my family. The July challenge recipe was hosted by Sketchy, of Sketchy’s Kitchen. He chose a skate recipe from the Alinea Cookbook, which is to be served with “powdered traditional flavors” – more on exactly what that means in a minute.

First, the original recipe called for skate, a creature similar in appearance to a stingray. Many Daring Cooks chose to substitute other types of seafood because skate is on the “avoid” list. (According to the Monterey Bay Aquarium and other similar websites, skates have been overfished, and most are caught by a method that results in high levels of accidental catch of other fish. The fishing method also results in substantial damage to the seafloor.)

So, I substituted US farmed Tilapia for the skate, and thought the results were delicious. I suggest you do the same! (Please check out the rest of the list and try to make good seafood choices when you prepare seafood in the future!)

Besides the controversial main ingredient, the recipe brings up another interesting topic. For one, it touches on molecular gastronomy, a modern method of cooking that I have not, until now, had a chance to experience. This version of MG involves home-drying an assortment of foods to be pulverized into flavorful powders. Thus, the flavors of the dish are intense and very concentrated. The powders are served alongside the main course – seafood poached in a velvety butter sauce – and the fish is dipped into the assortment of powders as it is eaten. The result is really a taste explosion in your mouth – it’s delicious. Definitely something I’m not used to eating, though!

The recipe does require some special equipment. Best results will be achieved if you own a dehydrator. Some Daring Cooks were able to duplicate the results in a microwave. It’s also possible to use an oven set on a very low temperature – but it takes a very long time. You’ll also need some way to grind the dehydrated foods. Many people used coffee grinders or a mortar and pestle. I used a food processor and sifted the powders through a fine mesh strainer.

I wasn’t certain if I was going to be able to complete this month’s challenge. For one, I don’t own a dehydrator or a microwave. Nor do I have a coffee grinder or a mortar and pestle. And, it’s been 90+ degrees nearly every day lately, so I wasn’t too excited about running my oven all day to complete the challenge. To top it all off, I have had a problem with my back lately, so I have been moving around more slowly than usual.

However, my mother owns an awesome dehydrator and I was able to talk her into shipping some dehydrated food to me. (Thanks, Mom!) In addition to her contributions, I dried some of the thinnest of the required ingredients in my oven, purchased some already-dried items from the grocery store, and pulled a few spices out of my pantry to come up with the rest of the ingredients. Sorry, with this bad back, that was the best I could do!

I’m glad I did what I could to put together the challenge. Like I said, the food was so flavorful and delicious. Definitely different, and definitely outside of my usual comfort zone of cooking – but that’s why I joined the Daring Kitchen. If you’ve got a dehydrator and haven’t tried a recipe like this yet, give it a shot. It’s really not too difficult at all.

The version I’m posting here reflects the changes I made to the original recipe. There were a few ingredients I was unable to source, so I left them out of this post. Check out Sketchy’s blog if you want to see how the challenge recipe was originally written for us. His blog also includes instructions for using a microwave or an oven to dry the powders.

Tilapia and Green Beans, with Home-Dried Powders
Serves 4

1 red onion, trimmed and thinly sliced
30 grams capers (in brine, not oil-packed)
1 cup fresh Italian parsley (left intact)
1/4 cup fresh cilantro (left intact)
1 ounce dried lemon peel (I used the brand Melissa’s, which is sweetened)
3 Tbsp dried instant milk powder
1 Tbsp brown sugar
1 lb butter (4 sticks)
300 grams fresh green beans
Salt, to taste
4 tilapia fillets
2 bananas (neither overripe nor underripe)
Juice of 1 lemon

Optional
Pink peppercorns
Ground white pepper
Sweet Hungarian paprika
Any other ground flavoring you have or want to make that you think will match the flavors of the dish

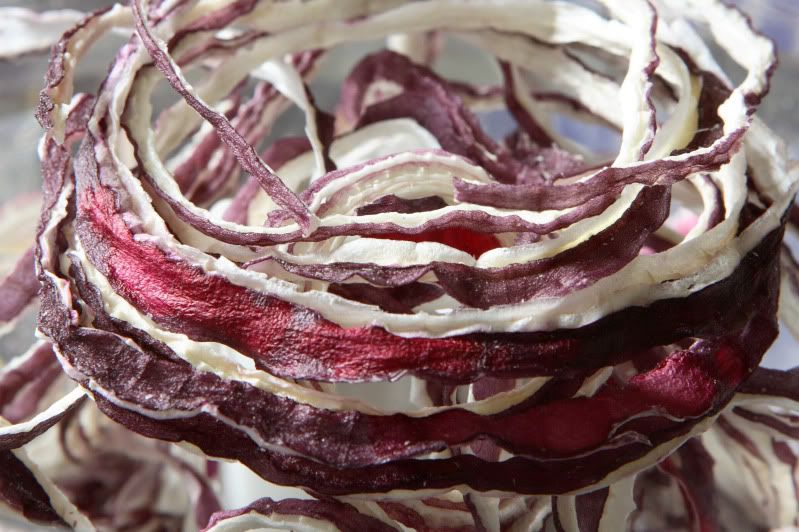
First, the onions and capers need to be dehydrated and ground. Special thanks to my Mom, who dried these for me using her dehydrator. See Sketchy’s blog if you want to try a different dehydration method.

Dry the red onion slices in a dehydrator at 135 degrees until they are brittle, about twelve hours.


Use a food processor, mortar and pestle, or coffee grinder to grind the brittle onions. Pass the ground onions through a fine strainer and store the powder in an airtight container.

Rinse the capers under water. Use a towel to remove as much water as possible. Dry the capers at 135 degrees until dry, about 12 hours. Use a clean grinding implement to grind the capers. Pass them through a fine strainer and store the powder in an airtight container.

The parsley and cilantro also need to be dried, but they don’t take nearly as long. I used my oven to dry these. You can use a dehydrator if you’ve got one.
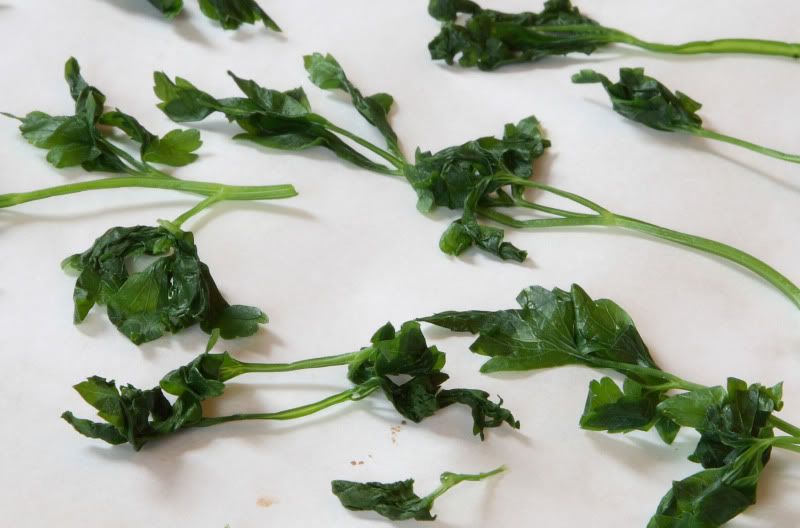
Preheat the oven to the lowest setting possible (mine only goes down to 200 degrees, so that’s what I used). Cover a cookie sheet with a piece of parchment paper. Bring some water to a boil in a small saucepan. Blanch the cilantro and parsley in the boiling water for one second, then transfer them to ice water to stop the cooking process. (You don’t have to keep the two herbs from mixing.) Pat the herbs dry with paper towels. Lay the cooled cilantro and parsley out on the parchment paper as flat as possible. Don’t let the leaves touch one another, or they won’t dry properly.


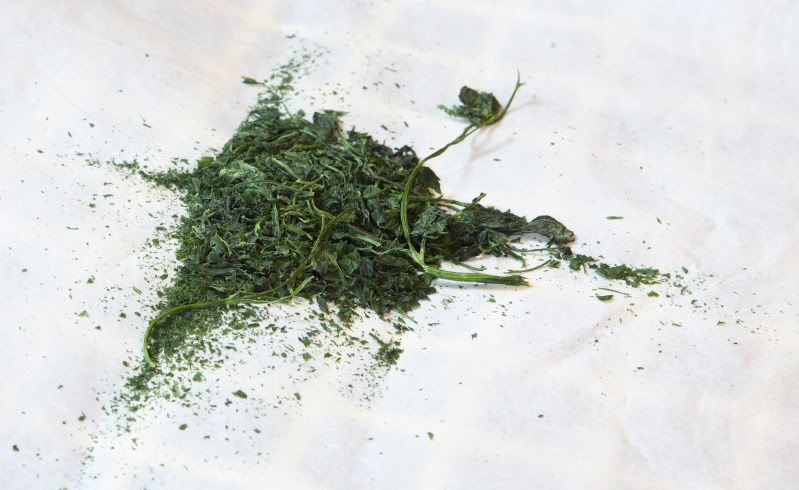
Dry the herbs in the oven, turning them over once, until they are brittle. At 200 degrees, I left them in for 15 minutes on each side. Nearly all of the pieces were sufficiently dried, except for the thickest stems and a few clumps of leaves I missed. I just crunched them up a little bit, picked out the couple of pieces that weren’t brittle enough, and ground the rest up. Use a clean grinding implement to grind up the cilantro and parsley (again, you can mix it together, no need to keep it separate).


Pass the ground herbs through a fine strainer and store the powder in an airtight container.


In a clean bowl of a food processor, grind the lemon peel until it is as small as possible. (It won’t pulverize like the other dried things will, but it’ll do. It will bring an interesting variation in texture to the final dish.) Store it in an airtight container.

In a small skillet, toast the dried milk powder over medium heat, stirring occasionally. (Be cautious not to burn it!) Turn it out into a small bowl and allow it to come to room temperature. Mix the brown sugar into the cooled milk powder. Store it in an airtight container.

The recipe may be made ahead to this point.

Before we start cooking fish and green beans, we’ll first make a beurre monte, a buttery liquid we’ll use for poaching. Heat 60 grams of water in a large saucepan to a boil. Meanwhile, cut the butter into rough cubes (approximately 1 Tbsp each). Once the water has reached a boil, turn the heat down to low. Stir in one cube of butter at a time, waiting to add the next cube until the last one has melted. Keep this liquid heated, but do not allow it to exceed 195 degrees F.

Now we’ll divide up the beurre monte. Three-fourths of the finished beurre monte will stay in the large saucepan over low heat. One fourth of the finished beurre monte should be transferred to a medium saucepan over low heat. After you've divided it up, add water to the each beurre monte to double it’s volume – this doesn’t have to be exact and can be “eyeballed” up the side of the pan. Or, if you’re more comfortable doing so, you can pour each portion of butter sauce into a liquid measuring cup and add an equivalent amount of water. Again, keep the liquids heated, but not above 195 degrees.

Decorate your serving plates:
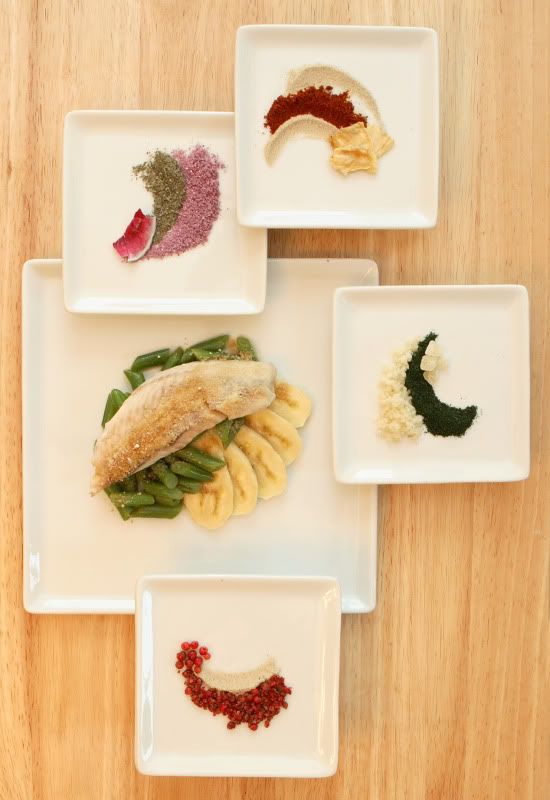
The powders are to be plated alongside the fish, swirled in a decorative fashion. Since my back was causing problems and I wasn’t physically up for a lengthy trial-and-error process, I plated the powders on several smaller plates. (Much easier, because if you screw it up, you’re not out a whole plate of multiple powders.) You can check out other Daring Cooks' photos for more plating ideas.

I plated crushed pink peppercorns and ground white pepper (both storebought), garnished with whole pink peppercorns


the ground red onion and capers, garnished with a chip of dried red onion,


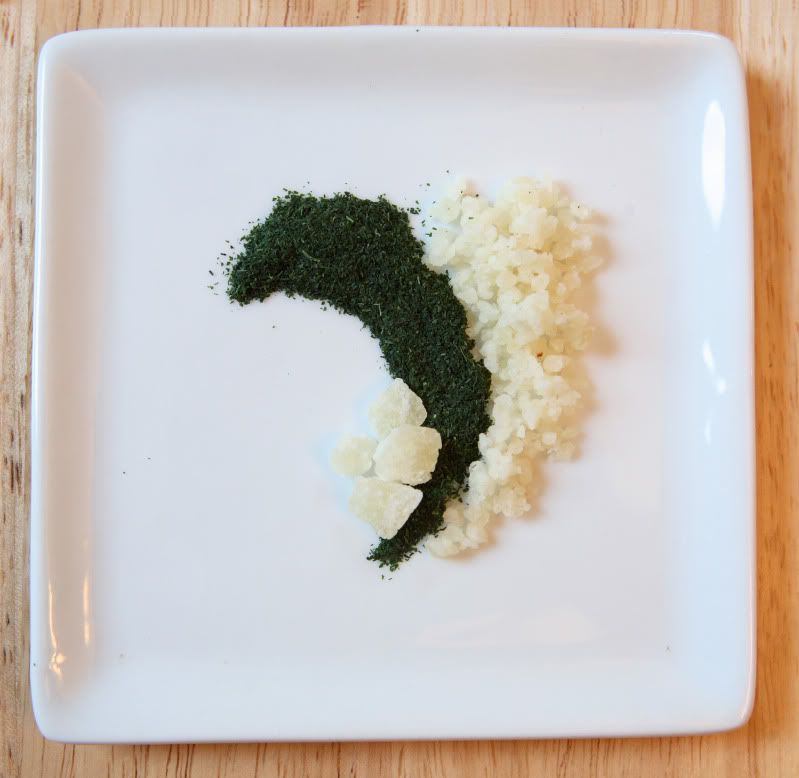
ground white pepper and sweet Hungarian paprika (also storebought), garnished with several chips of dried pineapple (another dried item my mom shipped - and they were delicious, but wouldn’t pulverize well enough to use in this recipe),


and the powdered parsley/cilantro and the sweetened lemon peel, garnished with a few of the larger, unground pieces of peel,


It is much easier to decorate the empty plates now, rather than waiting until after the fish is cooked. Otherwise the fish will get cold while you fumble with the various powders. Just be sure you leave room for the fish later!

We’re ready to start cooking:
Cut the green beans diagonally into bite-sized pieces. Add them to the smaller portion of beurre monte. Turn the heat to medium and poach the beans until they are done to your liking. Taste the beans and season them with salt.

While the beans are poaching, turn the heat of the larger saucepan up to medium. Add the tilapia fillets (you might need to do this in batches) and poach, turning once, until the fish turns white and easily flakes apart. (That should only take a few minutes on each side.) Be careful to avoid overhandling the fish, or it might fall apart. After you’ve removed the cooked fish, season it with salt.

Meanwhile, thinly slice two bananas diagonally. Squeeze the lemon juice over them to prevent browning. Fan several banana slices on each serving plate. Top the bananas with the drained green beans. Top the beans with a fish fillet. Sprinkle the milk powder/brown sugar mixture on top of the fish.


Serve the fish piping hot. Encourage your eaters to dip the fish in the various powders, experimenting with different flavor combinations. My favorite was definitely the capers and the red onions!

Saturday, June 27, 2009

Bakewell Tarts (er…Puddings?) - the June Daring Bakers Challenge


This month’s Daring Bakers challenge introduced me to something I’ve never tried making before. I guess that’s part of why I joined the group!

The June Daring Bakers' challenge was hosted by Jasmine of Confessions of a Cardamom Addict and Annemarie of Ambrosia and Nectar. They chose a Traditional (UK) Bakewell Tart... er... pudding that was inspired by a rich baking history dating back to the 1800's in England.

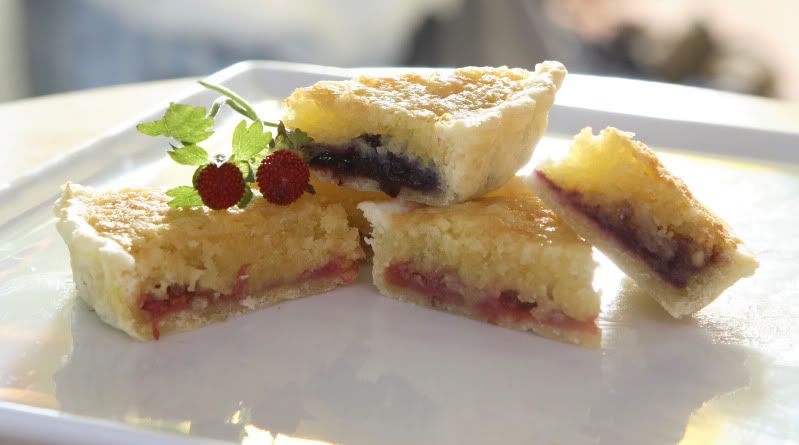
Apparently there’s a long-standing debate as to whether this type of dessert is classified as a “pudding” or as a “tart.” I am no expert on desserts from the UK, but to me, it appears to be more of a tart… Anyway, whatever it’s called, it turns out it tastes pretty good! It’s definitely a taste and texture I’m not used to, but I could get used to it pretty quickly. It also seems to be more of a breakfast or tea item rather than a dessert to complete a 4-course dinner – at least, that’s how it’d fit into my own menu lineup if I were to make it frequently.

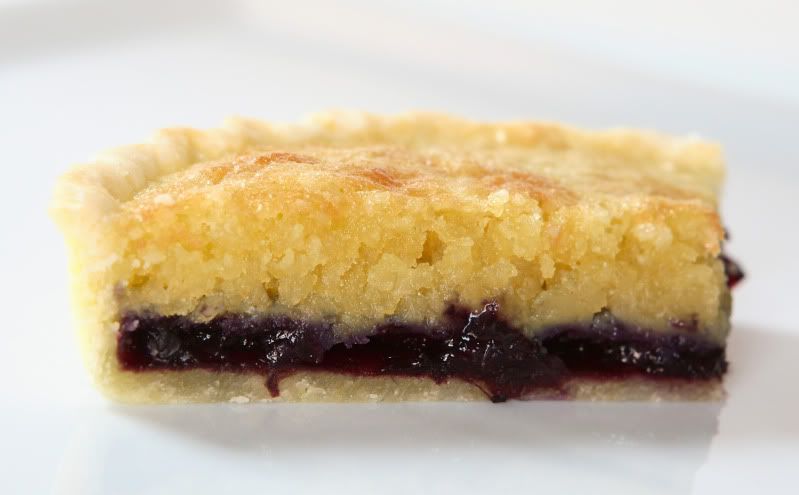
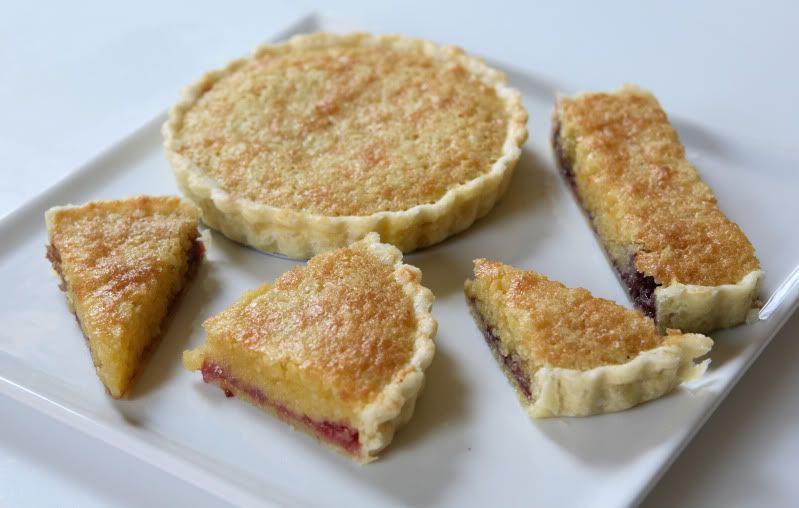
This dessert/tart/pudding consists of a sweetened shortcrust pastry spread with a thin layer of jam, topped with frangipane, an almond-scented, cake-like layer, baked in a tart pan. We were required to make homemade crust and frangipane, and encouraged to make our own jam for the filling. Here's a closeup of the layers, so you have an idea of what it's supposed to look like:


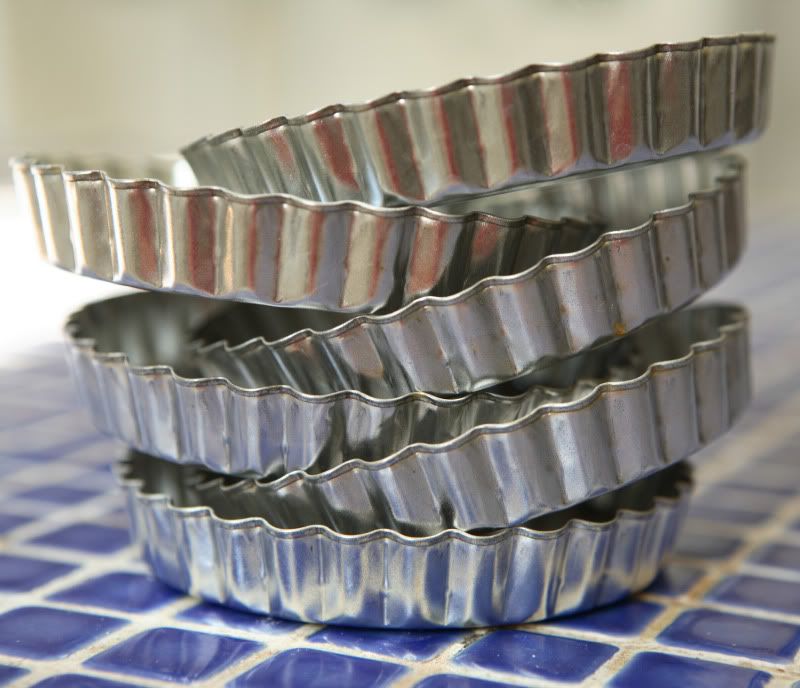
I decided to make smaller-sized tartlets so I could experiment with a variety of jam flavors. The recipes shown here will make enough to fill six 4” tartlet pans.


While we’re on the topic of equipment, you’ll need to get out your kitchen scale! (Sorry, the original recipe was provided to the Daring Bakers in weight measurement only.)

I made two pan jams following the guidance of one of our co-hosts, Jasmine. She suggested trying a fruit-to-sugar ratio of 10:1 (for 100 grams of fruit, start with 10 grams of sugar, adjust it later if you want it sweeter). That should work for many varieties of berries, and I can say that it does work for both blueberries and strawberries, because that’s the flavors of jam I made!


Bakewell Tarts
Makes six 4” tartlets

Make the jam first – it needs to cool before it can be used. Note that each of the recipes listed below makes enough jam for HALF of the tartlets. You could also use store-bought jam. I admit: I did try one tartlet with store-bought raspberry jam and another tartlet with store-bought blackberry jam. (I like variety.) But that homemade blueberry jam won them all out - it is amazingly good and very simple! Give it a try!


Blueberry Jam
Makes enough jam for three tartlets – double this if you want them ALL blueberry flavored!

150g blueberries
15g sugar
A squeeze of lemon juice


In a medium-sized saucepan (nonstick is best), mix the fruit and the sugar over medium heat. Stir together, mashing the fruit with the back of your spoon. The mixture will become liquidy. Taste it and add more sugar if you want. Cook over medium heat, stirring and mashing frequently, for five minutes. Add the lemon juice – just a quick, small squeeze. Continue to stir and cook for another five or ten minutes depending upon how thick you want the jam. Pour it out into a small bowl and refrigerate it until it’s time to use it.

Strawberry Jam
Makes enough jam for three tartlets – double this if you want them ALL strawberry flavored!

160g strawberries, hulled and sliced into small pieces
16g sugar
A squeeze of lemon juice

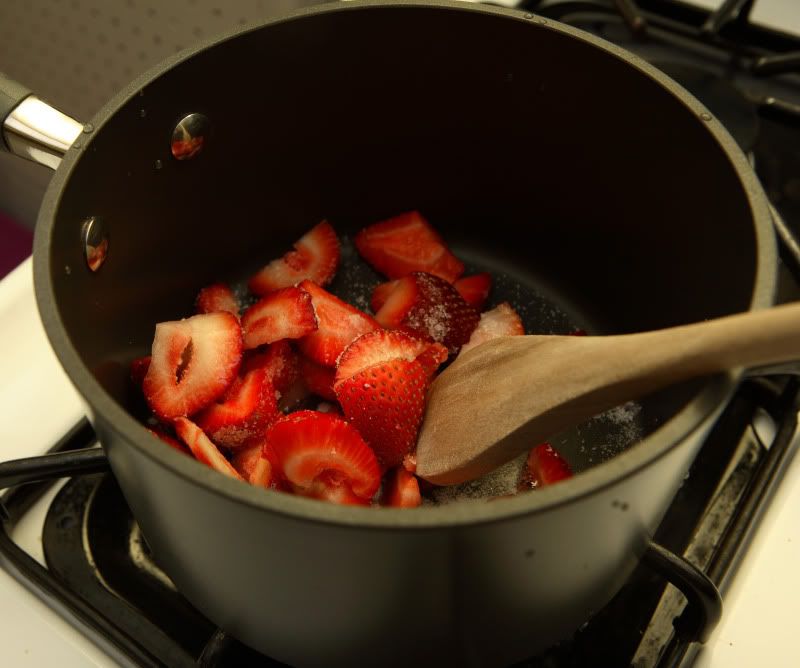
In a medium-sized saucepan (nonstick is best), mix the fruit and the sugar over medium heat.


Stir together, mashing the fruit with the back of your spoon. The mixture will become liquidy. Taste it and add more sugar if you want. Cook over medium heat, stirring and mashing frequently, for five minutes. Add the lemon juice – just a quick, small squeeze. Continue to stir and cook for another five or ten minutes depending upon how thick you want the jam. Pour it out into a small bowl and refrigerate it until it’s time to use it.

Next, make the Crust. It also needs to chill.

Sweet Shortcrust Pastry

225g (8oz) all purpose flour
30g (1oz) sugar
2.5ml (1/2 tsp) salt
110g (4oz) unsalted butter, cold (frozen is better)
2 egg yolks
2.5ml (1/2 tsp) almond extract
15 to 30ml (1 to 2 Tbsp) cold water

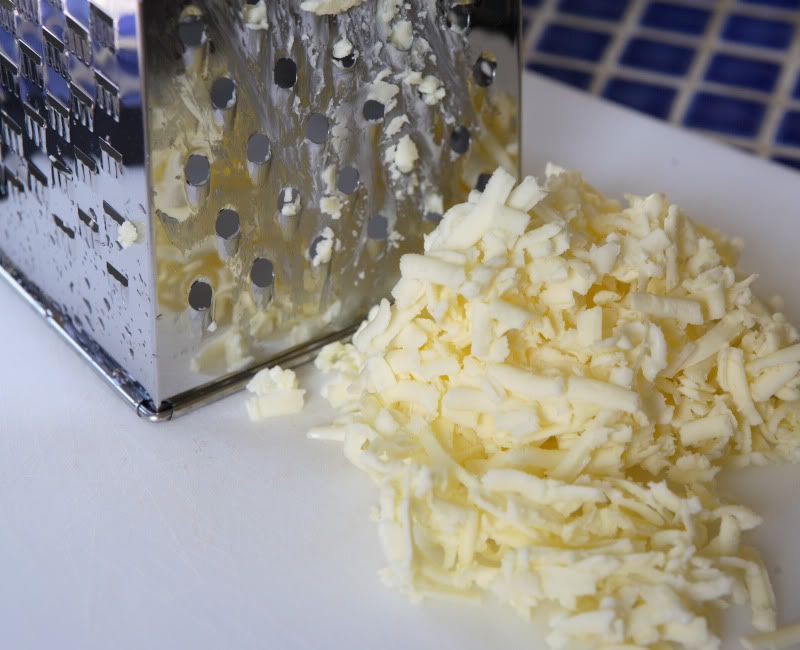
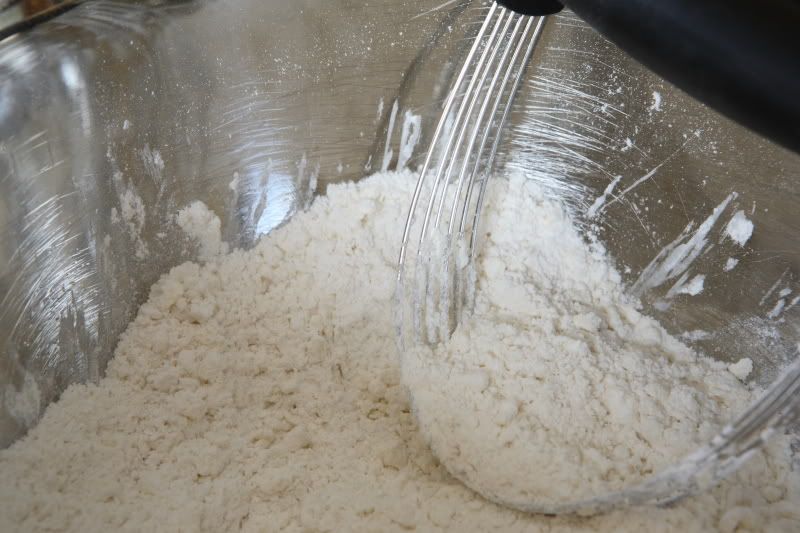
In a large bowl, sift together the flour, sugar and salt. Using the large holes on a box grater, grate the butter into the flour mixture.


Using your finger tips and working very quickly, or using a pastry blender, rub/cut the fat into the flour until the mixture resembles coarse bread crumbs. Set aside.


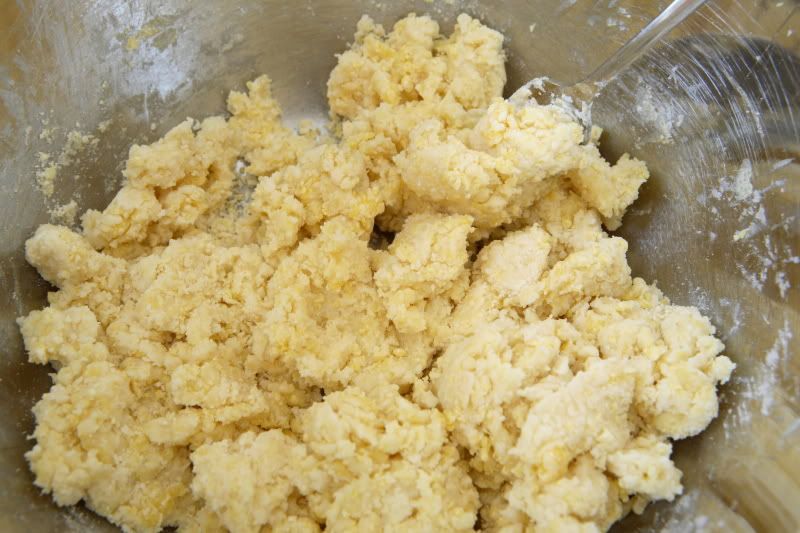
Lightly beat the egg yolks with the almond extract. Use a fork to quickly mix the egg mixture into the flour mixture. Keep mixing while dribbling in the water, only adding enough to form a cohesive and slightly sticky dough.


Form the dough into a disc, wrap it in plastic wrap, and refrigerate for at least 30 minutes

Meanwhile, make the frangipane.

Frangipane

125g (4.5oz) unsalted butter, softened
125g (4.5oz) icing sugar
3 eggs
5ml (1 tsp) almond extract
125g (4.5oz) ground almonds
30g (1oz) all purpose flour

Cream the butter and sugar together until the mixture is light yellow in color and is very fluffy. Scrape down the side of the bowl and add the eggs, one at a time, beating well after each addition. The batter may appear to curdle – that’s fine. After all three eggs are in, pour in the almond extract and mix for about another 30 seconds. Scrape down the sides again. Add the ground nuts and the flour; mix well. The mixture will be soft, keep its slightly curdled look (mostly from the almonds) and retain its pallid yellow color. This can be refrigerated until it’s time to use it.

On to assembly!

Preheat your oven to 400 degrees F.

Cut the dough into six equal-sized pieces. Keep the portions you’re not using immediately in the refrigerator. This dough has a lot of fat in it so it is difficult to roll out if it gets too warm - it becomes very sticky. The easiest way to roll it out is to do so with the dough sandwiched in between two sheets of waxed paper. (Parchment will work too, but that’s more expensive!)


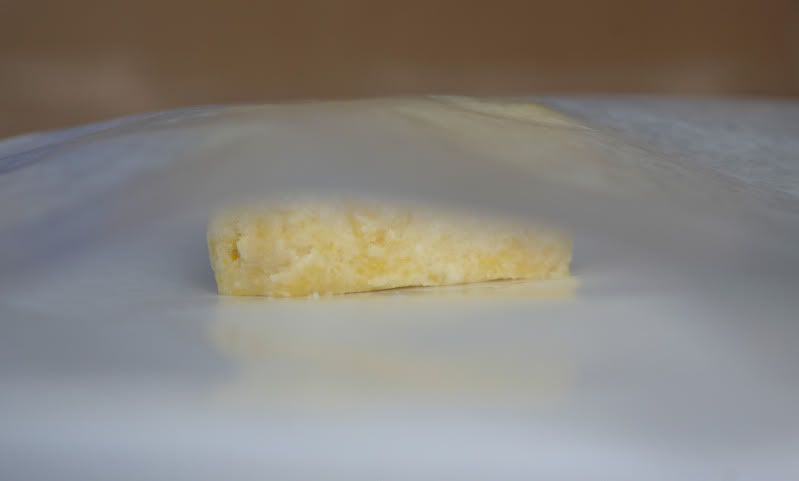
Roll out a small circle about six inches in diameter. Peel off one sheet of waxed paper. Fold the sheet in half, sticky side inside (we’re reusing the waxed paper for a quick moment, and the sticky side will just make a goopy mess if it is facing out). Gently replace the folded piece of waxed paper back on your dough circle.

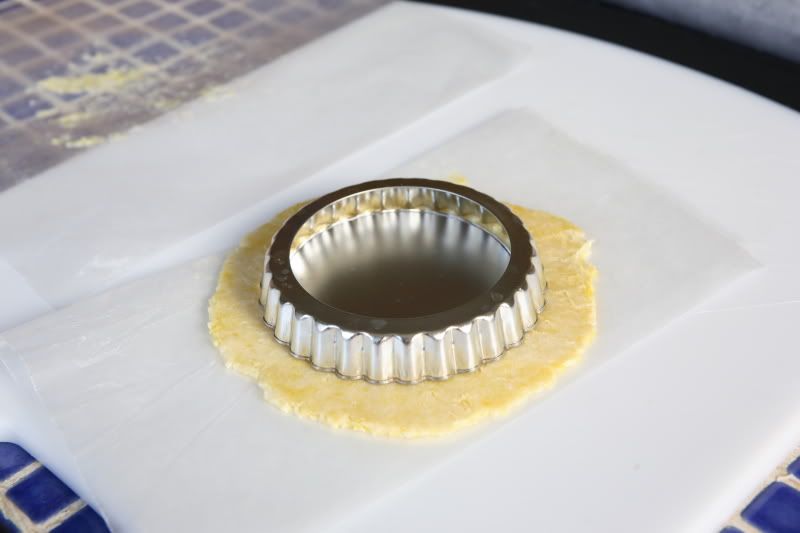
Flip the whole dough/paper assembly over and peel off the other piece of waxed paper. Fold it in half and save it too – we’ll use it again in a second. Place your tart pan upside down on top of the dough.


Invert the dough/pan and peel off the folded sheet of waxed paper.


If at any time you’re having lots of difficulty getting the papers to peel off, pop it all in the fridge for a couple of minutes. Do note that it will most likely be sticky, and residual dough will probably be left behind on the paper. If you end up having any holes, you can patch them up in a minute.

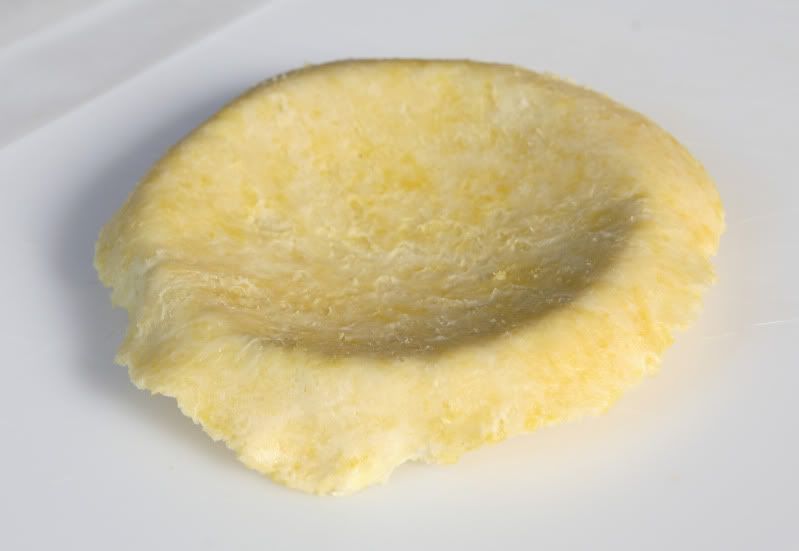
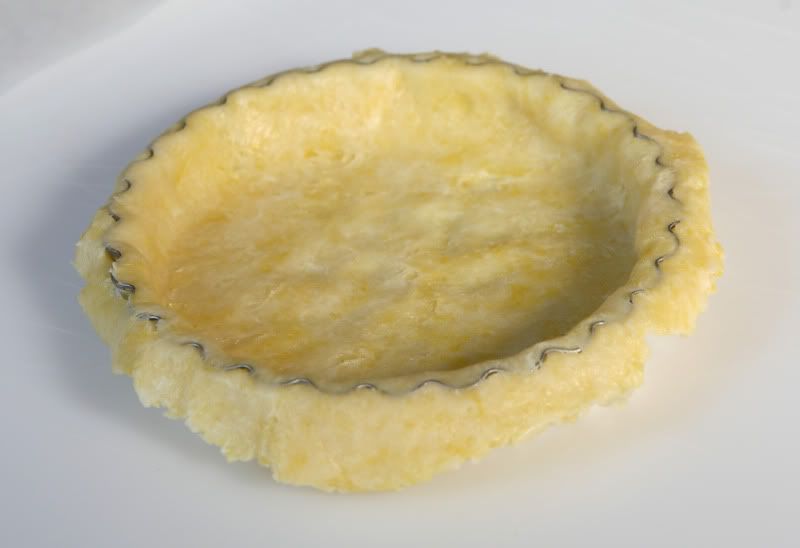
Use your knuckles to ease the dough down into the bottom of the pan.


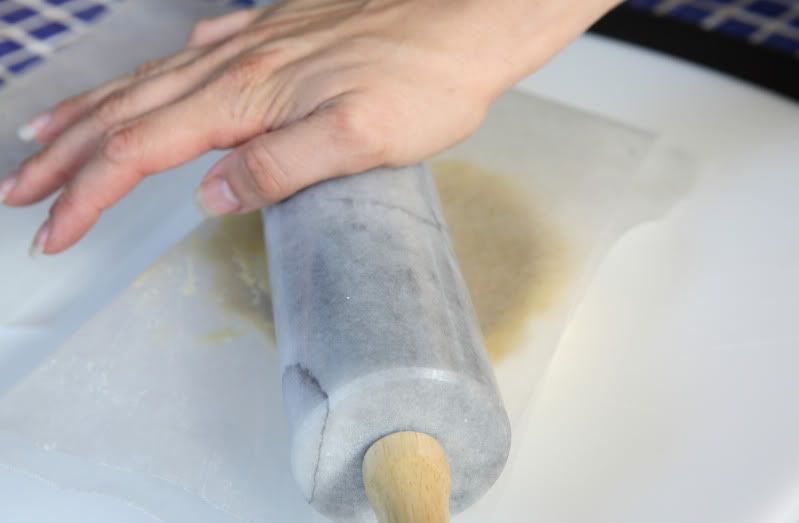
Allow any excess dough to overhang the edge of the tart pan. Reuse that second sticky-side-in sheet of folded waxed paper from earlier: gently place it on top of the tart pan. Use your rolling pin to press down on top of the waxed paper and pan.


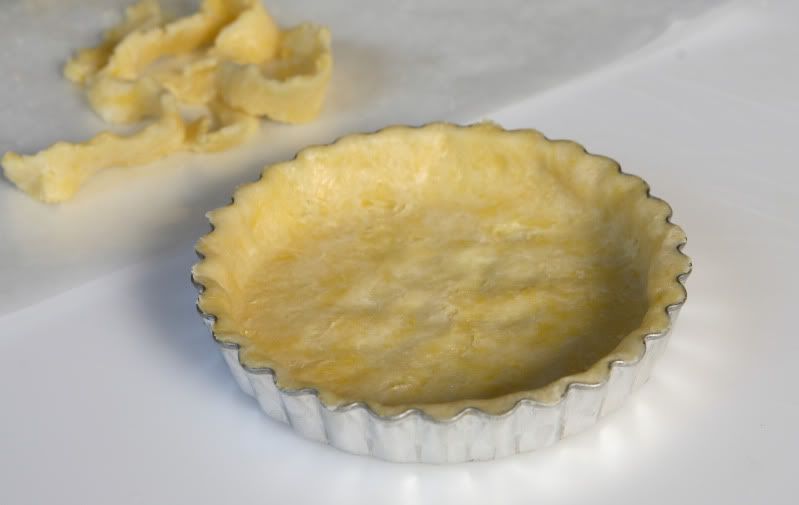
The effect: the pan acts as a “cookie cutter” and trims the dough for you – you’ll be left with perfect pretty edges.


Discard the goopy waxed paper and pick away the excess dough. Patch any holes using these scraps if necessary.


Yes, you do go through a lot of waxed paper - but by folding it in half you’re reusing it (well, for a while at least…that helps some). Yes, you COULD roll it out without the paper on a well-floured surface – but excessive quantities of flour will make your crust tough. The waxed paper method is easier and tastes better. And, trust me, you do NOT want to pick this sticky, buttery dough off of your countertop. (Especially if you have my impractical tiled countertop!)

Repeat the above steps to get the remaining five dough balls into your tart pans. As you finish each pan, pop them into your freezer for a few minutes. If you run out of room in the freezer, rotate them into the fridge.

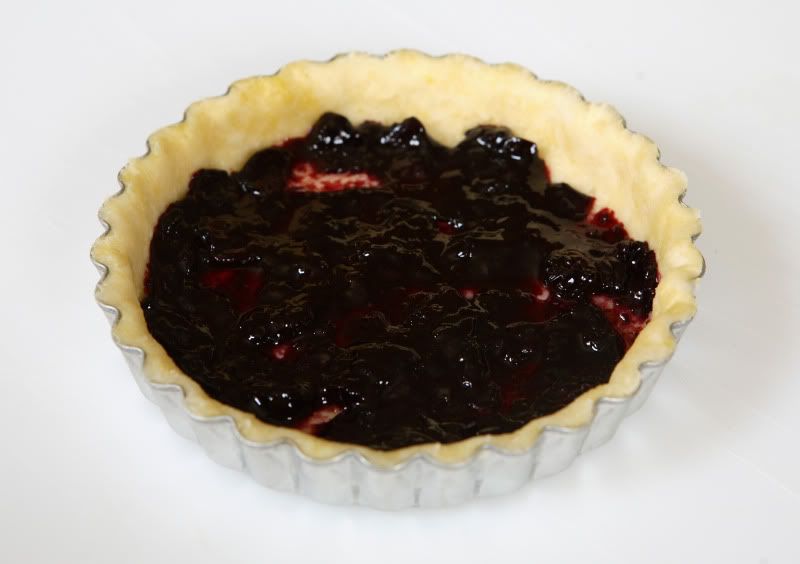
Spread about 1 tablespoon of jam inside each chilled tart shell. Cover the bottom of the crust evenly. The jam layer should be rather thin, just enough to coat the bottom.


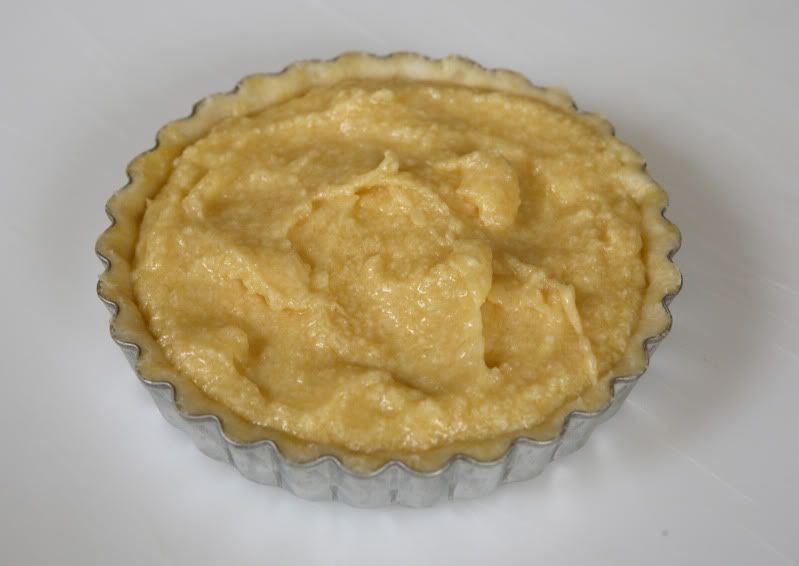
Top each tart with a scoop of frangipane, spreading it to the edges of the crust. The frangipane layer should fill up the remaining volume of the pan, and will be approximately equal in height to the tart crust.


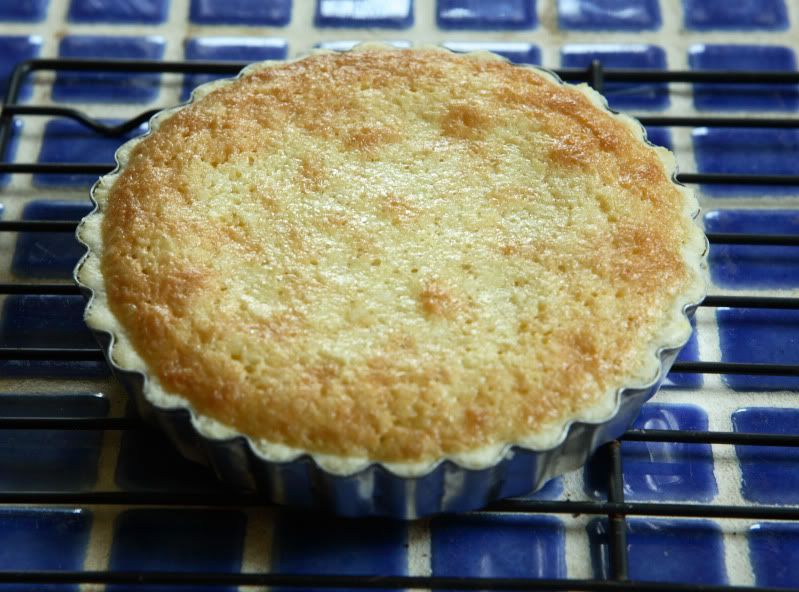
Bake for 15-18 minutes, until the tops are puffy and a tanned golden brown. Do not underbake!


Allow the tarts to cool on the counter slightly – if you cut into them too early, the jam will run out. I waited until the tarts were cool enough that I could handle them without fear of being burnt – they were still slightly warm on the inside but were nicely set. Perfect!