Showing posts with label cookie. Show all posts

Monday, October 10, 2011

Simple Vanilla Drop Sugar Cookies (or Whoopee Pies?!)


Although I love the simple vanilla flavor of sugar cookies, I hardly ever make them.  I think its because they’re a little pesky to make – they usually require lots of refrigeration time.  The dough must be rolled out on the countertop, and regular readers of this blog will recall from photographs that my kitchen countertop is tiled – its not the usual smooth Formica or granite or whatever surface it is that most people have in their kitchen.  The textured tile countertop makes it basically impossible to roll out cookies.  (Don't ever put a tile countertop in your kitchen.)

If I want to make cut-out sugar cookies, I have to haul the dough and cutters and cookie sheets over to a family member’s house, invade their kitchen, and make them there.  Consequently, I usually only bother with sugar cookies once or twice a year, generally only around a holiday, and make cut-out shapes of Christmas trees and angels or Easter bunnies and tulips over at my Dad’s house with my sisters.

To satisfy my sugar cookie fix during the rest of the year, I’m always looking for a good soft drop sugar cookie recipe.  This one works pretty well – no refrigeration required, and the fact that I don’t have a smooth countertop is irrelevant.  The mixing process is easy enough your kids can put the recipe together.  Unlike most sugar cookie recipes, you don’t need to plan to make the cookies four hours ahead to allow ample time for refrigeration.  The cookies are simply dropped onto the cookie sheet with a cookie scoop.  The addition of sour cream gives the cookies great flavor, and keeps them ultra soft, as long as they don’t get excessively overbaked.  They taste good either frosted or unfrosted.

My mom found the first version of this recipe’s ingredient list and baking times somewhere, it apparently came from compilation cookbook put together by Beta Sigma Phi, “The Millennium Cookbook.”  She might have made a few modifications on her end (the recipe was originally supposed to be a roll-out sugar cookie recipe, but my mom found it to be way too soft to easily roll out).  We thought it might make a good drop cookie recipe, and thus I began experimentation in my kitchen.

Turns out, the resulting unbaked “dough” IS really soft – its really more like a thick cake batter than it is like any other cookie dough I’ve ever made.
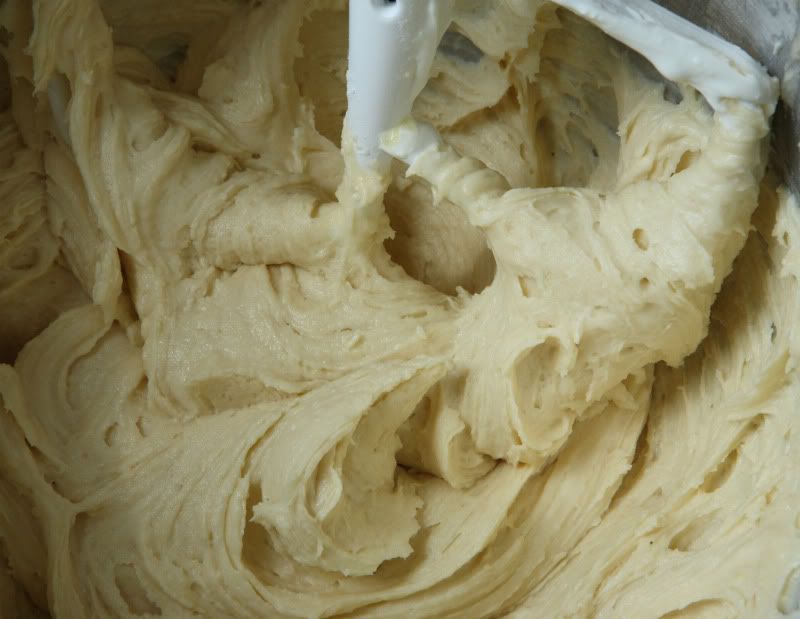


I have no idea how anyone could possibly roll the dough out without making a huge mess - multiple cups of flour would need to be dusted onto the countertop during the rolling process, and the cookies wouldn’t be nearly as tender with the addition of all that extra flour.  The original recipe concept seemed so difficult and inconsistent – the drop cookie method as I’ve written it below is definitely the way to go.

During experimentation, I discovered these cookies work pretty well as the cake portion of a whoopee pie.  Since the cookies are vanilla and are not strongly flavored, they pair well with a tangy lemon curd filling.  I’ve included an easy-to-make lemon curd filling recipe below the cookie recipe in case you want to try that out.  It uses good-quality store-bought lemon curd, and therefore is way less complicated to make than it would be if you were to make the lemon curd yourself.

Soft Vanilla “Drop” Sugar Cookies
Makes about 4 dozen cookies, depending on how big your cookie scoop is

1 cup butter
1-1/2 cups sugar
2 tsp vanilla
3 eggs
Finely grated zest from one small lemon
4 cups flour
1/2 tsp salt
2 tsp baking powder
1 tsp baking soda
One 8-oz. container sour cream (3/4 cup)

Preheat your oven to 350 degrees F.

Using a mixer, cream together the butter and sugar.  Add the vanilla, eggs, and lemon zest; mix until well-combined.

While the mixer is running, in a separate medium bowl, blend together the flour, salt, baking powder, and baking soda.

Mix half of the flour mixture into the butter mixture until batter is well-combined.  Then mix in half of the sour cream until the batter is uniform.  Add the remaining flour mixture, and once it has been mixed in thoroughly, add the remaining sour cream, and mix until the batter is combined.

Cover your cookie sheets with aluminum foil.  Use a cookie scoop to drop heaping tablespoons of batter onto the sheet, spacing them several inches apart as they will spread slightly.  (My cookie scoop dropped .75 ounces of dough with each scoop.)
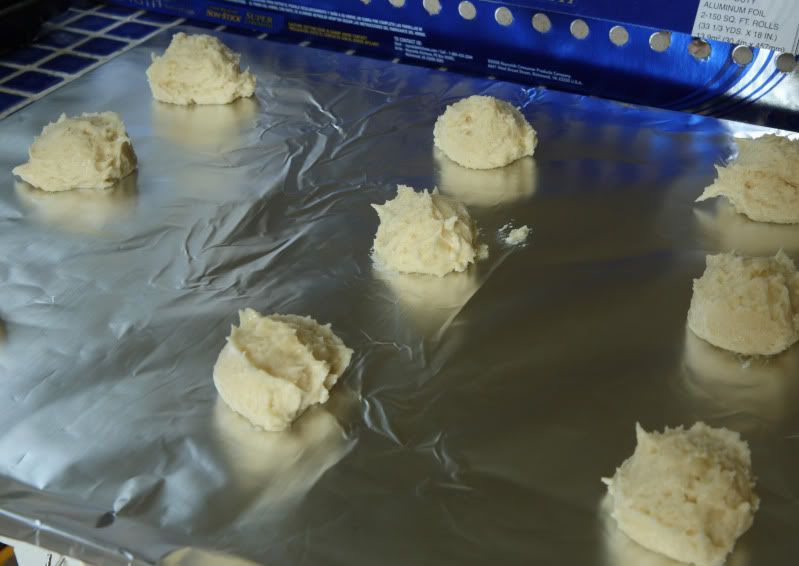


Bake the cookies at 350 for 11-13 minutes.  The cookies will look pillowy and should only be barely browned.


Let the baked cookies rest on the warm cookie sheet for 5 minutes before transferring the sheet of foil to a wire cooling rack.  The cookies will be too soft to remove from the foil at this time, but will firm up as they continue to cool.  Once the cookies have cooled completely, remove them from the foil.  They may need to continue to sit on the racks a bit longer until they are firm enough to move to storage containers.

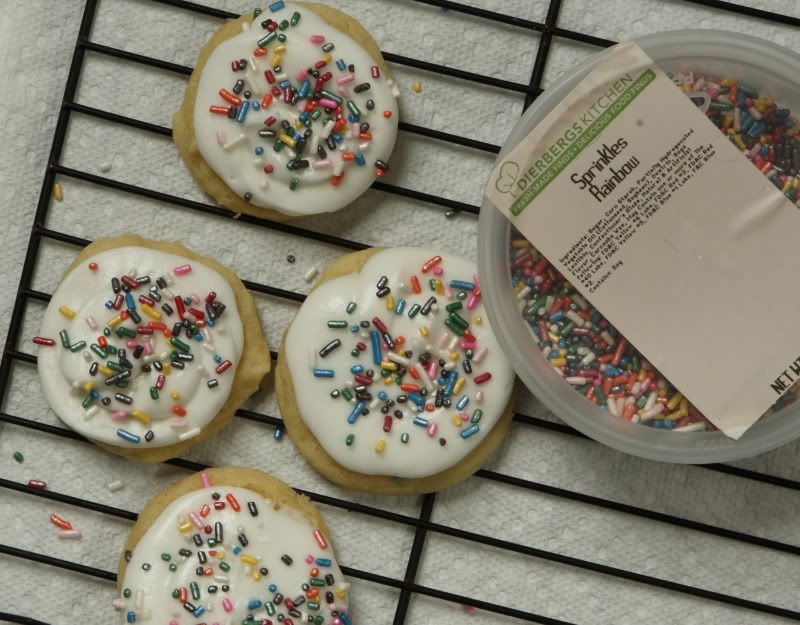
The cooled cookies can be frosted, filled-and-sandwiched into whoopee pies, or just enjoyed plain.


Easy Lemon Curd Filling
in case you want to make whoopee pies out of the cookies

2 cups unwhipped heavy whipping cream
2 Tbsp sugar
1 cup prepared lemon curd, I used storebought Dickinson's brand

In a medium bowl, whip the cream and sugar on high speed until soft peaks form.  Set aside.

Put the lemon curd in a small bowl (I like to use a 2-cup glass measuring cup).  Spoon in about 1/2 cup of the whipped cream.
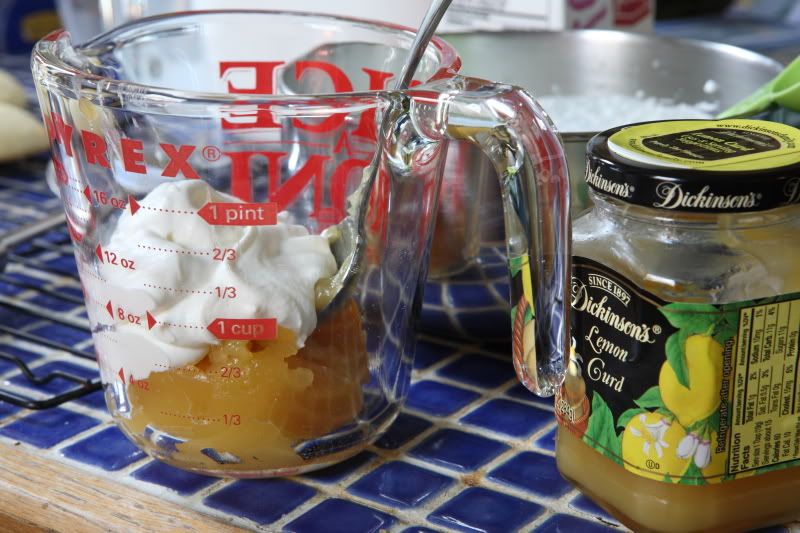


Stir vigorously to incorporate the lemon curd into the cream.  It may not be entirely lump-free but stir it until it is mostly smooth.
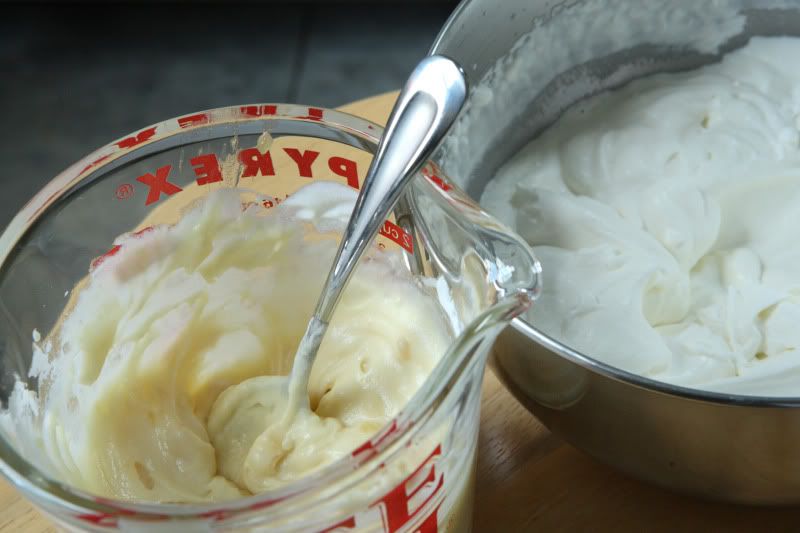


Transfer the lemon mixture into the bowl containing the remaining whipped cream.  Use a spatula to gently fold the lemon mixture into the cream.  Don’t overmix it, just fold it until the color is uniformly lemon yellow.
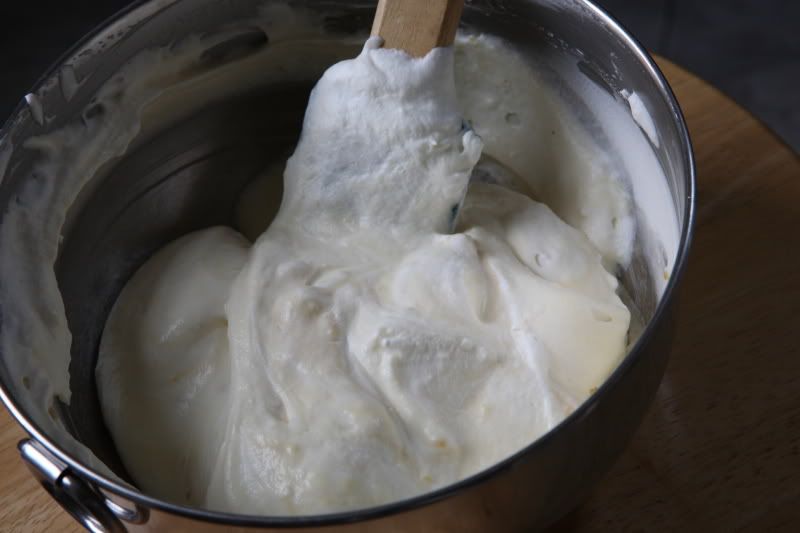


Pair up your cookies - match them up so you have similarly-shaped pairs, so your finished product looks better.

Dollop the lemon cream mixture onto one of each of the cookie pairs, then sandwich them together.

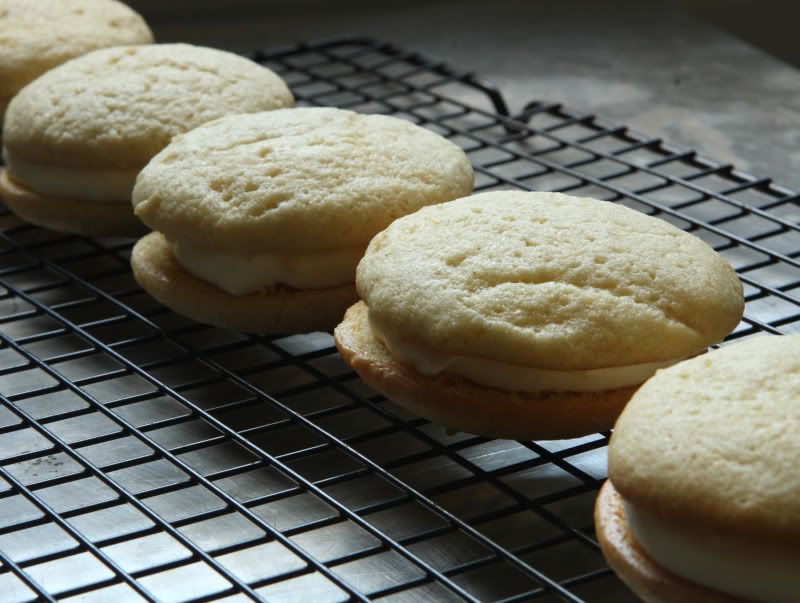


Since this filling recipe contains cream, you’ll need to refrigerate the cookies if you aren’t planning to serve them right away.  The cream is quite soft at room temperature, but is more firm at refrigerator temperature, and is quite delicious served either way.  I think I preferred the refrigerator temperature personally, but that’s just me.  They will last about a week in the fridge (if you haven’t eaten them all first!).

Printable PDF File (with pictures)
Printable PDF File (text only)

Monday, February 15, 2010

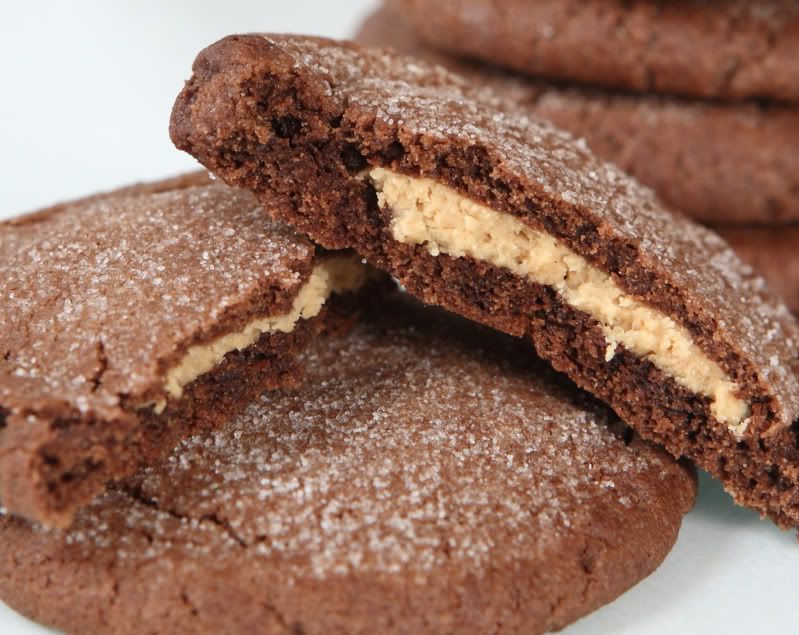
Chocolate Peanut Butter Cookies


I love reading the newspaper. There’s something satisfying about paging through the inky newsprint, sipping on a cup of hot cocoa, catching up on the latest national news, soaking up the details in the local stories, and comparing the weather forecast to reality. I always save the best for last: the comics (Calvin and Hobbes, I miss you!). The same section has the Sudoku puzzle…I love solving those. There’s a certain comforting feeling about tangible print media that cannot be recreated by online news sources.

My absolute favorite section is, of course, the food and cooking section (too bad it only comes once a week!). I love reading about local restaurants, getting ideas for recipes, and looking through the grocery advertisements. I’ve always been a recipe clipper – you’ll never know when you find a recipe that’s a keeper!

This recipe is one of those clipped-out-of-a-newspaper keepers. It was printed when I was ten years old (there are expired coupons for Chex cereal on the back of it!). My mom had this recipe clipping taped to the inside back cover of one of our favorite cookie cookbooks.

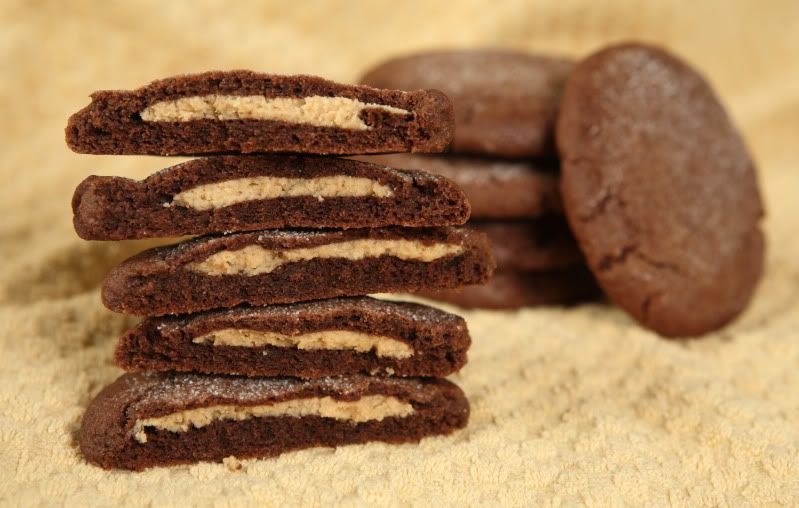
I remember wanting to make the cookies often as a child, partially because I have always loved the combination of chocolate and peanut butter, and partially because the cookies in the accompanying picture had these cute little green and white Christmas trees piped on them – they looked fun to eat. The name they gave the cookies was “Magic Peanut Butter Middles,” a name I always thought fell short (the “Magic” part seemed cool to a ten-year-old, but “Middles”?? Really??  Ok, I guess the name I came up with isn't much better...) Despite the writers’ (and my) halfhearted attempt at a creative title, the cookies were always a hit with me and my sister. Biting into what looks like just a plain old chocolate cookie and finding a delicious, creamy peanut butter filling is fun when you’re ten! (It’s still fun now!)

The recipe is very hands-on, so it’s a little messy, but the method is easy enough that my sister and I made them together when we were young.  You might enjoy making these with your kids.

Be sure you use “kid's” peanut butter, not the all-natural kind that you have to stir up before using. (The Jif/Skippy/Peter Pan/whatever kinds contain solid fats, and the cookie recipe presumably was written and tested with that fat composition in mind because it specifically recommends Skippy brand original creamy peanut butter.) Or, try the natural kind and report back on how it turns out…I have never tried using natural peanut butter in this particular recipe, but I have tried Jif brand original creamy peanut butter, and I can say that it works well.


Chocolate Peanut Butter Cookies
Makes 18 cookies

First, start the cookie dough:

Cookie Dough Ingredients
1-1/2 cups all-purpose flour
1/2 cup unsweetened cocoa
1/2 tsp baking soda
1/2 cup sugar
1/2 cup packed brown sugar
1/2 cup butter
1/4 cup “kid's” peanut butter (not the “natural” kind)
1 tsp vanilla
1 egg

Preheat your oven to 375 degrees F.

In a small bowl, whisk together the flour, cocoa, and baking soda - blend it well. Set it aside.

In a large bowl (I use my stand mixer, but always did this with a wooden spoon when I was a kid), beat together the sugar, brown sugar, butter, and 1/4 cup peanut butter until it is light and fluffy and well-combined. Add the vanilla and egg; beat well.

While the stand mixer is combining the above ingredients, I start mixing together the filling:

Filling Ingredients
1/2 cup “kid's” peanut butter (not the “natural” kind)
1/2 cup powdered sugar

In a medium bowl, combine the 1/2 cup peanut butter and the powdered sugar. It starts out with a rough texture…


…but will come together if you just keep stirring.


Roll the filling into 18 one-inch balls. (Yes, there’s more than 18 here…I made a bigger batch.) Set them aside.


(When I was a kid, I just used my hands, but now that I have better kitchen tools, I use a mini ice cream scoop like this one…


…so much easier! Less mess! It’s exactly one inch in diameter, so it’s the perfect size.)

Back to finishing the cookie dough:

Stir the cocoa mixture into the large bowl containing the creamed butter/sugar mixture until the ingredients are all blended together.

Now start shaping the cookies:

Take a heaping tablespoon-or-so of dough (about the size of a ping pong ball)…


…and use your fingertips to sort of flatten it into a little cupped circle of dough. Put one of the peanut butter balls in the center…


Shape the chocolate dough around the peanut butter to entirely encase it. Roll it around in your hands to make a smooth ball. Place the shaped dough about 2 inches apart on a cookie sheet (the original recipe calls for an ungreased sheet, but I always use parchment paper on my sheets for easier cleanup).


Use the bottom of a drinking glass dipped in granulated sugar to flatten the cookie balls to approximately 1/4-inch thick. (Don’t be too skimpy with the sugar or it’ll all disappear into the cookies as they’re baking.)


Bake at 375 degrees F for 7 to 9 minutes, or until the cookies are barely set and slightly cracked. They should still be soft – do not overbake them or they will be dry.


Leave the baked cookies on the warm cookie sheet for only a few minutes, just until they are firm enough to transfer to wire racks for cooling.

These cookies are soft inside, but have a nice exterior texture due to the sugar on top. With all the peanut butter in these cookies, you’ll definitely need to enjoy these with a tall glass of cold milk! Yum!


Thursday, January 7, 2010

White Chocolate Cherry Oatmeal Cookies, with Simple Hot Cocoa


Today was a snow day for me. It doesn’t snow too often in St. Louis – usually just a few times each winter. So when we have four inches of accumulation, most schools and many businesses go ahead and call off. I was given the day off! Great! Besides, it was really one of those days where you might as well just stay indoors curled up in a blanket, sip on a hot chocolate, and enjoy a good book…and I had off from work and didn’t have to go anywhere, so that’s exactly what I did.

I knew I wanted to bake something today. With the beautiful – but cold – blanket of sparkly white snow just outside my kitchen window, I wanted to make something that would heat my kitchen up and ward off the chill. I also didn’t want to have to go to the store to collect ingredients – it was just too cold outside! Fortunately, I had all the ingredients at home for oatmeal cookies…

And, I’ve been craving oatmeal cookies lately. My version is a soft and moist cookie, spiced with a bit of cinnamon and nutmeg. They are studded with sweet Lambert dried cherries, compliments of my mom’s summer cherry harvest (thanks, Mom!). White chocolate chips are folded into the dough – they give a creamy flavor counterpoint to the sweet cherries.

White Chocolate Cherry Oatmeal Cookies
Makes about 3 dozen cookies

1-3/4 cups flour
3/4 tsp baking soda
3/4 tsp baking powder
1/2 tsp salt
1/2 tsp ground cinnamon
1/2 tsp ground nutmeg
1/2 lb (2 sticks) unsalted butter, room temperature
1-3/4 cups dark brown sugar
2 large eggs
2-1/2 tsp vanilla
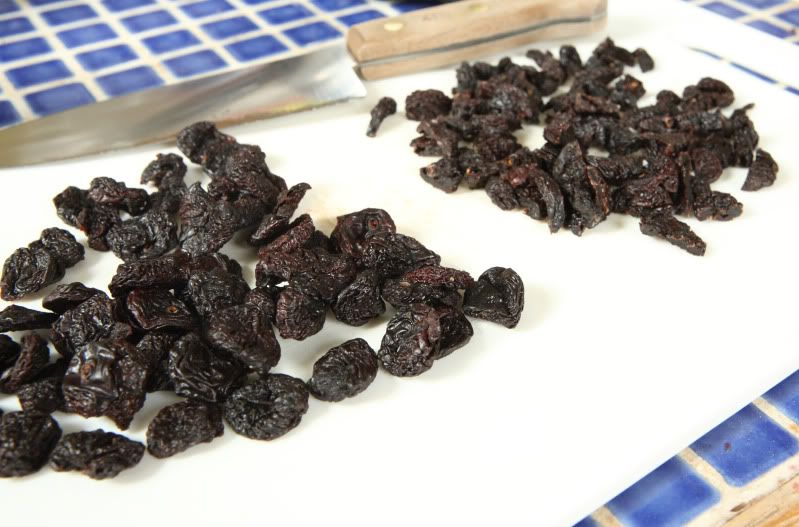
1 c dried cherries, either sweet or tart will work, but I used sweet, because that is what I had on hand
3-1/2 cups oatmeal (not instant!)
1 c white chocolate chips

Preheat your oven to 350 degrees. Cover your cookie sheets with parchment paper.

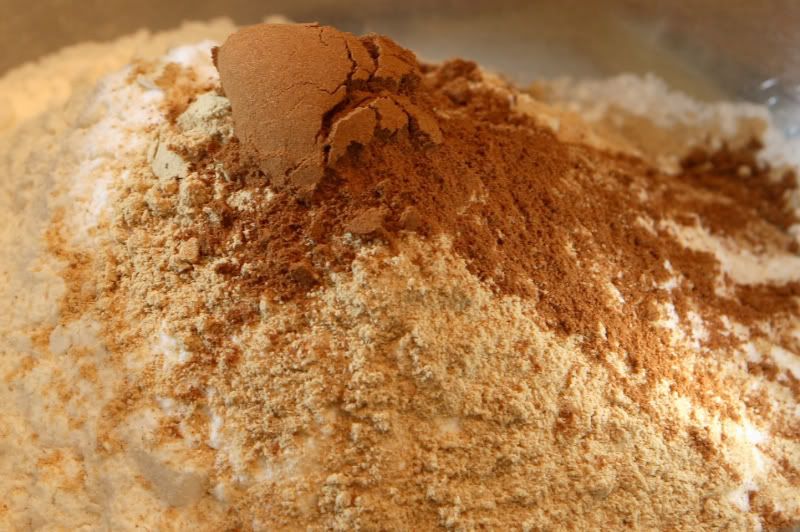
In a medium bowl, use a whisk or a fork to mix together the flour, baking soda, baking powder, salt, cinnamon, and nutmeg. Set this aside. (I tend to measure my nutmeg and cinnamon generously, like the next picture…)


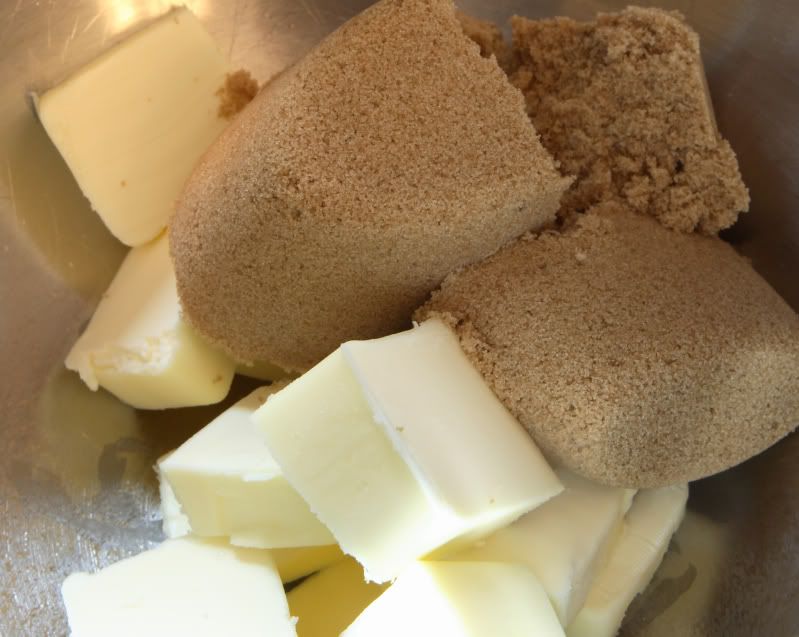
Place the butter and brown sugar in a clean large bowl, preferably one that goes to a stand mixer. Beat the butter and brown sugar together until it is well-incorporated. Add the eggs and vanilla, and beat until a smooth batter has formed.

While the batter is beating, roughly chop the cherries to approximately the size of a raisin. Set them aside.


Once the butter mixture is smooth and well-mixed, add the flour mixture, stirring only until the ingredients are combined.

Add the oatmeal, cherries, and white chocolate chips. Stir until all ingredients are incorporated. (The batter is very stiff – this is definitely a recipe that is easier to make in a stand mixer.)


Use a small ice cream scoop to portion out 1.5-ounce balls of dough, approximately the sized of a ping pong ball. Place the cookie dough balls about two inches apart on a cookie sheet covered with a sheet of parchment paper or a Silpat.


Bake at 350 degrees until the cookies are pillowy and are almost firm to the touch, 6 to 9 minutes. They should appear slightly underbaked. Remove the cookies from the oven and let them sit on their cookie sheet, undisturbed, for five minutes. Transfer the parchment paper to a cooling rack and let the cookies sit on the paper until they are firm enough to transfer directly to the cooling rack.

What goes better with cookies on a cold winter day than…hot cocoa! Its super easy to make and tastes so much better than the stuff that comes from a packet. I don’t own a microwave, so I just make mine on the stovetop, but if your kitchen is so equipped, you could zap your milk long enough to heat it just until its steaming hot.

I have several small mixing bowls, so I mix each drink’s cocoa individually, that way I don’t have to worry about evenly portioning the cocoa mixture. I just use a fork to stir up each bowl of cocoa.


Simple Hot Cocoa
For each drink, you’ll need:

1 cup of milk
1 Tbsp granulated sugar
1-1/2 Tbsp cocoa powder
A teeny, tiny pinch of salt

Scald the milk over medium heat. (That is, heat it over medium heat, but don’t let it boil. It should be steamy and warm, but not bubbling.)

While the milk is heating, in a small bowl, combine the granulated sugar, cocoa powder, nutmeg, and salt. Whisk it together with a fork until it is well-incorporated and all of the large cocoa chunks have been disintegrated into powder. Pour the cocoa mixture into the bottom of your mug; top with the warm milk and stir to incorporate.


If you’re feeling particularly decadent, top your hot chocolate with whipped cream and a drizzle of homemade caramel sauce.

Saturday, November 7, 2009

Brown Butter Blondies


I seem to gravitate towards baking bar cookies in the Fall. For some reason I tend to make more comfort food during the Fall season, and the rough-edged, rustic look and flavor of a bar cookie is the perfect sweet ending to a savory home-cooked meal like a pot roast and mashed potatoes.

To me, the ultimate bar cookie is definitely a brownie – fudgy or otherwise. I enjoy them so much that I definitely make those year around. But at certain times of the year – Fall especially – I start craving blondies: brownies without the chocolate.

Yes, it may seem wrong to remove the chocolate from a brownie, but believe me, one taste of these slightly-savory-yet-sweet blondies, and you’ll be hooked. I have a batch in the oven right now, and the smell is simply heavenly. I browned the butter and toasted the walnuts before mixing the batter, and the butter and nuts baking up with the salted brown sugar batter smells amazing.

Speaking of nuts – I think the amount of nuts in this recipe is perfect. I’m not a huge nuts-in-my-brownies fan, though. (In a regular brownie recipe, I usually just omit them altogether.) But the quarter cup of nuts in this recipe is just enough to provide a great walnutty flavor, plus a little crunch and texture, without being overly chunky. If you’re not a big fan of nuts, I encourage you to leave them in anyway – just chop them on the smaller side. (By the way, any extra nuts from a partially-used bag will stay fresh much longer if you freeze them!)

The browned butter and dark brown sugar makes a beautiful dark golden-colored blondie. In fact, its so deeply colored for a blondie, it almost looks like a light-colored brownie. Don’t be confused by the pictures shown here – I promise there’s no chocolate present in that pan!

Brown Butter Blondies
Makes 16 two-inch bar cookies

4 Tbsp unsalted butter
1 cup packed dark brown sugar
1 egg
1 tsp vanilla
1 cup flour
1 tsp baking powder
1/2 tsp salt
1/4 cup chopped walnuts

Preheat the oven to 375 degrees F. Grease an 8” square baking pan.

In a small saucepan, melt the butter over medium heat, stirring often, until the butter is foamy and the solids are beginning to brown. Use caution during this step – it takes awhile for the butter to begin to brown, but once it starts changing color, it goes from beautifully browned to burnt in what seems like point-six seconds. As soon as the butter solids have started to brown (the foam will stay light colored), remove it from the heat and pour it into a medium mixing bowl.


Meanwhile, in a small skillet over medium-high heat, toast the nuts until they become lightly browned, shaking or stirring the pan frequently to prevent burnt spots. Turn the nuts out onto a small cutting board and chop the biggest pieces to create uniform pea-sized nuts. Set the nuts aside.

Add the brown sugar to the browned butter; mix to combine. Add the egg and vanilla and mix it until it is incorporated. Add the flour, baking powder, and salt, and mix it until it is nearly combined – white streaks of flour should remain. The dough will seem overly dry. Add the chopped toasted nuts and mix them in until the remaining flour streaks are incorporated and the nuts are evenly distributed. The batter is very crumbly – much more like cookie dough than like a liquidy batter.


Scrape the batter into the greased pan and use your fingers to pat it into the corners of the pan, distributing the batter as evenly as possible.


Bake at 375 degrees F. for 20-22 minutes or until the blondies are golden brown. Let them cool on a rack, then cut them into two-inch squares.


Sunday, November 1, 2009

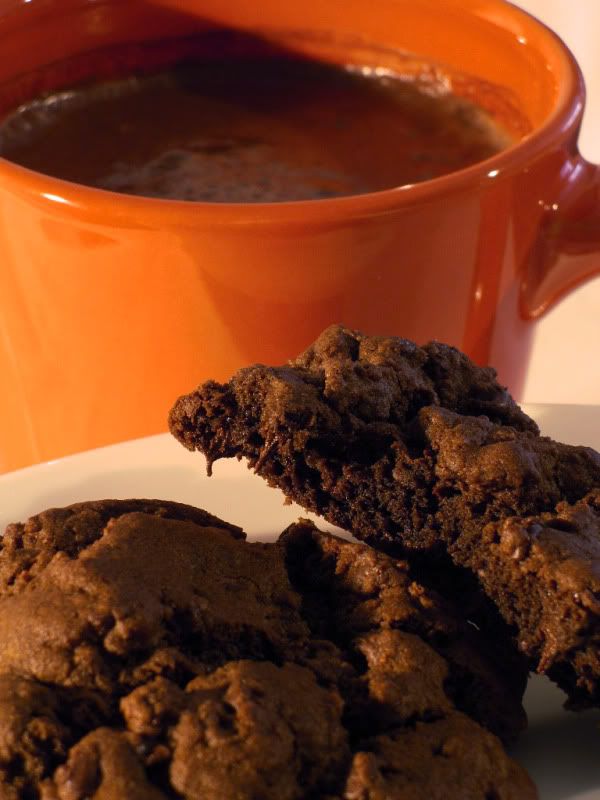
Triple Chocolate Chip Cookies


I know it’s still a little early to talk Christmas (I don’t like seeing the Santa Claus and Christmas tree decorations in stores while I'm shopping for a Halloween costume either), but today is November 1, and if you are the type who likes to hand-make your Christmas cards, you’ve got to start thinking about them kind of early. If you’re hand-making cards this year, if you haven’t already started on them, you’ll need to start soon.

I love to make handmade greeting cards. If I had all the time in the world, I’d hand make all my Christmas cards, and I’d write personalized notes inside each one. In recent years, I haven’t had time to do all of that...life has just been too crazy busy lately.

Several years ago I felt particularly ambitious. I decided it would be cute to make little Christmas cards with an original recipe included. Fortunately I decided this early enough in the year that I had time to pull it all together.

I chose to feature a cookie recipe primarily because of space limitations. Cookie recipes are usually pretty straightforward: cream the fat and sugar, add the wet ingredients, then stir in the dry ingredients, followed by anything chunky like chocolate chips or nuts. There are usually not a lot of complex instructions to write out (no primer on whipping egg whites, for example), so the recipe is short enough in length that it doesn’t take up much physical space on a small index card.

Another reason I chose a cookie recipe: baking cookies is a classic Christmas activity for my family. My sister and I make batches upon batches every year. A cookie recipe enclosed in a Christmas card just seemed to “fit.”

So, I needed a good recipe – chocolate, of course. I came up with this triple-chocolate cookie recipe. I tested and retested it several times in my kitchen because I have several great cooks spread throughout my family, and I didn’t want to give them something that would end up flopping in their kitchen. (I think I even asked my mom to test the recipe in her kitchen, too.) After a little bit of adjustment here and there, the recipe was ready to go. Now I just needed a way to present the recipe, and a greeting card to go along with it.

I thought long and hard about exactly what the Christmas card should look like. I have always liked the retro look of polka dots, and since the cookies were chocolate, a chocolate-colored card with some kind of polka-dotted paper seemed to fit the bill. But I couldn’t find any polka dotted paper that was just right (all the dots were either too large or too small for what I envisioned).

Rather than settle for something less satisfactory, I ended up designing my own polka-dotted paper in Photoshop. I printed it out on my color laser printer, deckled the edges, and wrapped it around chocolate brown cardstock I got for free from Archiver’s (if you shop there often, you’ll know they have those great Free Cardstock! coupons). Bonus, the Christmas cards didn’t cost too much to make!

I baked up one last batch of cookies and shot a few pictures, one of which I Photoshopped alongside an as-abbreviated-as-possible version of the recipe. I used brown papercrafting rivets to attach the printouts to the front and back sides of recipe card-sized cardstock. Voila, my recipe card insert to my Christmas greeting card.

Unfortunately it’s been several years since I did this project, so I don’t have any of the finished cards left. (Silly me, I mailed them all.) If you were one of the recipients of those cards, and still have it floating around somewhere, let me know so I can borrow it and take a picture of it! Therefore, as of right now, I have no pictures, so you’ll just have to imagine the card in your brain. Aside from what I’ve already described, it was cute, but pretty basic: just a fold-over card with a place to write a Christmas greeting. The thickness of the cardstock protected the enclosed recipe card from the mail sorting machines at the Post Office.

For your viewing pleasure, I do have the file of the polka dot paper saved (I made two color variations).


I also still have the Photoshop files I used to do the card layout.


If you’re not into making a zillion Christmas cards but want a nice hostess gift for someone, you could make up a batch of the cookies, type up or handwrite a cute recipe card, and package it all in a cute Christmas tin.

Or just forget the crafty stuff and make the cookies anyway! Yum!

Triple Chocolate Chip Cookies
Makes 2 dozen cookies

4 ounces 70% cacao dark chocolate (In my most recent batch, I used Lindt, but I have made it with both Scharffen-Berger 70% and with Baker's brand chocolate.)
1/2 cup unsalted butter
3/4 cup packed dark brown sugar
3/4 cup granulated sugar
2 Tbsp unsulphured molasses
1 Tbsp vanilla
1 egg
1/2 cup cocoa
1/8 tsp salt
1-1/2 cups all-purpose flour
1-1/4 tsp baking soda
1/4 tsp baking powder
12 ounces semi-sweet mini chocolate chips

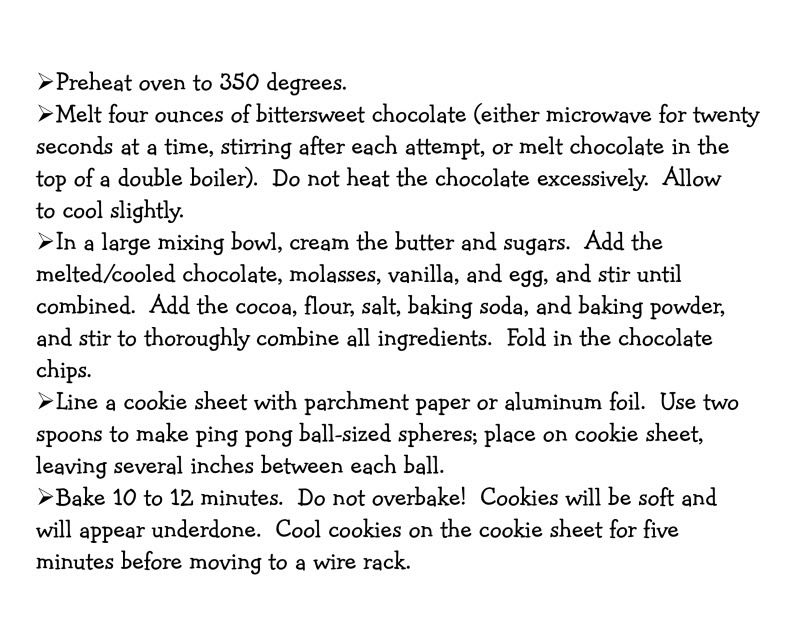
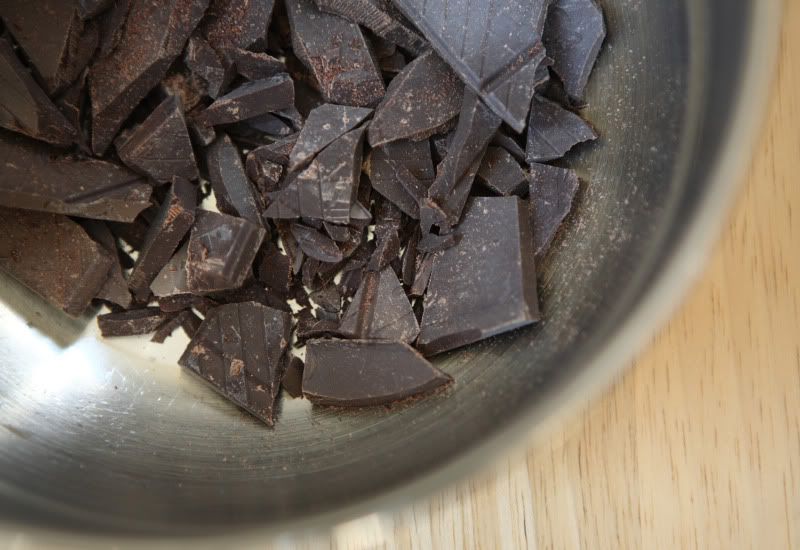
Preheat oven to 350 degrees F. Roughly chop the chocolate.


In the top half of a double boiler, melt the chocolate, stirring frequently. Do not heat the chocolate excessively. Set it aside and allow it to cool slightly.

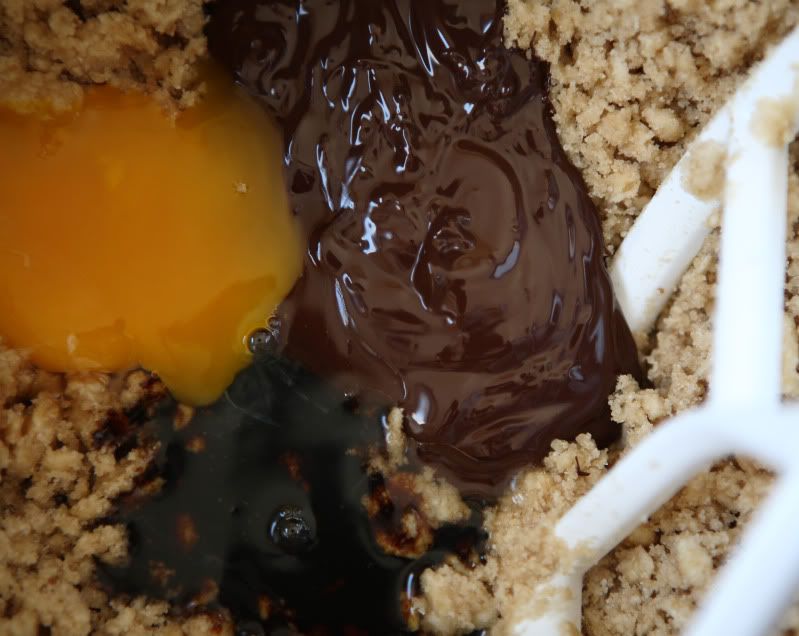
In a clean large mixing bowl, cream together the butter, brown sugar, and granulated sugar. Add the melted and cooled chocolate, molasses, vanilla and egg, and beat until combined.


Add the cocoa, salt, flour, baking soda, and baking powder.  Stir to thoroughly combine all ingredients. The dough will be stiff and might seem overly dry, but will hold shape when pressed together. Add the chocolate chips; stir to distribute evenly throughout the dough.

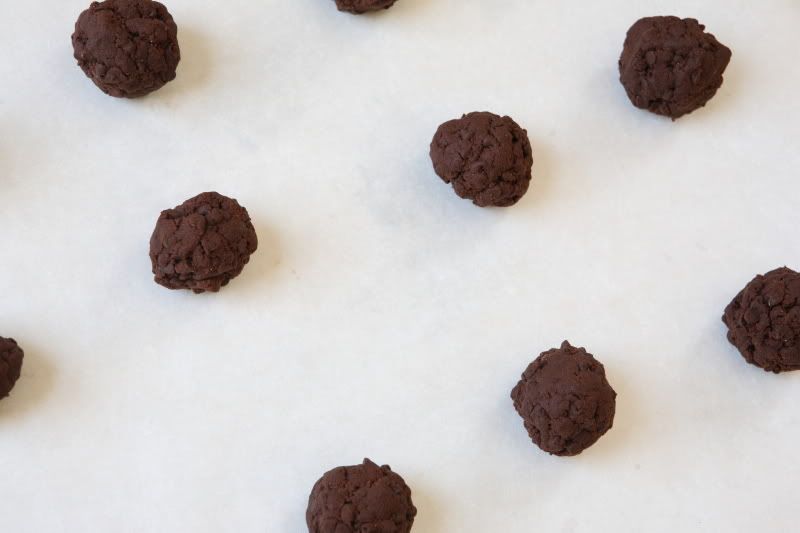
Press dough together into ping pong ball-sized spheres on a cookie sheet lined with foil or parchment paper, spacing them several inches apart. Each ball of dough should weigh approximately 1.5 ounces.


Bake 10-12 minutes. Whatever you do, DON’T overbake the cookies! They will still be soft – almost too soft - when they are done.

Cool the cookies five minutes on the cookie sheet before transferring the foil/parchment to a wire rack. As the cookies firm up, they can be transferred directly to the rack to complete the cooling process. Store them in an airtight container.

Monday, August 3, 2009

Homemade Marshmallow - Part of the July Daring Baker's Challenge

The July Daring Bakers' challenge was hosted by Nicole at Sweet Tooth. She chose Chocolate Covered Marshmallow Cookies and Milan Cookies from pastry chef Gale Gand of Food Network.com.


I have been struggling with how to write this post. I don’t like to sugarcoat my writing to give a false impression of glowing success in the kitchen, but nor do I want to be a total downer when something didn’t turn out quite right.

To be totally frank, I thought the recipes weren’t written very well. Definitely great ideas, but it’s obvious that the Food Network didn’t take enough time to test and rewrite either of these recipes. I was hoping I’d have time to test and retest to give you a better recipe, but with that backache problem I had earlier in the month, I just ran out of time. (I actually made the cookies before my back acted up, but once the back went out, that was it for the month. I barely got through the Daring Cook's challenge, and as you can see by the lack of other posts, I wasn’t able to make much of anything else either. Although my back has mostly healed by now, I’m late on this post because I’ve been out of town for a week.)

I’m not entirely ruling out “baker’s error” on my part...but I see that a number of other Daring Bakers had similar results, so I’m less likely to think the problems I identified were due to our Bakers’ own mistakes. I was also very cautious to follow the recipes exactly (especially once I identified several red flags). But, maybe they didn't turn out because of something I did - there were a number of other Daring Bakers who were happy with their results.

--------------------


The Milan cookies were two thin cookies sandwiched together by a ganache filling, mimicking the appearance of the Pepperidge Farm Milano cookies. I was really excited to make these cookies, as the Pepperidge Farm version (specifically the mint flavor) are one of my favorite types of store-bought cookies. I love their crisp, buttery texture, and couldn’t wait to try them at home.

Unfortunately, the Food Network version didn’t taste anywhere close to the Pepperidge Farm version. Nor did they taste better (I don’t mind improving on something already delicious, but these cookies didn’t fit the bill). They were chewy and gummy regardless of their baking time (no, they weren’t underdone, I tried quite a few trays with a wide variety of baking times). The recipe called for an insane amount of lemon and vanilla extract (2 Tbsp each – that’s 1/4 cup total!), thus the dough reeked of cheap alcohol and didn’t taste any better. The baked, unassembled cookie reminded me more of a poorly-executed tuile cookie than the Milano cookies I’ve bought from the grocery store. The recipe’s suggested yield was inaccurate and the cookie size recommended in the original recipe was not authentic.

So, I am not including the recipe here because I don’t post things on this blog that I’m not reasonably confident about. (My rule of thumb is, if I wouldn’t serve it to houseguests, I’m not posting it on here. And if I can’t give a friend the link to the recipe and expect her to be able to recreate it herself, it’s not going on the blog.) You can click on over to the host’s blog or over to Food Network if you are dying to try the cookies out...

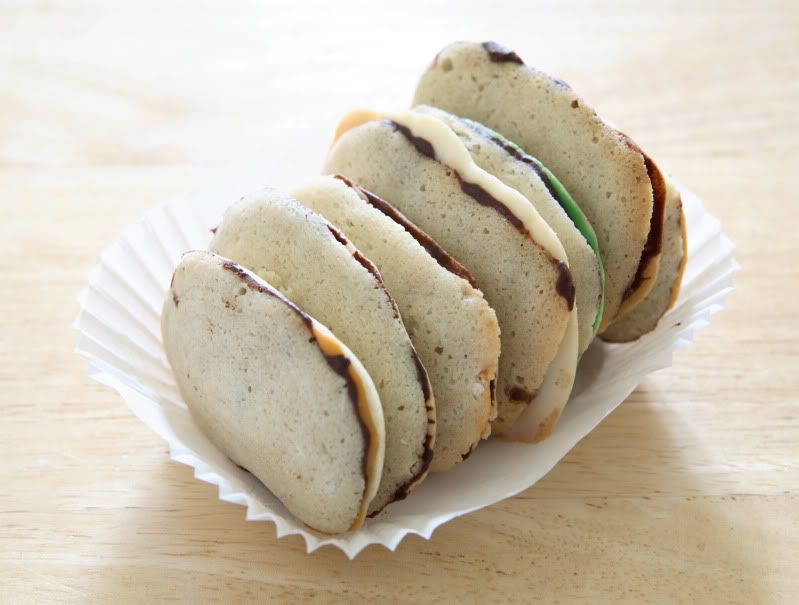
I will give you a photo – they looked good enough, they just didn’t taste good.


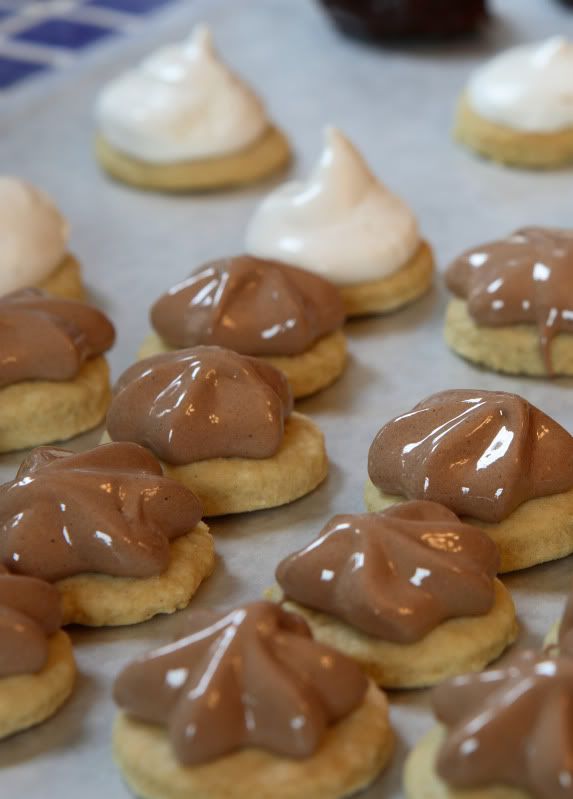
I did make multiple flavors of filling - shown from left to right are white chocolate/butterscotch, chocolate/orange zest, plain chocolate, chocolate/white chocolate, chocolate/mint, and a few duplicates: another straight chocolate, and another chocolate/butterscotch. The filling tasted good – it was simply basic chocolate ganache variations.

--------------------


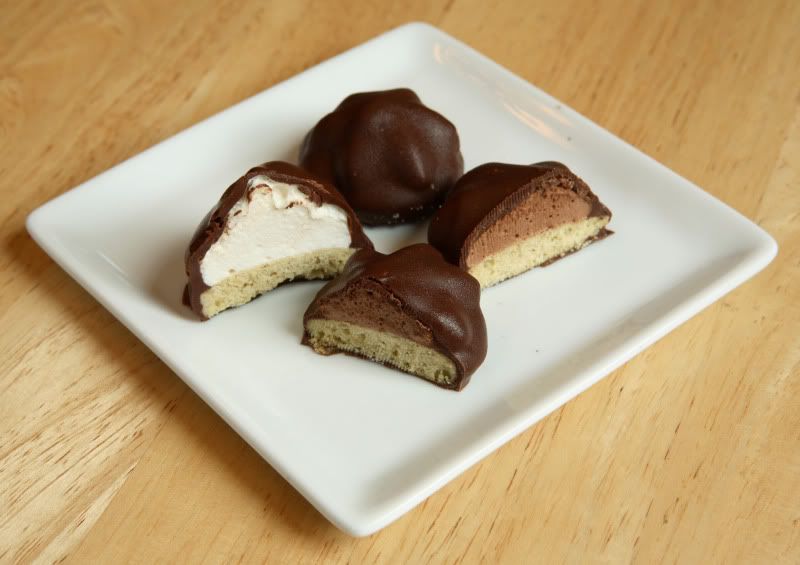
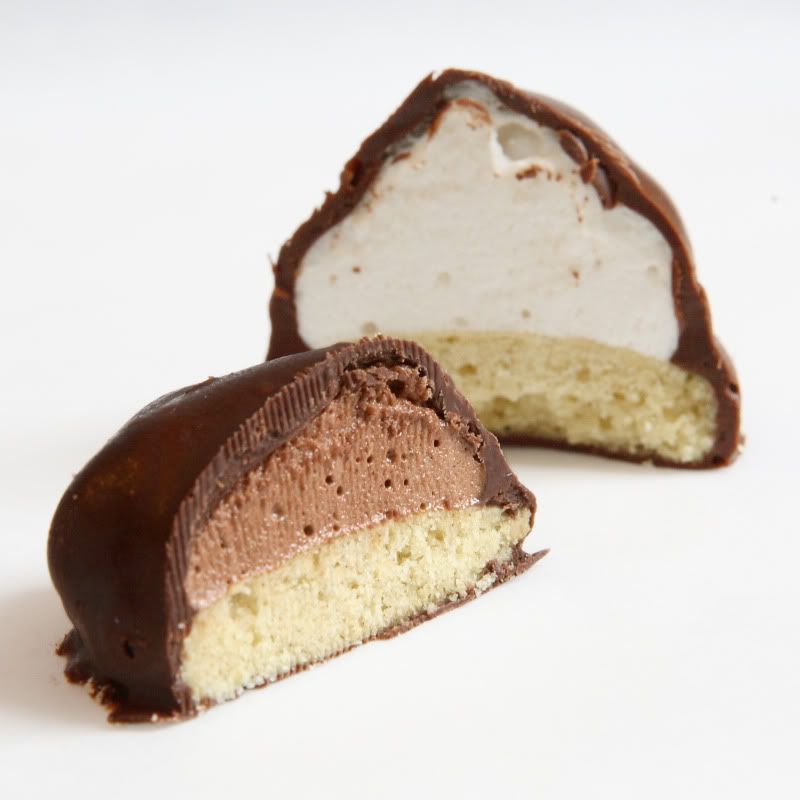
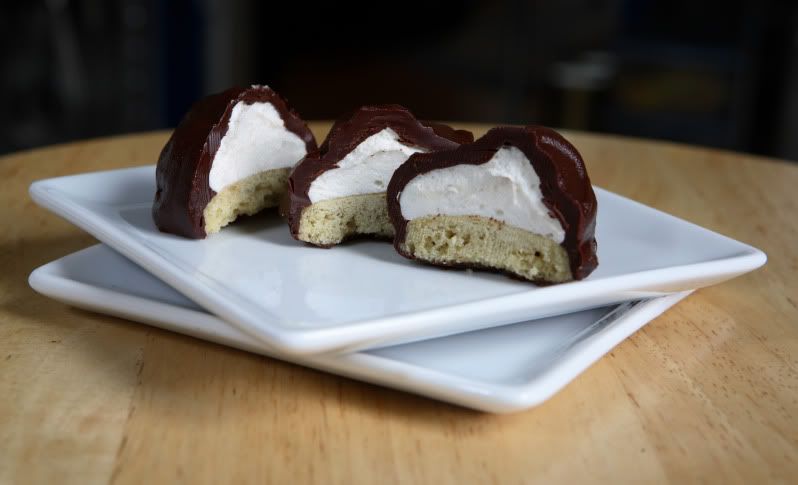
The marshmallow cookies were composed of three parts: a cookie base, which was topped with a homemade marshmallow “kiss,” all of which was dipped in a chocolate coating. My opinion of this recipe is varied: The “base” component of the cookie was dry and tasteless, and the recipe yielded twelve dozen cookies even though it indicated a yield of only two dozen. The marshmallow topping yielded enough to make four dozen cookies (that’s still twice as much as the suggested yield, but definitely not nearly enough to cover all of the cookies). And the chocolate coating yielded exactly the amount suggested in the original recipe: two dozen cookies. However, it was sticky and wet at room temperature, and bloomed as it sat to dry. Even after I popped the cookies in the refrigerator to set the chocolate up firm, the chocolate still did not have an appealing texture or appearance, and it melted once it was returned to room temperature. Tempering the chocolate would have solved these problems – and as I made a second batch of chocolate coating, that’s exactly what I did, with much better results.

Despite all the issues these cookie recipes presented, the marshmallow component was absolutely delicious, and it was a fun challenge - I’m glad I tried it, as I rarely make candy. I won’t give you the recipe for the entire completed cookie on this blog, but I will give you the marshmallow recipe, and you should make the marshmallow soon! Use it to top your favorite crispy sugar cookie recipe, or try a homemade graham cracker cookie, or a crunchy chocolate cookie, anything. Then dip it all in tempered chocolate, and you’ll have a delicious final product that’s similar to the intent of the original recipe. Or use the marshmallow to make homemade s’mores – toast them over your charcoal or gas grill if you don’t have plans to be near an open fire. You can pipe marshmallow “kisses” directly onto a piece of parchment paper dusted liberally with cornstarch.

I wouldn’t recommend that you double the marshmallow recipe because there’s a small window of time where it’s firm enough to not be overly runny, but soft enough to pipe into your desired shape. If you make too much marshmallow up at once, you won’t be able to pipe them all out before things set up and become too firm.

Another recommendation: I made my first batch of marshmallow with a stand mixer with the wire whip attachment. The second batch was made with a hand mixer with the standard beater attachment. Both worked well enough, but the best results were obtained with the stand mixer/wire whip setup - so if it’s available to you, use it!

Homemade Marshmallow
Makes enough to top four dozen 1.5” cookies
1/4 cup water
1/4 cup light corn syrup
3/4 cup (168.76 grams/5.95oz) sugar
1 tablespoon powdered gelatin
2 tablespoons cold water
2 egg whites, room temperature
1/4 teaspoon pure vanilla extract
3 Tbsp cocoa powder (optional)

In a medium non-stick saucepan, combine the water, corn syrup and sugar. Bring it to a boil until it reaches the “soft-ball” stage, or 235 degrees on a candy thermometer.

Meanwhile, in a small bowl, sprinkle the gelatin over the cold water and let it dissolve. It will turn into a glob of gelatin – if there is still dry gelatin, give it a quick stir to ensure all of it has a chance to dissolve.

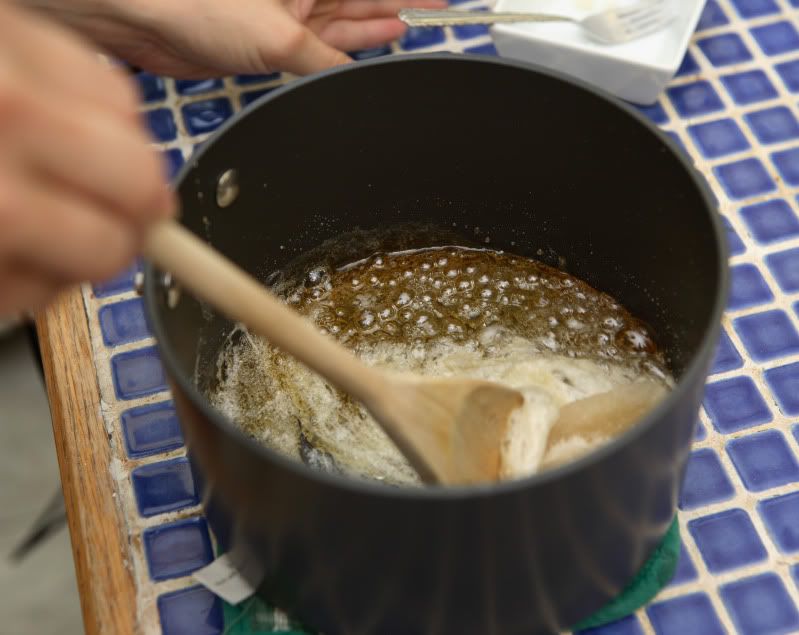
Once the syrup is at the “soft-ball” stage, remove the pan from the heat, add the gelatin, and mix. The pan will sizzle and bubble and glop up a bit, not too dissimilar from how it does when you make homemade caramel. Keep stirring and it will all smooth out. Note that in this picture, which was from my second batch of marshmallow, I ended up cooking the syrup a too long. (Sigh…distractions!) So it’s a little more golden than your results should be. It didn’t end up being a problem – the marshmallows still tasted great. And I was planning on making chocolate marshmallows for my second batch anyway, so the golden color didn’t matter once the cocoa was added.


In a large mixing bowl, whip the whites until soft peaks form. If in doubt, whip slightly more rather than slightly less – but don’t whip it so long that your whites are at a stiff-peak stage just yet.

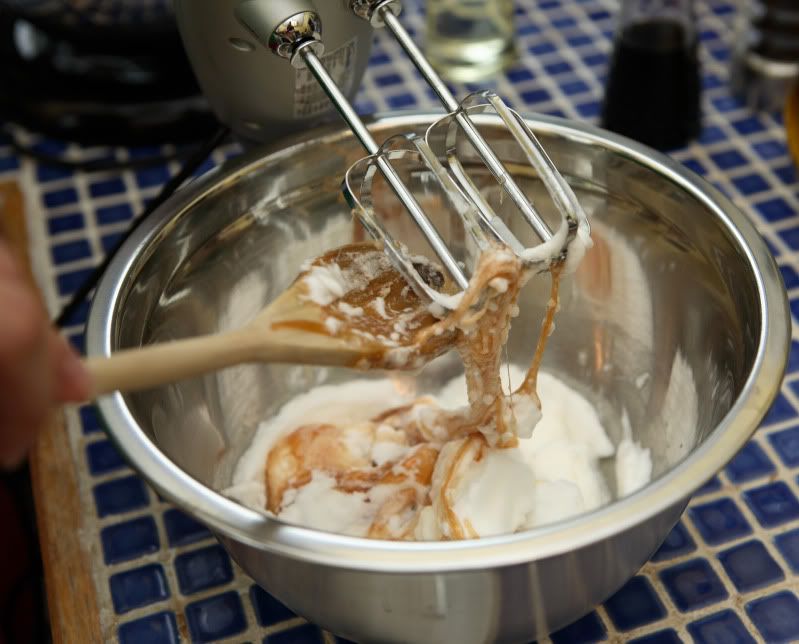
With the mixer off, scrape the still-warm syrup into the whites.


Add the vanilla. If you want to make chocolate marshmallows, flip the mixer back on high for a few seconds to begin to incorporate the liquid, then turn it back off and sift 3 Tbsp cocoa powder over the whites. Next, whether you’re making plain marshmallows or chocolate ones, continue to whip the marshmallow mixture on high speed until it is stiff.

Transfer the marshmallow mixture to a large pastry bag fitted with a wide tip – a large star Wilton #2110 (1M) makes a pretty shape. A large plain circle will work too. Don’t overfill the bag. I twist the top of the bag tightly closed and rest the pastry bag upside-down on itself in a tall liquid measuring cup so it won’t leak out of the top or bottom. Let the marshmallow mixture cool until it sets up enough to maintain an attractive shape during piping.

The marshmallow stuff sets up pretty quickly. Work fast because once it gets too firm you won’t be able to scrape it up or pipe it out nymore. But you can’t use it immediately – it does need to cool slightly or it will be too runny to hold shape. Pipe it onto cookies or graham crackers, or whatever your desired use is. Let the piped marshmallow dry until it is firm to the touch before you try to do anything else with it.


The syrup is difficult to clean up. Use dishwasher-safe implements and a non-stick pan. My non-stick pans won’t go in my dishwasher, so here’s how I clean them out: Fill the dirty pan about half-way with water. Put it on high heat and use a wooden spoon or other no-scratch utensil to scrape the sides and bottom of the pan as it heats up. As the pan gets warm, the sugar will dissolve into the water and rinse away. It might take a couple of tries to get the pan entirely sugar-free. The pan can then be washed by your usual method.

If you’re going to use a chocolate coating, I highly recommend that you take the time to temper the chocolate. It’s one of those things that sounds complicated, but is really super easy as long as you have a thermometer.

Tempered chocolate has a prettier appearance and won’t “bloom” (the lighter brown spotty swirls you sometimes see on chocolate). If you want some advice and background information on tempering chocolate, read Michael Chu’s article, Tempering Chocolate. I always use the Seed Method, which he describes at the point where the pictures begin. Remember, different types of chocolate temper at different temperatures, so be sure to adjust accordingly (broad suggestions on temperature ranges are included further down his article).

For what could potentially produce the best results, check out your chocolate manufacturer’s website, there’s a good chance they will list the exact temperature that should be used when tempering their brand of chocolate. In my case, since Scharffen Berger chocolate is what’s most readily available where I live, I have always referred to their website for tempering instructions when working with their brand of chocolate. However, they apparently changed their website recently – actually, it was three days ago, as of the time of this writing. Their new site doesn’t list tempering instructions, but their old site (which may or may not work by the time you read this) recommended the following instructions:

To temper chocolate, first chop up the chocolate you want to temper. Save a few chunks for later in the process. Then, melt all but the few chunks of chocolate over a double boiler to 110 degrees. By melting chocolate to 110 degrees F, you dissolve all crystals and start from scratch.

Take the chocolate off the heat. Add the chunks of chocolate you held back and, stirring, let it cool to about 80 degrees F.

Reheat the chocolate using a flash method over the hot water in the double boiler. Heat it 3 to 5 seconds at a time, take it off the heat, put it back on, rather than just sitting the bowl back on top of the hot water, until the mixture reaches 91 degrees F.


(During that last reheat step, I stir the chocolate five strokes while it's over the heat, then five strokes off the heat (then repeat). I think it's easiest when I get into that 1-2-3-4-5, 1-2-3-4-5 rhythm.)

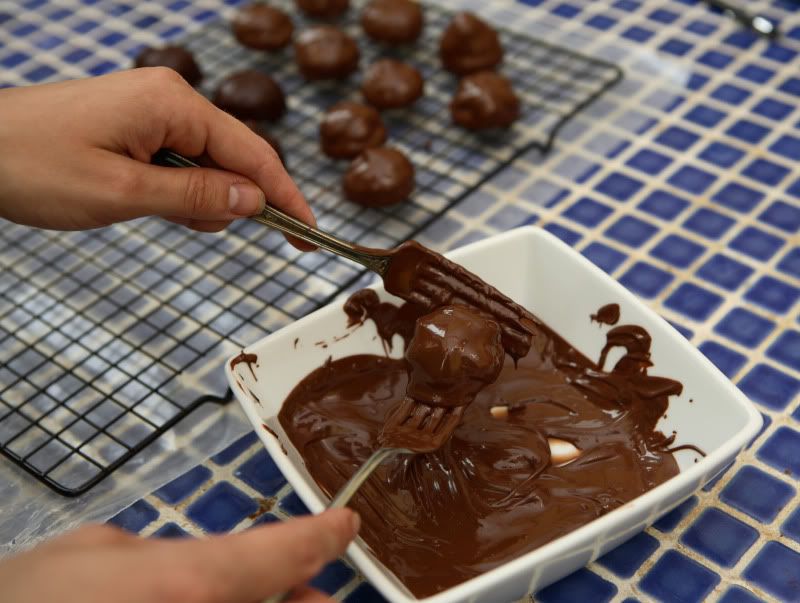
I find it easiest to coat the cookies using two forks. I put the coated cookies on a wire rack to allow any excess coating to drip off, then transfer them to parchment or waxed paper until they can completely firm up.


Although the cookies were dry tasting, they were cute!


The cookies below were made according to the original recipe, with untempered dark chocolate.

Sunday, April 19, 2009

Soft Ginger Cookies

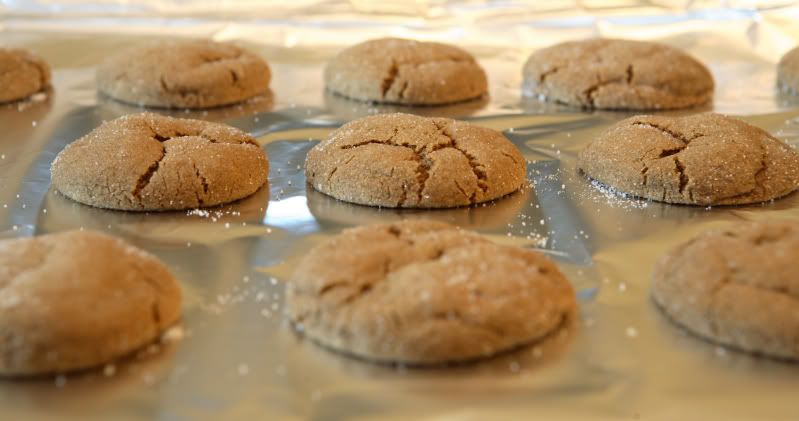
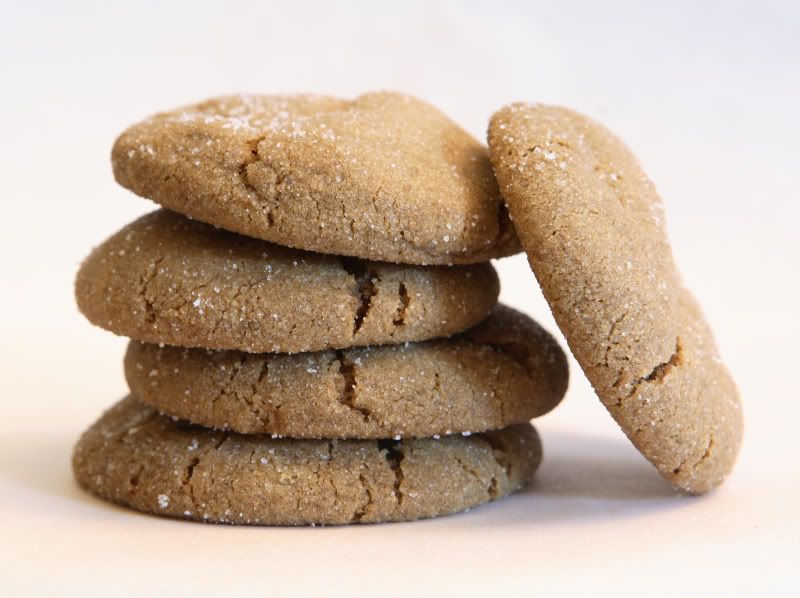
I've been craving these cookies for probably a month now, so I finally made them the other day. I love the ginger flavor (with a hint of lemon zest), and the soft-textured cookie practically melts in your mouth. The sugar coating on the outside adds the slightest bit of crunchy resistance when you bite into the cookie. Yum!

Unfortunately I'm not sure exactly how many cookies the recipe will yield because I have a confession to make: I eat the raw cookie dough as I'm making them! I know you're not supposed to do that, what with salmonella poisioning and all...but I've been eating raw dough all my life and have yet to get sick...

Anyway, I believe you'd be able to get around two dozen cookies if you used one good tablespoon of dough per cookie (if you didn't eat as much of the dough as I usually do!).

Soft Ginger Cookies
Makes 2 dozen (probably)
2 1/2 cups flour
2 tsp baking soda
1/2 tsp salt
3 tsp ground ginger
1 tsp ground cinnamon
3/4 cup butter, softened
3/4 cup dark brown sugar
1 large egg
1/4 cup unsulphured molasses
1 T grated lemon rind
granulated sugar, for rolling cookies

Preheat oven to 350 degrees F.

In a medium bowl, stir together the flour, baking soda, salt, ginger, and cinnamon. Set aside.


In a large bowl, cream butter and brown sugar together until well-incorporated and fluffy.


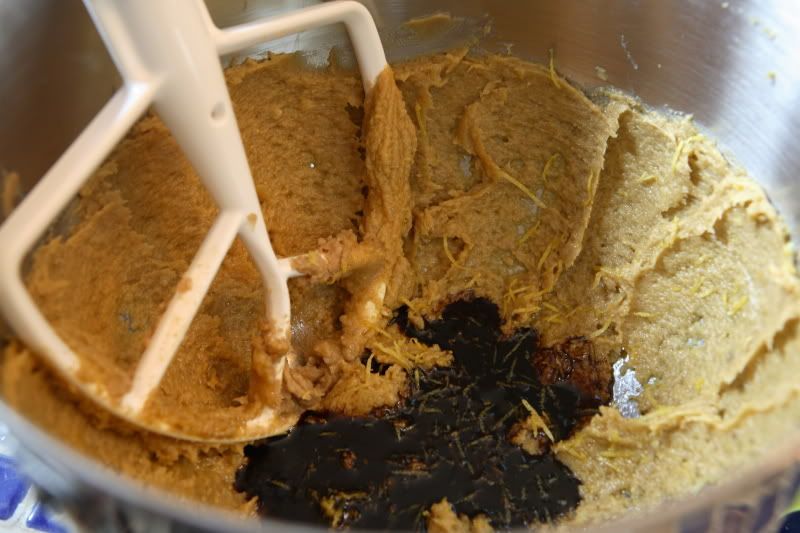
Beat in egg, molasses, and lemon rind until smooth.


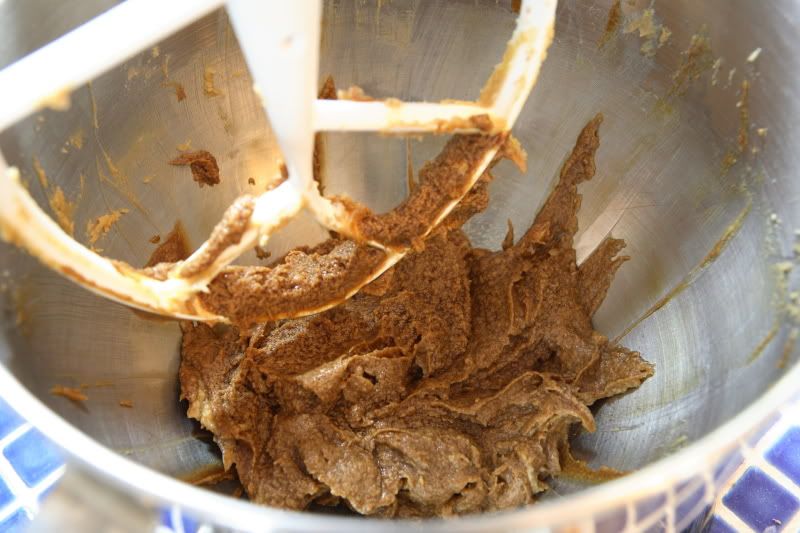
Stir the dry ingredients into the butter mixture. Blend well.

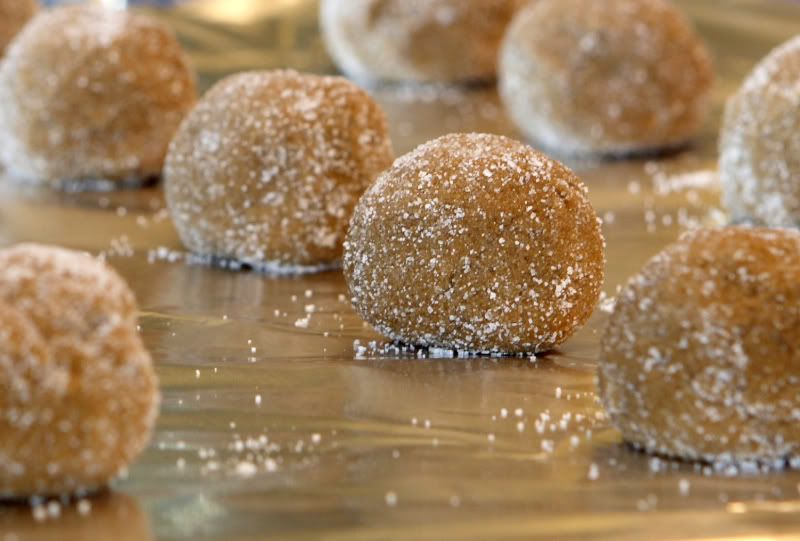
Roll dough, one tablespoon at a time, between the palms of your hands, into balls. Roll in granulated sugar. Place 2 inches apart on a cool, ungreased, aluminum foil-covered cookie sheets.


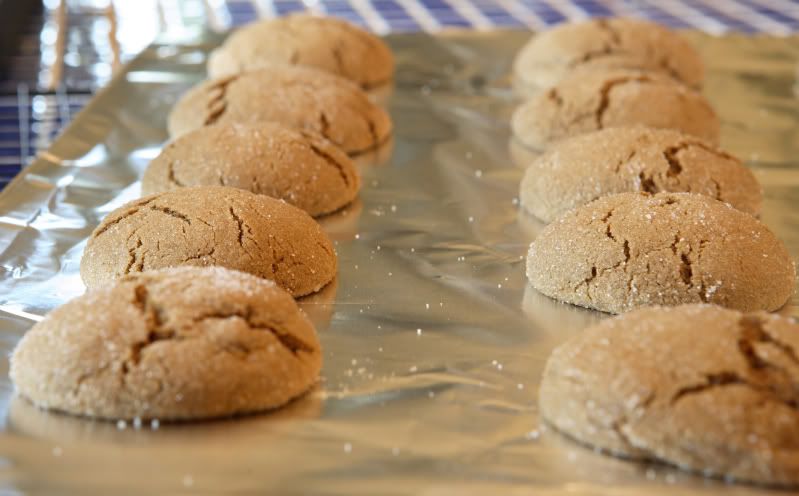
Bake in preheated oven for 10 minutes. Do not overbake (cookies will be pillowy and soft in the center).


Cool on the cookie sheet for five minutes. They will sink slightly as they cool.


Leave the cookies on the aluminum foil (or they'll rip apart if you try to move them). Transfer the foil pieces to cooling racks; allow the cookies to cool on the cooling racks completely before removing them from the foil. Cookies will stay soft if they are stored in airtight containers.