Showing posts with label cake. Show all posts

Thursday, January 6, 2011

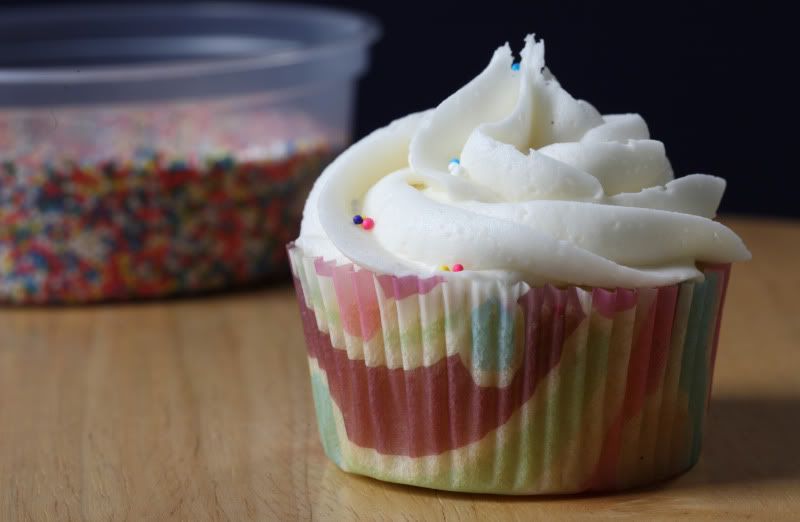
Vanilla Buttermilk Cupcakes with Vanilla American Buttercream Frosting


The day after New Year’s Eve is a great day for a lazy day – most people probably need a little bit of recovery time after their New Year’s Eve festivities, so no one really expects anything other than just that.  Assuming you’re not working, you can sleep in, be unmotivated to accomplish much of anything, lounge around the house, take a nap, watch TV, and think of nothing of any importance.

So, being as the day I baked this recipe did happen to be the day after New Year’s Eve, and being as I had it off from work, I took full advantage of the opportunity for a lazy day, and slept most of the morning, surfed the internet, spent the day in my PJ’s, and just plain took the day off.  The most complicated thing I thought of was whether or not I should take a nap (I initially decided against it since I slept in that morning and didn’t want to screw up my sleeping schedule for later that night, but then decided I was tired and a nap was definitely in order.).  I also thought about what I might want to make for the blog next.

I initially thought of cookies, but I guessed that most people are rather cookied-out now that we’re at the close of the holiday season.  (Posting any kind of cookie in January seems a little unfashionably late.)  Then my mind moved to cupcakes.  I haven’t made cupcakes in a long time – not since the last time I made my knockoff Hostess cream-filled cupcakes.  Those are delicious, but I decided they were too much work for my low brainpower day…however something a little less difficult would be perfect – like a classic vanilla cupcake with a swirly crown of frosting.

These cupcakes are super easy to make, so they are perfect if you’re having a lazy day like I was, or if your kids want to bake and you want to give them a recipe that is simple and uncomplicated.  The recipe is no more difficult to make than a batch of cookies (they actually kind of taste like sugar cookies in cupcake form), and it is made with things I almost always have in my fridge and pantry.  The recipe does call for both cake flour and all-purpose flour, and you should definitely use both as the recipe is written or you’ll end up with a cake that is too dry and dense.  The only ingredient that might be slightly more unique is buttermilk.  I always keep a container of dry powdered buttermilk in my fridge for recipes such as this (it takes a very long time for it to go bad, so I recommend you do the same even if you hardly ever use it).  If you don’t have that in your fridge, the chances are better that you might have some milk in there, and hopefully you have some vinegar somewhere around your house, so you can do the old fake buttermilk (vinegar-in-milk) trick in lieu of actual buttermilk.  (I’ve included the directions for this substitution in the recipe ingredients list.)

Note that one reason the recipe is so simple is because there are no egg whites to whip.  The lack of whipped egg whites means the cakes aren’t going to be as light and airy and perfect in texture as a cake with whipped whites included.  Sometimes I'm willing to sacrifice a bit of texture in favor of simplicity…sometimes I'm not.  If you’re just looking for a quick and easy cupcake recipe and don’t require perfection in the sponge cake world, these cupcakes will definitely fit the bill.  What I'm hinting at is, while these cupcakes aren't bad, nor are they going to be the cornerstone recipe of the next cupcake boutique shop.  But they are nice, easy-to-make, simple, unassuming cupcakes.

This recipe originally came from Martha Stewart’s Cupcakes cookbook.  While the cupcake recipe was pretty good given the limitations I’ve described above, I wasn’t satisfied with the quality of the frosting recipe that accompanied the cupcakes in the cookbook.  It didn’t make enough frosting, was excessively dense, buttery and greasy, and just wasn’t very good.  The frosting was so bad that I tossed it and made something different - much better tasting.  You should make the frosting I’ve posted below, or whatever your favorite buttercream frosting happens to be, instead of the frosting recipe written in the cookbook.

Vanilla Buttermilk Cupcakes
Makes about 42 standard-sized cupcakes, more or less, depending on how full you fill the tins.  The original recipe claimed a yield of 36 cupcakes, but I got 48 out of the batch...

3 cups cake flour
1-1/2 cups all-purpose flour
3/4 tsp baking soda
2-1/4 tsp baking powder
1-1/2 tsp coarse salt
1 cup plus 2 Tbsp unsalted butter (that’s 2-1/4 sticks), room temperature
2-1/4 cups sugar
5 whole eggs, plus 3 egg yolks
2 cups buttermilk (or use dry buttermilk according to the package instructions, or substitute fake buttermilk:  place 2 Tbsp vinegar in a 2-cup liquid measure.  Add milk to fill up the measure to 2 cups)
2 tsp vanilla extract
frosting and sprinkles, to decorate

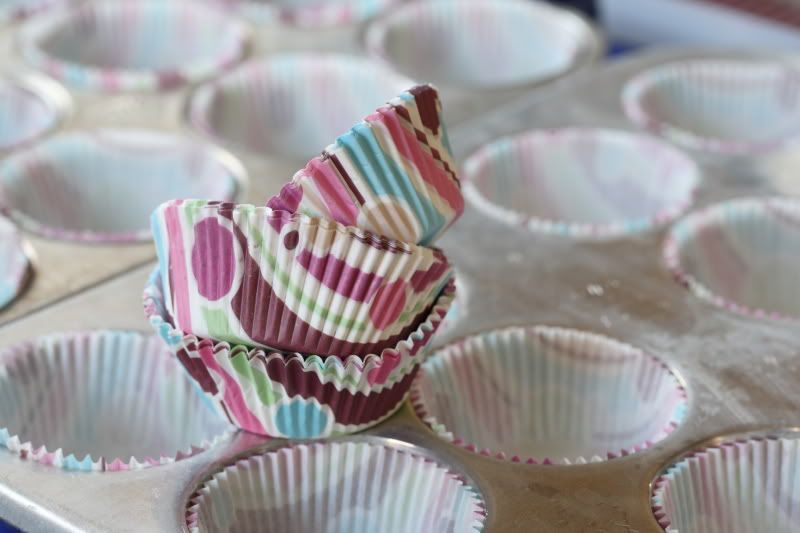
Preheat oven to 350 degrees F.  Line standard muffin tins with liners.  (I got these neat Wilton cupcake liners for 99 cents from Hobby Lobby!)


In a medium bowl, whisk together both flours, the baking soda, baking powder, and the salt.  Set the bowl aside.

With an electric mixer on medium-high speed, cream the butter and sugar until pale and fluffy.  Add the eggs one at a time (both the whole eggs and the egg yolks), beating until they are completely incorporated between each addition.  You may need to scrape down the sides of the bowl a few times as you work.

Add the flour mixture in three batches, alternating with two additions of buttermilk, and beating until combined after each.


Beat in the vanilla.

The finished batter is thinner than the above photo (it shows the batter mid-way through the mixing process).  Divide the batter between the cupcake liners, filling each 2/3 to 3/4 full.


Bake about 18-20 minutes, or until a cake tester inserted in the center comes out clean.  Turn the cupcakes out onto racks and cool completely before frosting.  The cupcakes will taste best when they’re served the same day they are baked.


(Oops, one cupcake liner was kind of bent in!  You know what that means?  Taste test cupcake!!) 

Vanilla “American” Buttercream Frosting
Makes 6 cups, which is about 58 ounces of frosting.  And there's a reason I gave you the yield of the frosting in ounces:

If you intend to frost your cupcakes with “cupcake shop”-style swirly tops (using a piping bag and a Wilton #2110 (1M) tip), this makes just enough to top 42 cupcakes assuming you use no more than 1.4 oz of frosting per cupcake.

If you intend to frost your cupcakes using the “smear with a knife” method, you can probably just make a half batch of this recipe, because my experience is that you’ll use much less frosting per cupcake (usually about half, so no more than .7 oz of frosting per cupcake), and therefore won’t need as much frosting to get the job done.  If you anticipate you’ll have a heavy hand with the frosting, you might want to make 2/3 or 3/4 of a batch of frosting.

3/4 cup unsalted butter, room temperature
6 Tbsp shortening
2 tsp vanilla
1/2 tsp salt
12 cups powdered sugar (about 3.2 pounds)
3/4 cup milk

Beat the butter, shortening, vanilla, and salt on medium-high speed until everything is well incorporated.  Meanwhile, I suggest that you measure the powdered sugar into a new, separate mixing bowl. (Doing so means you wont have to keep track of how many cups of sugar have been added to the frosting as you’re making it.)  Similarly, its easier to make the frosting if you have the milk measured into a liquid measuring cup with a spout.

After the butter has been fully mixed, the powdered sugar and milk should be added to the butter mixture a little bit at a time, alternating between the two.  I turn the mixer to low (or powdered sugar will be everywhere!) and use the pouring shield to drop in 1 cup of sugar.  I wait until the sugar has been incorporated into the butter mixture, then add a splash of milk, about 1 tablespoon for each addition.  Once the milk has been incorporated, I add another cup of sugar, wait for it to mix in, then add another tablespoon of milk, and so forth, until all of the sugar and milk has been added to the frosting.  It takes time to make the frosting, but you’ll have smooth, airy, lump-free frosting when you make it this way.

After the ingredients are all mixed in, beat the frosting on high speed until it is creamy and smooth.  It should be spreadable and pipeable, but you may need to adjust the consistency with a small addition of powdered sugar (sift it over the surface, then mix it in) or an additional drop or two of milk.


Wednesday, April 21, 2010

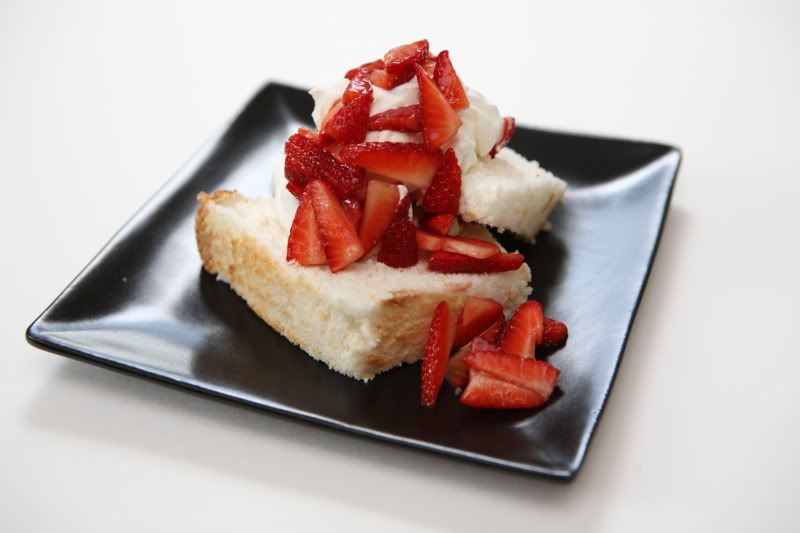
Strawberry Shortcake (with Angel Food Cake)

Strawberry shortcake is sort of the epitome of summertime desserts. The sweet-but-slightly-tart berries, swirls of whipped cream, and yummy shortcake make for one delicious dessert. (And it has fruit in it, so it’s good for you, right?)

There are several schools of thought on the proper base for strawberry shortcake. Some people like it served with sweetened biscuits. Some like it with sponge cake. Some like it with pound cake. Those are all good, but my favorite way to serve strawberry shortcake is with angel food cake.


This particular angel food cake recipe comes from Betty Crocker, circa the 1960’s. Yeah, the cookbook is a little outdated, but this recipe is a keeper...unlike some of the other ones in the book. There are a bunch of angel food cake variations on the same page, and they all require gelatin and something called “dessert topping mix” Fortunately this recipe steers clear of all of that. It is a standard angel food cake recipe, tried-and-true, and I’ve made this exact cake for many birthdays, a few graduation parties, and on many, many other occasions over the years.

If you don’t have an angel food cake pan and are planning to buy one, you should select your pan carefully.

  • An angel food cake pan should NOT be nonstick. (Angel food cake keeps itself risen by climbing up and sticking to the sides of the pan, and a nonstick pan prevents this from happening. The cake won’t have the proper height and the texture will suffer if the pan is nonstick.)
  • For almost all of my baking, I prefer light-colored pans because it keeps the food from over-browning. Angel food cake is no exception: try to find a light-colored pan.
  • The pan doesn’t need to be insulated or have any other fancy technology.
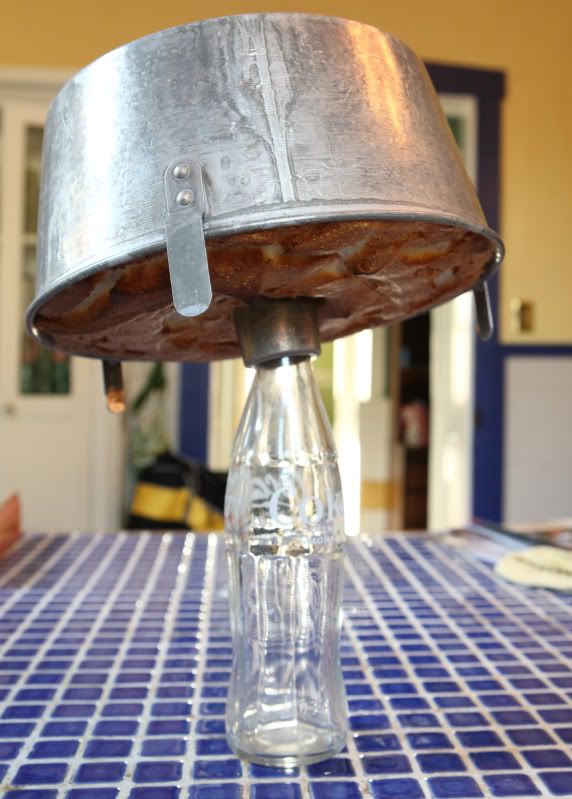
  • It does, however, need to have a way to stand upside down during the cooling process. My angel food cake pan has a tall central tube and little aluminum feet sticking off the top of the pan, which hold the cake off the countertop when the pan is inverted. This will cool the cake properly, but for even better air circulation, I stick a coke bottle in the central tube and turn the pan over balanced on the bottle (you’ll see pictures below). So, you’ll need either a pan that has feet, or you’ll need to come up with a way to invert it without smashing the cake. A wine bottle works too.
  • The best pans are two-part pans. Angel food cake needs to be cut out of its pan, and its basically impossible to do that with a one-piece pan. (That’s why they started making the one-piece pans nonstick, but we already went over why nonstick is a bad idea…) The one-piece pans work well for other things (pound cake!) but not well for angel food cake.
It’s really hard to find a good angel food cake pan at the kitchen store. Most properly-shaped pans are nonstick or made of dark-colored aluminum, neither of which I want. Last time I needed another angel food cake pan (before the days of the internet), I hit up the garage sales until I found an old one for a buck. The pan can be dinged up slightly and it won’t hurt anything. It’s not supposed to be a water-tight pan (properly-made angel food cake batter isn’t runny and shouldn’t leak through the pan), so don’t worry if the bottom doesn’t fit absolutely flat into the sides of the pan. Now that we are in the days of internet shopping, you can buy a new one from Amazon that meets all the specifications I’ve mentioned and it should work just as well as all of my Garage Sale Specials have worked for me.

Angel Food Cake
Makes one cake 10” in diameter and 4” tall

1 cup cake flour
3/4 cup plus 2 Tbsp granulated sugar
12 egg whites (about 1-1/2 cups)
1-1/2 tsp cream of tartar
1/4 tsp salt
3/4 cup granulated sugar
1-1/2 tsp vanilla
1 tsp almond extract

Preheat your oven to 375 degrees F.

In a medium mixing bowl, whisk together the flour and 3/4 cup plus 2 Tbsp granulated sugar. Set the mixture aside.

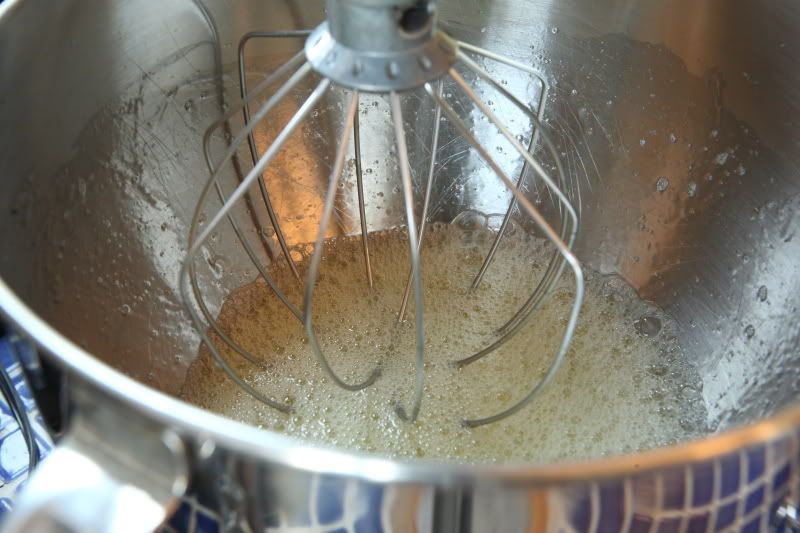
In a large mixer bowl, use the wire whip attachment to beat together the egg whites, cream of tartar, and salt until foamy.


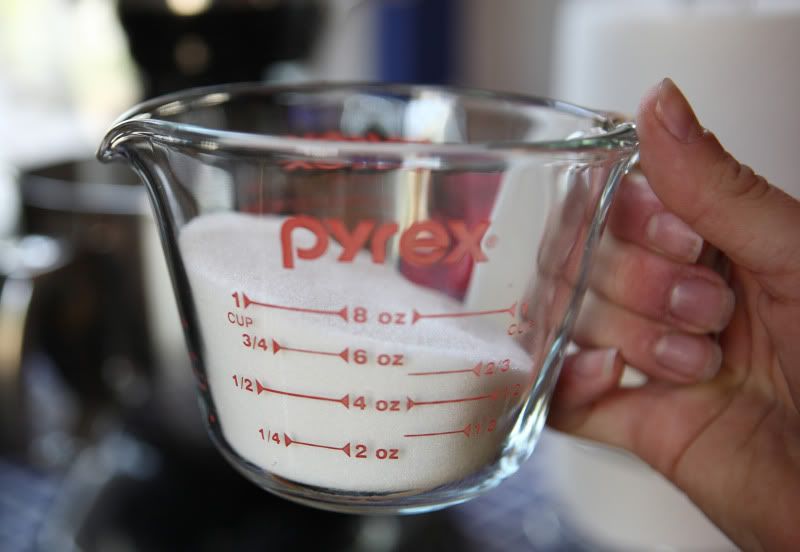
While this is happening, measure 3/4 cup granulated sugar into a spouted cup similar to this one:


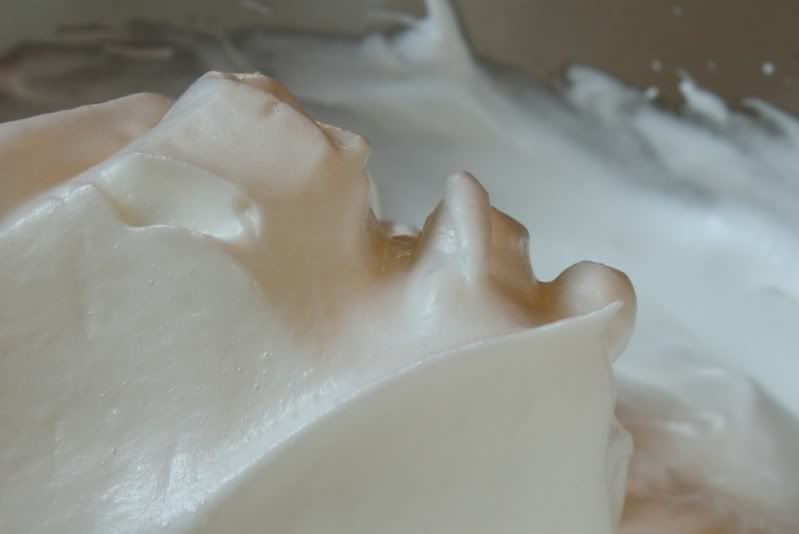
With the mixer on the highest speed, slowly shake in a very small stream of granulated sugar into the egg white mixture. Continue to add the sugar very slowly as the mixer is whipping the whites. Do not dump in large quantities of sugar at once. As the whites whip up, they will increase in volume. The goal is to shake all of the sugar into the egg whites in about the same amount of time it takes for the whites to be beaten to the “stiff peak” stage. You’ll know the whites are “stiff peaks” when you lift the beater out of the bowl and the whites hold shape and don’t slump back down into the mixture. But, use caution to avoid over whipping the whites – they’ll become chunky and that’s not what we’re looking for either.

Properly whipped egg whites are smooth and stand up like this:


Once you’ve finished beating the egg whites, take the bowl off of the mixer. The rest of the steps must be mixed by hand or you’ll deflate the batter. I like to use a large flat rubber spatula, but before I owned that particular piece of kitchen equipment, I used to use a flat wooden spoon with nearly-as-good results. Whatever you use, you’ll need to have something with a fairly long handle because in case you haven't noticed, there’s a lot of volume in that bowl now.

Add the vanilla and almond extracts. Use your rubber spatula or flat spoon to gently fold them into the egg whites. Don’t stir the batter or you’ll deflate it. Fold it. (I wish I had a video camera – I’d demonstrate it…sorry.) To fold, cut the spatula down the center of the egg whites, then run it along the bottom of the bowl, up the side, and down into the center again. Rotate the bowl and repeat the motion.

Sprinkle approximately 1/4 of the flour mixture over the surface of the flour. Fold it gently into the egg white mixture just until the flour mixture disappears into the batter. Add another fourth of the flour mixture and repeat the folding-and-adding process until you’ve folded all of the flour mixture into the egg whites.

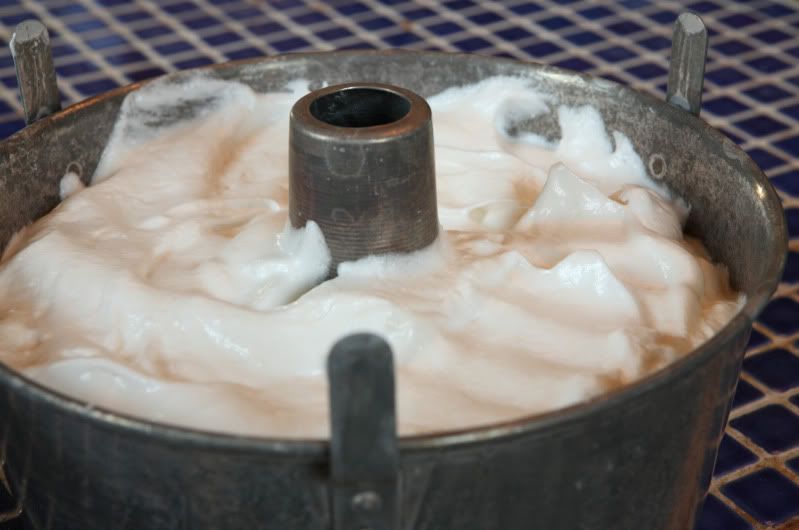
Spoon the batter into an ungreased angel food cake pan, 10” x 4.” Tap your rubber spatula straight down through the batter to help remove any air bubbles from the cake.


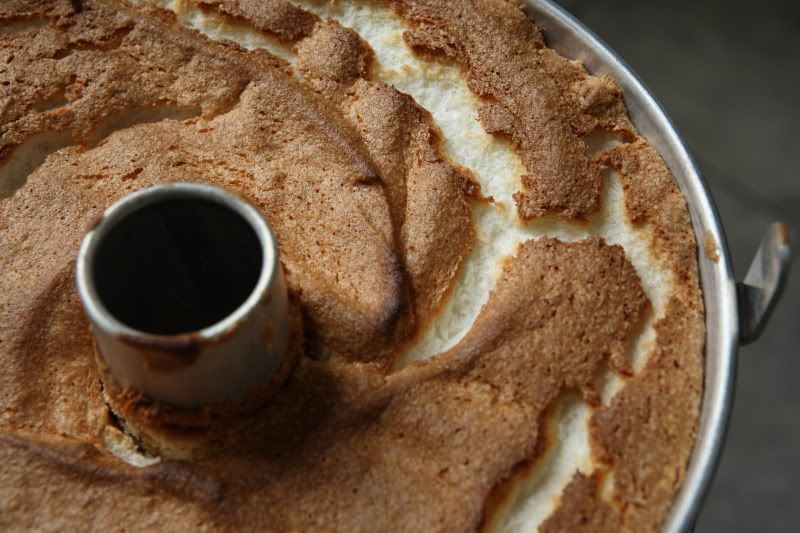
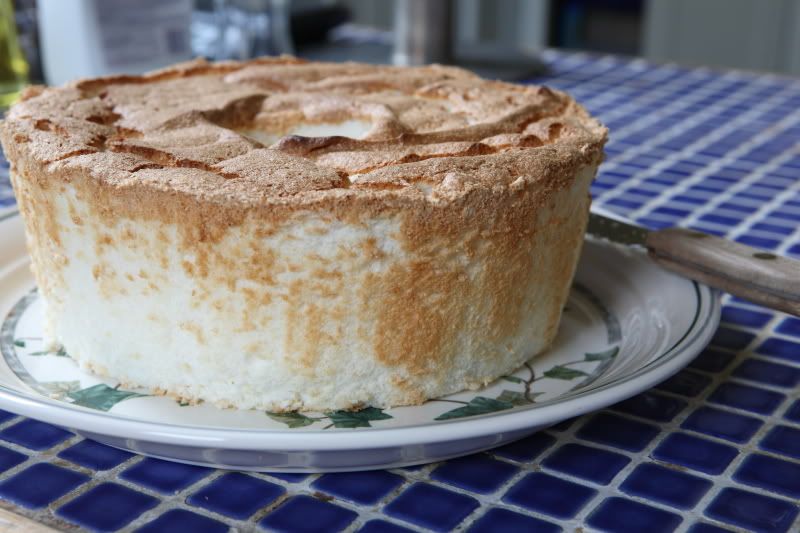
Bake the cake approximately 30-35 minutes. How can you tell when angel food cake is done baking? The top should be lightly browned. “Betty" tells you it should “spring back when touched lightly with a finger,” whatever that means. Here’s how I tell: as the cake bakes, the top surface cracks, exposing lighter-colored cake interior. When that lighter colored section of the cake is dry and no longer sticky, the cake is properly baked. I use the point of a knife or my fingernail to scrape just a tiny bit of crumb out of one of the lighter areas and see if it is still moist and sticky or if it is dry. If it’s still sticky, give it another 3 to 5 minutes in the oven. The top will be nicely browned and any peaked areas will be an even deeper, nearly-toasty brown.


As soon as the cake comes out of the oven, the pan must be inverted or the cake will sink. As I mentioned above, I use the coke bottle cooling method, but if your pan has feet, you can simply turn it upside down. The cake must be entirely cooled before it is removed from the pan. If you come back to your cake in fifteen minutes and find it has fallen out all over the countertop, you under baked it and didn’t give it enough time in the oven. Take notes for next time and try again. I promise, if it’s completely baked, and if you used the proper pan, it won’t fall out despite the fact that it's sitting upside down.


A side story… Once, earlier in my baking days, I decided I wanted to make lots of angel food cake for a party. I baked a whole bunch of these cakes in sort of an assembly line, one cake after another. I was running out of countertop space in my kitchen and had nowhere to cool the cakes. So I looked around my small apartment for somewhere else to balance my coke-bottle-cake-pan setup for an hour or so, and saw the flat surface of my bedroom dresser. Unfortunately I was in such a rush to get these cakes baked, I slightly under baked the cake – but I was new enough to baking that I didn’t realize it at the time. After I thought the cake had a sufficient amount of time to cool, I went back to my bedroom to bring it back to the kitchen…and found cake EVERYWHERE. (Since it was under baked, it fell out of the pan.) What a mess! Cake all over the top-of-the-dresser knick-knacks! Cake all over my clothes! Cake on the carpet! Cake all over the cat (who was very interested in it). And because it was under baked, it was sticky and sugary and very messy to clean up - and the last thing I wanted to do while running around making last-minute preparations for a party. Lesson learned:  be sure the cake is completely baked. Don’t get in a hurry to get it out of the oven!

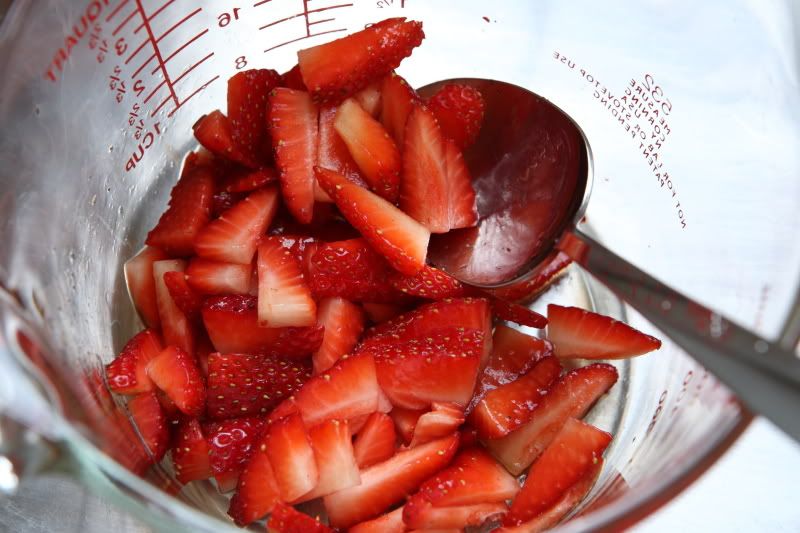
While the cake is cooling, you can prepare the strawberries for the shortcake:

Macerated Strawberries

16 ounces strawberries, tops discarded, fruit sliced
2 to 3 Tbsp of granulated sugar
1 to 2 tsp best-quality balsamic vinegar

The measurements above are somewhat approximate because the amount of sugar necessary will depend on how sweet your strawberries are. I recommend mixing the smaller quantity of sugar and vinegar in with the berries first. Let it all sit for about 20 minutes, then taste it and adjust the flavoring as necessary. (You can always add more sugar and vinegar, but you cannot take it out!) I like them on the tart side, but you might like them sweeter than even what I’ve written above.


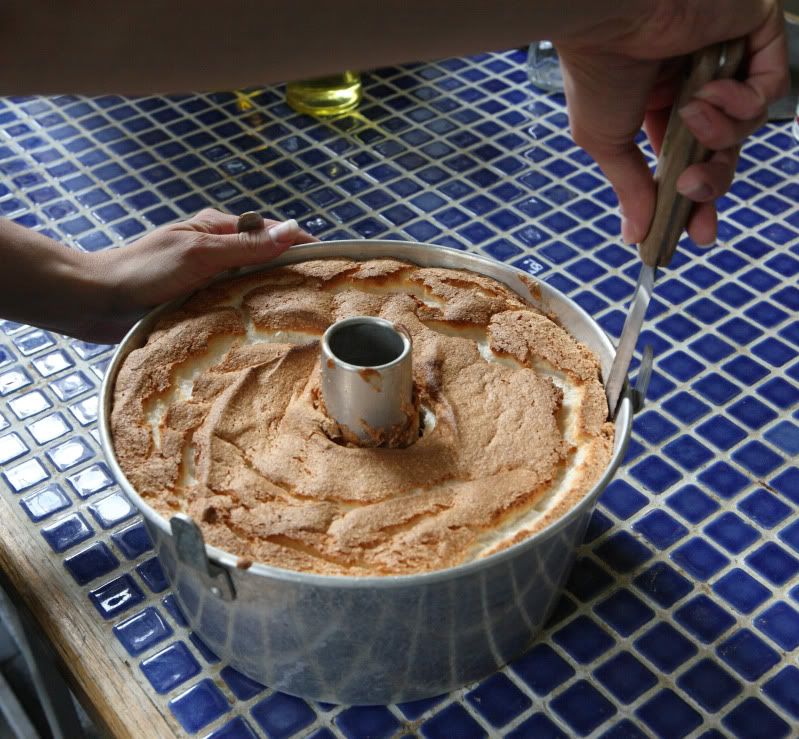
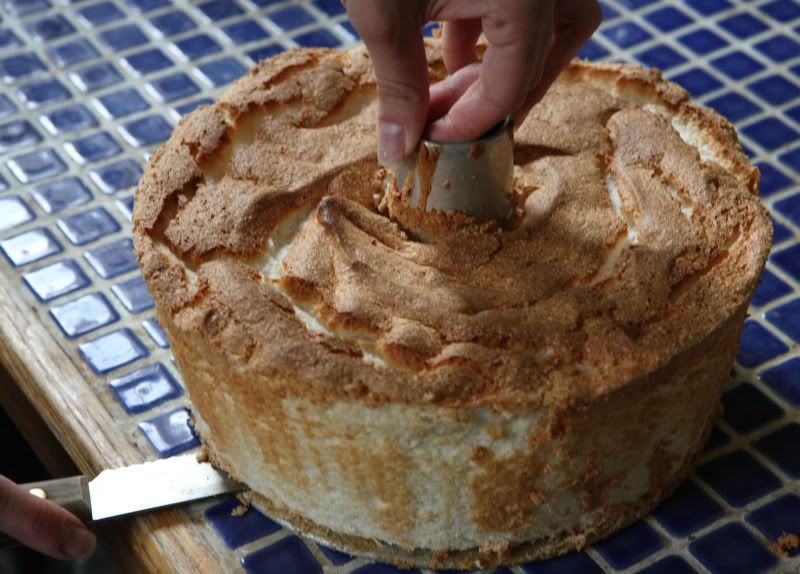
After the cake has cooled completely, the cake will need to be cut out of the pan. You’ll need a long serrated knife. First, holding the knife vertically, cut around the outside edge of the cake.  Use a sawing motion with the knife.  Then cut around the center tube in the pan. If you miss a spot, the cake will rip when you try to remove the pan, so be sure you are thorough in your cutting.


As long as you haven’t missed any spots, if you lift up on the center tube, you should be able to ease the side of the pan away from the cake.


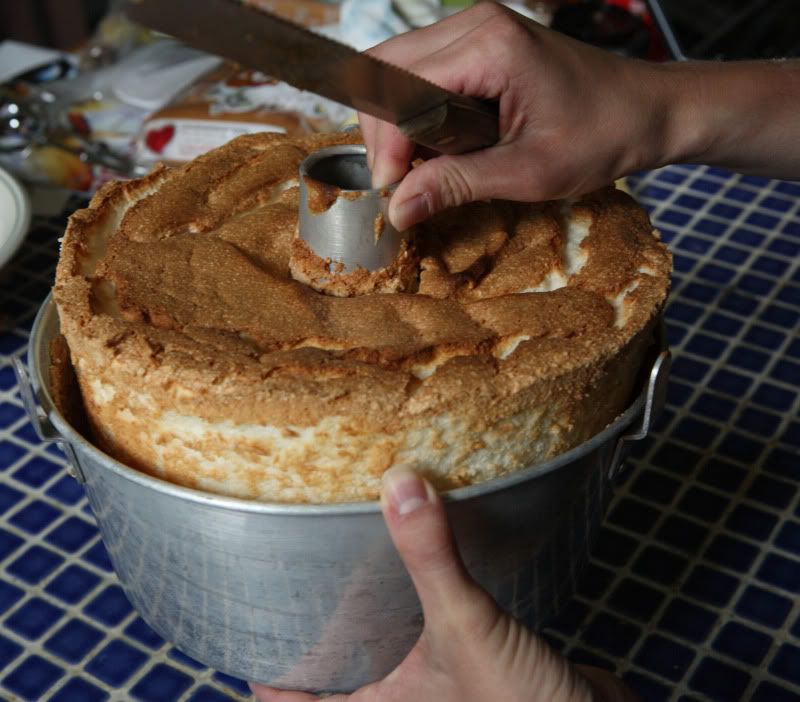
Hold the cake pan by the center tube. Place the knife horizontally and cut between the bottom of the cake and the base of the pan. Rotate the pan as you work so you get all areas of the pan. Double check to be sure your center tube is thoroughly cut free.


Once everything has been cut away from the pan, invert the cake onto a plate or a wire rack – the center piece should come right out.


(I turned mine out onto a rack, then flipped it over onto a plate because I thought the crackly top was prettier than the squared off bottom was.)


Immediately prior to serving, whip the cream

1 cup heavy whipping cream, more or less
1 Tbsp granulated sugar

Place the cream and sugar in a small bowl - one large enough to accommodate a hand mixer. Use a hand mixer to beat the cream on high speed until soft peaks form.

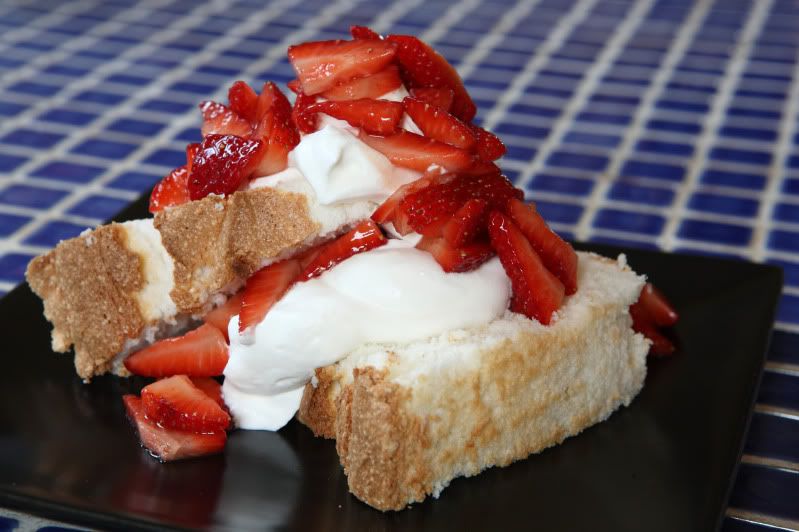
Assemble the strawberry shortcake from the angel food cake, berries, and whipping cream. Yum!


A note:  Angel food cake tastes best when it's served the same day it's baked.  If you must store it for another day, loosely cover it or put it under a cake dome.  Since the cake is mostly sugar and egg whites, it breaks down quickly if it gets moist, so it won't last too long, especially in a humid environment.  It doesn't last too long in my household anyway because it tastes pretty good...

Printable PDF file (with pictures)
Printable PDF file (recipe text only)

Saturday, November 14, 2009

Triple Layer White Cake With Raspberry Filling


My sister recently had a birthday, so we spent last weekend celebrating. I was lucky enough to be invited to join her and her friends at a tapas-style fusion restaurant, Mosaic. One word: yum. Our group tried nearly everything on the hot tapas menu, plus a few items from the cold tapas menu. Just about everything was outstanding. (If you’re in St. Louis and enjoy tapas-style food, give them a try. Go for the quail, potato gnocchi, tuna tartare, scallops, or the mussles…those were my favorites.)

For dessert, her boyfriend surprised her with a plate of beautiful cupcakes from The Cupcakery. Their cupcakes are simply delicious – tender cake with perfectly-sweetened frosting. (“Yum” works here too!) We had a great time celebrating together - thanks for inviting me along, sis!

The next evening we had a birthday celebration with just our family. I knew I wanted to make my sister a white cake since that’s her favorite flavor, but the cupcakes from the previous night were also white cake, and I didn’t want to have Round Two of exactly the same basic flavors. So, to mix things up a bit, I decided I’d layer the cake with raspberry filling and frost the outside with a totally different kind of frosting than what was on the cupcakes – I used a billowy marshmallow-flavored frosting.

Only problem was, I’ve never made a raspberry filling for a cake. (Well, I have used raspberry jam in certain applications before, but I needed something that would hold up to the weight of a three-layer cake.) I found a recipe for blackberry mousse filling on a cooking forum online, and it looked like several people tried it and thought it was decent enough, and people even indicated they had made it with raspberries instead of blackberries, and I was kind of short on time, so I gave it a shot. It was pretty good, but not exactly what I was looking for. Actually, it was almost too dense – at least, it was too dense when paired with the light-textured billowy frosting I used on the rest of the cake. That said, I think it’d be great when paired with a regular American-style buttercream or any other densely-textured frosting. It did make for a pretty presentation, though, and it was not too bad, so I’ll include it here. And more likely than not I’ll make it again, but next time I will probably omit the whipped egg white – that should make the texture less dense.

The cake and frosting I used came from one of my favorite cookbooks – one you’ve seen on this blog before – Diner Desserts, by Tish Boyle. I keep turning to this cookbook for great made-from-scratch desserts. I’m not sure how much I paid for the cookbook, but it was worth every penny. I haven’t changed the recipe much – it is really good exactly as it is. Some of the text I rewrote here to make it easier to understand (I hope!). And I added the raspberry filling.

As I was debating on how to transport the cake (its at least a 40-minute drive, even with decent traffic), I decided I’d bring the cake unassembled to my sister’s house. I finished the last steps of the filling and frosting there. I was afraid the cake would slide apart and be ruined if I tried to bring it already assembled (the frosting is really very light textured, and I was not sure exactly how the raspberry filling would hold up since I had never made it before). So I left the cooled cakes on their wire racks, covered each loosely with freezer paper (it has a coating of some kind of plasticy material that helps keep food from sticking), and stacked it all up in a cardboard tray left over from a case of bottled water. It worked out pretty well. The cakes did not stick to the freezer paper and everything arrived intact.

Triple Layer White Cake
Makes one three-layer cake 8 inches in diameter

2 cups cake flour
1 Tbsp baking powder
1/2 cup unsalted butter
1-1/2 cups granulated sugar
1 tsp finely grated lemon zest
1-1/2 tsp vanilla extract
1 tsp salt
9 large egg whites, at room temperature
1 cup whole milk

To make the white cake, position two baking racks near the center of the oven and preheat to 350 degrees F. Grease the bottom and sides of three 8-inch round cake pans. Cut out three rounds of parchment paper slightly smaller than the internal diameter of the bottom of the pans (test then to be sure they fit).


Grease the empty cake pans, then place a round of parchment paper in the bottom of the pan. Grease the paper. Dust the sides of the pan with flour and tap out the excess. (I’ll admit, I forgot this step…it all still worked out in the end, but it would have been easier to get the cake to come out of the pan if I had remembered…)

In a medium bowl, sift together the cake flour and baking powder. Stir them together with a whisk. Set them aside.

In an electric mixer, using the paddle attachment, in a large clean bowl, beat the butter on medium-high speed until smooth, about one minute. On medium speed, gradually beat in 1 1/4 cups of the granulated sugar. Increase the speed to high and beat until well combined, about two minutes. Add the lemon zest, vanilla, salt, and three of the egg whites. Scarpe down the sides of the bowl with a rubber spatula and beat the mixture on medium high speed until light and fluffy, about two minutes. Add the sifted dry ingredients in three additions alternately with the milk in three additions. (Three? Ok, at least split it into two (there’s hardly enough volume to easily split it into thirds), and I believe the best results are obtained if you work it out so an addition of dry ingredients goes in the bowl last. Not sure if there’s any logical reason as to why that’s better, but that’s how I’ve always done it.) Scrape down the bowl and beat until smooth, about 1 minute.

You’ll need to beat egg whites next. If you’re using a stand mixer and have no secondary hand-mixer or extra stand mixer bowl, transfer the batter to another large bowl, set it aside, and thoroughly wash the empty stand mixer bowl. (Any residual butter in the bowl will prevent the egg whites from properly whipping.) Or you can do what I did and just whip the egg whites in a new bowl with my electric hand-mixer.

In a large, clean bowl, beat the remaining six egg whites on medium-low speed until foamy. Increase the speed to medium-high and gradually beat in the remaining 1/4 cup of granulated sugar. Continue to beat until the whites are stiff, but not dry. Using a large rubber spatula, fold about 1/3 of the egg whites into the reserved batter. Then gently fold the remaining egg whites into the batter.  Avoid overmixing and deflating the batter - Fold only until the whites are incorporated.  It will look sort of foamy like this:


Scrape the batter into the prepared pans.

Bake the cakes for 15-20 minutes (mine took more like 25-30, but you might want to check them earlier…). The cakes are done when the tops spring back when they are touched, and a toothpick inserted into the center of each cake comes out clean. (Note From First-Hand Experience: do not use a knife point…the toothpick makes a much smaller, less-noticable hole!)


While the cakes are baking, start the raspberry filling. (If you elect to skip the berry filling, the white frosting as written will likely yield enough to frost and fill the cakes, as long as you don’t go overboard in piling on the filling.)

Once the cakes are done baking, cool them in their pans on wire racks for 30 minutes. Invert the cakes onto the racks, peel off the paper, and cool completely.

Raspberry Filling
Makes enough to frost the tops of two 8” cake layers

2 tsp unflavored gelatin
6 Tbsp cold water
2 cups frozen raspberries
1/2 cup granulated sugar
2 egg whites (probably optional...)
1-1/2 cups heavy cream

In a small bowl, sprinkle the gelatin over 2 tablespoons of the water. Let it stand until the gelatin has softened, about 5 minutes.


Meanwhile, in a food processor, puree the raspberries with the remaining 4 tablespoons of water.


Use the back of a spoon to press the raspberry puree through a fine-mesh sieve. Collect the strained puree in a small saucepan – there should be about 1 1/2 cups. Add the sugar and stir over medium heat until the berry puree is warm and the sugar is dissolved.


Stir in the softened gelatin until it has dissolved. Let the mixture cool.

In a medium bowl, using an electric mixer, beat the egg white until firm peaks form. (By the way, this is the step I’d probably omit in the future…but I haven’t actually tried it myself, so I’m not quite sure how it’d turn out!  Try it at your own risk...) Using a rubber spatula, fold the egg white into the cooled berry puree until no streaks of white remain.

In another medium bowl, beat the heavy cream until it holds soft peaks. Fold the whipped cream into the berry mixture and refrigerate until chilled, about 1 hour. Once the filling has chilled, it is ready to use.

While the berry puree and the cakes are cooling, you can make the fluffy white frosting.

Fluffy White Frosting
Makes enough to frost the exterior of a three-layer 8” cake (and then some)

5 large egg whites
1-3/4 cups granulated sugar
1/3 cup water
1/2 tsp cream of tartar
2 tsp vanilla extract

To make the fluffy white frosting, you’ll need to fashion a double boiler out of a pan of simmering water and a large mixing bowl. You’ll need to use an electric hand-mixer, so the stand mixer is out. Note that you’ll need to select an electric hand-mixer that is up to the task: you’ll need to use it for nearly 15 minutes straight. I burnt out the motor of my first hand-mixer while making this frosting, but the upside was that I had a great excuse to buy a great heavy-duty one which has successfully whipped the frosting on several occasions since then.

Fill a medium saucepan with several inches of water. Take a large, deep bowl and place it over the saucepan to see if the water touches the bottom of the bowl. It shouldn’t – and if it does, dump out some of the water. Turn the heat onto medium-high. You may need to adjust the heat as you work – you’re looking to maintain a simmer in the water, but not a boil, and again, the water level shouldn't touch the bottom of the bowl.


In the large bowl, combine the egg whites, sugar, water, and cream of tartar. With the handheld mixer, beat the mixture until foamy, about one minute.

With the bowl set in the saucepan of simmering water, beat constantly on medium speed until the mixture reaches 160 degrees. This will take approximately seven minutes. Use caution – don’t let the mixer cord melt or catch on fire or cause some other terrible situation!

Once the mixture has reached 160 degrees, remove the bowl from the heat. Add the vanilla and beat the frosting on high speed until it holds stiff peaks. This will take approximately seven more minutes. The frosting is now ready to use.


To prepare to assemble the cake, I start by placing two-inch wide strips of waxed paper on the edges of the serving plate. Place a cake round on the plate. Adjust the strips as necessary: the waxed paper should be placed in such a way that it catches any drips or smears of frosting, protecting the plate and keeping it clean while the cake is being frosted.

Top the bottom layer of the cake with half of the raspberry filling. Stack another layer of cake on top of the cake, then frost it with the remaining raspberry filling.


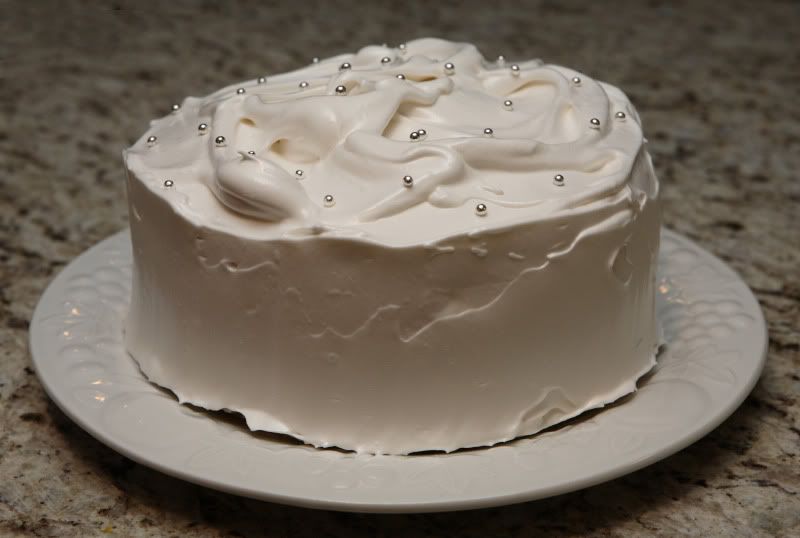
Finish by stacking the third layer on top. If necessary, insert skewers vertically into the stacked cake to help stabilize the layers (cut the skewers to the height of the cake). Using a large offset metal spatula, spread the fluffy white frosting around the sides and top of the cake, piling it up in dramatic swirls. Pull out the waxed paper strips and serve the cake immediately or refrigerate and bring it to room temperature before serving.


If you decide to add the egg to the raspberry filling, be mindful of its presence: the cake should be eaten shortly after the filling is prepared. I don’t think I’d eat it after the first day, but that’s just me. The fluffy white filling keeps slightly better, but not well enough to make the cake too far in advance. I’d recommend assembling the cake the same day you plan to eat it. (If you must do something in advance, bake the cake in advance and freeze the layers. Thaw them in their wrappers before you use them!)

Sunday, September 20, 2009

Mini Dobos Tortes - the August Daring Baker's Challenge


The August 2009 Daring Bakers' challenge was hosted by Angela of A Spoonful of Sugar and Lorraine of Not Quite Nigella. They chose the spectacular Dobos Torte based on a recipe from Rick Rodgers' cookbook Kaffeehaus: Exquisite Desserts from the Classic Caffés of Vienna, Budapest, and Prague.

I know, I know, it’s not August anymore. It’s actually past time to do the September challenge already. Obviously I am really late this month! Between school, work, life, family, and the million-and-two other activities that seem to take up my week…you know how it is.

One thing about this torte: it’s not incredibly difficult to make, but it takes a fair amount of time to complete the entire process. (Don’t start this on a Sunday night if you’ve got to get up early for work on Monday morning!) Fortunately, the recipe can be broken down into several individual components, which makes things easier to manage. I made the individual cake layers one day and finished the rest of the cake components and assembly the next day.

The torte recipe was originally written to make one five-layer 9” cake. I like making individually-sized desserts, so I scaled the cake down and made several mini Dobos Tortes. And, I felt the layers would be more visually appealing if they were thinner, so I made twice as many layers that were half as thick. (Those decisions were a large part of what made the cakes so labor-intensive…it would have gone a lot faster if I would have only had to frost and stack five layers instead of 30.)

Before you get started, you’ll need a few specific pieces of equipment. You’ll need some cookie sheets that are decent enough quality that they won’t warp when they heat up – mine are the thicker insulated type, and they worked perfectly. Also, I’d highly recommend that you use two offset spatulas: one large one for spreading the cake batter, and one small one for frosting the miniature cakes. (I don’t own a small offset spatula, so I used a small butter knife serving utensil from my silverware…it worked, but a small offset spatula would have worked even better.) Also, stock up on parchment paper…you’ll need quite a bit of it…and you might want to have some less expensive waxed paper on hand for some of the steps that don’t involve baking. You will also need a circular cookie cutter. I used a 3-1/16” cutter; whatever size you select will be the size of the diameter of the finished cakes. And, while we’re on the topic of equipment, if you have a double boiler, get it out. If not, don’t run out and buy one just for this purpose - you can improvise with a bowl set over a pan of simmering water.

Mini Dobos Tortes
Makes 3 or 4 cakes, depending on how tall you want to stack them

Make the sponge cake layers first, as they need to be cooled prior to assembly. If necessary, they can also be stored the longest out of any of the components – just stack the cakes up between sheets of waxed paper and store them in an airtight container.

6 large eggs, separated, at room temperature
1-1/3 cups (162g) confectioner's (icing) sugar, divided
1 teaspoon (5ml) vanilla extract
1 cup plus 2 tablespoons (112g) sifted cake flour
A pinch of salt

Position a rack at the top of your oven; preheat the oven to 400 degrees F.

In a large mixing bowl, using clean beaters, (use your stand mixer and the wire whip if you have one) beat the egg whites until soft peaks form. Gradually beat in 2/3 cup (81g) of confectioner's sugar until the whites form stiff, shiny peaks.


While the egg whites are whipping, begin the next step: In a separate large bowl, whisk together the egg yolks, 2/3 cup (81g) of the confectioner's sugar, and the vanilla. Whisk until the mixture is thick and pale yellow.

Using a large rubber spatula, stir about 1/4 of the beaten whites into the egg yolk mixture. Then, gently fold in the remainder of the beaten egg whites, leaving a few wisps of white visible.


Scatter the pinch of salt evenly over the surface of the egg mixture. Then, sift half the flour over the egg mixture. Gently fold it in; repeat with the remaining flour. (The only sifter I own qualifies as a decorative antique, so I just use my fine mesh sieve to shake the flour over the cake batter.)


Line a cookie sheet with a large piece of parchment paper. Using an offset spatula, spread about 200g of batter over the surface of the parchment paper into a big rectangle. (If you don’t have a scale to weigh the batter, don’t worry, just start with about 1 cup of batter and work up. Actually, I didn’t bother weighing the batter every time; I only weighed it so I could give you an idea of the approximate amount of batter you should use.) Spread the batter out into a large rectangle, approximately 12x15 inches. The length and width of the rectangle is not as important as the thickness of the batter: the batter should be spread out to somewhere between 1/8” and 3/16” thick (1/4” is thicker than I wanted my cakes to be). Try to make it as uniform in thickness and as smooth as possible. But, caution: if you can see the parchment paper through the batter, it’s too thin.


Bake the cake on the top rack until the top of the cake is lightly browned and the cake springs back when you touch it, 4 to 6 minutes. I found the baking time really varied depending on whether or not my gas oven happened to be actively working to heat the oven during the time the cake was inside…there’s a pretty good variation in temperature there that’s not normally noticeable over a 20 or 30 minute bake time. In short, keep an eye on the cakes – they’re so thin that they can overbake in a matter of a minute.


Once the cake has baked, slide the parchment and cake together off the cookie sheet. Let it sit flat on a heatproof countertop for a minute until the cake has cooled slightly: it should still be warm, but it should have cooled enough that you can handle it. (Don’t let it cool too long, or the cake will become too crisp and will break during the next step.) Rest a piece of parchment paper on top of the cake and flip the entire cake over, upside down. Peel the parchment paper off of the underside of the cake. Replace the same parchment paper back on the cake, then flip it all back over. Remove and save the top parchment paper – if it’s not too dirty you can reuse it. (These steps of flipping and peeling paper off will greatly aid in removing the cake during the next step.)

Use a round 3” cookie cutter to cut circles out of the baked cake. I pushed the cutter into the cake, pulled the cake circle and cutter away from the cake as one unit (with the cake still stuck inside the cutter, I mean).


Then I pushed the blade of a flat spatula against the outside of the circular cookie cutter, which trimmed the ragged edges off of the cake.


Once I pushed the circle out of the cookie cutter, I had perfect little cake circles. The cake would gum up the cookie cutter after 3 or 4 cuts, so I just used my fingernail to scrape the cake residue off of the blade.


I got 35 circles out of the entire recipe. While I was cutting out cake circles, I stacked up some of the scraps to gauge their thickness, and decided I wanted my cakes to be 10 layers thick. So my yield is three 10-layer cakes, with a few extra circles to account for breakage during assembly. You could also make four 8-layer cakes.

Set the cut circles out on a cooling rack. Don’t let the edges touch or they’ll stick together. You’ll notice that the one side of the cake is stickier than the other side – don’t let the cakes rest on their sticky side.


The cakes can be made ahead up to this point. Once the cakes have cooled completely, you can stack the cakes between layers of parchment paper. Store in an airtight container or wrap the stacks well. If you’re only storing the cakes overnight, they can be left at room temperature. If you refrigerate the cakes, let them come to room temperature before you attempt to unwrap them.

The next step is the chocolate buttercream. Although it can be stored at room temperature overnight, I made mine the same day I served it.

Chocolate Buttercream

4 large eggs, at room temperature
1 cup (200g) caster (ultrafine or superfine white) sugar
4oz (110g) 70% cacao dark chocolate, finely chopped
2 sticks plus 2 tablespoons (250g) unsalted butter, at room temperature.

First, prepare a double-boiler: fill the bottom half of a double boiler about 1/3 of the way with water and bring it to a boil. Once it begins to boil, back the heat down so it is at a simmer.

Meanwhile, off the heat, in the top half of the double boiler, whisk together the eggs and sugar until they pale and thicken. Once the water is at a simmer, fit the top half of the pan onto the bottom half and continue whisking the egg mixture over the heat another 2 to 3 minutes. Whisk constantly. The mixture will continue to thicken and will become somewhat foamy. Whisk in the finely chopped chocolate and cook, stirring, for another 2 to 3 minutes more.

Scrape the chocolate mixture into a mixing bowl and leave to cool to room temperature. (If you have a stand mixer, use its bowl!)

Once the chocolate mixture has completely cooled to room temperature, beat in the softened butter on high speed, one a small piece (about 2 tablespoons/30g) at a time. For best results, use a stand mixer or an electric hand mixer. Once the butter has been completely added, continue beating the mixture until you end up with a thick, velvety chocolate buttercream. (There is a period in the mixing process where it looks very soupy and nothing like buttercream. Keep beating, it will come together eventually. Don’t give up.)

The next step is to begin assembling the Dobos tortes.

If you haven’t already done so, count your cake layers and decide how many cakes you’ll make. Choose several of the least wrinkled, most evenly baked, best-looking cake layers from the selection of mini cakes you baked earlier. These layers will be the topmost layer on your finished tortes, so you’ll need one layer per finished cake. You might want to grab an extra one or two to account for potential breakage. Set the good cake layers aside from the others; save them for later.

I assembled my cakes directly on their serving plates. To keep the plates clean, I cut up little strips of waxed paper and put them under the edges of the cake. Once they were entirely iced, I pulled the strips out. Voila, clean plates. I recommend you do that.

Place a small dab of frosting on the center of your serving plate. Top with one cake layer – press it flat to create a good foundation for your cake. Thinly ice the top of the layer, then top with another layer and repeat the icing/stacking process until all of the layers are iced and stacked except for the top cake layers you set aside earlier (leave those off for now, they will be added later). As you’re working, take care to build the cake up as evenly as possible to avoid a “leaning tower of Dobos.” If your tortes start to lean, toothpicks inserted vertically might help. Keep your icing thin and your “tower” will probably be just fine.


Once the layers are stacked (except for those reserved layers), frost the top and sides of the torte. Set the frosted tortes aside.


The last step is the decorative sugar toppings. It is best to make sugar topping and any other decorations as close as possible to serving time. They should be made the same day they will be served and should be kept in a cool, DRY place (not a refrigerator – it’s too moist). If you absolutely must store the sugar decorations, store them in an airtight container with a packet of desiccant enclosed. Don’t place sugar decorations directly on top of the cake until immediately prior to serving, or moisture from the cake and frosting will harm the sugar.

If you’ve never worked with sugar, you might be surprised to learn that working with sugar is actually very easy. It is kind of messy, so use waxed paper or newspaper to keep it from getting all over your countertop. I encourage you to try it out…the candied hazelnuts are much easier than you might think, and are very impressive-looking. They taste pretty good too.

Candied Hazelnuts and Cake Tops

The reserved unfrosted, unstacked mini Dobos torte cake layers
6-8 whole hazelnuts (or, whatever the quantity you need to top your cakes, plus a few extras to account for breakage), for the candied hazelnuts
6-8 additional hazelnuts, to be chopped for the side of the cakes
1 cup sugar
12 tablespoons (180 ml) water

First, the setup for the candied cake tops: Use newspaper or waxed paper to cover your countertops. Over a piece of waxed paper, place a wire cooling rack. Place the unfrosted, unstacked cake layers on the cooling rack. Set them out so they don’t touch each other, and leave a decently sized gap between them. For best results, use a cooling rack with larger gaps.

Toast all of the hazelnuts in a dry skillet over medium heat until they barely begin to change color. Don’t let them burn. Turn them out onto a paper towel; let them cool slightly until you can handle them. Divide them back into two portions: those to be candied and those to be chopped.


We’ll get set up to candy the hazelnuts next. You’ll need to devise a way to suspend the hazelnuts. I suggest you come up with something similar to what I did: I used an open cabinet which hangs overtop my countertop. I stuck a skewer into each hazelnut and weighed the skewer down with small but heavy plates. I covered my countertop with waxed paper. Get everything ready to go.


Gently insert a skewer partway into each hazelnut. Don’t insert it too far, or you’ll break the hazelnut into pieces. (That’s why you have a few extra to account for breakage. If you break one, swap it out with one from the reserved pile of nuts to be chopped for the sides of the cakes.)

Next, make the candy syrup. Once your syrup has cooked, you’ll need to move quickly so go ahead and read ahead in the recipe before you begin…so you know what’s coming…

Stir the sugar and water together in a small saucepan – nonstick will give you the easiest cleanup later. Bring to a boil over a medium heat, stirring to dissolve the sugar. Once the sugar has dissolved into a smooth syrup, turn the heat up to high and boil without stirring, swirling the pan by the handle occasionally and washing down any sugar crystals on the sides of the pan with a wet brush until the syrup has turned into an amber-colored caramel. (We’re boiling until we reach approximately 340 degrees F. Caution: Your thermometer must be clean and dry every time you insert it in the sugar syrup. Another caution: Although it takes awhile to cook from the first step to the perfect stage of golden, it will change from a beautiful caramel color to burnt in a matter of seconds, so don’t let your guard down - stay on top of it!)

Once the syrup has turned to caramel, immediately pour a thin layer over the top of each cake. Work quickly – the longer the syrup is in the pan, the more it will continue to cook due to residual heat. Also, try to conserve the syrup as you pour – you will still need to use part of it to dip the hazelnuts. Depending on how good you are at metering out the syrup, it might just be easiest to plan on making two batches of syrup. Another tip: try to avoid overpouring because an excessive amount of syrup will “glue” the cakes to the cooling rack (that’s why you have extra cakes – in case some break as you attempt to remove them from the rack.) Don’t try to remove the cakes just yet because you need to dip the hazelnuts while the syrup is still hot...

After you’ve poured the syrup over the cakes, immediately begin dipping the skewered hazelnuts. Gently dip each one into the pan, then suspend it so the excess syrup drips off of it in a long string.


Some of it will break off and collect on the waxed paper. You can gather this excess up into a loose “birds nest” and save it to use as a cake decoration, too.


Note: Avoid getting any moisture in the syrup or it will seize up into a gritty unattractive mess. If that happens, or if you run out of syrup, you’ll need to caramelize more sugar…

The candied nuts and cake pieces need time to cool to firm up. Meanwhile, chop the reserved, uncandied hazelnuts. Gently press the chopped nuts onto the sides of the frosted cakes.

The sugar syrup on both the cake tops and the hazelnuts should harden up fairly quickly. (If they don’t firm up into brittle sugar pieces, you didn’t cook the sugar syrup long enough.) Once they are completely firm, you can gently handle them. Try to avoid touching them any more than necessary because you could leave fingerprints or moisture marks on the sugar. Use scissors to trim the hazelnut “drips” to your preferred length – you can leave them long and dramatic or you can trim them to several inches if you prefer. Gently twist the skewers out of the hazelnuts. Remove the candied cake pieces from the cooling rack – you might need to turn the rack upside down and pop the pieces off from the underside if the sugar was poured on too thickly.

Immediately prior to serving, top the Dobos tortes with a piece of candied cake. Garnish with the candied hazelnuts. Serve immediately.