Showing posts with label grilled. Show all posts

Sunday, March 14, 2010

Homemade Barbeque Sauce

In anticipation of better weather (and in protest of our current not-winter-anymore-but-not-quite-spring-either weather), I've started grilling outdoors.  We have a nice covered porch which makes it easy to use the grill even if it's raining.  Barbequed chicken is pretty easy to make outdoors because it doesn't require much babysitting.  The chicken is brushed with sauce and is placed on the grill.  After a few minutes, it is flipped once, brushed with more sauce, but is otherwise left alone while it cooks.  Pretty simple.

Homemade barbeque sauce is really easy to make. Onions are browned in butter (olive oil can be substituted for a somewhat healthier sauce…but the butter tastes better), then everything else is added and simmered over medium heat. There’s not much to it.


One thing that's great about this sauce: you can make it ahead and freeze it. You can also make it in larger quantities.

Homemade Barbeque Sauce (for chicken)
Makes about 3 cups of sauce

1 small onion, finely chopped (a mini food processor works well!)
2 Tbsp unsalted butter
1/4 cup molasses
1/2 cup freshly-squeezed lemon juice (2 large lemons yielded the proper amount of juice)
1/2 cup dry red wine (I used a Malbec on this particular occasion, but I usually make it with Cabernet Sauvignon or Shiraz)
Several shakes (to taste) of Tabasco or similar hot sauce
1/4 cup ketchup
1/4 cup spicy mustard
2 Tbsp Worcestershire sauce
2 tbsp brown sugar
3 large cloves garlic, minced
1 tsp cumin
1/2 tsp black pepper
1/4 tsp ground cloves
1/2 tsp ancho chili powder (another type will also suffice if you don’t have ancho)
1 cup water

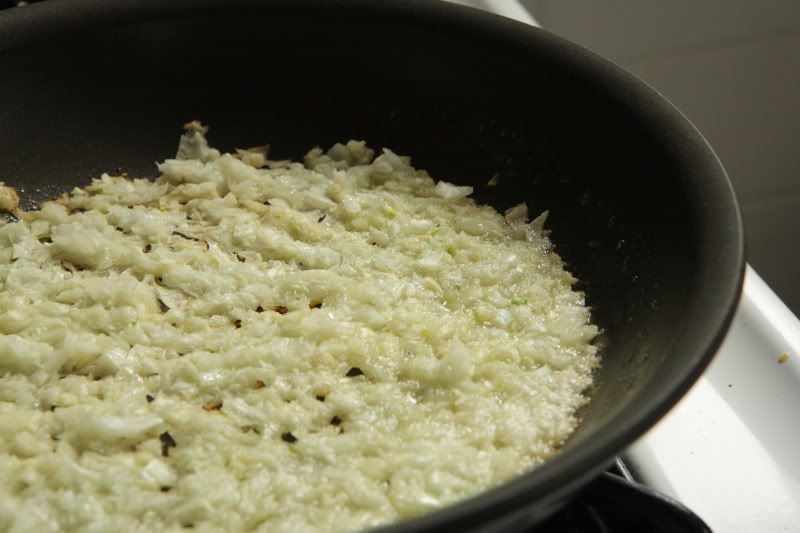
Place the chopped onions and the butter in a medium skillet. Spread out the onions so they cover the bottom of the pan. Turn the heat to medium-low and allow the onions to brown slowly. The moisture will begin to cook out of the pan and the onions will begin to brown at the edges. Avoid stirring the pan until this starts to happen. The pan looks like this when it’s time to stir (see the browned edges?):


Stir the onions and allow them to continue to brown slightly longer, so they are evenly browned. Transfer the browned onions to a medium saucepan and add the remaining ingredients.

Simmer the sauce over medium heat, stirring often, to reduce the sauce by approximately one third.

I usually serve this sauce with grilled chicken. I pour a small amount of the sauce over the chicken pieces as a marinade. The remaining sauce is saved to mop the chicken as it is grilling. (Remember, should any of the reserved basting sauce come into contact with raw meat, be sure to return the sauce to a boil before using it to baste cooked chicken!)


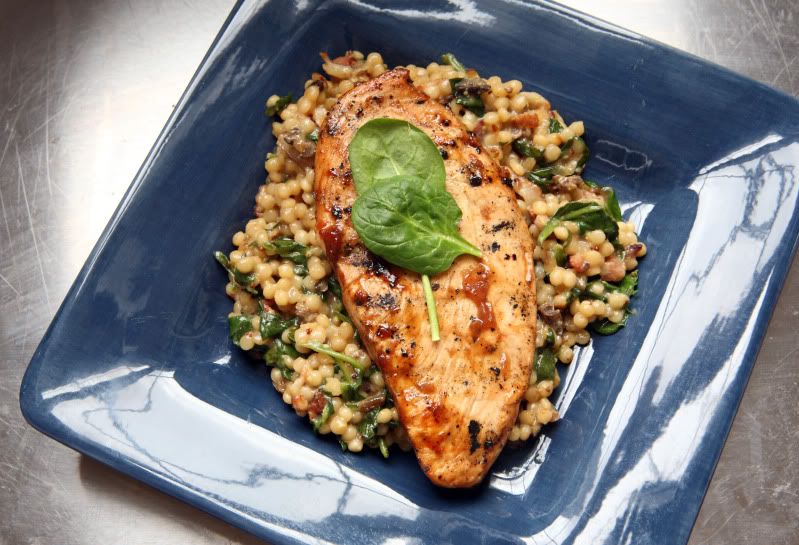
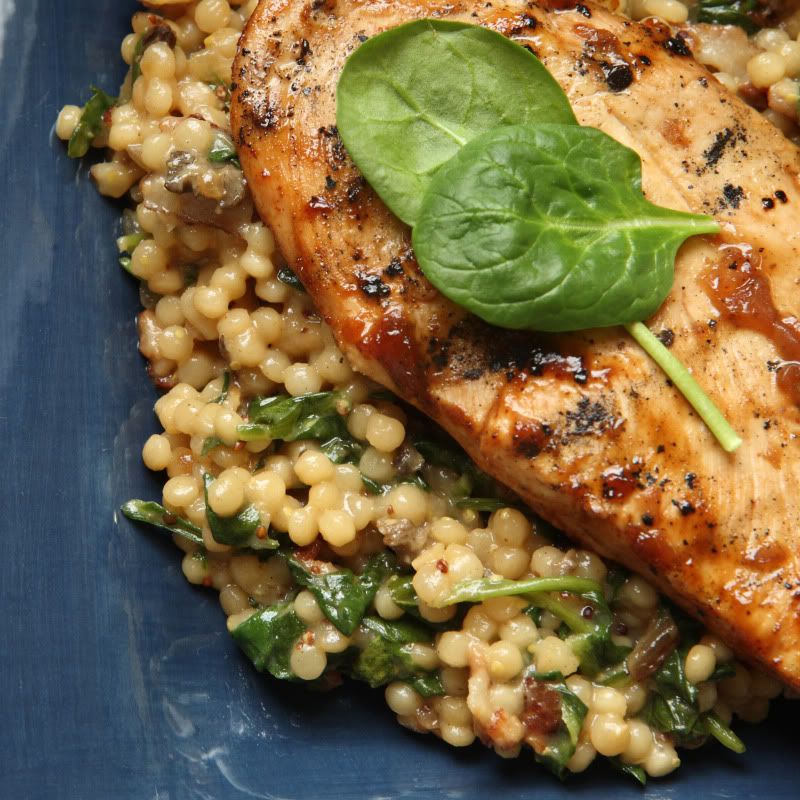
The chicken in these pictures is served with my Bacon and Spinach Couscous. It’s really yummy – give it a try.

Printable PDF file (with pictures)
Printable PDF file (text only)

Saturday, January 30, 2010

Grilled Pork Tenderloin with Pineapple Ginger Sauce, served with Grilled Pineapple


Have you ever had grilled pineapple? If you haven't had it, try it!  It will totally change your opinion of pineapple. The heat causes the sugars to caramelize slightly, resulting in a deeper flavor, and the grill marks look pretty against the yellow fruit.

Not only does pineapple taste great grilled, but it also makes a great marinade ingredient due to a certain naturally-occurring enzyme. The recipe written here is a fruity pineapple marinade, spiked with ginger and a little garlic. It pairs really well with pork tenderloin, and works great on the grill.

If you’ve never bought or cut up a whole pineapple before, don’t worry, I have provided you with instructions! Give it a try!

How to choose a pineapple at the grocery store:

Pineapples don’t continue to ripen after they’ve been picked, so you’ll want to choose the ripest pineapple available from your grocer. Unless you live in or near Florida and have other locally-grown options available to you, you’re probably buying a pineapple imported from Hawaii. (I guess that statement is only true if you live in the United States…I’m not sure what the pineapple availability is elsewhere.)

Since Hawaiian pineapples are the ripest when they have a bright golden color, pick the pineapple that has the most gold on its skin (but not a mottled brown color, because too much brown = rotten!). Some green skin coloration is ok, but the greener the skin is, the less ripe the pineapple was when it was picked.

The spiky leaves should be stiff and green (again, not brown). Grab the base of the bunch of leaves – it should wiggle slightly…not too much wiggle, but not totally stiff either. One more thing to check: the pineapple was once attached to its plant on the underside of the fruit. Turn the fruit over and look to be sure the place where it was attached to the plant hasn’t turned moldy.

Now that you have your pineapple, you're ready to start making...

Grilled Pork Tenderloin with Pineapple Ginger Sauce, served with Grilled Pineapple
Serves 4

1 fresh pineapple
1/3 cup hoisin sauce
4 tsp peeled, grated fresh ginger
1 large clove of garlic, minced
1 tsp Dijon mustard
1-1/2 pounds pork tenderloin, trimmed of any fat
1 tsp soy sauce
2/3 cup chicken stock

First, cut up the pineapple:

Chop off and discard the leafy crown. A lot of people cut off the bottom of the pineapple at this point, but I usually leave it on because its roughness provides more stability on your cutting board (cut pineapple is slippery!). If its really uneven, though, you might prefer to cut it off. Cut off and discard all of the skin from the sides of the pineapple. If you missed any “eyes” or seeds, cut them out too.


If you haven’t yet, slice off and discard the bottom of the pineapple. With the pineapple standing on its end, cut straight down just next to the core.


Set aside the coreless piece. Mirror the exact same cut on the other side of the core so you have two large coreless pieces and one rectangular piece which still contains the core. Cut off the pineapple on either side of the core. The core is too tough for me to want to eat, so I usually just discard it (although I do know a guy who puts lots of salt on it and eats it anyway…).


You should be left with two smaller pieces of pineapple and two larger slabs of pineapple. Cut the larger slabs of pineapple into 1/2-inch slices. Set these aside – they’ll be grilled later.


The two smaller pieces of pineapple can be cut into chunks – place them in a small food processor. Process the pineapple to make chunky juice. Transfer approximately half of it to a small saucepan and reserve it for later – this will become a sauce to be served with the meat. The rest will be used to create a marinade.

Then, marinate your meat:

The remaining processed pineapple can be transferred to a gallon-sized food storage bag (or whatever vessel you’re going to use to marinate your meat). Add 3 Tbsp hoisin sauce, 2 tsp grated fresh ginger, the minced garlic, the mustard, and the trimmed pork tenderloin. Seal the bag and smash it around a bit to incorporate the ingredients and coat the pork. Let the pork sit a minimum of 15 minutes. (Obviously longer is fine, you can even put this together in the morning before you go to work.)

Then make the sauce:

Near the end of the marinating time, prepare the sauce: In the small saucepan with the reserved processed pineapple, combine 2 Tbsp hoisin sauce, 2 tsp grated fresh ginger, the soy sauce, and the chicken stock. Set the sauce aside until its time to grill the meat.

About grilling big pieces of meat:

When I’m grilling a piece of meat this big, I do several things. One is that I use medium indirect heat. I have a three-burner gas grill. I turn the two outer burners up to medium or medium-high, and the middle burner on low. The pork is placed over the middle low-heat burner.

I also use a heat-safe thermometer. They’re not too expensive to buy from the kitchen section of your grocery store. You just put it in the meat and leave it there during the entire cooking time. The thermometer beeps when it reaches the proper temperature. Easy, and totally worth the nominal cost. Go buy one while your meat’s marinating. (Just remember, use a hot pad to remove it when you’re done with it…it’s hot. Yes, that’s personal experience talking. Doh!)

Grill the pork tenderloin over medium indirect heat, with the grill covered, turning it once, until it reaches 155 degrees internally. The exact time varies (there’s a lot of variables), but count on around 20 minutes.


While the meat is grilling:

While the meat is cooking, bring the sauce to a simmer over medium heat, then turn it to low heat until serving time. The sauce will thicken as it bubbles – if necessary, add another splash of chicken stock if the pan gets too dry. I pour a few tablespoons of the sauce over the meat at the halfway point of the grilling time – just after turning it over. (Careful, don’t contaminate the sauce with raw meat…and if you do, bring it back up to a boil before serving it.)


Half-way through the pork's cooking time, add the reserved pineapple slices to the warmer part of the grill. Cook them over medium direct heat, turning them once, until the pineapple is soft and warm, with nice grill marks on each side. Each side should take just a few minutes at the most. When they’re done, you can move them to a cooler spot on the grill, or transfer them to a plate and cover them with foil to keep them warm.


When the meat has reached 155 degrees internally, remove it from the heat and cover it with aluminum foil. Let it rest for about five minutes before slicing it (the temperature will rise to 160 as it rests).

To serve, thinly slice the pork into medallions. Serve it alongside the grilled pineapple slices, topped with the sauce. I like to serve this meal with rice…it’s a great way to soak up the sauce!

Friday, July 3, 2009

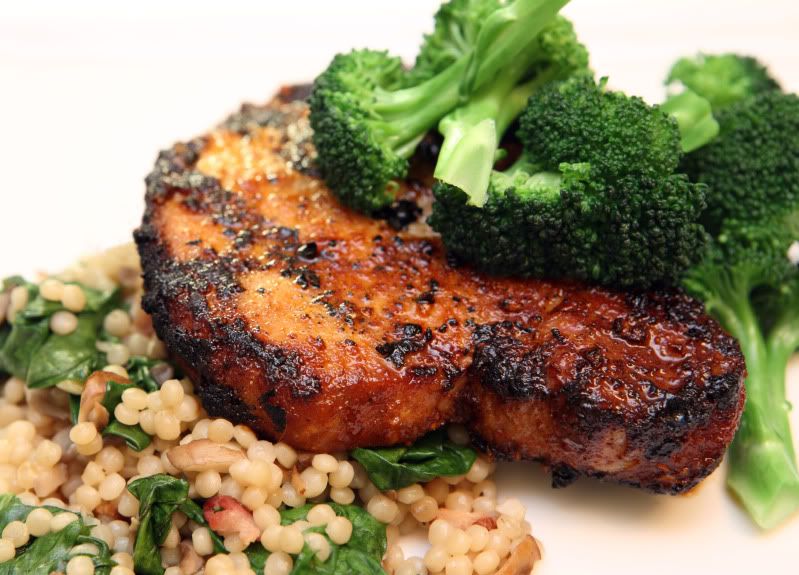
Grilled Pork Chops with Paprika Rub


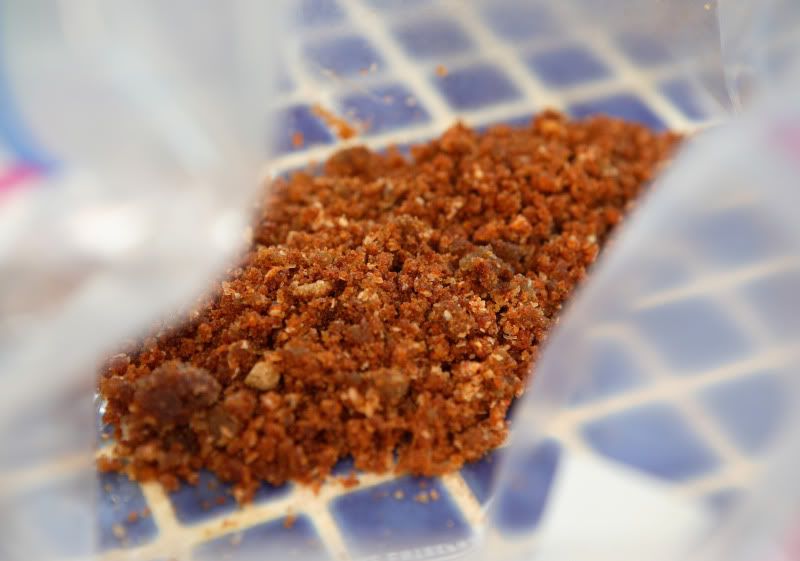
This spice rub is so easy to make and it tastes great. The prep is quick, but it does need time to sit in the refrigerator to let the meat take on the flavors. I usually make it in my mini food processor so I don't have to cut up the garlic - especially if I'm multiplying this recipe to feed a lot of people.

A lot of my weeknight meals are inspired by recipes in Everyday Food magazine…this is modified from their July/August 2009 issue.

Grilled Pork Chops with Paprika Rub
Serves 4

4 cloves garlic
3 Tbsp vegetable oil
2 Tbsp brown sugar
2 tsp coarse salt
2 tsp sweet Hungarian paprika
½ tsp hot Hungarian paprika (cayenne pepper will work if you don’t have hot paprika)
½ tsp ground black pepper
4 bone-in pork chops

Place all of the ingredients except the pork in a small food processor bowl. Process until the garlic is finely chopped and the ingredients are all incorporated. Scrape the mixture into a gallon-sized thick plastic bag.


Add pork chops to the bag. Seal the bag up, squeezing out any excess air, and gently knead the bag to coat the meat with the spice rub. Refrigerate at least one hour, up to overnight.

Grill over medium-high heat until pork is cooked through. Cooking times will vary depending on the thickness of your pork, but you’re probably looking at 3 to 5 minutes per side. Pork is considered “medium” when the center is at 160 degrees F – don’t overcook it or it’ll be dry and tough.

If you’re not into pork, try this on beef. This past Father’s Day, I served this spice rub on ribeye steaks and it was a hit. I’m sure it’d be good on chicken too.

If you’re looking for something to take along on a camping trip, toss this together in a thick baggie and freeze it before you leave home. Stick the baggie in a watertight container and let it sit in the ice in your cooler, thawing little by little over the course of your camping trip until it’s soft enough to successfully grill over your campfire. It’ll be delicious, I guarantee!

Saturday, June 6, 2009

Steak Tacos, Red Pepper and Corn Salsa, Homemade Refried Beans, and Guacamole

Craving steak tacos?

Thinly-sliced, lime-and-cilantro-flavored steak
Fire-roasted red pepper and corn salsa
Spicy jalapeno pinto beans
Cool and refreshing guacamole


I know I am!

Let's get cooking! Many of the ingredients can be prepared ahead of time. Some items can be cooked ahead and simply reheated, or kept warm over a low grill (that’s what I do at home when I’m just cooking for the family), or in a slow oven (that works well if you’re cooking on a larger scale). I have written the recipes below as if I’m serving them to my family immediately.

All quantities below will serve four people


Steak Marinade
1 lb flank steak, left unsliced
Juice of 2 limes
3 cloves garlic, ran through a garlic press, or chopped
½ of a jalapeno, seeds and ribs removed, chopped (more or less to taste)
2 Tbsp fresh cilantro, chopped
¼ cup olive oil
½ tsp ground cumin
¼ tsp ground paprika

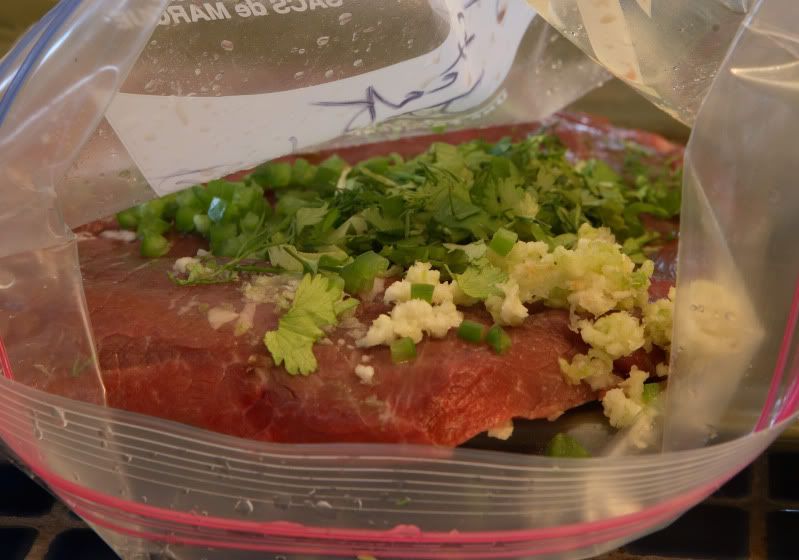
Place the flank steak in a resealable container or heavy zip-lock bag. Add the remaining marinade ingredients and let rest for several hours, or as long as overnight. Turn/shake the bag occasionally to coat everything evenly.


Meanwhile, start the salsa – it needs to go on the grill first.

Fire-roasted Red Pepper and Corn Salsa

2 red peppers, seeds and ribs removed, cut into thirds
1 onion, peeled and quartered
1 Tbsp olive oil
Salt and pepper
2 ears corn, shucked, but with as much of the stems left intact as possible.
One 16-ounce can black beans, rinsed and drained
1 tsp cumin
1 Tbsp fresh flat-leaved Italian parsley, chopped
2 Tbsp fresh cilantro, chopped


Prepare your grill to obtain medium to medium-low heat.

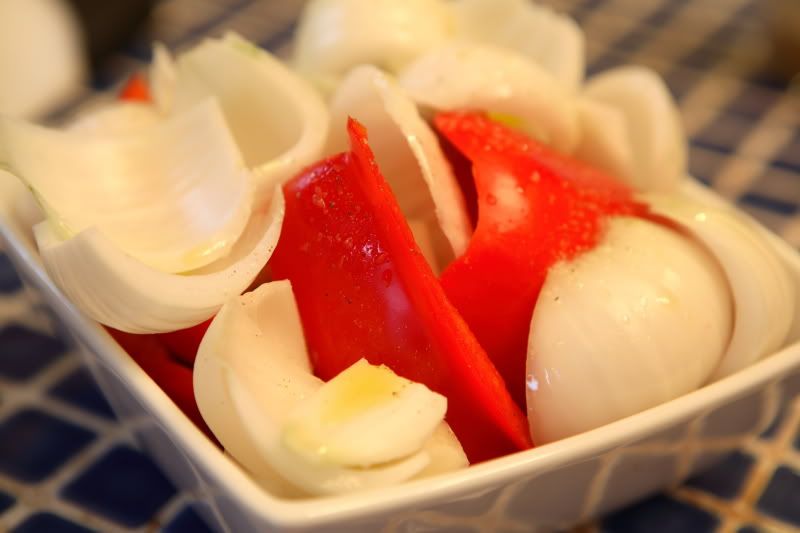
Place the red peppers in a medium bowl. Add the onion, separating each quarter into individual pieces. Drizzle olive oil over the onion mixture; sprinkle with salt and pepper. Toss to coat all pieces.


Carefully place the onion mixture on your grill (you might experience a brief flare-up due to the olive oil). Put the shucked corn on the grill at this time, too. Grill over medium to medium-low heat, turning often, until the skin of the peppers starts to blister and the vegetables are cooked through and lightly charred. (Yes, charred skin is ok!)

If you’re making the homemade refried beans, start the first step of that recipe while you’re waiting for the peppers and corn to grill. Depending on how fast you are, you might also find this is also a good time to mix up guacamole.

Remove the cooked veggies to a flat working surface, such as a heat-resistant cutting board. Allow the vegetables to cool slightly, then carefully use your fingers or a knife to remove the skins of the peppers and any other excessively charred portions of the vegetables. Roughly chop the peppers and onions, then place them in a large bowl.

Carefully cut the corn kernels off of the corn cobs. The easiest way to do this is to cut off the last inch of the tip of the corncob opposite of the stalk, creating a flat end. Place the end flat on your cutting board and use a large, sharp knife to carefully cut straight down the cob. Oh, and if you left the stalk on the end of the corncob, you’ve got yourself a nice handle that usually works out pretty well. CUT CAREFULLY! Did I mention that you should be careful while cutting that corn off? Hey, you could also go out and buy a gadget that accomplishes this task for you…but I’ve never tried it so I can’t comment on its real-world practicality. Once you get those corn kernels off of that cob, add the kernels to the onion mixture.

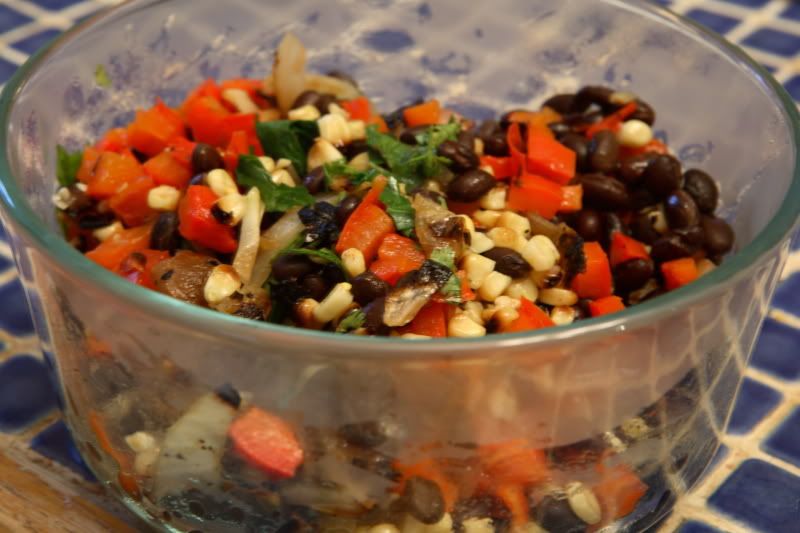
Add the rinsed and drained black beans, cumin, parsley, and cilantro to the onion mixture and gently stir to incorporate everything. If you’re not ready to serve the salsa yet, I recommend putting it into a foil packet and placing it in a cooler spot on your grill. It can be moved to a warmer spot and reheated right before serving. Although I prefer the salsa served warm, it is good either hot or cold, so you could refrigerate it if you didn’t want to mess around with trying to keep it warm.


Homemade Refried Beans
1 onion, processed or chopped into small pieces
1 Tbsp olive oil
1 jalapeno, seeds and ribs removed, finely chopped
One 16-ounce can pinto beans, undrained
2 Tbsp fresh flat-leaved Italian parsley, chopped
1 Tbsp fresh cilantro, chopped
1 tomato, roughly chopped


Step one: (which I recommend you complete while you’re waiting for your veggies to grill if you’re making the salsa…) Place the chopped onion and olive oil in a large frying pan with deep sides. Over medium-low heat, cook the onion until it begins to brown, stirring occasionally. If your heat is low enough, this shouldn’t require too much babysitting, so go back up and finish that salsa…

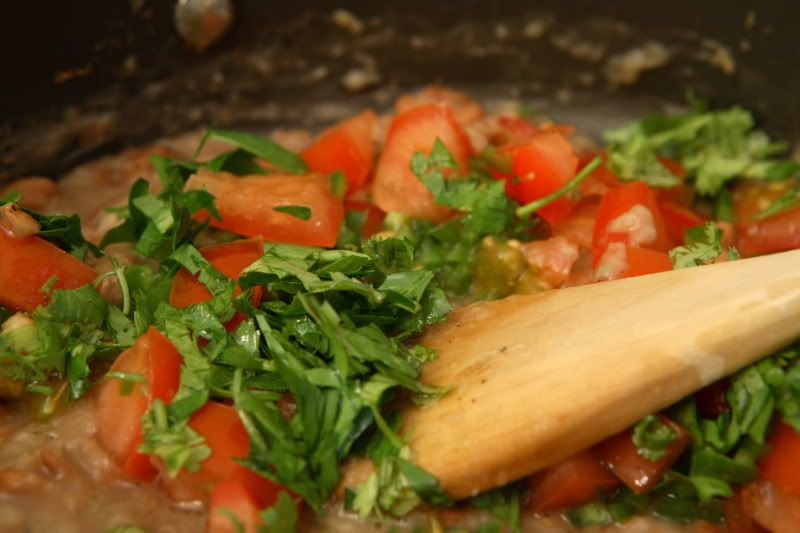
The rest of the recipe: (This only needs to heat through…so you can do this last step right before serving time.) Add the chopped jalapeno and undrained pinto beans to the pan. Use a potato masher or the back of a spatula to mash and stir up the beans. I mash about half of the beans for a variation in texture. Stir in the parsley, cilantro, and tomatoes.


For the tacos
Lettuce
Tomato, chopped
Grated cheese (I usually use Colby-jack)
Soft tortilla shells (I usually use something from the La Tortilla Factory lineup – they’re a little healthier than most tortilla options I’ve seen)


Guacamole
2 ripe avocados, halved and pitted.
Salt and pepper
Juice of ½ to 1 lime (to taste)


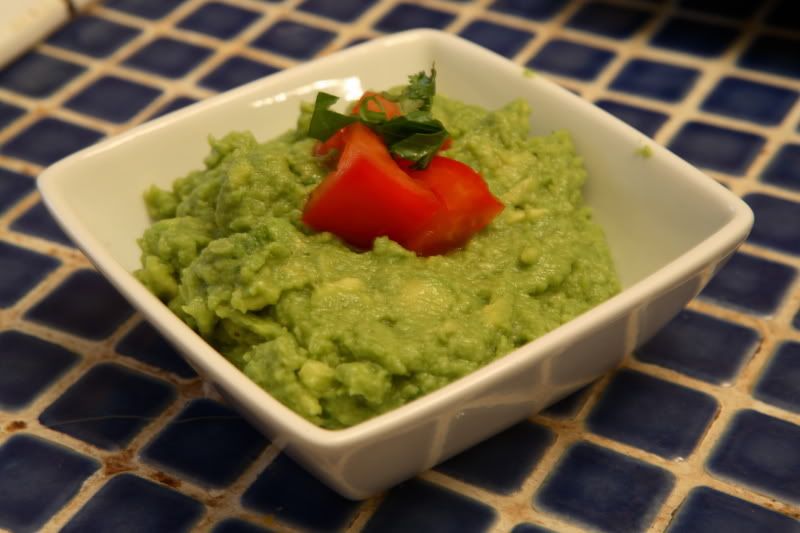
Use a large spoon to scoop the avocado flesh out of the skins. Add salt, pepper, and lime juice to taste. I don’t have a large mortar/pestle, so I just use a big wooden spoon to mash it all up until it’s smooth.


Once you’ve got everything above done, grill up that steak! Prepare your grill to obtain medium high heat. Flank steak is best served rare or medium-rare. Times will vary, but if you're grilling over medium-high heat, you’re probably looking at three or four minutes on each side. Spoon a little of that leftover marinade over the meat as it’s cooking (you boiled that marinade first to avoid those germies, didn’t you?).

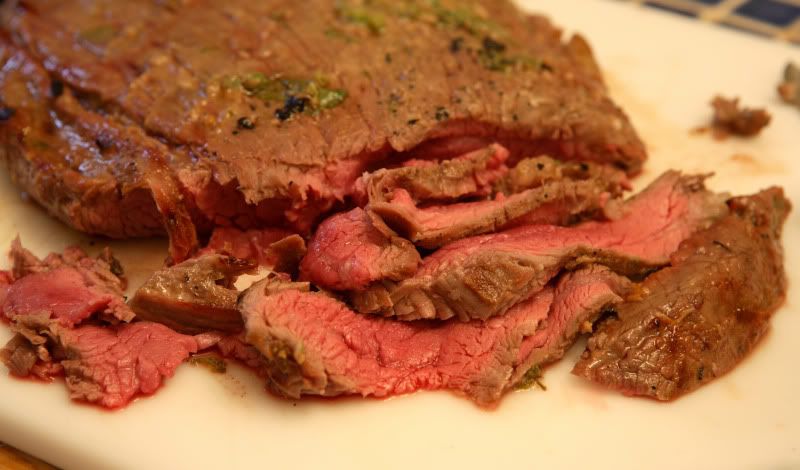
Flank steak has a really obvious striated appearance. Thinly slice the cooked steak perpendicular ACROSS the stripes, NOT parallel to the stripes.


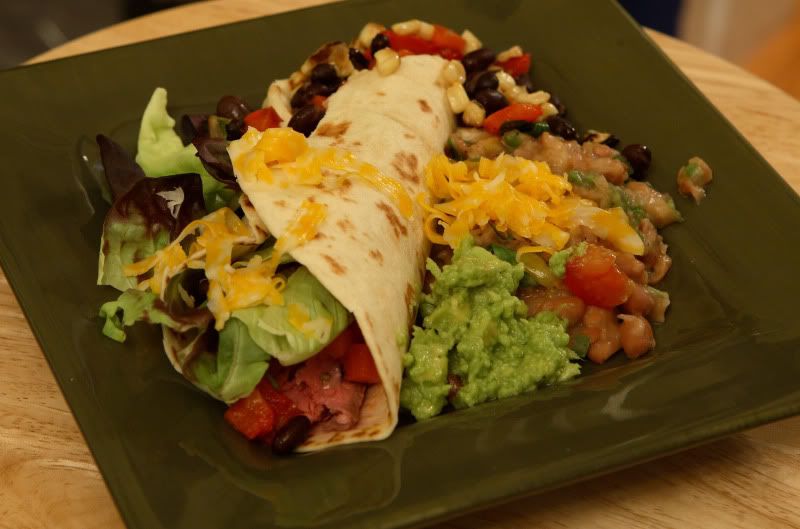
Assemble those tacos and eat! (These tacos are so filling, I find rice and tortilla chips aren’t necessary.)


Oh, and if you're a vegetarian, just omit the meat. The beans would be great spooned into the tacos, or try grilling up some marinated portabellas...
Sunday, May 17, 2009

"Pineapple Mint" Chicken

A friend of mine was surfing the internet recently and found this recipe for Mojito Chicken, by Guy Fieri of Food Network fame. We agreed the recipe needed a few changes (Baking marinated chicken? Obviously it should be GRILLED!) but we both thought the basic idea sounded good. My friend apparently went home and made the recipe for his family, although I’m not sure what kind of changes he made to it. He did mention he cut back on the amount of mint suggested in Guy’s original recipe, and I know he grilled the chicken.

I studied the original recipe further, read the accompanying reviews, and came to the conclusion that the recipe was probably too salty, too minty for my taste, and was a lot more elaborate than necessary.

I made one other conclusion: regular grocery store mint just wasn’t going to cut it. I never much cared for the strong mint flavor of the stuff the grocer carries, anyway.

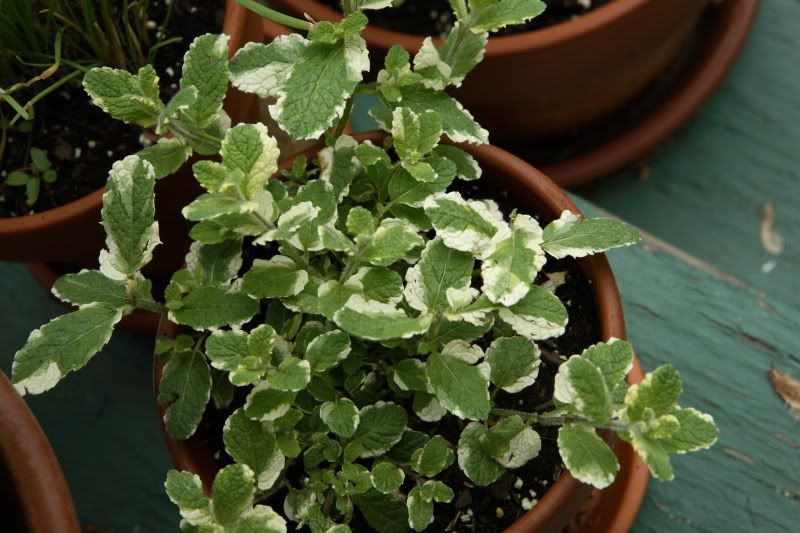
The last time I was at the greenhouse/nursery, I saw some interesting varieties of herbs, including a variety of mint called “Pineapple Mint.” It’s beautiful, as far as herbs go, and has fuzzy stems, with ivory and green leaves. True to its name, its leaves have the unmistakable aroma of freshly-cut pineapple. I initially passed on the plant because I was already over budget as it was. But when I saw this recipe and thought of the possibilities presented by Mojito Chicken, I immediately knew I’d have to go back and buy the Pineapple Mint plant for the sole purpose of trying it with this recipe.


$3.50 well spent. Delicious. Not overwhelmingly minty, just right.

I’d totally recommend picking up some of this plant if you ever see it around!

So, I ended up modifying quite a bit of the original recipe – same basic flavors, but different quantities and different method. It’s a lot easier now – mix up some ingredients and wait for the marinade to do its magic. There's no pineapple in the recipe because there wasn't any in Guy Fieri's original recipe, so the recipe title is only a reference to the variety of mint I used.

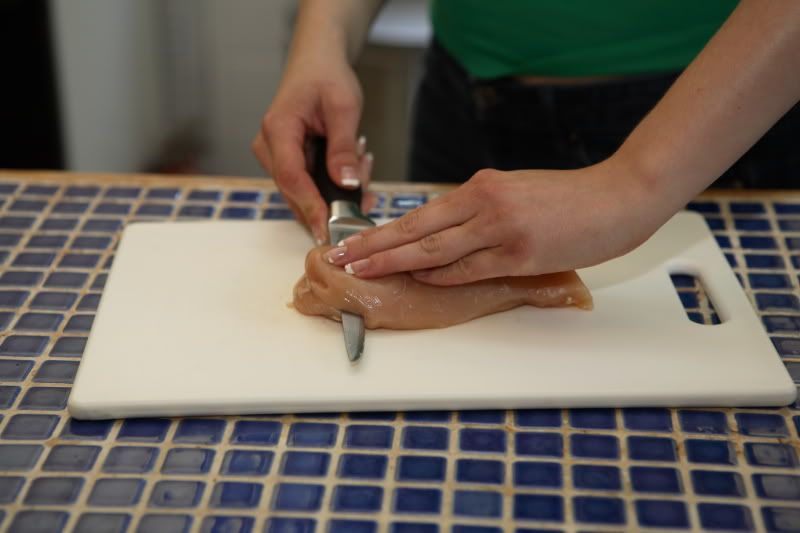
Usually when I’m grilling chicken breast halves, I slice them horizontally into two flat, thin pieces. They cook more evenly (no dried out, overcooked edges or undercooked centers!). If you have a long, thin, sharp boning knife, give it a try. (Carefully! Don’t cut yourself!) You can use a chef’s knife too, but a boning knife is easier because there's less knife surface area to stick to the meat. This also helps with portion control...it looks like you're eating a full half of a breast, but you're not.


“Pineapple Mint” Chicken
Serves 4-6

2 to 4 halves chicken breast
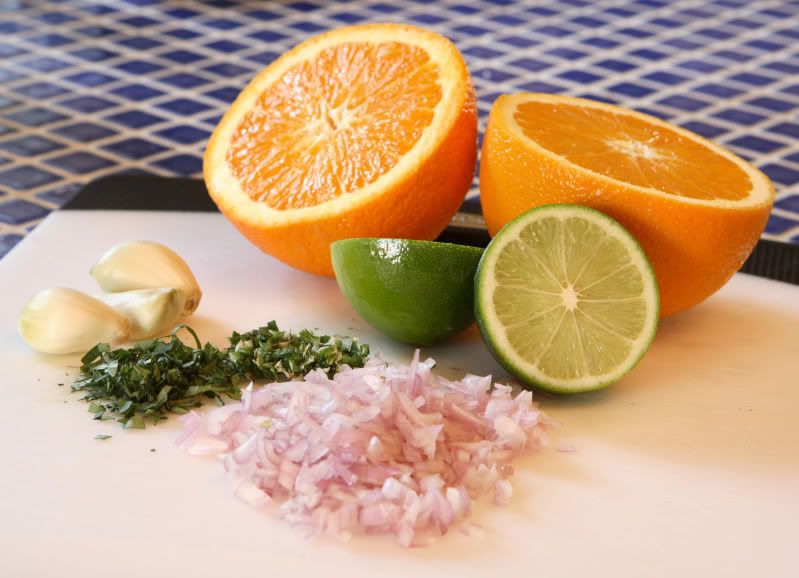
3 large cloves garlic, pressed or finely chopped
1 large shallot, finely chopped
1/4 tsp cumin
1 Tbsp fresh oregano, finely snipped
1/2 tsp kosher salt
1 tsp freshly ground black pepper
1 tsp paprika
1 Tbsp fresh Pineapple Mint, or another mint variety
2 oranges, juiced
1 lime, juiced
1/4 cup rum (If you’re anti-rum, you could sub it out for chicken stock, but the taste won’t be the same.)
1/4 cup olive oil

Place the chicken pieces in a dish or heavy plastic bag – something you can use to hold them while they marinate.


In a medium bowl, mix together remaining ingredients. Pour over chicken. Allow chicken to marinate at least two hours, up to eight hours.

Grill chicken over medium-high heat only until chicken is no longer pink. Turn once. While chicken is grilling, bring the leftover marinade to a boil (kill the germs!). Spoon boiled marinade over chicken as it is grilling.

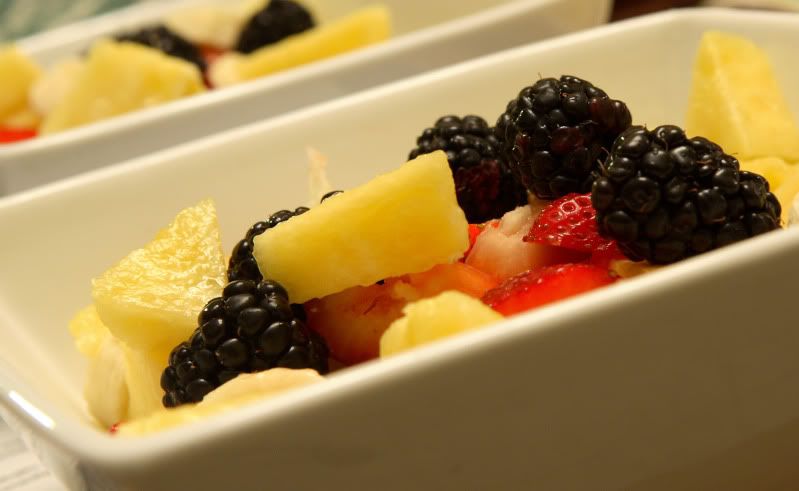
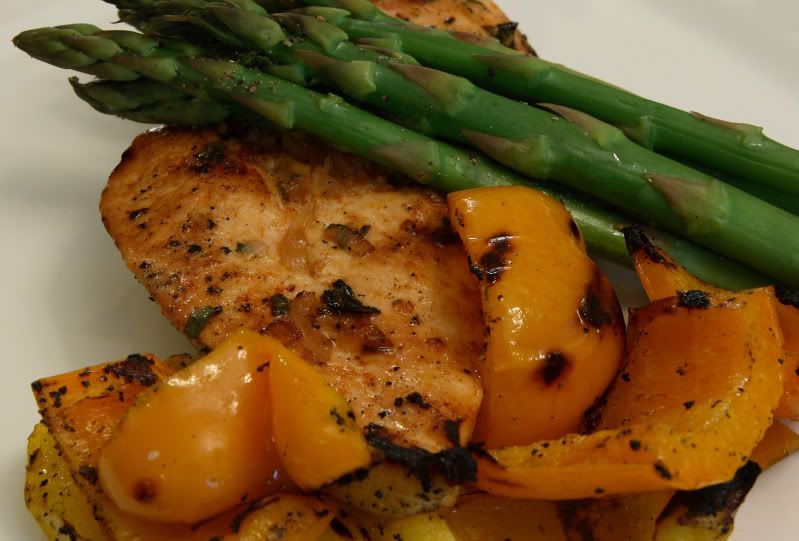
I served this with a fruit salad (pineapple, strawberries, blackberries, and bananas!) and grilled asparagus and bell peppers. Simple and delicious!