
This month’s Daring Cooks recipe was pretty unusual – at least, compared to what I usually cook for my family. The July challenge recipe was hosted by Sketchy, of Sketchy’s Kitchen. He chose a skate recipe from the Alinea Cookbook, which is to be served with “powdered traditional flavors” – more on exactly what that means in a minute.
First, the original recipe called for skate, a creature similar in appearance to a stingray. Many Daring Cooks chose to substitute other types of seafood because skate is on the “avoid” list. (According to the Monterey Bay Aquarium and other similar websites, skates have been overfished, and most are caught by a method that results in high levels of accidental catch of other fish. The fishing method also results in substantial damage to the seafloor.)
So, I substituted US farmed Tilapia for the skate, and thought the results were delicious. I suggest you do the same! (Please check out the rest of the list and try to make good seafood choices when you prepare seafood in the future!)
Besides the controversial main ingredient, the recipe brings up another interesting topic. For one, it touches on molecular gastronomy, a modern method of cooking that I have not, until now, had a chance to experience. This version of MG involves home-drying an assortment of foods to be pulverized into flavorful powders. Thus, the flavors of the dish are intense and very concentrated. The powders are served alongside the main course – seafood poached in a velvety butter sauce – and the fish is dipped into the assortment of powders as it is eaten. The result is really a taste explosion in your mouth – it’s delicious. Definitely something I’m not used to eating, though!
The recipe does require some special equipment. Best results will be achieved if you own a dehydrator. Some Daring Cooks were able to duplicate the results in a microwave. It’s also possible to use an oven set on a very low temperature – but it takes a very long time. You’ll also need some way to grind the dehydrated foods. Many people used coffee grinders or a mortar and pestle. I used a food processor and sifted the powders through a fine mesh strainer.
I wasn’t certain if I was going to be able to complete this month’s challenge. For one, I don’t own a dehydrator or a microwave. Nor do I have a coffee grinder or a mortar and pestle. And, it’s been 90+ degrees nearly every day lately, so I wasn’t too excited about running my oven all day to complete the challenge. To top it all off, I have had a problem with my back lately, so I have been moving around more slowly than usual.
However, my mother owns an awesome dehydrator and I was able to talk her into shipping some dehydrated food to me. (Thanks, Mom!) In addition to her contributions, I dried some of the thinnest of the required ingredients in my oven, purchased some already-dried items from the grocery store, and pulled a few spices out of my pantry to come up with the rest of the ingredients. Sorry, with this bad back, that was the best I could do!
I’m glad I did what I could to put together the challenge. Like I said, the food was so flavorful and delicious. Definitely different, and definitely outside of my usual comfort zone of cooking – but that’s why I joined the Daring Kitchen. If you’ve got a dehydrator and haven’t tried a recipe like this yet, give it a shot. It’s really not too difficult at all.
The version I’m posting here reflects the changes I made to the original recipe. There were a few ingredients I was unable to source, so I left them out of this post. Check out Sketchy’s blog if you want to see how the challenge recipe was originally written for us. His blog also includes instructions for using a microwave or an oven to dry the powders.
Tilapia and Green Beans, with Home-Dried Powders
Serves 4
1 red onion, trimmed and thinly sliced
30 grams capers (in brine, not oil-packed)
1 cup fresh Italian parsley (left intact)
1/4 cup fresh cilantro (left intact)
1 ounce dried lemon peel (I used the brand Melissa’s, which is sweetened)
3 Tbsp dried instant milk powder
1 Tbsp brown sugar
1 lb butter (4 sticks)
300 grams fresh green beans
Salt, to taste
4 tilapia fillets
2 bananas (neither overripe nor underripe)
Juice of 1 lemon
Optional
Pink peppercorns
Ground white pepper
Sweet Hungarian paprika
Any other ground flavoring you have or want to make that you think will match the flavors of the dish
First, the onions and capers need to be dehydrated and ground. Special thanks to my Mom, who dried these for me using her dehydrator. See Sketchy’s blog if you want to try a different dehydration method.
Dry the red onion slices in a dehydrator at 135 degrees until they are brittle, about twelve hours.

Use a food processor, mortar and pestle, or coffee grinder to grind the brittle onions. Pass the ground onions through a fine strainer and store the powder in an airtight container.
Rinse the capers under water. Use a towel to remove as much water as possible. Dry the capers at 135 degrees until dry, about 12 hours. Use a clean grinding implement to grind the capers. Pass them through a fine strainer and store the powder in an airtight container.
The parsley and cilantro also need to be dried, but they don’t take nearly as long. I used my oven to dry these. You can use a dehydrator if you’ve got one.
Preheat the oven to the lowest setting possible (mine only goes down to 200 degrees, so that’s what I used). Cover a cookie sheet with a piece of parchment paper. Bring some water to a boil in a small saucepan. Blanch the cilantro and parsley in the boiling water for one second, then transfer them to ice water to stop the cooking process. (You don’t have to keep the two herbs from mixing.) Pat the herbs dry with paper towels. Lay the cooled cilantro and parsley out on the parchment paper as flat as possible. Don’t let the leaves touch one another, or they won’t dry properly.
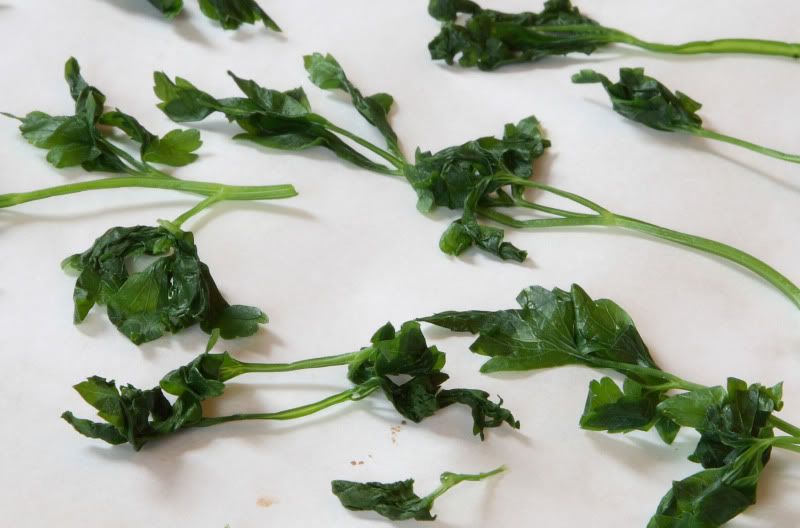
Dry the herbs in the oven, turning them over once, until they are brittle. At 200 degrees, I left them in for 15 minutes on each side. Nearly all of the pieces were sufficiently dried, except for the thickest stems and a few clumps of leaves I missed. I just crunched them up a little bit, picked out the couple of pieces that weren’t brittle enough, and ground the rest up. Use a clean grinding implement to grind up the cilantro and parsley (again, you can mix it together, no need to keep it separate).
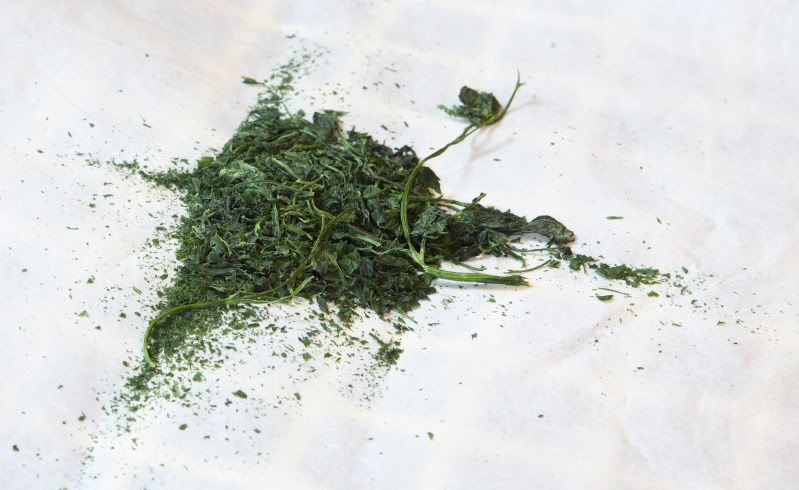
Pass the ground herbs through a fine strainer and store the powder in an airtight container.

In a clean bowl of a food processor, grind the lemon peel until it is as small as possible. (It won’t pulverize like the other dried things will, but it’ll do. It will bring an interesting variation in texture to the final dish.) Store it in an airtight container.
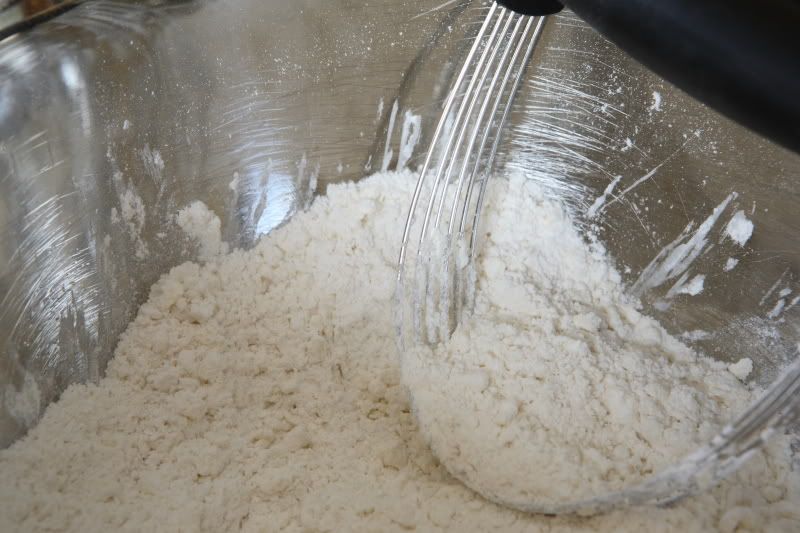
In a small skillet, toast the dried milk powder over medium heat, stirring occasionally. (Be cautious not to burn it!) Turn it out into a small bowl and allow it to come to room temperature. Mix the brown sugar into the cooled milk powder. Store it in an airtight container.
The recipe may be made ahead to this point.
Before we start cooking fish and green beans, we’ll first make a beurre monte, a buttery liquid we’ll use for poaching. Heat 60 grams of water in a large saucepan to a boil. Meanwhile, cut the butter into rough cubes (approximately 1 Tbsp each). Once the water has reached a boil, turn the heat down to low. Stir in one cube of butter at a time, waiting to add the next cube until the last one has melted. Keep this liquid heated, but do not allow it to exceed 195 degrees F.
Now we’ll divide up the beurre monte. Three-fourths of the finished beurre monte will stay in the large saucepan over low heat. One fourth of the finished beurre monte should be transferred to a medium saucepan over low heat. After you've divided it up, add water to the each beurre monte to double it’s volume – this doesn’t have to be exact and can be “eyeballed” up the side of the pan. Or, if you’re more comfortable doing so, you can pour each portion of butter sauce into a liquid measuring cup and add an equivalent amount of water. Again, keep the liquids heated, but not above 195 degrees.
Decorate your serving plates:
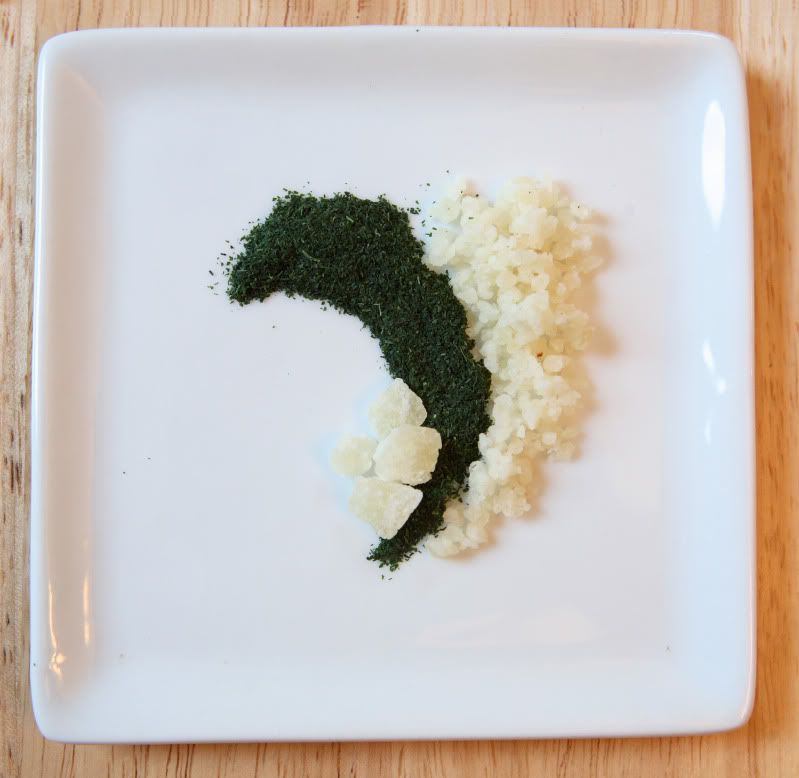
The powders are to be plated alongside the fish, swirled in a decorative fashion. Since my back was causing problems and I wasn’t physically up for a lengthy trial-and-error process, I plated the powders on several smaller plates. (Much easier, because if you screw it up, you’re not out a whole plate of multiple powders.) You can check out other Daring Cooks' photos for more plating ideas.
I plated crushed pink peppercorns and ground white pepper (both storebought), garnished with whole pink peppercorns

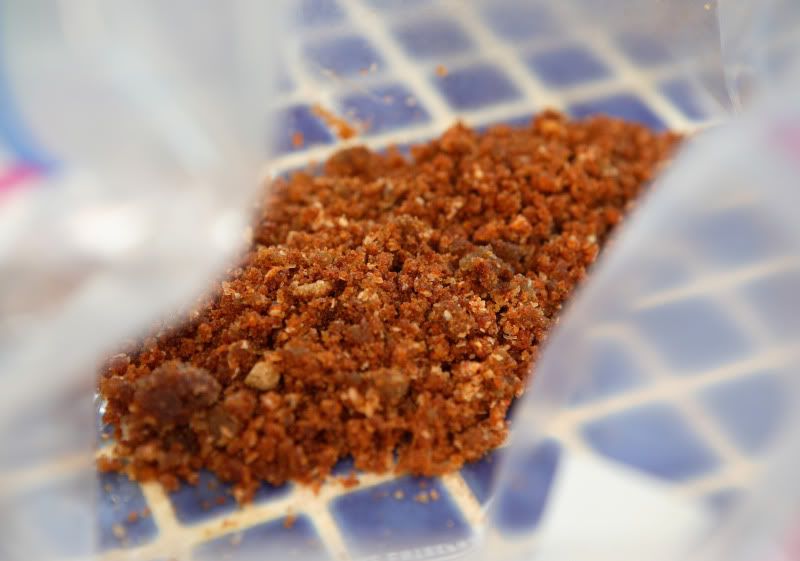
the ground red onion and capers, garnished with a chip of dried red onion,

ground white pepper and sweet Hungarian paprika (also storebought), garnished with several chips of dried pineapple (another dried item my mom shipped - and they were delicious, but wouldn’t pulverize well enough to use in this recipe),

and the powdered parsley/cilantro and the sweetened lemon peel, garnished with a few of the larger, unground pieces of peel,
It is much easier to decorate the empty plates now, rather than waiting until after the fish is cooked. Otherwise the fish will get cold while you fumble with the various powders. Just be sure you leave room for the fish later!
We’re ready to start cooking:
Cut the green beans diagonally into bite-sized pieces. Add them to the smaller portion of beurre monte. Turn the heat to medium and poach the beans until they are done to your liking. Taste the beans and season them with salt.
While the beans are poaching, turn the heat of the larger saucepan up to medium. Add the tilapia fillets (you might need to do this in batches) and poach, turning once, until the fish turns white and easily flakes apart. (That should only take a few minutes on each side.) Be careful to avoid overhandling the fish, or it might fall apart. After you’ve removed the cooked fish, season it with salt.
Meanwhile, thinly slice two bananas diagonally. Squeeze the lemon juice over them to prevent browning. Fan several banana slices on each serving plate. Top the bananas with the drained green beans. Top the beans with a fish fillet. Sprinkle the milk powder/brown sugar mixture on top of the fish.

Serve the fish piping hot. Encourage your eaters to dip the fish in the various powders, experimenting with different flavor combinations. My favorite was definitely the capers and the red onions!

